
PWI Telescope Control Software Manual


14
the primary mirror toward the Schmidt corrector at the fastest rate. You can monitor the
focuser index position just above the “Move In” and “Move Out” commands to determine
where you currently are in the focuser’s travel range.
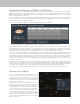
For most precise focusing, select “Control Panel” from the Focuser section in the Menu.
The Focuser pop-up window will appear.
Use the Rate slider to select the Focus Motor speed rate. Selecting rate 1 rotates the
focus knob at 8°/second, rate 2 rotates the focus knob at 32°/second, and rate 3 rotates
the focus knob at 128°/second. Choose rate 1 for fi ne focusing. To move the focuser
inwards (i.e. primary mirror moves away from Schmidt corrector), click “Move In.” To move
the focuser outwards (i.e. primary moves towards the Schmidt corrector), click “Move
Out.” You can monitor the current focuser index position in the Focuser pop-up window.
To return to a specifi c focuser index position, enter the position into the box on the bottom
right of the window, and then click “Move To.” This is convenient if you already know the
specifi c focuser index position that focuses your setup. The next time you observe, you
can enter this focuser position, click “Move To,” and the telescope should be in good
focus.
Refer to the online instruction manual at celestron.com for more information on the
Celestron Focus Motor.
Using a Celestron GPS Accessory
With the Celestron SkySync GPS (or the older CN16 GPS) accessory connected to an AUX port on the mount, connect to CPWI.
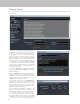
CPWI will automatically search for the GPS accessory. Once found, you will see the GPS section in the Menu. Once the GPS
accessory satellite links and is ready to be used, select GPS, and you will be able to see your latitude and longitude coordinates as
reported by the GPS accessory. CPWI will now use the location data provided by the GPS accessory. You can see this information
when you perform an alignment in the “Review Time and Location” area of the Select an Alignment Method window. To disable the
use of the GPS location data for the alignment, deselect the “Enable GPS” checkbox in the “Review Time and Location” area.
Menu Options
In this section, we will review the more detailed functionality that can be accessed from the different sections of the Menu on the left
side of the screen once connected to the mount.
Connection
This is where it all starts. Select “Mount USB,” “Hand Controller,” or “WiFi” as indicated previously in this manual to connect CPWI
to the mount and start an observing session. Once connected, you can select “Disconnect” to disconnect CPWI from your mount.
Alignment
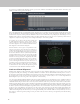
View Pointing Model – Selecting this will open up the PointXP
6 window.
Here you can fi nd detailed information about the current mount
alignment model. For a detailed YouTube video discussion of this
window, refer to the Pointing Model Help in the Help section of
the Menu (requires internet connection). You can also access this
video by selecting Help from the options at the top of the PointXP
6 window. For a simplifi ed user interface to the current mount
alignment model, select “Add Reference(s)” from the Alignment
section of the Menu (see below).
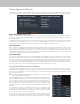
Perform ASPA - Discussed previously in this manual, this
selection achieves accurate polar aligning of EQ mounts (including
AZ mounts on EQ wedges).
Add References - Allows additional alignment reference points to
be added to the mount model. If you notice your mount’s pointing
accuracy is not quite as accurate as you would like in certain areas
of the sky, add a pointing reference (i.e. star) in that area of sky
to increase pointing accuracy. You can also add any object to the
mount model by clicking on it in the SkyViewer and then clicking
“Add to Model” from the object information pop-up window.