EdgeHD Series INSTRUCTION MANUAL EdgeHD 8 ● EdgeHD 9.
Your telescope is designed to give you years of fun and rewarding observations. However, there are a few things to consider before using your telescope that will ensure your safety and protect your equipment. Warning Never look directly at the sun with the naked eye or with a telescope (unless you have the proper solar filter). Permanent and irreversible eye damage may result. Never use your telescope to project an image of the sun onto any surface.
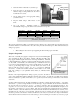
A Attaching the Visual Back The visual back is the accessory that allows you to attach all visual accessories to the 8" telescope. The 8" telescope optical tubes come with the visual back installed. If it is not already on the tube it can be attached as follows: 1. Remove the rubber cover on the rear cell. 2. Place the knurled slip ring on the visual back over the threads on the rear cell (Fig 1-1). 3.
Installing the Eyepiece The eyepiece, or ocular, is an optical element that magnifies the image focused by the telescope. The eyepiece fits into either the visual back directly (8" only) or the star diagonal. To install an eyepiece: 1. Loosen the set screw on the star diagonal until the tip no longer extends into the inner diameter of the eyepiece end of the diagonal. 2. Slide the chrome portion of the eyepiece into the star diagonal. 3.
2. Slide the eyepiece end of the finderscope into the front ring of the bracket (the front ring is the one without the adjustment screws), then through the back ring. It may be necessary to push down the spring loaded pivot screw so that the finder will pass through the back ring (see figure 1-3) 3. Push the finder back until the O-Ring is snug inside the front ring of the finder bracket. 4. Hand tighten the two alignment thumb screws until they make contact with the finderscope.
A telescope is an instrument that collects and focuses light. The nature of the optical design determines how the light is focused. Some telescopes, known as refractors, use lenses. Other telescopes, known as reflectors, use mirrors. The EdgeHD optical system (Apanatic Schmidt) uses a combination of mirrors and lenses and is referred to as a compound or catadioptric telescope. This unique design offers large-diameter optics while maintaining very short tube lengths, making them extremely portable.
Focusing Your telescope's focusing mechanism controls the primary mirror which is mounted on a ring that slides back and forth on the primary baffle tube. The focusing knob, which moves the primary mirror, is on the rear cell of the telescope just below the star diagonal and eyepiece. Turn the focusing knob until the image is sharp. If the knob will not turn, it has reached the end of its travel on the focusing mechanism. Turn the knob in the opposite direction until the image is sharp.
Although the power is variable, each instrument under average skies has a limit to the highest useful magnification. The general rule is that 60 power can be used for every inch of aperture. For example, the C8 is 8 inches in diameter. Multiplying 8 by 60 gives a maximum useful magnification of 480 power. Although this is the maximum useful magnification, most observing is done in the range of 20 to 35 power for every inch of aperture which is 160 to 280 times for the C8 telescope.
After looking at the night sky for a while you may want to try photographing it. Several forms of celestial photography are possible with your telescope, including short exposure prime focus, eyepiece projection, long exposure deep sky, terrestrial and even CCD imaging. Each of these is discussed in moderate detail with enough information to get you started. Topics include the accessories required and some simple techniques.
T-Adapter 1. Center the Moon in the field of your telescope. 2. Focus the telescope by turning the focus knob until the image is sharp. Make sure the mirror lock knobs are loosened. 3. Set the shutter speed to the appropriate setting (see table below). 4. Trip the shutter using a cable release or self timer. 5. Use your camera's bracketing feature to automatically change exposure time in order to find the best exposure.
for this process; one to release the camera shutter and one to hold the card. Here's the process for making the exposure. 1. Find and center the desired target in the viewfinder of your camera. 2. Turn the focus knob until the image is as sharp as possible. 3. Place the black card over the front of the telescope. 4. Release the shutter using a cable release. 5. Wait for the vibration caused by releasing the shutter to diminish. Also, wait for a moment of good seeing. 6.
This device allows you to photograph and guide through the telescope simultaneously. Celestron offers a very special and advanced off-axis guider, called the Radial Guider (#94176). In addition, you will need a T-Ring to attach your camera to the Radial Guider. Other equipment needs include a guiding eyepiece. Unlike other forms of astrophotography which allows for fairly loose guiding, prime focus requires meticulous guiding for long periods.
Another way to reduce vibration is with the Vibration Suppression Pads (#93503). These pads rest between the ground and tripod feet. They reduce the vibration amplitude and vibration time.
Fastar L ens Assem bly CCD Camera Figure 3-5 Figure 3-6 The key factors for good CCD imaging are; exposure time, field-of-view, image size, and pixel resolution. As the F-number goes down (or gets faster), the exposure times needed decreases, the field-of-view-increases, but the image scale of the object gets smaller. What is the difference between f/2 and f/10? F/2 has 1/5 the focal length of f/10.
While your telescope requires little maintenance, there are a few things to remember that will ensure your telescope performs at its best. Care and Cleaning of the Optics Occasionally, dust and/or moisture may build up on the corrector plate of your telescope. Special care should be taken when cleaning any instrument so as not to damage the optics. If dust has built up on the corrector plate, remove it with a brush (made of camel’s hair) or a can of pressurized air.
Before you begin the collimation process, be sure that your telescope is in thermal equilibrium with the surroundings. Allow 45 minutes for the telescope to reach equilibrium if you move it between large temperature extremes. To verify collimation, view a star near the zenith. Use a medium to high power ocular — 12mm to 6mm focal length. It is important to center a star in the center of the field to judge collimation. Slowly cross in and out of focus and judge the symmetry of the star.
7. Once the star image is in the center of the field of view, check to see if the rings are concentric. If the central obstruction is still skewed in the same direction, then continue turning the screw(s) in the same direction. If you find that the ring pattern is skewed in a different direction, than simply repeat steps 2 through 6 as described above for the new direction. Perfect collimation will yield a star image very symmetrical just inside and outside of focus.
You will find that additional accessories enhance your viewing pleasure and expand the usefulness of your telescope. For ease of reference, all the accessories are listed in alphabetical order. Barlow Lens - A Barlow lens is a negative lens that increases the focal length of a telescope. Used with any eyepiece, it doubles the magnification of that eyepiece. Celestron offers two Barlow lens in the 1-1/4" size.
Series 2 – #94119-20 Deep Yellow, Red, Light Green, ND25% T (#s 12, 25, 56, 96ND-25) Series 3 – #94119-30 Light Red, Blue, Green, ND50% T (#s 23A, 38A, 58, 96ND-50) Series 4 – #94119-40 Yellow, Deep Yellow, Violet, Pale Blue (#s 8, 47, 82A, ND96-13) Light Pollution Reduction (LPR) Filters - These filters are designed to enhance your views of deep sky astronomical objects when viewed from urban areas.
CELESTRON TWO YEAR WARRANTY A. Celestron warrants this telescope to be free from defects in materials and workmanship for two years. Celestron will repair or replace such product or part thereof which, upon inspection by Celestron, is found to be defective in materials or workmanship. As a condition to the obligation of Celestron to repair or replace such product, the product must be returned to Celestron together with proof-of-purchase satisfactory to Celestron. B.
Celestron 2835 Columbia Street Torrance, CA 90503 U.S.A. Tel. (310) 328-9560 Fax. (310) 212-5835 Web site at http//www.celestron.com Copyright 2009 Celestron All rights reserved. (Products or instructions may change without notice or obligation.) Item # 91030-INST $10.