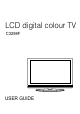
LCD digital colour TV C3298F USER GUIDE
Introduction Thank you for purchasing this TV which has been designed and manufactured to give you many years of trouble free service. You may already be familiar with using a similar product but please take time to read these instructions which have been written to ensure you get the very best from your purchase. HDMI HDMI (High Definition Multimedia Interface) is the next generation of digital interface.
Contents 1-3 SAFETY INFORMATION 4-5 6-9 10 10-15 16 17 17 18-25 26-28 29-31 32 33-36 Unit and Accessories Remote Control Aerial connection Connecting external devices Common Interface slot Auto installation setup Source menu Menu settings Multimedia Operation Recording Operation EPG menu DVD Operation 37 38 39 TROUBLE SHOOTING GUIDE TECHNICAL SPECIFICATIONS Wall mounting options
SAFETY INFORMATION IMPORTANT SAFETY INSTRUCTIONS - READ CAREFULLY BEFORE USE. Take note of the following safety information which appears on the back of the TV. CAUTION TO PREVENT ELECTRICAL SHOCK, DO NOT REMOVE ANY COVER SCREWS, NO USER SERVICEABLE PARTS INSIDE, REFER SERVICING TO QUALIFIED SERVICE PERSONNEL. This symbol indicates that there are important operating maintenance instructions in the literature accompanying this unit.
IMPORTANT SAFETY INFORMATION (Continued) This unit has been produced according to all current safety regulations. The following safety tips should safeguard users against careless use and the dangers connected with such use. x Although this appliance has been carefully manufactured and rigorously checked prior leaving the factory, as with all electrical appliances it is possible for problems to develop.
IMPORTANT SAFETY INFORMATION (continued) x x x x x Liquids spilt into the unit can cause serious damage. Switch the set OFF and disconnect the mains power supply, then consult a qualified service person before attempting to use the unit again. Do NOT remove the safety covers. There are no useable or serviceable parts inside. You may invalidate the warranty. Qualified personnel must only service this apperatus. Do NOT tap or shake the screen, you may damage the internal circuits.
Unit and Accessories Insert disc according to the label next to the disc slot LED Indicator Remote Control Window(keep clear) The functions of the TV buttons are described below. Menu : Press to display the OSD menu, press again to exit the menu. Vol +/- : Press to adjust the volume. CH+/- : Press to skip through the channels. TV/AV : Press to display the input source menu. Power : Press ON/OFF the TV set. The functions of the DVD buttons are described below.
Unit and Accessories (continued) U TV set Remote Control Batteries Power cable Remote Guide Remote Guide QUICK START GUIDE Quick Start Guide 5 Warranty Card USER GUIDE Warranty Card User Guide
Remote control Functions of remote control buttons Dependant on the model of theTV some keys will have no function iViewer Only used on TVs with Internet Player*. In this mode the remote does not control the TV. to control the TV again. Press If you have set the remote to work a Satellite receiver, the remote controls only the Satellite receiver and not the TV when you press Press to control the TV again.
Remote control (continued) Dependant on the Model of the TV some keys will have no function Menu TV Settings Picture Sound Extras Option Language DVD setup Restore Setting *Dependant on Model Source Menu ATV (Analogue) DTV ( Freeview ) SD1 (red card)* SD2 (green card)* AV Scart 1 Scart 2 * S-Video* HDMI 1 HDMI 2 HDMI 3 YPbPr DVD VGA USB Help This displays a page that gives telephone numbers for service. Press to enter, press again to exit.
Remote control (continued) Dependant on the model of TV some keys will have no function *Dependant on Model iViewer HOLD TEXT DVD 8
S Remote control (continued) Installing Batteries in the Remote Control 1. Remove the battery compartment cover at the rear of the remote control by pushing the retaining clip forward and pulling up. 2. Install the supplied batteries, ensuring the polarity matches what is shown in the battery compartment. 3. Replace the battery compartment cover. Using the Remote Control To use the remote control point it at the TV and press the required buttons.
Aerial connection USER GUIDE WARNING! ENSURE THE TV AND ALL ANCILLARY EQUIPMENT IS UNPLUGGED FROM THE MAINS BEFORE MAKING ANY CONNECTIONS! Connecting the TV Antenna Connect the TV antenna to the aerial socket with a 75 ohm co-axial plug. For best results use a high gain TV aerial, preferably roof or loft mounted. • To improve picture quality in a poor signal area, purchase and install a signal amplifier. • If the antenna needs to be split for two TVs, use a 2-Way Signal Splitter (not supplied).
Connecting external devices (continued) Common Interface USB device Output to Audio amplifier Switch: Turn on/off the power supply Output to Audio amplifier TV Signal Satellite Box or Blue Ray DVD 11
Connecting external devices (continued) CONNECTIONS Name AC POWER IN SWITCH USB Function Description Connect to power supply Turn on/off the power supply Connect to USB device for multimedia HDMI1/2/3 Connect to the HDMI socket of your DVD or Satellite Box VGA PC audio in Connect to the PC VGA output to display PC graphics PC audio input SCART CI Connect to the scart input / output of external devices CI slot (pay as you view card slot) COAX YPbPr Video (AUDIO)L/R IN RF Headphone (AUDIO)L/R out Out
Connecting external devices (continued) PC connection As PCs are sometimes still supplied with a ‘conventional’ CRT monitor, you may need to adjust the display settings of your PCs graphics card, otherwise the pictures may not appear correctly. Switch on your PC (still with your original monitor connected) no w select the screen resolution, and select 60Hz refresh rate. Switch off your PC, then connec t it to your TV while both appliances are still switched off.
Connecting external devices (continued) Connecting Video camera and Video recorder Video camera x x x x Connect the AV cable to the TV and to the video camera. Turn on both video camera and the TV. Select AV/CVBS source You can now see the playback picture from the video camera. Note: x To connect the video camera using other cables, refer to the video camera instruction manual. Video recorder x x x x Connect the Scart cable to the TV and video recorder.
Connecting external devices (continued) Connecting an audio system You can supply the TV sound to the stereo system (A) with the Scart socket. Use a special scart cable SCART to RCA. (Please consult your hi-fi instructions for details). If you have a surround sound amplifier/decoder (B) Use the Scart cable or the special scart cable Scart to RCA.
USER GUIDE Common Interface Slot USING YOUR COMMON INTERFACE SLOT Common Interface The Common Interface (CI) slot is designed to accept the Conditional Access Module (CAM) and Smart Card in order to view the pay TV programmes and additional services. Contact your Pay Per View TV service provider to get more information about the modules and subscriptions. NOTE: Conditional Access Module and Smart Cards are sold separately.
Auto installation setup Power On / Off the TV Power Switch On / Off Press the power switch to setting and the standby indicator will light red. To turn on the LCD TV Press the power button on the LCD TV or the button on the remote control, the standby indicator will light green. To turn off the LCD TV Press the power button on the LCD TV or the button on the remote control, the standby indicator will light red.
BasLc Use Menu Settings 1. Turn the TV on. 2. Press the MENU button on the Remote Control. 3. Use the and buttons to navigate through the menu. 4. Press the EXIT button to exit the Menu. TV SETTINGS MENU Allows you to search channels and set up a variety of channel options. (Select DTV source for example) (Select DTV source for example) EXTRAS MENU: Allows you to setup a variety of time options. (Select DTV source for example) Allows you to customize the sound options and effects.
Application Menu Settings (continued) 1. TV SETTINGS menu Description Auto Scan Press OK button to enter the hint menu, and select the Country and Tune Type mode for the TV, then press OK button to start auto tuning. DTV Manual Tuning Press OK button to enter the DTV Manual Tuning menu, select a DTV channel, and press OK button to start searching. ATV Manual Tuning Press OK button to enter the ATV Manual Tuning menu. Storage To: Select a position for storing the programme.
Menu Settings (continued) Programme Edit Press OK button to enter the Programme Edit menu as the following picture. Delete: Select a channel and press RED button to delete. Move: Select an ATV channel, and press YELLOW button, then you can use and buttons to change the position of the programme, press YELLOW again to confirm the change. Press menu to exit and it will automatically save the current set.
Menu Settings (continued) 2. PICTURE menu Description Picture Mode: Choose from Standard, Dynamic, User and Mild. Note: Contrast, Brightness, Color and sharpness are only available and can be adjusted in the User mode option in the Picture Mode Settings. Contrast: Controls the difference between the brightest and darkest regions of the picture. Brightness: Controls the overall brightness of the picture. Color: Control the color.
Application Menu Settings (continued) 3. SOUND menu Description Sound Mode: Allows you to select among: Standard, Music, Movie, Sports and User. Treble(Can be adjusted when the sound mode is User): Controls the relative intensity of higher pitched sounds. Bass (Can be adjusted when the sound mode is set to User): Controls the relative intensity of lower pitched sounds. Balance: To adjust the balance of the left and right sound track, or turn off the volume of the left and right sound track.
Menu Settings (continued) 4. EXTRAS menu Description Sleep Timer: Allows you to setup the sleep timer among: 10min, 20min, 30min, 60min, 90min, 120min,180min, 240min and off. PC Setup (PC mode only) : Press OK button to enter the submenu to adjust Horizontal / Vertical position, Size or Phase of the picture. Note: The options Schedule List, Recorded List, Timer Record and PVR File System are described on pages 29 -31.
Menu Settings (continued) 5. OPTIONS menu DVD Setup Restore Setting Description OSD Language: Allows you to select menu language. Audio Language (can be selected in DTV mode): Allows you to select audio language. Subtitle Language (can be selected in DTV mode): Allows you to select subtitle language. Menu Time Out: Allows you to setup the time of the menu display on the screen among: 5s, 10s, 15s, 20s, 25s, 30s, 35s, 40s. Country: Displays UK, this can be changed by using the Auto tune function.
Menu Settings (continued) 6. LOCK menu Description Lock System: Turn on/off the Lock System function. Note: You should enter the code to operate the menu.(original code is 0000) Set Password: Set pin code. If the Pin code has been changed you must enter the present code. New : Enter the new password. Confirm: Enter the new password. Lock Channel: You must enter the password to view channels that have been locked.
Multimedia Operation Basic Operation 1). Press the SOURCE button on the remote control to display the input source menu, select USB source by the / buttons, and press OK button to enter the Multimedia menu seen below. DTV ATV SCART YPBPR DVD PC HDMI1 HDMI2 HDMI3 AV USB Select 2). Insert USB device, you will find the name of the device display on the screen.
Multimedia Operation (continued) 1. Photo Photo viewing Press / button to select the option on the menu, and press OK button to change. Repeat: Select the repeat mode from Repeat All, Repeat 1, Repeat None. Music: Play/Pause the music. Playlist: Display the playlist on the screen and select the photo of your choice. Info: Display the information of the file. Rotate: Rotate the photo clockwise/counterclockwise. Zoom Out/In: Zoom out/in the photo. Move View: Move the photo in Zoom out mode. 2.
Multimedia Operation (continued) 3. Movie Play the movie Press / button to select the option on the menu, and press OK button to change. Repeat: Select the repeat mode from Repeat All, Repeat 1, Repeat None. Set A-B: Select and play the preferable part of the file by setting A and B at the beginning and end. Press OK button to cancel. Playlist: Display the playlist on the screen. Info: Display the information of the movie. Slow: Play the movies at slow speed, press button to cancel.
Recording Operation PVR settings Press the MENU button, and select EXTRAS menu. 1). Schedule List Display the recorder shedule. 2). Recorded List INFO: Display the information of the programme you recorded. RED button: Delete the recording you select.
Recording Operation (continued) 3). Timer Record Set the timer record The TV will record the programme automatically according to your settings. TITLE: Select the channel you want to record. MODE: Select the record mode. Start Time: Select the start recording time. End Time: Select the end recording time. Press OK button to save the setting and exit the menu, and there will be a hint on the screen. 4). PVR File System Setup the PVR File system before you start recording.
Recording Operation (continued) 5) Start Recording Record and Time shift function buttons Recording: Press to start recording. PAUSE: Press to enter the timeshift mode, press again to play the recording. Stop: Press to stop recording or timeshift. B: To display the list of programmes scheduled for recording. A: To display the list of programmes already recorded on the USB. 1) Recording menu When you press REC button, the screen will display the recording menu as below: Full mode Simple mode Note: a.
EPG menu Display the programme guide by pressing the GUIDE button. Press the BLUE button to highlight the top of the table in yellow, press the CHANNEL or TIME. Programme list by TIME / to select Programme list by CHANNEL Press / button to highlight the date, now press the / buttons to select the date you want to view (7 day EPG) Press the / buttons to highlight the channel option, press / buttons to select the channel you want to view. You can select a programme for recording using the / buttons.
DVD Operation Turn on your TV then use the Source button on the remote control or the TV/AV button on the TV to select DVD mode.. If there is no disc in the DVD player the screen will show “NO DISC”. Place a disc Insert a disc according to the instruction label next to the dvd insert slot. Do not touch the playing surface. Hold the disc around the outside with your fingers and place the disc into the slot. The player will automatically draw the disc into the player.
Digital Audio Disc 1. Compatible with Digital Audio discs 2. The player will search the disc directory automatically and display the contents on screen. 3. The player will then start to play the first track, of the selected directory. 4. To change directories use the direction buttons. DVD System Operation System operation will define the setting of the set; these definitions will be stored until you change them again. General Steps of Setup Menu 1. Pause or Stop the player.
TV SYSTEM According to the Color system of your TV, select proper TV TYPE. PASSWORD The password option is initialized as locked. You cannot set the ratings limit or change the password. To enable these features you must unlock the Password. The default password is "0000". Using the / button, move the highlight to "PASSWORD", press the button and enter "0000". You will see the padlock symbol open. You may now change the RATING or put in a new password number.
4. DIGITAL SETUP The video setup options are illustrated below: - DYNAMIC RANGE: Use the / button to move the scroll and adjust the dynamic range. - DUAL MONO: Choose the mode of the audio output. - There are four modes: STEREO, MONO L, MONO R, MIX MONO. Disc Care About Disc Terms Title Generally, pictures or music compressed on a DVD are divided into several sections, "title".
USER GUIDE TROUBLE SHOOTING GUIDE To assist in locating possible faults use the help guide below. SYMPTOM TROUBLESHOOTING No Picture, no sound Check that the TV is correctly plugged in. Check that the TV is connected to a suitable power source. Check the electrical supply is turned on. Ensure that the TV is powered on. Check that the cables are fitted securely. Ensure the aerial and/or external sources are connected. Press the SOURCE button to change the source. Turn the TV on or off.
TECHNICAL SPECIFICATIONS Specifications of the TV that you have just purchased may vary from the information in this table due to technical innovations. TV Specifications TV System PAL / BG / DK / I Audio System BG / DK / I Screensize 32”(Diagonal) Resolution 1366 x 768Pixels(RGB) Aerial input 75 Audio output power 2 x 6W Power requirements 100-240V ̚ 50/60Hz Power consumption < 180W Standby power consumption <1W Weight 12.
Wall Mounting 1. The stand must first be removed. Place the TV face down. 2. Remove the five screws that secure the stand. 3. Remove and store the stand and screws. 4. Use four machine screws to mount the TV on the bracket. This unit is VESA-Compliant and designed to be wall mounted with a VESACompliant 200mm x 200 mm mounting kit.