Preface Thank you for purchasing this cellular phone. To guarantee your cellular phone works properly, please follow the instructions in this manual to prevent any possible incidents or malfunctions. Follow all safety warnings to avoid injury or property damage. Screen displays and illustrations in this user’s manual are designed to help you operate your phone to its optimum performance. We continuously strive to improve our products.
Contents 1 Preface ------------------------------------------------------------------------------------------------------------------------------1 2 Introduction -----------------------------------------------------------------------------------------------------------------------3 2.1 PHONE DISPLAY ......................................................................................................................................... 3 2.2 KEY FUNCTIONS .....................................................
6.3 CALL CENTER ........................................................................................................................................... 18 6.4 STK ........................................................................................................................................................ 18 6.5 FUN & GAMES .......................................................................................................................................... 18 6.6 MULTIMEDIA ................
2 Introduction 2.
2.2 Key Functions Key Function Dial/Answer key Answer all calls Make calls from Sim card View SIM card call logs in standby mode. Pressing and holding to turn the phone on/off. End a call or reject an incoming call. Return to the idle mode. Press to perform the function currently displayed in the bottom left/right corner of the screen. End /Power Key Left/Right Soft Key OK Key Numeric key * Key # Key In idle mode, press to enter Dailler in which you can enter phone number directly. Confirm a selection.
Navigation Key Press to access four functions in idle mode. Within a menu, press Up, Down, Left or Right to scroll through menu options. Note: “Press” in this manual, means to press and release the key; “press and hold” means to press and hold the key for at least 2 seconds. 2.3 Icons & Symbols Icon Description Network - Indicates signal strength (no bar indicates no signal; 4 bars indicate strongest). Battery - Indicates battery level.
Lock- Indicates that the keypad is locked. Alarm-Indicates that the alarm clock is on. Headset-Indicates that headset profile is activated. Alert type is “Ring”. Vibrate – Indicates that the vibrator is on.
3 Getting Started Please read the safety instructions in the "Safety Information and Notices" section before use. 3.1 Inserting the SIM Card and the battery 3.1.1 Remove the back cover Make sure the phone is switched off. You need to remove the back cover of your phone before you can insert the SIM card. Hold the phone with the front facing downwards; press and pull the back cover down; lift the back cover up to remove it. 3.1.
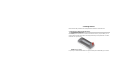
3.1.3 Insert the SIM card Make sure that the metallic contacts are facing downwards. slide the SIM card into SIM slot.
3.1.4 Install the battery With the metallic contacts of the battery facing the metallic contacts in the battery slot, press the battery down into its slot until it locks into place.
3.1.5 Install the back cover Align and hook the back cover and then press the back cover up until it locks into place.
3.2 Inserting a T-Flash (External Memory) Card With the metal contacts facing down, gently slide the T-Flash card into the slot.
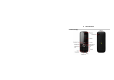
3.3 Turning the phone on To turn the phone on, press and hold the Power key. Enter the PIN code if required (the 4 to 8 digit secret code of your SIM card). It is preconfigured and provided to you by your network operator or retailer. If you enter an incorrect PIN code 3 times in succession, your SIM card will be locked. To unlock it, you must obtain the PUK code from your network operator. 3.4 Charging the Battery 1. Ensure the battery is inserted in the handset.
3. Disconnect the charger from the phone. 4. Disconnect the charger from the AC power socket. Note: If the battery is powerless, the battery icon will reappear after a few minutes of charging. 3.5 Important Password Phone lock password is 1122. 3.6 Keypad Lock and Unlock Go to Settings > Security settings > Auto keypad lock to select the time for keypad lock. In idle mode, if the time expires, the keypad will be locked automatically.
4 Text Entry 4.1 Input Method 4.1.1 Changing the input modes During text editing, you can press the # Key to switch input modes, or press the Left Soft Key [Options] and choose Input Method to select different input modes. 4.1.2 Entering Symbols In any input mode, press the * Key to open the symbols input screen. Use the navigation key to choose the desired symbol and the OK key to select it. 4.
# Switch between input mode. * Press to activate punctuation mode. Example: How to enter the word "HOME" 1. Press the # Key to switch to ABC. 2. Press 4 6 6 3, the first word “GOOD” appears. 3. Press ▶ to select “HOME”. 4. Press the OK Key to confirm “HOME”. 4.3 Multi-tap Input This method requires multiple key presses to reach the desired character: the letter "h" is the second letter on the 4 key, so you must press 4 twice quickly to enter "h".
5 Calling 5.1 Making a Call 1.In idle mode, enter the phone number. 2.Press the Dial/Answer Key to make a call. 3.Press the End/Power Key to end the call. 5.1.1 Making an International Call 1. In idle mode, press * key twice to enter "+". 2. Enter the country code. 3. Enter the area code followed by the phone number. 4. Press the Dial/Answer Key to make a call. 5.2 Answering a Call Press the Dial/Answer Key or Left Soft Key Options > Answer to answer it. Press End/Power key to reject it.
6 Menu Functions 6.1 How To Use 6.1.1 Select Menu Press the OK Key to enter main menu in idle mode. Press the Navigation Key to choose desired menu and press the OK Key to enter the selected menu. You can exit a menu and return to idle mode by pressing the Right Soft Key [Back] or the End/Power Key. 6.
6.3 Call center 6.3.1 View Call History 1. 2. 3. Select Menu > Call center > Call history. Press the Navigation Key to view different call logs. Choose a particular number and press the Dial Key to call the number directly. 6.3.2 Adjust Call Settings 1. 2. Select Menu > Call center > Call settings. Now you can set the call waiting, call divert, call barring and so on. 6.
6.6 Multimedia 6.6.1 Camcorder Your cellular phone features a camera that allows you to take pictures and record short videos. The pictures and videos can be saved in memory card or phone.Please ensure that the camera lens is clean before you take pictures and , as small dust particles can strongly affect the picture quality. Take a photo Launch Camera From idle mode, press the OK Key to enter the main menu then select Multimedia > Camcorder Take a picture Press Navigation Down Key to Camera mode.
Exit Press the OK Key once to begin recording. Press the OK/Left Soft Key again to pause. To save the video, press the Right Soft Key. The video will automatically saved and it will be stored in File Manager. Press the End/Power Key or the Right Soft Key. Camcorder Option Menu When the camcorder is activated you can change a number of settings by pressing the Left Soft Key before taking a picture or recording a video.
After a certain video clip is selected, press OK key to play. 6.6.4 Audio player Keys Operation The keypad operations during music playback are as follows: Key Description The OK Key List the audio file from the storage you set. Navigation Key ▼ Press to stop the music. Short press to select the previous song/next song. Press and hold to Navigation Key ◀ or ▶ rewind/fast forward the track during playback. *, # Adjust volume. Left Soft Key [List] List the audio file from the storage you set.
Supply of this product does not convey a license nor imply any right to distribute MPEG Layer-3 compliant content created with this product in revenue-generating broadcast systems(terrestrial, satellite, cable and/or other distribution channels), streaming applications(via internet, intranets and/or other networks), other content distribution systems(pay-audio or audio-on-demand applications and the like) or on physical media(compact discs, digital versatile discs, semiconductor chips, hard drives, memory c
Note: The FM radio will not work unless the headset is attached. Attach the headset to the USB port located at the bottom of the phone. To operate the radio: 1. Select Menu >Multimedia >FM radio. 2. If the FM is off, press the Navigation Down Key to activate or deactivate the FM radio. 3. Press the * / # Key to adjust the volume. 4. Press the Navigation Up Key to activate or deactivate Auto search. 5. Press the Navigation Right/Left Key to switch the channels.
File list: Allows you to list the radio program you have recorded. 6.6.7 File Manager 1. 2. Select Menu > File Manager. Press the Left Soft Key [Options] and select Open to view different folders. Note: If you have inserted a T-Flash card (external memory card), here you can view its files. 6.7 Phonebook Your phonebook list is saved either on the SIM card’s memory or Phone’s memory. You can also choose to list both. 6.7.1 Search contact 1.
To create a new SIM/phone contact: 1. Select Menu > Phonebook > Add New Contact. 2. Then enter all related information about the contact. 3. Press the OK Key or Done to save the contact details. 6.7.3 Others In this Phonebook menu, you can also view the Caller groups. Select “Menu > Phonebook, press Options to select Phonebook settings can set the preferred storage for the contacts. 6.8 Messaging 6.8.1 Creating a text message 1. 2. 3. 4. Select Menu > Messaging > Write message > Text message.
6.8.2 Creating a multimedia message 1. 2. 3. 4. Select Menu > Messaging > Write message > Multimedia message. Edit the content of the message. You can add pictures, sound, and other objects to the multimedia message. You can also insert a new slide, preview the message, and set the slide duration. After you have completed inserting content, press the Left Soft Key [Options] and select Send to. Enter the recipient, or choose a contact from phonebook.
Select “Menu > Messaging > Delete messages” to delete the message if you need. Select “Menu > Messaging > Templates” to use the default SMS and MMS templates Select “Menu > Messaging > Message settings” to adjust the message settings. 6.9 Organizer This menu contains features and options designed to keep you organized and informed while on the go. 6.9.1 Calendar This feature allows you to keep track of your schedule and tasks saved in the calendar.
8. Press Done to save the event. 6.9.2 Tasks You can also view, edit or delete the tasks from the options under this feature. For the first-time user, you will need to follow the steps below: 1. Select Add in the Task List. Then choose the task type. 2. Edit your Task by entering date, time, Subject, alarm, repeat and other information. 3. You can choose to turn the alarm on as the reminder. 4. Select Done and Yes to save your task. 6.9.3 Set an alarm 1. 2. 3. 4. Select Menu > Organizer > Alarm.
Calculator applies simple calculator function such as addition, subtraction, multiplications and division. To start using 1. Go to Organizer and select Calculator. 2. Enter the number with keypad, and then click the “+” for addition, or click the “-“for Subtraction, or click the “*” for Multiplication, or click the “/” for Division. 3. Click Left soft key or Navigation key to calculate. 4. To exit calculator, press the End Key or the Right soft Key. 6.9.
Your phones support Web Browser. You can obtain various services such as up-to date news, weather, sport, and other information as well as other Internet services. These services are designed and maintained by WAP service providers. Note: To activate WAP service, you may need to contact your service provider. Do not switch the phone on when the wireless phone use is prohibited or when it may cause interference or danger.
Service inbox WAP push messages are saved here. Settings GPRS (General Packet Radio Service) is a technology that use for sending and receiving data over the mobile network. If the settings have made by the service provider, you may begin immediately. If the accessed profiles have been assigned by your service provider, select a profile and activate it. Otherwise, you may key in setting manually. For appropriate settings, contact your network operator or service provider.
Cache: The information or date you have accessed is all stored in the cache of the phone. A cache is a file buffer used to store date only temporarily. You can clear the cache by selecting this option. Cookies: Under the consideration of privacy and security issue, we would suggest you to clear cookies which may contain sensitive information just in case your phone is misplaced, lost or stolen.
To edit the Profile You can customize Profile settings to meet your preference. 1. In Profile menu, select a profile. 2. Select Options > Customize. 6.11.2 Phone settings This menu option allows you to set phone parameters suh as time and date, schedule power on/off, language, Pref. input methods, Encoding,Display,Themes, Dedicated key, Auto update of date and time,Flight mode and Misc.settings. 6.11.
Certificate manager: Select to view, delete, delete all or set the key usage. 6.11.5 Connectivity Bluetooth Your phone is designed to be compliant with Bluetooth technology. Bluetooth technology enables wireless connections between electronic devices. The Bluetooth connection can be used to listen to stereo music, send images, video, texts and vCards. To start using Bluetooth technology Your Bluetooth connection needs to be configured prior to operation.
2. 3. Select Bluetooth. Select Power to switch on/off the Bluetooth connectivity. Visibility You may turn the visibility of your phone on or off when other devices are trying to search devices supporting BT technology. To pair BT devices 1. In Settings menu, choose Connectivity > Bluetooth. 3. Go to My device. 4. Select Search new device, then press the left soft key, your phone will automatically search all BT devices. 5. To pair with a BT device, press Pair.
1. 2. 3. 4. Select the object you want to send. Select Options > Send. Choose Via Bluetooth, then your phone will search for the BT device. Select the device you would like to share followed by the sending action. To receive data using Bluetooth connectivity When you receive data through Bluetooth, a notification message will pop up to ask if you are willing to accept. If you decide to receive the message, press Yes and the data will be saved in the Received folder of the File Manager.
To pair with a BT audio device, follow the steps below: 1. 2. 3. 4. 5. 6. In Settings menu, choose Connectivity > Bluetooth. You will have to power on the Bluetooth connectivity of your phone and the device you wish to connect first. After the Bluetooth connectivity is turned on, select Search audio device. Your phone will automatically search the device. Whenever you select the device, there will be a pop-up message to notify you. Press Pair to pair your phone with the headset.
Advanced Audio Path: This function helps you to set if you wish to leave your audio path in the phone or BT headset. Storage: You can choose the storage for the received files, phone, memory card or always ask. Sharing permission: You can set your Sharing permission to Full control or read only My address: you can view your handset address here. Data Account You can access WAP via GSM Data or GPRS.
8 Troubleshooting Common issue Bad connection Aftersound or cacophony Idle time becomes short Reason Using the cellular phone in an area where the network connection is poor, such as around a tower or basement where a radio wave cannot be sent effectively. Using the cellular phone when the network is busy, such as an on-off duty time or the line is busy. Related to the distance of the send basis of the network. It is caused by the network connection and it is a regional problem.
Need to change battery. Cannot switch on When you cannot receive signals, your cellular phone will continue to send to find a basis. A lot of battery power is used, so as to limit idle time. Battery is drained. Wrong SIM card SIM card is damaged. SIM card is not inserted properly. Dirt on metal side of SIM card. Cannot connect to network shut off your phone. Insert a new battery. Please move to an area where the signal is strong or temporarily turn off your phone.
Feeble signal. Please move to an area where signal is stronger and try again. Cancel call barring Cancel fixed dialing Cannot call Call barring is activated Fixed dialing is activated Wrong PIN code Entered the wrong PIN code three times. Contact your operator. Cannot charge Battery or charger is damaged. Change battery or charger. Charge in area where the temperature is lower than 0℃ or Change charging environment. higher than 40℃. Bad connection Cannot add contact Contacts memory is full.
9 Safety Information and Notices Using the Cellular Phone and Charger Danger: Only use the battery and charger approved by the manufacturer. Using other brands may cause battery leakage, overheating, explosion or even fire. Caution: Keep the phone away from dust, water and damp areas. Dust, water or other liquids may cause overheating, electrical leakage, and/or phone failure. The phone, battery, charger and AC adapter are not waterproof. Keep them away from liquid.
Do not use the phone while you are driving. Pull over and stop your automobile to dial or answer a phone call. Usage of cellular phones in aircrafts or hospitals is prohibited. Turn the phone off to prevent interference with electronic medical devices. Follow any rules or regulations in such places. Do not use the phone at a gas station, near fuel or near chemicals.
Do not dispose of the battery into a fire. Doing so may cause battery explosion or even fire. If you have difficulties installing the battery, do not force the installation. This may cause battery leakage, overheating, explosion or even fire. Keep metal objects away so they do not come in contact with the battery or its connectors as it may cause the battery to short circuit, overheat or explode. Do not weld the polarities of the battery directly together.
or pose a risk to the vehicle. Using the Charger Danger: Only use the charger that came with the phone. Using a different charger may cause the phone to breakdown or explode. If the charger short circuits, a fire may occur. Do not use a damaged, worn or broken charger. This may cause a fire. Clean dust away from the power socket to avoid the possibility of a fire. Do not store the charger near any liquids. If liquids spill onto the charger it may cause it to overheat or breakdown.
Hold the plug while unplugging the power cord. This will avoid any potential damage or even fire. Requirements for Cellular Phone Avoid using your cellular phone in extremely high or low temperatures. Use the phone in a temperature range between 0~40℃and humidity of 35%~85%. It is recommended that you do not use your cellular phone near a telephone, TV set, radio or other radio frequency sensitive devices.
The exposure standard for wireless mobile phones employs a unit of measurement known as the Specific Absorption Rate, or SAR. The SAR limit set by the FCC is 1.6W/kg. *Tests for SAR are conducted using standard operating positions accepted by the FCC with the phone transmitting at its highest certified power level in all tested frequency bands. Although the SAR is determined at the highest certified power level, the actual SAR level of the phone while operating can be well below the maximum value.
www.fcc.gov/oet/ea/fccid after searching on FCC ID: T38PCD3031. For body worn operation, this phone has been tested and meets the FCC RF exposure guidelines for use with an accessory that contains no metal and the positions the handset a minimum of 1.5 cm from the body. Use of other accessories may not ensure compliance with FCC RF exposure guidelines. If you do no t use a body-worn accessory and are not holding the phone at the ear, position the handset a minimum of 1.
which can be determined by turning the equipment off and on, the user is encouraged to try to correct the interference by one or more of the following measures: -Reorient or relocate the receiving antenna. -Increase the separation between the equipment and receiver. -Connect the equipment into an outlet on a circuit different from that to which the receiver is connected. -Consult the dealer or an experienced radio/TV technician for help.
12 MONTH LIMITED WARRANTY PERSONAL COMMUNICATIONS DEVICES (the Company) warrants to the original retail purchaser of this PCD handheld portable cellular telephone, that should this product or any part thereof during normal consumer usage and conditions, be proven defective in material or workmanship that results in product failure within the first twelve (12) month period from the date of purchase, such defect(s) will be repaired or replaced (with new or rebuilt parts) at the Company’s option, without charg
Defects in appearance, cosmetic, decorative or structural items such as framing and non-operative parts; Product damaged from external causes such as fire, flooding, dirt, sand, weather conditions, battery leakage, blown fuse, theft or improper usage of any electrical source. The Company disclaims liability for removal or reinstallation of the product, for geographic coverage, for inadequate signal reception by the antenna or for communications range or operation of the cellular system as a whole.
In addition, for reference to an authorized Warranty station in your area, you may telephone in the United States (800) 229-1235, and in Canada (800) 465-9672 (in Ontario call 416-695-3060). THE EXTENT OF THE COMPANY’S LIABILITY UNDER THIS WARRANTY IS LIMITED TO THE REPAIR OR REPLACEMENT PROVIDED ABOVE AND, IN NO EVENT, SHALL THE COMPANY’S LAIBILITY EXCEED THE PURCHASE PRICE PAID BY PURCHASER FOR THE PRODUCT.
you. This Warranty gives you specific legal rights, and you may also have other rights, which vary from state to state or province to province. IN USA: PERSONAL COMMUNICATIONS DEVICES 555 Wireless Blvd. Hauppauge, NY 11788 (800) 229-1235 IN CANADA: PCD COMMUNICATIONS CANADA LTD.
54