
Installation Guide


4
basic installation rules
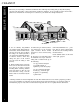
basic installations
The manufacturer has provided these suggested instructions as installation guidelines. The manufacturer,
however, neither installs the panels nor has any control over the installation. It is the responsibility of the
contractor and/or the installer to ensure panels are installed in accordance with these instructions and any
applicable building codes. The manufacturer assumes no liability for either improper installation or personal
injury resulting from improper use or installation.
1. Installed panels must move
freely from side to side.
2. Do not stretch horizontal
siding panels upward when apply-
ing: instead, push upward on the
bottom of the panel you are install-
ing, until the locks fully engage.
Nail in place. Panels should
hang without strain after nailing.
Stretching the panel upward pulls
the natural radius out of the panel
and increases the friction of the
locks.
3. Always nail in the center of
the slot. WARNING: Do not nail
at the end of a slot! Doing so will
cause the siding panel to be perma-
nently damaged. If you must nail
near the end of a slot to hit a stud,
etc., extend the length of the slot
with a nail slot punch tool.
4. Do not nail tightly. Allow a
minimum of 1/32˝ between the
back of the nail head, screw or
staple crown and the nailing strip.
Nails or staples should be placed
approximately 12˝ to 16˝ apart.
Drive fasteners straight and level
to prevent distortion and buckling
of the panel. For fastening specs,
see page 13.
5. Leave a minimum of 1/4˝
clearance at all openings and stops
to allow for normal expansion and
contraction. When installing in
temperatures below 40º F, increase
minimum clearance to 3/8˝.
6. Do not caulk the panels where
they meet the receiver of inside
corners, outside corners, or
J-Channel Trim. Do not caulk the
overlap joints.
7. Do not face-nail or sta-
ple through siding. Vinyl sid-
ing expands and contracts with
outside temperature chang-
es. Face-nailing can result in
permanent ripples in the siding.
8. Panels should be overlapped
approximately 1˝. Fasten panels
approximately 8˝ or more from
the overlap seam for best lap
appearance.
9. Avoid the use of unstable or
uneven underlayment. Keep in
mind that siding can only be as
straight and stable as what lies
under it. See Section “Preparing
the Walls” for more information.
10. When installing shutters, cable
mounts, etc., make sure screw hole
in the siding is 1/4˝ larger than
the attachment screw diameter.
(Example: an 1/8˝ screw requires
a 3/8˝ hole in the siding.) This will
allow the panel to still expand and/
or contract.
11. Never attach fixtures directly
to panels. When attaching fixtures,
first drill a hole in the siding 1/4˝
larger than the diameter of the
fasteners, allowing for expansion
and contraction. Note: Fasteners
for fixtures must penetrate the solid
substrate.