
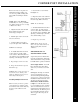
Installation Guide


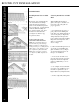

cedar dimensions - shingle & round cut
cedar dimensions - shingle & round cut
60
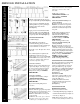
Tools Required
• Hammer
• Pencil
• Snips
• Nail Slot Punch
• Circular Saw with 18-24 Tooth
Carbide Tipped Blade
(not reversed)
• Chalk Line
• Utility Knife
• Tape Measure
• Level
• Corrosion-Resistant Siding Nails
or Screws
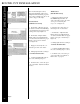
ACCESSORIES
• Corner post:
• Shingle
• Standard
• Inside Coner Post
(j-channel can be used as inside corner)
• Starter strip
• ¾˝ minimum J-channel
• Utility trim
Note: Use universal cedar starter
strip and accessories with at least
¾˝ pocket depth.
Important
A SOLID NAILABLE
SHEATHING, SUCH AS PLY-
WOOD OR OSB IS NECES-
SARY FOR A
PROPER AND SECURE
INSTALLATION.
• This product is for exterior use
only and should be installed on
flat, vertical walls to maintain an
even appearance.
• Panels should be acclimated to air
temperature by placing them in
the general work area at least one
hour prior to installation. Air tem-
perature should be checked when
installing the first course of each
new wall to determine the amount
of panel overlap. As air tempera-
ture changes, it is NOT necessary
to go back and adjust the spacing
of previously installed panels.
• Allow ¼˝ clearance for all stops,
such as corner posts and J-chan-
nels. When installing product in
very cold temperatures (<40°F),
allow 3/8˝ clearance for expansion
and contraction.
• In order to finish the wall without
a short course at the top, measure
down from the soffit and adjust as
needed.
• For Maximum wind load nail
through center of Nail Slots
every 8˝.
• When nailing though slots, always
nail in CENTER of the slot. DO
NOT NAIL TIGHT. Panels must
be able to move to allow for
expansion and contraction caused
by temperature change.
• See nailing instructions for
specific panels.
Maintenance
• To clean, use mild soap with
warm water to remove dirt, dust
or surface stains that may collect
from time to time.
• Product should NOT be painted.