
Installation Guide


17
preparing the wall
Furring strips
Residing Existing
Structures
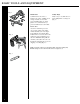
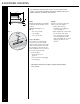
Step 1
Nail down any loose boards on
existing siding, and replace any rotten
wood as needed. DO NOT INSTALL
VINYL SIDING OVER ROTTEN
WOOD. (See Fig. 1)
Step 2
Scrape off loose caulk and any other
buildup that may interfere with the
siding installation. Remove all items
such as gutters, downspouts, and light
fixtures as needed.
Step 3
Install suitable sheathing, as needed,
to provide a smooth, flat, and stable
surface for the installation of the vinyl
siding. See information previously
given in this segment for additional
instructions on subwall protection and
flashing.
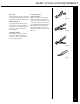
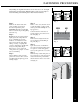
Step 4
Install furring in areas needing
straightening and leveling. Apply
rigid sheathing to cover and level the
furring strips. Do not apply vinyl
siding directly to furring strips with-
out sheathing, because the siding may
conform around the furred areas
causing an uneven appearance.
(See Fig 2)
Step 5
Window and door casings may need
additional attention or preparation.
Depending on vinyl siding moldings
being used, a window/door casing
generally needs to extend out from the
finished subwall sufficiently, to allow
a J-Channel or similar molding to butt
to it. In some situations, building out
the casings, or using special purpose
moldings such as Window and Door
Surround may be necessary.
Fig. 1
Fig. 2