
Use and Care Manual


110524-1
8
MAINTENANCE
Regular maintenance on your cooler will increase performance and extend the life of your cooler.
WARNING: Before accomplishing any maintenance ensure power is turned o and the motor and pump are
unplugged.
START OF SEASON MAINTENANCE
Accomplish these basic steps before the temperatures require cooling in case you have to acquire replacement parts.
CLEAN OR REPLACE MEDIA
1. With power DISCONNECTED, remove louvered doors.
2. Inspect lter media. Scale buildup on the media will obstruct the airow and cause the media to be less absorbant. If there is a
lot of scale buildup, check the bleed or purge settings. The bleed-o may be plugged, or the purge cycle may need to be more
frequent. A dirty lter will be less ecient and will cause a decrease of cooling in the home.
3. If media is dirty, remove from the louvered side. Remove the top media support brackets, loosen the water trough screws and raise
water trough, then lift out media.
4. Clean the media with a garden hose. Light scraping may be required to remove mineral deposits. Do not use harsh detergents or
pressure washers in cleaning. Make every eort to keep the media intact.
5. The original media has a standard life of 5 years, but in areas with very high mineral content the media may have to be replaced
sooner. If cooling eciency is not adequte, replace the media.
6. When reinstalling existing or installing new replacement pads, we recommend using original equipment, MasterCool® media
replacement pads for highest cooling capabilites.
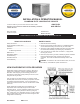
OIL BEARINGS
1. The blower bearings should be oiled each year with non-detergent 20/30 weight oil.
2. Locate and open the oil cup on each of the blower bearings and add a few drops of oil.
CLEAN PUMP
1. Pump should be cleaned at least once a year or more often if debris accumulates.
2. Unplug motor and pump from junction box, and disconnect pump distribution tube.
3. Using a screw driver, pry plastic retaining fasteners straight up out of the pump-mounting
bracket.
4. Slide the pump o the mounting bracket.
5. Extract pump from straining basket or netting and remove base of pump.
6. Clean pump, turn impeller to ensure free movement.
7. Remove pump spout and check for blockage.
8. Reinstall pump base and verify it is secure.
9. Before reinstalling pump, check water hose, bleeder line and water distributor tube to
ensure there is no blockage in any lines.
10. Reinstall the pump by sliding pump onto mounting bracket and reinserting the plastic
retainers to ensure pump stays in upright postion.
11. Reinstall pump water distributuion tube to the pump outlet spout, making sure it is
pressed onto spout securely.
CHECK BELT
1. Before unit is turned on, check that belt condition is good. If belt must be replaced, install same sized belt.
2. Verify belt tension is correct: 3/4” deection with 3 lbs of force.
END OF SEASON SHUTDOWN
The cooler should be prepared before any extended period of non use, and especially before winter shutdown.
1. Drain all water from unit, supply line and pump to ensure no damage occurs from freezing. Keep water line disconnected from both
unit and supply line.
2. Unplug motor and pump from junction box.
3. Clean unit.
4. Cover unit to protect nish for long periods of non use.
Impeller
Remove
Base
Blower Bearing
Oil Cup