
Operating Guide


100559 - 3500W PORTABLE GENERATOR
MAINTENANCE
20
MAINTENANCE
Make certain that the generator is kept clean and stored
properly. Only operate the unit on a flat, level surface in a clean,
dry operating environment. DO NOT expose the unit to extreme
conditions, excessive dust, dirt, moisture or corrosive vapors.
! WARNING
Never operate a damaged or defective generator.
! WARNING
Improper maintenance will void your warranty.
"
NOTICE
For Emission control devices and systems, read and
understand your responsibilities for service as stated in the
Emission Control Warranty Statement of this manual.
The owner/operator is responsible for all periodic maintenance.
Complete all scheduled maintenance in a timely manner.
Correct any issue before operating the generator.
For service or parts assistance, contact our
Technical Support Team at 1-877-338-0999.
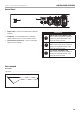
Cleaning the Generator
! CAUTION
DO NOT spray generator directly with water.
Water can enter the generator through the cooling slots and
damage the generator windings. It can also contaminate the
fuel system.
1. Use a damp cloth to clean exterior surfaces of the
generator.
2. Use a soft bristle brush to remove dirt and oil.
3. Use an air compressor (25 PSI) to clear dirt and debris
from the generator.
4. Inspect all air vents and cooling slots to ensure that they
are clean and unobstructed.
To prevent accidental starting, remove and ground the spark
plug wire before performing any service.
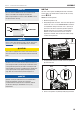
Changing the Engine Oil
Change oil when the engine is warm. Refer to the oil
specification to select the proper grade for your operating
environment.
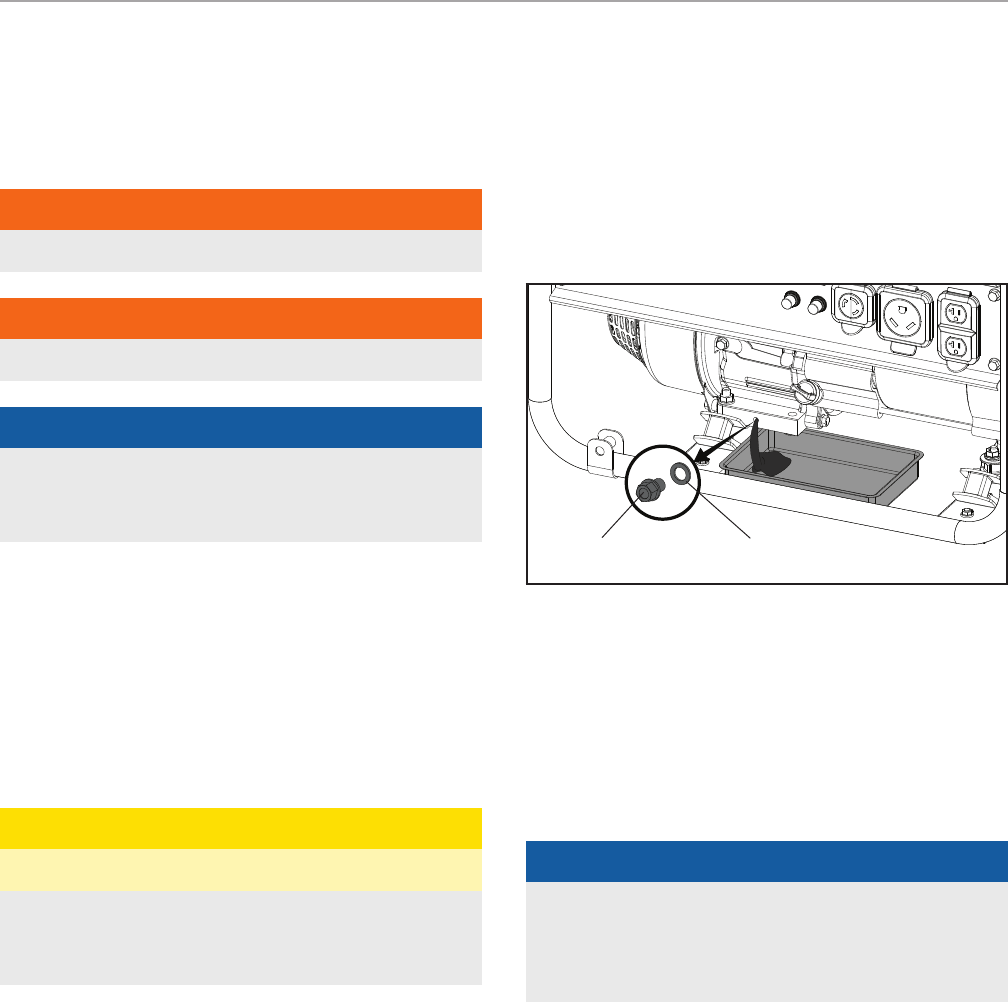
1. Remove the oil drain bolt and washer with a 10 mm socket
(not included) and extension.
2. Allow the oil to drain completely into an appropriate
container.
DRAIN BOLT WASHER
3. Replace the oil drain bolt and washer.
4. Remove the oil fill cap/dipstick to add oil.
5. Add oil according to “Add Engine Oil” on Assembly
section. DO NOT OVERFILL. Oil not included for routine
maintenance.
6. Dispose of used oil at an approved waste management
facility.
"
NOTICE
Once oil has been added, a visual check should show oil
about 1-2 threads from running out of the fill hole. If using
the dipstick to check oil level, DO NOT screw in the dipstick
while checking.
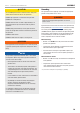
Cleaning and Adjusting the Spark Plug
1. Remove the spark plug cable from the spark plug.
2. Use a spark plug socket tool (not included), or a
13/16 in. (21 mm) socket (not included) to remove the plug.
3. Inspect the electrode on the plug. It must be clean and not
worn to produce the spark required for ignition.
4. Make certain the spark plug gap is
0.024-0.031 in. (0.6-0.8 mm).