
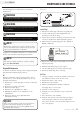
Owner`s manual


REV 42436-20121015 8
42436 ENGLISH
ASSEMBLY
Your generator requires some assembly. This unit ships
from our factory without oil. It must be properly serviced
with fuel and oil before operation.
If you have any questions regarding the assembly of your
generator, call our help line at 1-877-338-0999. Please
have your serial number and model number available.
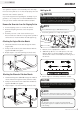
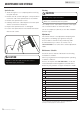
Remove the Generator from the Shipping Carton
1. Set the shipping carton on a solid, flat surface.
2. Remove everything from the carton except the
generator.
3. Carefully cut each corner of the box from top to
bottom. Fold each side flat on the ground to provide a
surface area to install the wheel kit and support leg.
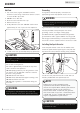
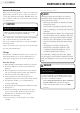
1. Place the generator on a flat, level surface.
2. Remove oil fill cap/dipstick to add oil.
3. Add 0.42 qt. (0.4 L) of oil and replace oil fill cap/
dipstick. Once oil has been added, a visual check
should show oil about 1-2 threads from running out of
the fill hole.
4. Check engine oil level daily and add as needed.
The recommended oil type is 10W-30 automotive oil.
NOTE
Add Engine Oil
DO NOT attempt to crank or start the engine before it
has been properly filled with the recommended type and
amount of oil. Damage to the generator as a result of
failure to follow these instructions will void your warranty.
CAUTION
The engine is equipped with a low-oil-shutoff and will
stop when the oil level in the crankcase falls below the
threshold level.
CAUTION
Check oil often during the break-in period. Refer to the
Maintenance section for recommended service intervals.
NOTE
The generator rotor has a sealed, pre-lubricated ball
bearing that requires no additional lubrication for the life
of the bearing.
NOTE
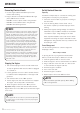
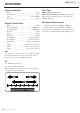
Attaching the Engine Vibration Mounts
1. Thread the vibration mount bolt through the frame
(engine side).
2. Firmly secure the bolt to the frame with the M8 nut.
Tighten. DO NOT over tighten.
3. Repeat steps 1-2 for the remaining mount (2 total).
Attaching the Alternator Vibration Mounts
1. Thread the flange bolt (M8x20) through the vibration
mount and then through the frame (alternator side).
2. Firmly secure the bolt to the frame with the M8 nut.
Tighten. DO NOT over tighten.
3. Repeat steps 1-2 for the remaining mount (2 total).