
Instructions / Assembly


7 REV 66526-20130930
ENGLISH 66526
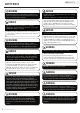
Your chemical pump requires some assembly. This unit
ships from our factory without oil. It must be properly
serviced with fuel and oil before operation.
If you have any questions regarding the assembly of your
chemical pump, call our help line at 1-877-338-0999.
Please have your serial number and model number
available.
Remove the Chemical Pump from the Shipping Carton
1. Set the shipping carton on a solid, flat surface.
2. Remove everything from the carton except the
chemical pump.
3. Carefully cut each corner of the box from top to bottom.
ASSEMBLY
The engine is equipped with a low oil shut-off
sensor and will stop when the oil level in the
crankcase falls below the threshold level.
CAUTION
Check oil often during the break-in period. Refer to the
Maintenance section for recommended service intervals.
NOTE
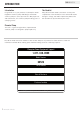
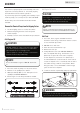
1. Place the chemical pump on a flat, level surface.
2. Remove oil fill cap/dipstick to add oil.
3. Add up to 0.63 qt (0.6 L) of oil and replace oil fill
cap/dipstick. DO NOT OVERFILL.
4. Check engine oil level daily and add as needed.
The recommended oil type is 10W-30 automotive
oil.
NOTE
Add Engine Oil
DO NOT attempt to crank or start the engine before
it has been properly filled with the recommended
type and amount of oil. Damage to the
chemical pump as a result of failure to follow these
instructions will void your warranty.
CAUTION
manual-6.pdf 1 8/20/13 10:12 AM
Pouring fuel too fast through the fuel screen may
result in blow back of fuel at the operator while filling.
WARNING
Add Engine Oil Cont’d.
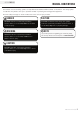
Add Fuel
1. Use clean, fresh, regular unleaded fuel with a
minimum octane rating of 85 and an ethanol content
of less than 10% by volume.
2. DO NOT mix oil with fuel.
3. Clean the area around the fuel cap.
4. Remove the fuel cap.
5. Slowly add fuel to the tank. DO NOT OVERFILL.
Fuel can expand after filling. A minimum of ¼ in.
(0.64 cm) of space left in the tank is required
for fuel expansion, more than ¼ in. (0.64 cm) is
recommended. Fuel can be forced out of the tank as
a result of expansion if it is overfilled, and can affect
the stable running condition of the product. When
filling the tank, it is recommended to leave enough
space for the fuel to expand.
6. Screw on the fuel cap and wipe away any spilled fuel.