PATIO HEATER Owner’s Manual MODEL: HSS-A-SS IMPORTANT Read this manual carefully before assembling, using or servicing this heater. Keep this manual for future reference. R R ANS Z83.26-2007/CSA 2.37-2007 Gas-Fired Outdoor Infrared Patio Heaters ANS Z83.26a-2008/CSA 2.
Contents DANGER General Safety Information....................................... 1 Assembly Instructions DANGER indicates an imminently hazardous situation which, if not avoided, will result in death or serious injury. Components & Hardware........................................ 3 Additional Requirements ........................................ WARNING 3 WARNING indicates an imminently hazardous situation which, if not avoided, could result in death or serious injury.
DANGER DANGER • EXPLOSION - FIRE HAZARD • Keep solid combustibles, such as building materials, paper or cardboard, a safe distance away from the heater as recommended by the instructions. • Provide adequate clearances around air openings into the combustion chamber. • Never use the heater in spaces which do or may contain volatile or airborne combustibles, or products such as gasoline, solvents, paint thinner, dust particles or unknown chemicals.
WARNING • This product is fueled by propane gas. Propane gas is invisible, odorless, and flammable. An odorant is normally added to help detect leaks and can be described as a “rotten egg” smell. The odorant can fade over time so leaking gas is not always detectable by smell alone. Assembly Instructions Components Remove all components from package. Reflector Panel(3) Reflector Plate • Propane gas is heavier than air and leaking propane will sink to the lowest level possible.
Additional Requirements WARNING The following items are not included, but are necessary for California Proposition 65 Combustion by products produced when using this product contain chemicals known to the state of California to cause cancer, birth defects, and other reproductive harm. assemble without proper tools. Philips screwdriver w/ medium blade. Adjustable opening wrench. Leak Detection Solution(Instructions on how to make solution are included in step ) Used in Hardware Picture .. .
Step 2 – Attach Pole to Support Brackets Put the upper pole onto the lower pole, using 2pcs 3/16” screws to firmly secure 2pcs pole.The warning .. Step 3 – Load Cylinder Housing onto Pole Load Cylinder Housing onto Pole. Slide Cylinder Housing down. label on the upper pole should be on the same side as the flat plate of the lower pole. .. Step 4 – Attach Reflector Studs to Screen Cover Insert 3 Reflector Studs & 3 Flat Washers. Tighten studs securely. Install Pole onto three Support Brackets.
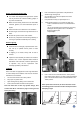
.. . . . Load Head Assembly by inserting hose into pole. Insert Head Assembly into pole. Control knob should be above decal on pole. 9 Req’d Small Screw s . 9 Req’d Small Flat Washers Attach Head Assembly to pole, and loosely install four 9 Req’d Cap Nuts Slide one Small Flat Washer over threaded end of screw and screw on Cap Nut loosely. small bolts. Tighten bolts securely. Step 6 – Install Reflector . . WARNING Remove protective cover before assemble.
.. Slide 3 Large Flat Washers over threaded end of The minimum permissible gas supply pressure of 10 W.C. is required for purpose of input adjustment. The minimum hourly of 17000 Btu is required input rating for a heater for automatic operation at ratings less than full input rating. Studs. The pressure regulator and hose assembly supplied with the appliance must be used. Step 7 – Attach Reflector Assembly to Studs Support Heater.
Leak Check Operation WARNING DANGER • Perform all leak tests outdoors. • Extinguish all open flames. • CARBON MONOXIDE HAZARD • NEVER leak test when smoking. • Do not use the heater until all connections have been leak • For outdoor use only. Never use inside house, or other tested and do not leak. unventilated or enclosed areas. This heater consumes air (oxygen). Do not use in unventilated or enclosed areas to avoid endangering your life.
. . .. .. . . . Before Turning Gas Supply ON: Your heater was designed and approved for outdoor use only. Do NOT use it inside a building, garage, or any other enclosed area. Make sure surrounding areas are free of combustible 5 Push and release the igniter button until pilot flame is 6 Once the pilot is lit, continue to depress the control Knob for 30 seconds. 7 If the pilot dose not stay lit, repeat steps 4 to 6.
If you experience any ignition problem please consult “Troubleshooting” on page 11. Caution: Avoid inhaling fumes emitted from the heater’s first use. Smoke and odor from the burning of oils used in manufacturing will appear. Both smoke and odor will dissipate after approximately 30 minutes. The heater should NOT produce thick black smoke. Note: The burner may be noisy when initially turned on. To . . . Shut Down: Turn Control Knob clockwise to Pilot.
Troubleshooting If the problem is: And this condition exists: Then do this Cylinder valve is closed Open valve Blockage in orifice or pilot tube Clean or replace orifice or pilot tube Open gas line and bleed it (pressing control Pilot won’t light Air in gas line knob in) for not more than 1 - 2 minutes or until you smell gas Low gas pressure with cylinder valve Note: Heater operates at reduced efficiency below 40ºF fully open Use match to light pilot; obtain new igniter and Igniter fails r
.. .. . . Gas odor with extreme yellow tipping of flame. Heater does NOT reach the desired temperature. Heater glow is excessively uneven. Heater makes popping noises. . . . Store heater upright in an area sheltered from direct contact with inclement weather (such as rain, sleet, hail, snow, dust and debris). If desired, cover heater to protect exterior surfaces and to help prevent build up in air passages. Never leave LP cylinder exposed to direct sunlight or excessive heat.
CALENTADOR DE PATIO Manual del Usuario MODELO: HSS-A-SS IMPORTANTE Lea este manual minuciosamente antes de ensamblar, encender o dar servicio al calentador. Conserve este manual para referencias futuras. R R ANS Z83.26-2007/CSA 2.37-2007 DE GAS EXTERNO Calefactor de patio Infrarrojo ANS Z83.26a-2008/CSA 2.
Contenidos PELIGRO Información General de Seguridad .............................. 1 Instrucciones de Montaje Componentes & Hardware ......................................... 3 Requisitos Adicionales ............................................. 3 PELIGRO indica una situación de peligro inminente la cuál, al no evitar, podría causar la muerte o lesiones graves. ADVERTENCIA ADVERTENCIA indica una situación peligrosa inminentemente la cuál, si no evitada, podría dar lugar a muerte o a lesión seria.
PELIGRO PELIGRO • EXPLOSIÓN - RIESGO DE INCENDIOS • PELIGRO DE MONÓXIDO DE CARBONO • Mantenga los combustibles sólidos, tales como materiales de construcción, papel o cartulina, una distancia de seguridad alejado del calentador según lo recomendado por las instrucciones.
ADVERTENCIA • Este producto es aprovisionado de combustible por gas de propano. Gas de propano es invisible, inodoro, e inflamable. Un odorante se agrega normalmente a la ayuda en la detección de escapes y se puede describir como olor de “huevo podrido”. El odorante puede descolorar en un cierto plazo así que el gas escapado no es siempre perceptible por el olor solo • Gas de propano es más pesado que aire y propano escapado se hundirán al nivel más bajo posible.
Requisitos Adicionales ADVERTENCIA Propuesta de California 65 Los subproductos de combustión producidos al utilizar este producto contiene los productos químicos conocidos al estado de California para causar cáncer, defectos de nacimiento, y otro daño reproductivo. Hardware Los siguientes elementos no están incluidos, pero son necesarios para el correcto ensamblaje de su calentador. No intente el ensamblaje del equipo sin las herramientas adecuadas. .. . Destornillador Phillips con lámina media.
Paso 2 –Fijar Poste a los Soportes Ponga el poste superior sobre el poste inferior, usando dos tornillos de 3/16” para conjuntar los dos postes. La etiqueta de advertencia en la parte superior del poste .. Paso 3 –Cargar Carcasa de Cilindro Cargar Carcasa de Cilindro. Deslizar Carcasa de Cilindro hacia abajo. debe estar en el mismo lado del plato llano de polo inferior. .. Paso 4 –Fijar Pernos del Reflector Insertar 3 pernos de reflector & 3 Arandelas planas. Apretar con seguridad los pernos.
.. . Cargar Conjunto de Cabezas por insertar en el poste. Insertar Conjunto de Cabezas en el poste. Botón de control debe estar sobre etiqueta en poste. 9 Req’d Tornillo Pequeñ o . Fijar Conjunto de Cabezas al poste, y instalar cuatro pernos pequeños sin apretar. . Apretar con seguridad pernos. . 9 Req’d Arandelas planas peq 9 Tuercas de Cabeza Req’d Deslizar una Arandela Plana pequeña sobre la cabeza ensanchada de tornillo y tornillo en Tuerca de Cabeza sin apretar.
.. Paso 7 – Fijar Unión de Reflector a los Pernos Soportar Calentador. Deslizar 3 Arandelas Planas Grandes sobre la cabeza ensanchada de pernos. 6 Arandelas Planas Grandes Req’d .. 3 Req’d Tuerca de mariposa Colocar la Conjunto de Reflector 3 pernos . Instalar arandelas planas grandes sobre pernos & apretar con seguridad las tuercas de ala sino no las apriete demasiado! La presión permitida mínima de suministro de gas de 10 W.C. es requerida para ajustar la entrada.
Chequeo de fuga Operación ADVERTENCIA PELIGRO • Realizar todas las pruebas de fuga al aire libre. • Extinga todas las llamas abiertas. • PELIGRO DE MON ÓXIDO DE CA RBONO • NO prueba de fuga al fumar. • No utilice el calentador hasta que todas las conexiones hayan realizados prueba de fuga y no se fuguen. Manguera/ la Conexión del regulador . .. .. .. . Regulador / Conexión del Cilindro Hace 2-3 onzas.
. . .. .. . . . Antes de activar la alimentación de gas (ON): Su calentador ha sido diseñado y autorizado ÚNICAMENTE PARA SU USO EN EXTERIORES. NO lo utilice en el interior de un edificio, garaje, o cualquier otra zona cerrada. Asegúrese de que el área circundante está libre de materiales combustibles, gasolina o cualquier otro vapor o líquido inflamable. 5 6 Empuje y suelte el botón del encendedor hasta que la llama experimental es visible a través del agujero para mirar.
Si usted experimenta cualquier problema de ignición por favor consulte “resolución de problemas” en página 11. Precaución: Evitar de inhalar los humos emitidos del calentador de primer uso. Humo y olor de la quema de los aceites usados en fabricación aparecerán. Humo y olor disiparán después de aproximadamente 30 minutos. El calentador NO debe producir humo negro grueso. Nota: El quemador puede ser ruidoso cuando está encendid o inicialmente.
Resolución de problemas Si el problema es: Y esta condición existe: Entonces hacer esto Válvula de cilindro es cerrada Abra Válvula Obstrucción en orificio o tubo de piloto Limpie o substituya orificio o tubo de piloto Aire en línea de gas Abra línea de gas y la sangre (pulsando botón de control) por no más que 1 - 2 minutos o hasta usted huele el gas.
.. .. . . Olor de gas con Punta Amarilla de llama. El calentador NO alcanza la temperatura deseada. El resplandor del calentador es excesivamente desigual. Calentador tiene chasquidos. Arañas y insectos pueden anidar en quemador u orificios. Esta condición peligrosa puede dañar el calentador y hacerlo inseguro para el uso. Limpie los agujeros del quemador usando limpiapipas duradero. El aire comprimido puede ayudar a quitar partículas más pequeñas.