
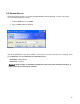
Specifications


18
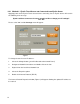
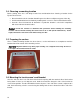
4. After ensuring that each terminal has been loosened enough to accommodate the wire, insert
and secure each wire into the touch screen’s terminal block, as seen in Figure 7.
5. Tug each wire after they are tightened to insure that they are secure.
Figure 7
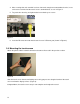
6. Insert the Ethernet connector into the touch screen’s Ethernet port (shown in Figure 6).
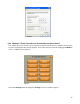
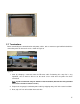
3.8 Mounting the touch screen
Attach the power and the network connections that were discussed in the previous section.
Figure 8
Slide the touch screen into the wall taking care to only put pressure along the border of the touch
screen and not the display surface. (Figure 8)
Congratulations, the touch screen setup is now complete and ready to be tested.