
Specifications


46
4.14 LIGHTING: Insteon (080002)
Use your EyeOn Technician CD to view the following files.
For Insteon SwitchLinc V2 Dimmer User's Guide view file Insteon-SwitchLinc.
For Insteon SwitchLinc V2 Relay User's Guide view file Insteon-SwitchLinc-Relay.
For Insteon KeyPadLinc V2 User's Guide view file Insteon-KeypadLinc.
For Insteon KeyPad Linc Labels view file Insteon-KeypadLinc-Labels.
For LampLinc V2 User's Guide view file Insteon-LampLinc.
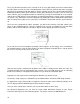
You will need to place two Insteon Access Points throughout the house for maximum Insteon
reliability. It is also recommended to install a Phase Coupler across the 240 line where the dryer is
plugged in.
No setup is required at this point for the lighting system. All of the setup will be done in the Installer's
Screen.
On keypad link you need to make sure all lights are off before you program. If you have an 8 button
you need to fix the B button to turn the light off. Click for 10 seconds, let go then click for 5. Then let
go and click for 5 more. Turn light off then repeat.
However, you might want to connect the 3-ways in the house for ease of the home owners' use before
you will be ready to setup the lighting system (The lighting section can not be setup until the server is
up and running). To connect two switches together, simply press and hold the little set button for ten
seconds of Switch 1. The LEDs on the switch should blink. Hold the on button on Switch 2 for ten
seconds, the light should flash off and on. Now you will have to link the switches the other way. Hold
the on button for Switch 2 for ten seconds until the LEDs are blinking. Do the same to Switch 1. Now
you should be linked both ways. If you want to link 3 or more switches you will have to link every
switch in both directions to make this work properly.
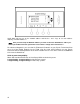
This device connects at 19200 BPS 8-N-1.
You must connect the PLM to the server.