
Specifications

91
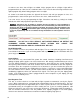
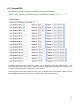
Next, select what type of switch you are programming (i.e. dimmer, relay or keypad).
If you are programming a LampLinc or ApplianceLinc, you will need to choose Program Code By box-
> and type in the code from the back of the device. When entering the code do not put spaces or
periods between the numbers, as it appears on the device. In other words, if the formatting is
11.22.33, it should be entered 112233.
The next option on this page is Sort. You will be able to sort the lighting list to move a light up and
down in the list on the touch screen, web-based screen, PDA, and mobile device. The lower the
number, the closer the light is to the top of the list. We recommend using intervals of five, so that
any switches added in the future can easily be placed between existing switches in the list.
Now click the Add Light button. Please read and follow the on-screen instructions that apply to the
type of light you are adding. For example, if you are adding a Master Dimmer you will need to press
and hold the reset button on the dimmer switch for 3 seconds until the indicator LED starts flashing
in the ON position. From here you would need to press the Add Light button above the instructions.
The screen that appears will give you information regarding the light that was pressed. Again, click
Add Light at the top to complete the process. If the Add Light attempt was unsuccessful, the status
will appear next to the word “Lighting” at the top of the screen. If a “Device Not Found” error occurs,
hit the Refresh
link to retry. If the device still isn’t found, check the Access Points for proper phasing
and then try adding the light again.
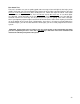
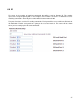
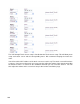
Add Slave
If you have a slave switch (a switch that is not the master switch in a three-way, four-way, or five-
way circuit), click the Add Slave link for the switch you want to be its master. Use the drop-down
boxes to choose the slave switch type and program code, which, in this case, should be “Program
Code By Light”. Hit the Add Light button and read the on-screen instructions, as outlined in the
section above.
Delete
The Delete link will simply delete the light. If you delete a light, it is recommended that you reset that
light switch to factory default. If you delete a slave or master, it is recommended that you reset all
the switches in that master/slave group to factory default.
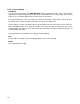
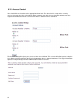
Edit
Use the Edit link to change the light’s name, type, and sorting number. There is also an option to
“
Include in all room lights?” which you can use to keep a light from being controlled by the All button
on the individual room and All screens. There’s also an option to Relink To PLM, if the light is not
returning statuses like it should. This button is also necessary for adding KeypadLinc buttons to the
server. This involves editing the light and using the Relink To PLM button to link all of the individual
buttons to the PLM. To make this happen, hit the Relink to PLM button under the Edit screen. You
will need to press and hold each button you are trying to program until it starts blinking. If it says
“Not found” please repeat the process until the button is linked successfully to the PLM.
Important!
The button indicator lights must be in the off position when linking the KeypadLinc
buttons to the PLM.
Program
After adding a light, you will need to program it. Programming lights can be a time consuming
process, so please be patient. Time increases exponentially each time a slave is added to a master.