OPERATING INSTRUCTIONS Setting Up Set grill up on solid, flat surface with adequate wind shelter. Keep grill at least 0.5m from nearest wall. Protect LP cylinder from direct sunlight and keep away from heat sources (max. 122° F ). Do not move grill while hot, and do not leave unattended during operation. Place gas cylinder into hole in bottom shelf. Position gas cylinder so that cylinder valve is facing to left side of grill.
Regulator and Hose These items are supplied with the appliance, but replacements are available from your equipment retailer or an authorized LP gas supplier. Use only regulators and hose approved for LP Gas at the above pressures. The life expectancy of the regulator is estimated as 10 years. It is recommended that the regulator is changed within 10 years of the date of manufacture. The use of the wrong regulator or hose is unsafe; always check that you have the correct items before operating the appliance.
** BEFORE USE CHECK FOR LEAKS ** Never check for leaks with a naked eye. Always use a soapy water solution. NOTE: Before starting the grill, check for leaks. Make sure the regulator valve is securely fastened to the burner and the cylinder to prevent fire or explosion hazard when testing for a leak. Always perform the “Leak Test” as described below before lighting the grill or each time the cylinder is connected for use.
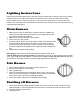
Lighting Instructions Always open hood while igniting grill. If grill does not light, always wait 5 minutes for gas to clear before relighting. Failure to do either may result in an explosive flare-up, which can cause serious bodily injury or death. Once lit, but before cooking on grill for first time, let grill sit for 15 minutes with hood closed. This heat cleans grill’s internal parts from anything they may have come into contact with during manufacturing and shipping. Main Burners 1.
Lighting Burner with a Match 1. Push in and rotate knob to HIGH position 2. Place match in match holder installed on side of grill housing. Once lit, place flame through cooking grates near burner ports, as shown. Burner should light immediately. 3. Adjust knobs to desired cooking settings. Observe Flame Height When Lit View burner flame through flame viewing hole. Flame should be blue and yellow in color, and approximately 1/2-inch to 3/4-inch tall on HIGH setting. Disconnecting the Gas Cylinder 1.
Cylinders must be stored outdoors in an upright position and out of the reach of children. The cylinder must never be stored where temperatures can reach over 121° F. Do not store the cylinder near flames, pilot lights or other sources of ignition. DO NOT SMOKE NEAR A GAS CYLINDER. Again, this appliance is designed for use outdoors, away from any flammable materials. It is important that there are no overhead obstructions and that there is a minimum distance of 90cm from the side or rear of the appliance.
CLEANING AND CARE CAUTION: All cleaning and maintenance should be done while grill is completely cool and with gas cylinder valve completely closed. DO NOT clean any grill part in a self-cleaning oven. The extreme heat will damage the finish. Recommended Cleaning Materials • • • • Mild dishwashing liquid detergent Nylon cleaning pad Hot water Wire brush Cleaning • • • • • • • • Burning off the grill after every use (approximately 15 minutes) will keep excessive food residue from building up.
• • • • • • • • • • • • Ashes left in bottom of CHARCOAL GRILL for too long hold moisture and may cause rust if not cleaned out. GRILL is made of steel and cast iron, which WILL rust, especially without proper care. Do not use self-starting charcoal, as it gives off an unnatural flavor. Burn lighter fluid off completely before cooking. After use, coat bare metal with vegetable oil to reduce rust. Remove EXTERIOR rust with wire brush and touch up with high heat paint, available at most hardware/auto stores.
GAS GRILL TROUBLESHOOTING Problem Possible Cause Burner will not light with Obstruction of gas flow match. Sudden drop in gas flow or reduced flame Irregular flame pattern, flame does not run the full length of burner. Flame is yellow or orange.
GAS GRILL TROUBLESHOOTING Problem Possible Cause Low gas pressure Flare-Up Persistent grease fire Flashback (fire in burner tube(s)) Inside of lid appears to be peeling - like paint peeling Grease build-up Excessive fat in meat Excessive cooking temperature Prevention/Cure Change propane tank Excess flow valve tripped Clean grill Tri8m fat before grilling Lower temperature accordinglyExcessive cooking Temperature Grease trapped by food build- Turn knobs to OFF. Turn up around burner system. gas OFF.
INSTRUCCIONES OPERATIVAS Instalación del Equipo Coloque la parrillera en una superficie plana y sólida, resguardada del viento. Mantenga la parrillera alejada de la pared más próxima por al menos 1 ½ pies. Proteja al cilindro de GLP de la luz directa del sol y manténgalo alejado de fuentes de calor (máx. 122°F o 55°C). No mueva la parrillera mientras esté caliente y no la deje sin supervisión durante su operación. Coloque el cilindro de gas en el hueco del estante inferior.
Regulador y Manguera Estos artículos se suministrados con el equipo, pero los repuestos estarán disponibles en su tienda de equipos o en un proveedor autorizado de gas licuado de petróleo (Gas LP o GLP). Use sólo los reguladores y mangueras aprobados para Gas LP para las presiones indicadas arriba. Se estima que la vida útil del regulador sea de 10 años. Se recomienda que el regulador sea cambiado en un plazo menor a los 10 años de su fabricación.
Conectando el Cilindro de Gas al Equipo Este equipo deberá ser utilizado exclusivamente con gas butano y propano o mezclas de baja presión o mezclas de GLP, fijados al regulador de baja presión apropiado, a través de una manguera flexible. La manguera deberá ser fijada al regulador y al equipo mediante abrazaderas de manguera. 1.
Instrucciones de Encendido Siempre abra la tapa mientras enciende la parrilla. Si la parrilla no enciende, espere cinco minutos para que el gas se vaya antes de volver a encenderlo. No hacer estas dos cosas, puede resultar en un estallido explosivo que puede causar lesiones severas o la muerte. Una vez encendida, pero antes de cocinar por primera vez en la parrilla, deje que la parrilla se mantenga con la tapa cerrada por 15 minutos.
Apagar los Quemadores 1. Gire la(s) perilla(s) en dirección anti horaria hasta la posición HIGH, luego empuje y gire a OFF. Nunca gire la perilla sin empujarla, ya que podría dañar la válvula y perilla. Para los quemadores laterales, empuje y gire a OFF. 2. Rápidamente, cierre la válvula de cilindro de gas. 3. Cierre la tapa de la parrilla. Encender el Quemador con un Cerillo 1. Empuje y rote la perilla hasta la posición HIGH. 2.
Cilindro de Gas ¡El cilindro de gas no deberá dejarse caer ni ser manejado bruscamente! Si el equipo no está en uso, el gas debe apagarse desde el tanque de suministro. Reemplace la tapa protectora en el cilindro luego de desconectar el cilindro del equipo. Los cilindros deben ser almacenados al aire libre o en el exterior, en posición vertical y mantenerse fuera del alcance de los niños. El cilindro nunca deberá ser almacenado en lugares donde la temperatura sobrepase los 122°F (55°C).
5. NUNCA EXCEDA LOS 450° F (230° C). ESTO DAÑARÍA EL ACABADO Y CONTRIBUIRÍA A LA OXIDACIÓN 6. Usted puede cubrir ligeramente el exterior del cuerpo de la parrillera (mientras está caliente) con aceite vegetal. Esto extenderá la vida útil del acabado, similar a cuando pule un carro. Su parrillera está lista para ser utilizada. LA PINTURA NO ESTÁ CUBIERTA POR LA GARANTÍA Y REQUERIRÁ DE RETOQUES OCASIONALES. ESTE EQUIPO NO TIENE GARANTÍA CONTRA LA OXIDACIÓN.
Un interior sin cubierta se oxidará si no se mantiene adecuadamente con una capa normal de aceite vegetal en todas las superficies de metal dentro de la parrillera. Usted puede usar aceite vegetal en spray o líquido, aplicándolo con una toalla de papel en la parrillera fría. Limpieza del Ensamblaje del Quemador 1. 2. 3. 4. 5. 6. 7. 8. 9. • • • • • • • • • • • • Corte el suministro de gas por medio de las perillas de control y el tanque de gas. Retire las rejillas de cocción y la pantalla térmica.
RESOLUCIÓN DE PROBLEMAS DE LA PARRILLERA A GAS Problema Posible Causa Prevención/Cura Electrodo agrietado o Reemplace el electrodo salen chispas de la grieta Alambre suelto o deReconecte el alambre o reemplace el sconectado ensamblaje del electrodo/alambre El quemador no enciende al usar un cerillo El quemador no enciende al usar un cerillo Caída repentina del flujo de gas o reducción de la llama No hay flujo de gas Revise si el tanque de propano está vacío.
RESOLUCIÓN DE PROBLEMAS DE LA PARRILLERA A GAS Problema Posible Causa Prevención/Cura Patrón de llama irregular, Los puertos del quemaLimpie los puertos del quemador la llama no corre por todo dor están bloqueados u el largo del quemador. obstruidos. El quemador no enciende Tuerca de acoplamiento y Gire la tuerca de acoplamiento desal usar un cerillo regulador no conectado de una media conexión a una vuelta adicional de tres cuartos, hasta que se detenga súbitamente. Apriete a mano. No utilice herramientas.