Snapshot Vue™ 6.1 Ok on Dimmer Outdoor OK Sound Activated DMX512 Master/Slave Autoswitching Transformer Replaceable Fuse User Serviceable Duty Cycle USER MANUAL Chauvet, 3000 N 29th Ct, Hollywood, FL 33020 U.S.A. (800) 762-1084 – (954) 929-1115 FAX (954) 929-5560 www.chauvetlighting.
TABLE OF CONTENTS 1. Before You Begin ...................................................................................................................................... 3 What is included.............................................................................................................................................. 3 Unpacking Instructions .................................................................................................................................... 3 AC Power .........
1. BEFORE YOU BEGIN What is included ¾ ¾ ¾ ¾ 1 x Vue™ 6.1 Power Cord Warranty Card User Manual Unpacking Instructions Immediately upon receiving a fixture, carefully unpack the carton, check the contents to ensure that all parts are present, and have been received in good condition. Notify the shipper immediately and retain packing material for inspection if any parts appear damaged from shipping or the carton itself shows signs of mishandling. Save the carton and all packing materials.
Safety Instructions Please read these instructions carefully, which includes important information about the installation, usage and maintenance of this product. • • • • • • • • • • • • • • Caution! Please keep this User Guide for future consultation. If you sell the unit to another user, be sure that they also receive this instruction booklet.
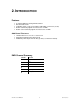
2. INTRODUCTION Features • • • • • 6-channel DMX-512 rotating LED moonflower Blackout/static/strobe Individual control of red, green and blue LEDs within each cluster (3 total) Built-in automated programs via master/slave or DMX Built-in sound activated programs via master/slave or DMX Additional Features • • • Linkable with Vue™ I, Vue™ 1.
Product Overview Bracket Adjustment Knob Hanging Bracket Digital Display Microphone AC Power Input & Fuse Sound Sensitivity Knob Power Output Connector DMX Input Connector DMX Output Connector Vue™ 6.
3. SETUP Disconnect the power cord before replacing a fuse and always replace with the same type fuse. Fuse Replacement With a flat head screwdriver wedge the fuse holder out of its housing. Remove the damaged fuse from its holder and replace with exact same type fuse. Insert the fuse holder back in its place and reconnect power. The fuse is located inside this compartment. Remove using a flat head screwdriver.
CAB LE C ONN ECTORS Cabling must have a male XLR connector on one end and a female XLR connector on the other end. 1 3 2 DMX connector configuration COMMON INPUT 1 3 2 CAUTION 1 3 2 DMX + DMX - Resistance 120 ohm 1/4w between pin 2 (DMX -) and pin 3 (DMX +) of the last fixture. OUTPUT Termination reduces signal errors and to avoid signal transmission problems and interference, it is always advisable to connect a DMX signal terminator.
Stand-Alone/Master/Slave Fixture Linking 1. Connect the (male) 3 pin connector side of the DMX cable to the output (female) 3 pin connector of the first fixture. 2. Connect the end of the cable coming from the first fixture which will have a (female) 3 pin connector to the input connector of the next fixture consisting of a (male) 3 pin connector. Then, proceed to connect from the output as stated above to the input of the following fixture and so on.
4. OPERATING INSTRUCTIONS Display Options M/S DMX Menu Functions MAIN FUNCTION SELECTION SET.d SET.S SET.f SET.A d:001-d:512 S:001-S:100 F:000-F:100 A:000-A:035 SUND AUTO INSTRUCTION Sets the DMX starting address Sets the speed of the current program Sets the flash rate of the current program Selects the current program in standalone This is displaying that the fixture is operating in sound activation mode This is displaying that the fixture is operating in auto activation mode Navigating the menu 1.
Operation Stand-Alone Mode (Sound-Active, Auto Mode): This mode allows a single unit to run to the beat of the music, or the unit will auto change in Auto Mode. There is an LED indicator on the rear of the fixture which will indicate this mode. 1. Use SET.A to choose the desired program. 2. Use SET.S to set the speed of the current program 3. Use SET.f to set the flash rate of the current program. Note: when there is no sound available, then the unit will automatically switch to auto mode.
DMX Channel Values CHANNEL VALUE FUNCTION 1 000 Ù 024 025 Ù 049 050 Ù 074 075 Ù 099 100 Ù 124 125 Ù 149 150 Ù 174 175 Ù 199 200 Ù 224 225 Ù 249 250 Ù 255 Control/Operating Mode Dimmer mode Stand-alone mode 1 (automatic) Stand-alone mode 2 (automatic) Stand-alone mode 3 (automatic) Stand-alone mode 4 (automatic) Stand-alone mode 5 (automatic) Stand-alone mode 6 (automatic) Stand-alone mode 7 (automatic) Stand-alone mode 8 (automatic) Stand-alone mode 9 (automatic) Stand-alone (sound active) 2-4 000 Ù 0
SETTING THE STARTING ADDRESS This DMX mode enables the use of a universal DMX controller device. Each fixture requires a "start address" from 1 to 512. A fixture requiring one or more channels for control begins to read the data on the channel indicated by the start address. For example, a fixture that uses 6 DMX channels and was addressed to start on DMX channel 100, would read data from channels: 100, 101, 102, 103, 104, and 105.
D MX QU ICK R EFER ENC E CHART DMX Address Quick Reference Chart Dip Switch Position DMX DIP #9 SWITCH SET 0=OFF #8 1=ON #7 X=OFF or ON #6 #1 #2 #3 #4 #5 0 0 0 0 0 1 0 0 0 0 0 1 0 0 0 1 1 0 0 0 0 0 1 0 0 1 0 1 0 0 0 1 1 0 0 1 1 1 0 0 0 0 0 1 0 1 0 0 1 0 0 1 0 1 0 1 1 0 1 0 0 0 1 1 0 1 0 1 1 0 0 1 1 1 0 1 1 1 1 0 0 0 0 0 1 1 0 0 0 1 0 1 0 0 1 1 1 0 0 1 0 0 1 0 1 1 0 1 0 1 0 1 1 0 1 1 1 1 0 1 0 0 0 1 1 1 0 0 1 1 0 1 0 1 1 1 1 0 1 1 0 0 1 1 1 1 0 1 1 1 0 1 1 1 1 1 1 1 1 1 Dip Switch Position Vue™ 6.
Vue™ 6.1 Maintenance Guide Symptom(s) Possible Solution(s) 1 or more LED’s are not illuminating 1 or more LED’s are producing very low output Breaker/Fuse keeps blowing Device has no power Fixture is not responding to DMX Clean the fixture regularly to avoid any such failure. This fixture is convection cooled, which means that if the surface is kept clean and free of debris, then proper cooling will be allowed to occur An LED may have failed, resulting in an open circuit.
Contact Us General Information Chauvet Lighting 3000 N 29th Ct, Hollywood, FL 33020 (U.S.A.) voice: (954) 929-1115 fax: (954) 929-5560 toll free: 800-762-1084 Technical Support Address: Service Dept. 3000 N 29th Ct, Hollywood, FL 33020 (U.S.A.) Support (Email): tech@chauvetlighting.com Telephone: (954) 929-1115 - (Press 4) Fax: (954) 929-5560 - (Attention: Service) Website: http://www.chauvetlighting.com 5. APPENDIX DMX Primer There are 512 channels in a DMX-512 connection.
be cleaned at least twice a month. Dust build up reduces light output performance and can cause overheating. This can lead to reduced lamp life and increased mechanical wear. Be sure to power off fixture before conducting maintenance. Unplug fixture from power. Use a vacuum or air compressor and a soft brush to remove dust collected on external vents and internal components.
Blow-out Diagram 1 3 4 5 2 6 7 Description Part Number 1 Front Fresnel Lens P150‐V6LENS 2 LED PCB Assembly P222‐VIVDLED 3 Electronic Transformer P140‐VIELTR 4 1.8° Stepper Motor P110‐VUEMTR 5 Display PCB P172‐VUEVIDP 6 Master PCB P170-VUEIVMP 7 Mounting Bracket/Yoke P110-VUEVIBK 8 Bracket Adjustment knob P111-VUEVINB 9 IEC Power input P170-FUSEIEC 10 Edison Power output P170-IECMALE 11 Master Chip P177-VUEVIIC (not shown) Vue™ 6.
Electrical Connections Diagram Vue™ 6.
Technical Specifications WEIGHT & DIMENSIONS Length.............................................................................................................................. 13 in (330 mm) Width ............................................................................................................................... 13 in (330 mm) Height .............................................................................................................................. 13 in (330 mm) Weight ..............