Snapshot LED Mushroom OK on Dimmer Outdoor OK Sound-Activated DMX512 Master/Slave 115V/230V Switch Replaceable Fuse User-Serviceable USER MANUAL 5200 NW 108th Avenue, Sunrise, FL 33351 U.S.A. (800) 762-1084 – (954) 577-4455 FAX (954) 929-5560 www.chauvetlighting.
TABLE OF CONTENTS 1. BEFORE YOU BEGIN............................................................................................................................................................ 3 WHAT IS INCLUDED ...................................................................................................................................................................... 3 UNPACKING INSTRUCTIONS ..........................................................................................................
1. BEFORE YOU BEGIN What is Included Ø Ø Ø Ø 1 x LED Mushroom Power Cord Warranty Card User Manual Unpacking Instructions Immediately upon receiving a fixture, carefully unpack the carton, check the contents to ensure that all parts are present, and have been received in good condition. Notify the shipper immediately and retain packing material for inspection if any parts appear damaged from shipping or the carton itself shows signs of mishandling. Save the carton and all packing materials.
2.
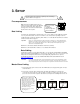
Product Overview con’t Hanging/mounting bracket Bracket adjustment knob LED Mushroom User Manual 5 Rev.
3. SETUP Disconnect the power cord before replacing a fuse and always replace with the same type fuse. Fuse Replacement With a flat-head screwdriver wedge the fuse holder out of its housing. Remove the damaged fuse from its holder and replace with exact same type fuse. Insert the fuse holder back in its place and reconnect power. The fuse is located inside this compartment. Remove using a flat head screwdriver.
Mounting Orientation This product may be mounted in any safe position as long as there is adequate room for ventilation. Rigging It is important never to obstruct the fan or vents pathway. Mount the Hanging Clamp product using, a suitable “C” or “O” type clamp. Adjust the angle of the fixture by loosening both knobs and tilting the fixture. After finding the desired position, retighten both knobs.
Setting the Starting Address This DMX mode enables the use of a universal DMX controller device. Choose start addresses so that the channels used do not overlap, and note the start address selected for future reference. Set the start address using the group of DIP switches located usually on bottom of the fixture. Each dip switch has an associated value. Adding the value of each switch in the ON position will provide the start address.
DMX Quick Reference Chart DMX Address Quick Reference Chart Dip Switch Position DMX DIP #9 SWITCH SET 0=OFF #8 1=ON #7 X=OFF or ON #6 #1 #2 #3 #4 #5 0 0 0 0 0 1 0 0 0 0 0 1 0 0 0 1 1 0 0 0 0 0 1 0 0 1 0 1 0 0 0 1 1 0 0 1 1 1 0 0 0 0 0 1 0 1 0 0 1 0 0 1 0 1 0 1 1 0 1 0 0 0 1 1 0 1 0 1 1 0 0 1 1 1 0 1 1 1 1 0 0 0 0 0 1 1 0 0 0 1 0 1 0 0 1 1 1 0 0 1 0 0 1 0 1 1 0 1 0 1 0 1 1 0 1 1 1 1 0 1 0 0 0 1 1 1 0 0 1 1 0 1 0 1 1 1 1 0 1 1 0 0 1 1 1 1 0 1 1 1 0 1 1 1 1 1 1 1 1 1 Dip Switch Position 0 0 0 0 0 0 0 0
5. APPENDIX General Maintenance To maintain optimum performance and minimize wear fixtures should be cleaned frequently. Usage and environment are contributing factors in determining frequency. As a general rule, fixtures should be cleaned at least twice a month. Dust build up reduces light output performance and can cause overheating. This can lead to reduced lamp life and increased mechanical wear. Be sure to power off fixture before conducting maintenance. Unplug fixture from power.
General Troubleshooting Applies to Symptom Solution(s) Lights Auto shut off Check fan thermal switch reset ü Beam is very dim or not bright Clean optical system or replace lamp Check 220/110v switch for proper setting ü Breaker/Fuse keeps blowing Device has no power Check total load placed on device Check for power on Mains. Check device’s fuse.
Technical Specifications WEIGHT & DIMENSIONS Length ................................................................................................................................................................ 12 in (306 mm) Width ................................................................................................................................................................. 8.1 in (206 mm) Height .............................................................................................