Snapshot 4BAR™ Use on Dimmer Outdoor Use Sound Activated DMX Master/Slave Auto-ranging Power Supply Replaceable Fuse User Serviceable Duty Cycle User Manual (Included) 4BAR™ User Manual 1 2/8/2012 10:53 AM
TABLE OF CONTENTS 1. BEFORE YOU BEGIN ....................................................................................................................................................... 2 WHAT IS INCLUDED ................................................................................................................................................................................ 3 UNPACKING INSTRUCTIONS ....................................................................................................
1. BEFORE YOU BEGIN What is included Ø Ø Ø Ø Ø Ø Ø 1 x 4BAR™ 1 x 4BAR™ transport bag 1 x Tripod stand 1 x Tripod stand transport bag 1 x Footswitch 1 x Warranty Card 1 x User Manual Unpacking Instructions Immediately upon receiving a fixture, carefully unpack the carton, check the contents to ensure that all parts are present, and have been received in good condition.
AC Power This fixture has an auto-ranging power supply that can accommodate a wide range of input voltages. The only thing necessary to do before powering on the unit is to make sure the line voltage you are applying is within the range of accepted voltages. This fixture will accommodate between 100~240 VAC, 50-60 Hz.
2.
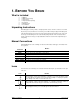
Product Overview Fuseholder Power In 4-pin Footswitch Connection Microphone Control Panel Sound Sensitivity Adjustment Knob DMX Out DMX In 2 3 1 4 4BAR™ User Manual 6 2/8/2012 10:53 AM
3. SETUP Disconnect the power cord before replacing a fuse and always replace with the same type fuse. Fuse Replacement With a flat head screwdriver wedge the fuse holder out of its housing. Remove the damaged fuse from its holder and replace with exact same type fuse. Insert the fuse holder back in its place and reconnect power. The fuse is located inside this compartment. Remove using a flat head screwdriver.
4. OPERATING INSTRUCTIONS Navigating the Control Panel Access control panel functions using the three panel buttons located directly underneath the LED Display. Button Function
Automatic Mode This fixture has several built-in automatic programs. To access them, please see the below instructions: 1) Press the
Master/Slave Operation This mode allows for multiple 4BAR™s to be controlled with a single footswitch. Please see the following instructions for the setup. 1) Connect the footswitch to the first 4BAR™. 2) Then, connect from the DMX Out of the Master 4BAR™ to the DMX In of the Slave unit. 3) Set the DMX starting address of the Slave(s) to “001”.
Footswitch operation The included footswitch provides quick access to preset colors, color change programs, and triggering via the onboard microphone on the 4BAR™. Please see the chart, along with the set of instructions, below for further explanation. 1. Power on the fixture. 2. Connect the footswitch to the 4BAR™ via the 4-pin connection cable with plug. 3. Press pedal # 1 (Preset) to activate control.
General Troubleshooting Applies to Symptom Solution(s) Lights Foggers & Snow Controllers Dimmers & Chaser ü Auto shut off Check fan thermal switch reset Breaker/Fuse keeps blowing Check total load placed on device Device has no power Check for power on Mains. Check device’s fuse. (internal and/or external) ü ü ü Fixture is on but there is no movement to the audio Make sure you have the correct audio mode on the control switches.
Contact Us World Wide General Information CHAUVET® 5200 NW 108th Avenue Sunrise, FL 33351 voice: 954.929.1115 fax: 954.929.5560 toll free: 800.762.1084 Technical Support CHAUVET® 5200 NW 108th Avenue Sunrise, FL 33351 voice: 954.929.1115 (Press 4) fax: 954.929.5560 (Attention: Service) World Wide Web www.chauvetlighting.
General Maintenance To maintain optimum performance and minimize wear fixtures should be cleaned frequently. Usage and environment are contributing factors in determining frequency. As a general rule, fixtures should be cleaned at least twice a month. Dust build up reduces light output performance and can cause overheating. This can lead to reduced lamp life and increased mechanical wear. Be sure to power off fixture before conducting maintenance. Unplug fixture from power.
Technical Specifications WEIGHT & DIMENSIONS Length........................................................................................................................... 47 in (1,193 mm) Height (fully extended) ................................................................................................. 91 in (2,311 mm) Weight ............................................................................................................................. 29 lbs (13.