
Technical data
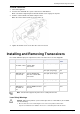
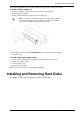
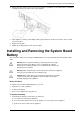

Installing and Removing Memory
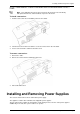
Customer Replaceable Parts Page 27
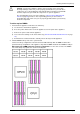
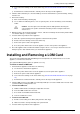
When performing a memory upgrade to the basic memory configuration: Install more DIMMS in all
the remaining slots. The DIMMs slots must always be populated as shown in the diagram.
3. To remove a DIMM:
a) Press the two retaining clips outward
b) Carefully pull the DIMM up. You will possibly find it necessary to pull one end of the DIMM and then
the other to gradually release it from the contact pins.
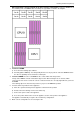
4. To insert a DIMM: Press the new DIMM into the socket until it clicks into position.
The top of the DIMM is smooth. The bottom edge has two different-length sets of contacts, which
connect to the slots on the socket. Be sure the contacts and slots are correctly aligned before you insert
the DIMM.
The retaining clips move into the lock position as you press the DIMM into position.
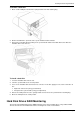
5. Insert the lower tray and turn on the appliance:
a) Move the system board tray into the appliance until it clicks into position.
b) Refasten the two retaining screws for the lower tray.
c) Connect the power cords to the appliance.
d) Press the power switch at the rear of the appliance, to turn on the power to the appliance.
The appliance automatically recognizes the new memory configuration.
6. Make sure the configuration is correct using the CLI.