
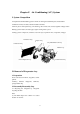
Service Manual


72
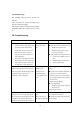
(2) Do not splash the refrigerant into eyes and
skin.
2.2. Disassemble instrument panel assy and
front cross beam. Pull out the related electrical
connectors.
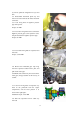
2.3. Loose fixing bolts on high/low pressure
pipe with spanner.
Torque: 5±1 Nm
2.4. Loosen two fixing bolts used to connect the
high/low pressure pipe to the expansion valve,
and pull outwards the high/low pressure pipe.
Torque: 8±1 Nm
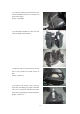
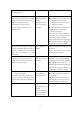
2.5. Loosen three fixing bolts of evaporator and
front side.
Torque: 3.5±0.5 Nm
2.6. Remove the inlet/outlet pipe snap rings
from the evaporator radiator with a plier, and
pull out the water pipe.
CAUTION: The coolant may flow out from the
water pipe, and pay attention to the recovery of
coolant.
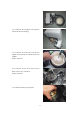
2.7. Loosen six fixing bolts of evaporator assy
fixed on the paintwork from the engine
compartment, and the fixed position is as
shown in the right figure.
Installation torque: 5±0.5 Nm
2.8. Take out evaporator and AC cable assy
from cab