7 9 9 4 S U B U R B A N A N D B L A Z E R O W N E R ’ SM A N U A L
INTRODUCTION 1994 Chevrolet Blazer and Suburban Owner’s Manual Welcome This manual was prepared to acquaint you with the operation and maintenance of your 1994 Chevrolet Blazer or Suburban and to provide important safety information. There is also a Chevrolet Truck Warranty and Owner Assistance Information booklet. In some vehicles, there can be information manuals from othermanufacturers like body builders or special equipment companies. We urge you to review all these publications carefully.
important Notes to Owners and Drivers . ...About DrivingYour Blazer: As with other vehicles of this type, failure to operate this vehicle correctly may result in loss of control or an accident. Be sure to read the “on-pavement” and “off-road” driving guidelines in this manual. (See “Driving Guidelines” and “Off-Road Driving With Your Four-wheel Drive Vehicle” in the Index.) ....About This Manual: Please keep this manual in your vehicle so it will be there if you ever need it when you’re on the road.
Model Reference This manual covers these models: UTILITY I WAGON ...
Table of Contents Introduction - How to Use this Manual This section tells you howto use your manual and includes safety and vehicle damage warnings and symbols. Section 1 - Seats and Safety Restraints This section tells you how to use yourseats and safety restraints properly. Section 2 - Features & Controls This section explains how to start and operate your vehicle.
How to Use This Manual Many people read their owner’s manual from beginning to end when they first receive their new vehicle. This will help you learn about thefeatures and controls for your vehicle. In this manual, you’ll find that pictures and words work together to explain thingsquickly. INDEX: A good place to look for what you need is the Index in back of the manual. It’s an alphabetical list of all that’s in the manual,and the page number where you’ll find it.
Safety Warnings andSymbols You will find a number of safetycautions in this book. We use a box with gray background and the wordCAUTION to tell you about things that could hurt you if you wereto ignore the warning. In the gray caution area,we tell you what the hazard is. Then we tell you what to do to help avoid or reduce the hazard. Please read thesecautions. If you don’t, you or others could be hurt. You will also find a circle with a slash throughit in this book.
Vehicle Damage Warnings Also, in this book you will find these notices: NOTICE: These mean thereis something that coulddamage your vehicle. In the notice area, we tell you about something that can damage your vehicle. Many times, this damage would not be covered by your warranty, and it could be costly. But the notice will tell you what to do to help avoid the damage. When you read other manuals,you might see CAUTION and NOTICE warnings in different colors orin different words.
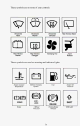
These symbols are important for you and your passengers whenever your vehicle is driven: I Fasten Safety Belts C I Door 1ock/Unlock These symbols have to do with your lights: A I Master Lighting Switch Turn Signal Direction 1 U Hazard Warning Flasher Headlight High Beam 0 Parking Lights Fog Lights Daytime Running Lights ...
These symbols are on some of your controls: I\J I I Windshield Washer Windshield Wiper Windshield Rear Window Wiper Defroster 1 3c r l i Rear Window Washer Ventilating Fan Rear Window Defogger Hatch Release These symbols are used on warning and indicator lights: p3 I I BafteryCharging Engine Coolant Temperature BRAKE I Engine Oil Pressure System I ANTILOCK I Brake Fuel I 4 Wheel RELEASE ix SHIFT 1 Parking Brake Release Anti-Lock I Shift Light
Here are some other symbols you may see: n Fuse Hood Release iighker X Horn
Seats & Safety Belts Section Here you'll find information about the seats in your vehicle and how to use your safety belts properly. You can also learn about some things you should not do with safety belts. Seats and Seat Controls . . . . . . . . . . . . . . . . . . . . . . . . . . . . . . . . 1-2 Frontseats . . . . . . . . . . . . . . . . . . . . . . . . . . . . . . . . . . . . . . . . . . . . . 1-2 Head Restraints . . . . . . . . . . . . . . . . . . . . . . . . . . . . . . . . . . . . . . . .
Seats and Seat Controls This section tells you about the seats - how to adjust them, and fold them up and down, It also tells you about reclining front seatbacks and head restraints. Front Seats Manual FrontSeat If your vehicle has a manual bucket, split bench, or full bench seat, you can adjust it with this lever at the front of the seat. Slide thelever at the front of the seat toward the outer seat support to unlock it. Using your body, slide the seat to whereyou want it.
Power Seat If your vehicle has a power seat on the driver’s side, you can adjust it with this switch at the front of the seat. You can use the center switch knob to move the seat where you want it. To raise the seat, move the center switch knob up. To lower the seat, move the center switch knob down. To move the seat forward, move the center switch knob toward the inside of the vehicle. To move the seat rearward, move the center knob toward the outside of the vehicle.
A .CAUTION: - 9 :.. -I- .
Head Restraints r Slide the head restraint up or down so that the top of the restraint is closest to the top of your ears. a .. . This position reduces the chance of a neck injury in a crash. Seatback Latches (Reclining Split Bench and Reclining Bucket Seats) The front seatback folds forward to let you access the rear of the vehicle. To fold the seatback forward, lift this lever. Lift the front of the lever and the seatback will fold forward.
Easy h t r y Seat (Utility Model FrontSeats) The driver and passenger front bucket seat and 40/60 the split bench seat of your vehicle hasan easy entry feature.This makes it easy to get in and outof the rear seat. To operate the seat, pull forward on the top of the lever, located at the side of the seatback, andtilt the back forward toward the front of the vehicle. When you do, the seat bottom will release. Just pull or push the seat forward untilit stops.
Rear Seats Easy Entry Seat (Wagon Model Second Seat) The right side of the rear 60/40 split folding bench seat, available in the wagon model, has an easy entry feature. That makes it easy to get in and out of the third seat, if you have one. the seatback toward the front of the vehicle. When you do, the seat bottom will release. Just pull or push the seat forward until it stops.
Rear Folding Seat (Utility Model) If your vehicle has a rear seat, the seatcan be folded flat for morecargo space. Before folding, make sure nothing is under or in front of the seat. When the seat is folded, it will layflat on the floor. To fold the seat, pull on the lever at the front of the seat cushion marked RELEASE. Then, using the handle at the side of the seatback, pull the seatback forward and fold it into the seat cushion. ....
Folding Second Seat (Wagon Models) If your vehicle has a 60/40 second seat, either side may be folded down to give you more cargo space. Before folding, push the buckle portion of the safety belt down into the seat cushion pockets, out of the way.Also, make sure that nothing is under or in front of the seat. When the seat is folded, it will lay flat on the floor.
To create a load floor, release the panels from the seatback by pushing rearward on the latch, and fold them out to cover the rear seat footwell. To return the seat to the passenger position, lift the loadfloor panels and latch them into the seatback. I Then, lift the seatback up and push rearwarduntil it latches. Lower the seat cushion until it latches in position.
To unlatch the safety belt, press in on the inside of the buckle cover sleeve and pull the latch plate out of Then, hang the latch plate end of the belt on the hook at the top of the retractor cover, out of the way. To remove the seat, fully open the rear load doors and enter the back of the vehicle. Move the seatback release lever, at the right rear of the seat, toward the center of the vehicle.
Then, fold the seatback forward into the seat cushion. To unlatch the seat from the floor, pull up on the center release handle at the rear of the seat and lift the rear of theseat up, out of the floor. Turn the seat sideways and takeit out of the vehicle. To put the seat back in, hold the seat sideways and put it into the vehicle. Turn the seat to the forward position and set it down, with the latches at the bottom of the seat over the hooks in the floor.
Safety Belts: They’re For Everyone This part of the manual tells you how to use safety belts properly. Italso tells you some things you should not do with safety belts. This figure lights up as a reminder to buckle up. (See “Safety Belt Reminder Light” in the Index.) It will light when you turn the key to RUN or START when your safety belt isn’t buckled, and you’ll heara tone or buzzer, too.
In many states and Canadian provinces, the law says to wear safety belts. Here’s why: They work. You never know if you’ll be in a crash. If you do have a crash, you don’t know if it will be a bad one. A few crashes are mild, and some crashes can be so serious that even buckled up a person wouldn’t survive. But mostcrashes are in between. In many of them, people who buckle up cansurvive and sometimes walk away. Without belts they could have been badly hurt or killed.
When the bike hits the block, it stops. But the child keeps going! 1 Take the simplest “vehicle.” Suppose it’s just a seat on wheels. Put someone on it. ...
Get it up to speed. Then stop the "vehicle." The rider doesn't stop. windshield ... or the instrument panel ...
or thesafety belts! With safety belts, you slow down as the vehicle does. You get more time to stop. You stop over more distance, and your strongest bones take the forces. That’s why safety belts make such good sense. Here Are Questions Many People Ask About Safety Belts-and the Answers Q: Won’t I be trapped in the vehicle after an accident ifI’m wearing a safety belt? A: You could be - whether you’re wearing a safety belt or not. But you can easily unbuckle a safety belt, even if you’re upside down.
Q: If I’m a good driver, andI never drivefar from home, why should I wear safety belts? A: You may be an excellent driver, but if you’re in an accident - even one that isn’t your h u l t - you and your passengers can be hurt. Being a good driver doesn’t protect you from things beyond your control, such as bad drivers. Most accidents occur within 25 miles (40 km) of home. And the greatest number of serious injuries and deaths occur at speeds of less than 40 mph (65 k d h ) .
Driver Position This section describes the driver’s restraint system. Lap-Shoulder Belt The driver has a lap-shoulder belt. Here’s how to wear it properly.
1. Close and lock the door. 2. Adjust the seat (to see how, see “Seats” in the Index) so you can sit up straight. L1 3. Pick up the latch plate and pull the belt across you. (On some models, you may hear a clicking sound as the belt is pulled out. The clicking sound is the shoulder belt tension feature operating properly.) Don’t let the belt get twisted. 4. Push the latch plate into the buckle until it clicks. Pull up on the latch plate to make sure it is secure.
Q: What’s wrong with this? n A: n The shoulder belt is too loose. It won’t give nearly as much protection this way.
Q: What’s wrong with this? A: The belt is buckled in the wrong place.
A: The belt is over an armrest.
Q: What’s wrong with this? A: The shoulder belt is worn under the arm. It should be worn over the shoulder at all times.
Q: What’s wrong with this? I A: 1 1 I 8 The belt is twisted across the body. 1 A CAUT1.ON: I To unlatch the belt, just push the button on the buckle. The belt should go back out of theway. Before you close the door, be sure the belt is out of the way. If you slam the door on it, you can damage both the belt andyour vehicle.
Safety Belt Use During Pregnancy Safety belts work for everyone, including pregnant women. Like all occupants, they are more likely to be seriously injured if they don’t wear safety belts. A pregnant woman should wear a lap-shoulder belt, and the lap portion should be worn as low as possible throughout the pregnancy. The best way to protect the fetus is to protect the mother. When a safety belt is worn properly, it’s more likely thatthe fetus won’t be hurt in a crash.
Center Passenger Position Lap Belt If your vehicle has front and rear bench seats, someone can sit in the center positions. When you sit in a center seating position, you have a lap safety belt, which has no retractor. To make the belt longer, tilt the latch plate and pull it along the belt.
To make the belt shorter, pull its free end as shown until the belt is snug. Buckle, position and release it the same way as the lap part of a lap-shoulder belt. If the beltisn’t long enough, see “Safety Belt Extender” at the end of this section. Make sure the release button on the buckle is positioned so you would be able to unbuckle the safety belt quicklyif you ever had to.
Lap-Shoulder Belt The positions next to the windows have lap-shoulder belts. Here’s howto wear one properly. 1. Pick up the latch plate and pull the belt across you. Don’t let it get twisted. 2 . Push the latch plate into the buckle until it clicks. If the belt stops before it reaches the buckle, tilt the latch plate and keep pulling until you can buckle it. Pull up on the latch plate to make sure it is secure. If the belt is not long enough, see “Safcty Belt Extender” at the end of this section.
The lappart of the belt should be worn low and snug on the hips, just touching the thighs. Ina crash, this applies force to the strong pelvic bones. And you’d be less likely to slide under the lap belt. If you slid under it, the belt would apply force at your abdomen. This could cause serious or even fatal injuries. The shoulder belt should go over the shoulder and across the chest. These parts of the body are best able to take belt restraining forces.
Children Everyone in a vehicle needs protection! That includes infants and all children smaller than adult size. i In fact, the law in every state in the United States and in every Canadian province says children up to some age must be restrained while in a vehicle. Smaller Children and Babies I Secure the baby in an infant restraint.
I I 1-32
Child Restraints Be sure tofollow the instructions for the restraint. You may find these instructions on the restraint itself or in a booklet, or both. These restraints use the belt system in your vehicle, but the child also has to be secured within the restraint to help reduce the chance of personal injury. The instructions that come with the infant or child restraint will show you how to do that.
Securing a Child Restraint ina Rear Outside Position You’ll be using the lap-shoulder belt. See the earlier section about the top strap if the child restraint has one. I . Put the restraint on the seat. Follow the instructions for the child restraint. 2. Secure the child in the child restraint as the instructions say. 3. Pull out the vehicle’s safety belt. Make the belt as long as possible by tilting the latch plate and pullingit along the belt. 4.
5. Buckle the belt. Make sure the release button is positioned so you would be able to unbuckle the safety belt quickly if you ever had to. 6. To tighten the belt, pull up on the shoulder belt while you push down on the child restraint. 7. Push and pull the child restraint in different directions to be sure it is secure. . .. To remove the child restraint, just unbuckle the vehicle's safety belt and let it go back all the way.
Securing a Child Restraint in a Center Seat Position When you secure a child restraint in a center seating position, you’ll be using the lap belt. See the earlier section about the top strap if the child restraint has one. I 1. Make the belt as long as possible by tilting the latch plate and pulling it along the belt. 2 . Put the restraint on the seat. Follow the instructions for the child restraint. 3. Secure the child in thechild restraint as the instructions say. 4.
5. Buckle the belt. Make sure the release button is positioned so you would be able to unbuckle the safety belt quickly if you ever had to. 6. To tighten the belt, pull itsfree end while you push down on the child restraint. 7 . Push and pull the child restraint in different directions to be sure it is secure. If the child restraint isn’t secure, turn the latch plate over and buckle it again. Then see if it is secure.
3, Pick up the latch plate, and run the lap and shoulder portions of the vehicle’s safety belt through or around the restraint. The child restraint instructions will show you how. If the shoulder belt goes in front of the child’s face or neck, put it behind the child restraint. 4. Buckle the belt. Make sure the release button is positioned so you would be able to unbuckle the safety belt quickly if you ever had to. 5. Pull the rest of the lap belt allthe way out of the retractor to set the lock.
6 . To tighten the belt, feed the lap belt back into the retractor while you push down on the child restraint. To remove the child restraint, just unbuckle the vehicle's safety belt andlet it goback all the way. The safety belt will move freely again and be ready to work for an adult or larger child passenger.
Larger Children Children who have outgrown child restraints should wear the vehicle’s safety belts. If you have the choice, a child should sit next to a window so the child can wear a lapshoulder belt and get the additional restraint a shoulder belt can provide. Accident statistics show that children are safer if they are restrained in the rear seat. But they need to use the safety belts properly. Children who aren’t buckled up can be thrown out in a crash.
A 2: What if a child is wearinga lap-shoulder belt, but the child isso small that the shoulder belt is very close to the child’s face or neck? A: Move the child toward the center of the vehicle, but be sure that the shoulder belt still is on the child’s shoulder, so that in a crash the child’s upper body wouldhave the restraint that belts provide.
Wherever the child sits, thelap portion of the belt should be worn low and snug on the hips, just touching the child’s thighs.This applies belt force to the child’s pelvic bones ina crash. Safety Belt Extender If the vehicle’s safety belt will fasten around you, you should use it. But if a safety belt isn’tlong enough to fasten, your dealer willorder you an extender. It’s free. When you go in to order it, take the heaviest coat you will wear, so the extender will be long enough for you.
Checking Your Restraint Systems Now and then, make sure all your belts, buckles, latch plates, retractors, anchorages and reminder systems are working properly. Look for any loose parts or damage. If you see anything that might keep a restraint system from doing its job, have it repaired. Replacing Safety Belts After a Crash If you’ve had a crash, do you need new belts? After a very minor collision, nothing may be necessary.
Q: What’s wrong with this? A: The belt is torn. Torn or frayed belts may not protect youin a crash. They can rip apart under impact forces. If a belt is torn or frayed, get a new one right away. Before replacing any safety belt, see your dealer for thecorrect part number. You’ll need the model year and model number for your vehicle. The model year is on your title and registration. And you can find the model number on the Certificatioflire label of your vehicle.
Features & Controls Section r L 1 Here you can learn about the many standard and optional features on your vehicle. and information on starting. shifting and braking . Also explained are the instrument panel and the warning systems that tell you if everything is working properly-and what to do if you have a problem . For explanationof vehicle symbols. refer to “Vehicle Symbols” in the Introduction . Keys . . . . . . . . . . . . . . . . . . . . . . . . . . . . . . . . . . . . . . . . . . . . . . . .
........................ . . . 2-30 EngineExhaust . . . . . . . . . . . . . . . . . . . . . . . . . . . . . . . . . . . . . . . . . . . 2-31 Running Your Engine While You’re Parked ..................... 2-31 Four-WheelDrive . . . . . . . . . . . . . . . . . . . . . . . . . . . . . . . . . . . . . 2-32 Transfer Case ............................................. 2-33 Front Axle Locking Feature .................................. 2-34 2-35 Windows ................................................
Keys - i 2-3 The square-shaped key is for the ignition only.
The oval-shaped key is for the doors and all other locks. . :. \ \ When a new vehicle is delivered, the dealer removes the plugs from the keys, and gives them to the first owner. Each plug has a code on it that tells your dealer or a qualified locksmith how to make extra keys. Keep the plugs in a safe place. If you lose your keys, you’ll be able to have new ones made easily using these plugs.
Door Locks There are several ways to lock and unlock your vehicle: From the outside: Use your door key.
From the inside: To lock the door,slide the lever on yourdoor down. To unlock the door, slide the lever up. Power Door Locks (Option) Press the bottom of the power door lock switch, marked LOCK, on either front door to lock all the doors at once. Press the switch marked UNLOCK to unlock all the doors at once. On four-door models, the switch on each rear door works only thatdoor’s lock. It won’t lock (or unlock) all of the doors - that’s a safety feature.
Your Doors and How They Work Side Doors To open the door from the outside, pull the handle up and pull the door open. To open the door from the inside, pull the lever toward you and push the door open.
Tailgate Glass, Tailgate and Rear Doors into your vehicle.You can't see or smell CO. It can cause unconsciousness and even death. I tailgate, or rear doors: into your ve :le. See"Comfort Controls'' in the Fdex. & Tailgate Glassand Tailgate If your vehicle has a tailgate, you must raisethe rear glass beforelowering the tailgate. To open the glass from the outside, use your door key.
Open the tailgate by lifting up on the handle while pulling the tailgate toward you. Close the tailgate before closing the rear glass. After closing, make sure the tailgate is securely latched by pulling it toward you. After closing the rear glass, pull up on its handle to make sure it is locked. Panel Doors To open the rear panel doors on the wagon model, you must open the right door first. If the door is locked, insert your door key in the lock and turn it to the left to unlock it.
The rear doors have a check assembly to keep them from fully opening during normal use. To fully open theeither rear door, you must release the check strap. First, open the door part way until the white markon the check strap is fully outside the door edge. If the end of the strap catches the pin on the door, the door is open too far, Then, hold the strap at the white mark, pull the strap toward you and open thedoor all the way.
Parking at Night Park in a lighted spot, close all windows and lock your vehicle. Remember to keep your valuables out of sight. Put them in a storage area, or take them with you. Parking Lots If you park in a lot where someone will be watching your vehicle, it’s best to lock it up and take your keys. But what if you haveto leave your ignition key? Whatif you have to leave something valuable in your vehicle? Put your valuables in a storage area or console. Lock the console.
Ignition Switch Use your square keyto start your vehicle. The -square key lets you turn the ignition switch to five different positions: 1. OFF I 2 2. RUN 3 5 3. START 4. ACC 5 . LOCK ACC (Accessory): ACClets you use things like the radio and the windshield wipers when the engine isoff. To get intoACC, push in the key will remain locked,just as it and turn it toward you. Your steering wheel was beforeyou inserted the key. LOCK: This positionlocks your ignition, steering wheeland transmission.
NOTICE: If your key seems stuck in “LOCK” and you can’t turn it, be sure itis all theway in. If it is, then turn the steeringwheel left and right whileyou turn thekey hard. But turn thekey only with your hand.Using a tool to forceit could break thekey or the ignition switch.If none of this works, then yourvehicle needs service. Key Release Lever The ignition key cannot be removed from the ignition of . .
Automatic Transmission: Move your shift lever to “ P ’ (Park) or “N” (Neutral). Your engine won’t start in any other position - that’s a safety feature. To restart when you’re already moving, use “ N ’ (Neutral) only. NOTICE: Don’t try to shift to “P” (Park) if your vehicle is moving.If you do, you could damage the transmission. Shift to “P” (Park) only when your vehicle is stopped. Manual Transmission: Hold the clutch pedal to thefloor, then shift your gear selector to neutral while starting the engine.
If your engine is already hot and then stalls, turn your ignition key to OFF. Then turn your key to RUN and wait 20 seconds before you restart your engine. When the engine starts, let go of the key and the acceleratorpedal. NOTICE: Your engine is designed to work with the electronics in your vehicle. If youadd electrical parts oraccessories, you could change the way the fuel injection system operates. Before adding electrical equipment, check withyour dealer.
Driving In Snow (Diesel Engines) When driving in a heavy snowstorm or in swirling snow witha diesel engine, snow can get intothe air intake system. If you keep driving in these conditions the air cleaner may get plugged, causing black smoke andloss of power. In an emergency, if the air cleaner gets plugged with snow, youcan remove the air cleaner. Then, drive to a place of safety as soon as possible and put the air cleaner back on.
3. If this light does not come on, orthe instant the light goes off, turn your ignition key to START. When the enginestarts, let go of the key. NOTICE: Holding your key in “Start” for longer than 15 seconds at a time will cause your battery to be drained much sooner. And the excessive heat can damage your starter motor. 4. If the engine does not start after 15 seconds of cranking, turn the ignition key to OFF. Wait one minute for the starter to cool, then try the same steps again.
To use the engine coolantheater, first turn off the engine. Then open the hood, unwrap the electrical cord and plug itin. It uses normal house voltage (1 10 volts), but: NOTICE: After you’ve used the coolant heater, be sure to store the cord in the manner it was, to help keep it away from moving engine parts. If you don’t, itcould be torn and damaged. How long should you keep the coolant heater plugged in? The answer depends on the weather, the kind of oil youhave, and some other things. Follow this chart.
If Your Diesel Engine Won’t Start If you’ve run out of fuel, look at “Running Out of Fuel” (see “Diesel Fuel Requirements and Fuel System”in the Index). If you’re not out of fuel, and your engine won’t start, do this: Turn your ignition key to RUN. Make sure that the “GLOW PLUGS” light is out. Then turn theignition key to START. If the light doesn’t gooff, wait a few seconds, then try starting your engine again. And, see your dealer as soon as you can for a starting system check.
In very cold weather,0°F (- 1 8 “C)or colder, the engine coolant heater can help. You’ll get easier starting and betterfuel economy during engine warn-up. Usually, the coolant heatershould be plugged in a minimum of four hours prior to starting your vehicle. To use the coolant heater: 1. Turn off the engine. 2. Open the hood and unwrap the electrical cord. 3. Plug it into a normal, grounded 1 10-volt outlet.
Automatic Transmission There are several different positions for your shift lever. 0 P (Park) This locks your rear wheels. It’s the best position to use when you start your engine because your vehicle can’t move easily.
R (Reverse) Use this gear to back up. NOTICE: Shifting to“R” (Reverse) while your vehicle is moving forward “R” only after your could damage your transmission. Shift to vehicle is stopped. To rock your vehicle back and forth to get out of snow, ice or sand without damaging your transmission, see “If You’re Stuck: In Sand, Mud, Ice orSnow’’ in the Index. N (Neutral) In this position, your engine doesn’t connect with the wheels. To restart when you’re already moving, use “ N ’ (Neutral) only.
- Going about 35 mph (56 km/h) or more, push the accelerator all the way down. You’ll shift down to the next gear and have more power. @ should not be used when towing atrailer, carrying aheavy load, driving on steep hills, or foroff road driving. Select “D” (third gear) when operating thevehicle under any of these conditions. D (Third Gear) This islike @, but you never go into Overdrive.You should use when towing a trailer, carrying aheavy load, driving on steep hills, or for off-road driving.
Five-Speed Manual Transmission . . This is your shift pattern. Here’s how to operate your transmission: 1 (First Gear)-Press the clutch pedal and shift into “I .” Then, slowly let up on the clutch pedal as you press the accelerator pedal. You can shift into “1” when you’re going less than 20 mph (32 k d h ) . If you’ve come to a complete stop and it’s hardto shift into “1 ,” put the shift lever in Neutral and let up on the clutch. Press the clutch pedal back down. Then shift into “1 .
Shift Light If you have a manual transmission, you may have a SHIFT light. This light will show you when to shift to the next higher gear for best fuel economy. When this light comes on, you can shift to the next higher gear if weather, road and traffic conditions let you. For the best fuel economy, accelerate slowly and shift when the light comes on. While you accelerate, it isnormal for the light to go on and off if you quickly change the position of the accelerator.
I NOTICE: If you skip more than one gear when you downshift, or youif race the engine when you downshift, you can damage the engine, clutch or transmission. Locking Rear Axle If you have this feature, your rear axle can give you additional traction on snow, mud, ice, sand or gravel. It workslike a standard axle most of the time, but when one of the rear wheels hasno traction and the other does, the locking feature will allow the wheel with traction to move the vehicle.
To release the parking brake: Hold the regular brake pedal down. Pull the lever, locatedjust above the parking brake pedal, marked RELEASE to release the parking brake. If the ignition is on when the parkingbrake is released, the brake system warning light will go off. NOTICE: Driving with the parking brake on can cause your rear brakes to overheat. You may have to replace them, and you could also damage other partsof your vehicle.
Shifting Into “P” (Park) (Automatic Transmission Models Only) Steering Column Shift Lever 1. Hold the brake pedal down with your right foot and setthe parking brake. 2. Move the shift lever into “P” (Park) position like this: 0 Pull the lever toward you. 0 Move the lever up as far as it will go. 3. If you have four-wheel drive, be sure the transfer case is in a drive gear - not in “ N ’ (Neutral) 4. Move the ignition key to LOCK.
5 . Remove the key and take it with you. If you can walk away from your vehicle with the ignition key inyour hand, your vehicle is in “P” (Park). If you have to leave your vehicle with the engine running, be sure your vehicle is in “ P ’ (Park) and your parking brake is firmly set before you leave it. If you have four-wheel drive with a manual transfer case shift lever, be sure that the transfer case is in a drive gear - not in “N” (Neutral).
Parking Your Vehicle (Manual Transmission Models Only) Before you get out of your vehicle, put your manual transmission in “R” (Reverse), turn off theengine, and firmly apply the parking brake . If you have four-wheel drive, be sure your transfer case is in a drive gear. Your vehicle could roll if it isn’t. If you are parking on a hill, or if your pulling a trailer, see “Parking on Hills” or “Towing a Trailer’’ in the Index.
Engine Exhaust Running Your Engine While You’re Parked (Automatic Transmission) It’s better notto park with the engine running. But if you ever have to, here are some things to know.
If you have four-wheel drive and your transfer case is in “N” (Neutral), your vehicle will be free to roll, even if your shift lever is in“P” (Park). So, be sure the transfer case is in a drive gear - not in “N” (Neutral). Follow the proper steps to be sure your vehicle won’t move. See “Shifting Into ‘P’ (Park)” in the Index. If you’re pulling a trailer, see “Towing a Trailer” in the Index.
NOTICE: Driving in the4H or 4L positions for a long time on dry or wet pavement could shorten the life of your vehicle’s drivetrain. Transfer Case The transfer case shift lever is on the floor to the right of the driver. Use this lever to shift into andout of four-wheel drive. An indicator near the lever shows you the transfer case settings. The front axleportion of the indicator diagram will light up when you shift into four-wheel drive.
When your headlights or parking lights are on, rotate the dial to the right of your headlight switch up to brighten, or down to dim, your transfer case indicator light. 2H (2-Wheel High): This setting is for driving in most street and highway situations. Your front axle is not engaged in two-wheel drive. 4H (&Wheel High): This setting engages your front axle to help drive your vehicle. Use 4H when you need extra traction, such as on wet or icy roads, or in most off-road situations.
Windows To open your manual windows, turn the hand crank on each door to raise or lower your side door windows. If you have the optional power windows, the controls are on each of the side doors. The driver’s door has a switch for the passenger windows as well. Your power windows will work when the ignition has been turned to ACC or RUN. Push the rear of the switch with thepower window symbol on it to lower the window. Push the front of the switch with the power windowsymbol on it to raise the window.
Hectric Tailgate Glass Release Before operating your electric tailgate glass release, see the caution under “Tailgate Glass, Tailgate and RearDoors” in this section. The electric hatch release button, located below the headlight switch, lets you release the tailgate glass. To release the glass, slide the button to the right untilyou hear the latch release. Then, lift the window up to open. If you have an automatic transmission,your shift lever must be in“P’ (Park) or “N”(Neutra1) for the release to work.
Horn To sound the horn, press the pad in the center of the steering wheel. The pad has a Tilt Wheel(Option) A tilt steering wheel allows you to adjust the steering wheel before you drive. You can raise it to the highest level to give your legs more room when you exit and enter the vehicle. To adjust the tilt steering wheel: 2-37 0 While holding the steering wheel, pull the lever toward you. 0 Move the steering wheel to a comfortable level, then release the leverto lock the wheel in place.
Multifunction Lever The lever on the left side of the steering column includes your: h I 0 Turn Signal and Lane Change Indicator 0 Headlight High-Low Beam & Passing Signal Windshield Wipers 0 Windshield Washer Cruise Control (Option) 2-38
Turn Signal and Lane Change lndicator The turn signal has two upward (for right signal) and two downward (for left signal) positions. These positions allow you to signal a turn or a lane change. To signal a turn, move the lever all the way upor down. When the turn is finished, the lever will return automatically. A green arrow on the instrument panel will flash in the direction of the turn or lane change. To signal a lane change, justraise or lower the lever until the green arrow starts to flash.
Headlight High-Low Beam To change the headlights from low beam to high or high to low, pull the turn signal lever all the way toward you. Then release it. When the high beams are on, this blue light on the instrument panel also will be on. Windshield Wipers You control the windshield wipers by turning the band with the wiper symbol on it.
For a single wiping cycle, turn the band to MIST. Hold it there until the wipers start, then let go. The wipers will stop after one cycle. If you want more cycles, hold the band on MIST longer. You can set the wiper speed for a long or short delay between wipes. This can bevery useful in light rain or snow. Turn the band to choose the delay time. The closer to LO, the shorter the delay. For steady wiping at low speed, turn the band to the LO position. For high speed wiping, turn the band further, toHI.
Remember, in freezing weather, don’t use your washer until the windshield is warmed. Otherwise the washer fluidcan form ice on the windshield, blocking your vision. NOTICE: When using concentrated washer fluid, follow the manufacturer’s instructions for adding water. Don’t mix water with ready-to-use washer fluid. Water can cause the solution to freeze and damage your washer fluid tank and other parts of the washer system. Also,water doesn’t clean as well as washer fluid.
When you apply your brakes, the Cruise Control shuts off. To Set Cruise Control Move the Cruise Control switch to ON. Get up to the speed you want. Push in the set button at the end of the lever and release it. Take your foot off the accelerator pedal. Get up to the speed you want.
To Resume a Sef Speed Suppose you set your Cruise Control ata desired speed and then you apply the brake. This, of course, shuts off the Cruise Control. But you don’t need to reset it. Once you’re going about 25 mph (40 km/h) or more, you can move the Cruise Control switch from ON to WA (Resume/Accelerate) for about half a second. You’ll go right back up to your chosen speed and stay there.
Here’s the second way to go to a higher speed: Move the Cruise switch from ON to WA. Hold it there until you get up to the speed you want, and then release the switch. To increase your speed in very small amounts, move the switch to WA. Each time you do this, your vehicle will go about 1 mph ( I .6 k d h ) faster.
Using Cruise Control onHills How well your Cruise Control will work on hills depends upon your speed, load, and the steepness of the hills. When going up steep hills, you may have to step onthe accelerator pedal to maintain your speed. When going downhill, you may have to brake or shift to a lower gear to keep your speed down. Of course, applying the brake takes you out of Cruise Control. Many drivers find this to be too much trouble and don't use Cruise Control on steep hills.
Headlights and Vehicle Lighting Your light switches are on the left side of your instrument panel.
Headlights-On Reminder A buzzer will sound when your headlights are turned on and your ignition is in OFF, LOCK or ACC. If you need to use your headlights when the ignition switch is inOFF, LOCK or ACC, the buzzer canbe turned off by turning the interior light switch dial all theway off. Daytime Running Lights(DRL) Indicator Light (Canada Only) ~ If your vehicle was first sold, when new, in Canada, you will have this light on the instrument panel. It goes on whenever the Daytime Running Lights are on.
Dome Lights The dome lights will come on when you open the doors or tailgate. You can also turn the dome lights on by turning the interior light dimmer dial all they way up until it clicks. You can use the dome lamp switch, located below the headlight switch, to set the dome lamps to come on automatically or remain off. To turn the lights off, just press the side of the switch marked OFF. To return the lights to automatic operation, press the side marked AUTO.
If your vehicle has an overhead console with reading lights, they can be swiveledto point in thedirection you want. To turn the light on, press the button nextto the light with the master lighting switch symbol on it. Press the button againto turn the light off. Underhood Reel Light If you have an underhood reel light, it is located inside the engine compartment on the passenger side fender. You can useit as a flashlight. To use the light, pull up on the lever and pull thelight out.
When you are done using the light, reel the cord back into the housing by turning the handle. Then, slide the light intothe holder. Press PUSH on the lever to hook the light into theholder. Mirrors Inside Mirror Push or pull the tab under the mirror to reduce glare from headlights behind you after dark.
Outside Mirrors Adjust your outside mirrors so you can just see the side of your vehicle, and have a clear view of objects behind you. Some mirrors can be folded in to enter narrow doorways. Electric Outside Rearview Mirrors If you have electric mirrors, they can be adjusted to point where you want from inside the vehicle. Select the mirror you want to move by moving the center of the switch, located on the driver’s door armrest, to R (right) or L (left).
Convex Outside Mirror Your right side mirror may be convex. A convex mirror’s surfaceis curved so you can see more from the driver’s seat. Sun Visors To block out glare, you can swing down the visors. You can also swing them out to help block glare at the front and side windows. I 2-53 Your visor may have a strap to hold small items, such as maps.
Some visors have an extender on the inside edge. When the visor is down, pull the extender out for extra glare coverage at the front or side. Some visors have mirrors with lights.If the mirror has lights, they will come on when you lift the mirror cover. Rear Window Wiper and Washer The rear window wipedwasher switch is on your instrument panel, to the right of the steering wheel. 0 To turn the wiper on, slide the lever to the right.
For delay wiping, slide the lever under DELAY to the center of the rear wiper control. The wiper will cycle every nine seconds. For steady wiper action, move the slide lever all the way to the right. 0 To wash the window, push in on the end of the lever. Window washer fluid will continue to spray until the lever is released. The wiper will continue with three more wipes and then return to the setting that was chosen before the leverwas pushed.
To use a rear ashtray, pull at the topof the ashtray door to flip the door open. To remove a rear ashtray, press down on the inside tabs and open thedoor fully. Don't put papers and other things that burn into your ashtrays. If you do, cigarettes or othersmoking materials could set them onfire, causing damage. Storage Compartments Your vehicle has a variety of storage compartments provided for your convenience. Glove Box To open your glove box, press the button down and pull the door open.
Two cup depressions are provided for your convenience. Center Floor Console Your vehicle may have a console compartment between the bucket seats. To open it, just squeeze the buttons on both sides of the keyhole, and pull up. Use your round key to lock this compartment. Your console also includes a handy place to hold cups.
Your console also has a cup holder that slides out, for the back seat passengers to use. Instrument Panel Cup Holder If your vehicle has a full or split bench seat, you may have a cup holder attached to the instrument panel. To use the cup holder, pull the handleand slide the cup holder tray out until it stops. Then, let the cup holder swing down into position. To close the cup holder, lift the front and slide the tray all the way in.
Center Overhead Console Your vehicle may have an overhead console. Ithas storage compartments inside it. Garage Door Opener Compartment If you have a garage door opener, the front overhead compartment can be used to conveniently store the opener. I To install the garage door opener, first open the compartment door by pressing the release button forward.
The pegs inside the compartment door are used to make sure the button on the compartment door will contact the control button on the garage door opener. Add one peg at a time until the PUSH button on the compartment door operates the garage door opener, with the compartment door closed, whenyou push the button marked PUSH.
Now, with the compartment door closed, push the button marked PUSH again to make sure the garage door opener operates properly. ? With the garage door opener positioned properly and the right number of pegs in place, you should onlyhave topush the PUSH button slightly to operate the opener. Adjust the position of the garage door opener and add or remove pegs, as needed, until the opener operates properly.
1 Place your sunglasses in the compartment door with the lenses facing out. Rear Compartment The rear compartment can be usedto store a small item, like a book. To open the rear compartment, press the release button located at therear of the compartment door.
Other Storage Compartments Your vehicle features a number of storage compartmentsfor convenient storage of often used items Some vehicles have storage areas in the instrument panel. Use these spaces for items such as gloves or small books. Some models have a storage pocket on each of the front doors. You can use the pocket to store a variety of small items.
Instrument Panel 13 1’2 1. Side Window Defogger Vents 2. Light Controls 3. Air Vents 4. Multifunction Lever 5. Tilt Lever 6. Instrument Cluster 7. Gearshift Lever 8. Audio System 9. Comfort Control System 10. Glove Box 1 1. Audio System 12. Ashtray 13. Rear Window Defogger Switch or Rear Heater Switch 15. Dome Light Override Switch 16. Fuse Panel 17. Parking Brake Release Handle Instrument Cluster Your instrument cluster is designed to let you know at a glance how your vehicle is running.
Speedometer and Odometer Your speedometer lets you see your speed in both miles per hour (mph) and kilometers per hour ( k d h ) . Your odometer shows how far your vehicle has been driven, in either miles (used in the US.) or kilometers (used in Canada). .. ' -20 MPH Tamper-Resistant Odometer Your odometer is tamper-resistant. The odometer will show silver lines between the numbers if someone tries to turn it back. You may wonder what happens if your vehicle needs a new odometer installed.
Tachometer If you have a tachometer, it displays the engine speed in revolutions per minute (rpm). 4 I NOTICE: Do not operate the engine with the tachometer in the red area, your engineor other parts could be damaged. Damage to your engine or vehicle caused by operating the engine in the red area isn't covered by your vehicle warranty. Warning Lightsandl Indicators This section describes the warning lights andgages that may be onyour vehicle. The pictures will help you locate them.
Waiting to do repairs can be costly - and even dangerous. So please get to know your warning lights and gages. They’re a big help. Brake System Warning Light The red brake system warning light is located at the bottom right corner of the instrument cluster Your vehicle’s hydraulic brake system is divided into two parts. If one part isn’t working, the other part can still work and stop you. For good braking, though, you need both parts working well.
Anti-Lock Brake System Warning Light The orange anti-lock brake system warning light is located near the top rightcorner of the instrument cluster mi With anti-lock, this light will go on when you start your engine and may stay on for several seconds. That’s normal. Ifthe light doesn’t come on, have it fixed so it will be ready to warnyou if there is a problem. If the light stays on, or comes on when you’re driving, your vehicle needs service.
Service Throttle Soon Light The orange Service Throttle Soon light, if you have one, is located near the middle left edge of the instrument cluster On diesel engines, a computer monitors the operation of the electronic accelerator. This light should come on when the ignition is on but the engine is not running, as a check to show you its working. If it does not come on at all, have it fixed right away.
Low Coolant Warning Light The orange Low Coolant Warning light, if you have one, is located in the upper left corner of the instrument cluster. If you have a diesel engine, you have a low coolant light. If this light comes on anytime the engine is running, your system is lowon coolant and the engine may overheat. See “Engine Coolant” in the Index and have your vehicle serviced as soon as you can.
Malfunction Indicator (Service Engine Soon) Lamp ENGINE N The orange Malfunction Indicator (Service Engine Soon) Lamp islocated at the middle right edge of your instrument cluster. A computer monitors the operation of your fuel, ignition and emission control systems. This light should come on when theignition is on but the engine is not running, as a check to show you its working. If it does not come on at all, haveit fixed right away.
This light will come on briefly when you are starting the engine. If the light comes on and stays on while you are driving, it could indicate a problem with your vehicle. It could be a problem with your oil pressure, coolant temperature, or some other problem. Checkyour various gages to see if they are in the warning zones. If theyare, have your vehicle serviced right away.
Listed are four situations you may experience with your fuel gage: 0 At the gas station, the fuel pump shuts off before the gage reads full. 0 It takes a little more or less fuel to fill up than the fuel gage indicated. For example, the gage may have indicated thetank was half full, but it actually took a little more or less than half the tank’s capacity to fill the tank. 0 The gage moves a little when you turn a corner or speed up. 0 The gage doesn’t go back to empty when you turn off the ignition.
Oil Pressure Gage Standard Cluster-Gas Standard Cluster -Diesel 40 TachometerCluster -Gas TachometerCluster-Diesel The oil pressure gage shows the engine oil pressure in psi (pounds per square inch) when the engine is running. Canadian vehicles indicate pressure in kPa (kilopascals). Oil pressure may vary with engine speed, outside temperature and oil viscosity, but readings above the low pressure zone indicate the normal operating range.
Headlight HighBeam Indicator Light The blue Headlight High Beam Indicator light is located near the middle left edge of the instrument cluster. The high beam indicator is on whenever you use your high beam headlights. For more details about high beams, see “Headlight High-Low Beam” earlier in this section. Turn Signal and Lane Change lndicator Lights The greenTurn Signal and Lane Change Indicator lights are located at the middle left and right edges of the instrument cluster.
Gages Fuel Gage Standard Cluster -Gas Standard Cluster -Diesel TachometerCluster-GasTachometerCluster-Diesel The fuel gage, when the ignition is on, tells you about how much fuel you have left in your tank. The gage will first indicate empty before you are out of fuel, and you should get more fuel as soon as possible.
A reading in the low pressure zone may be caused by a dangerously low oil level or other problem causing low oil pressure. Check your oil as soon as possible. I NOTICE: Damage to your engine from neglected oil problems can be costly andis not covered by your warranty. Voltmeter Standard Cluster Tachometer Cluster 14 When your engine is not running, but the ignition is on (in the RUN Position), this gage shows your battery’s state of charge in DC volts.
You can only drive for a short time with the reading in either warning zone. If you must drive, turn off all unnecessary accessories, and have the vehicle serviced as soon as possible. Center High Mount Stop Lamp (CHMSL) If items are loaded on the roof of the vehicle, as in a luggage carrier, care should be taken not to block or damage the CHMSL unit. Convenience Net If you have a conveniencenet, it is stored in a pouch attached to the spare tire.
Luggage Carrier (Option) The luggagecarrier has slats and side rails attached to the roof, and cross rails which can be moved fore and aft in the side rails to help secure cargo. Tie the load to the side rails or siderail supports. Use the crossrails mostly for foreand aft stops. NOTICE: Loading cargo that weighs more than 200 pounds (90.6 kg) on the luggage carrier may damage your vehicle. When youcarry large things, never let them hang over the rear orthe sides of your vehicle.
If you need to carry long items, move the cross rails as far apart as they will go. Tie the load to the cross rails and the side railsor side rail supports. Also tie the load to the bumpers. Do not tie the load so tightly that the cross rails or siderails are damaged. After moving the cross rails, be sure to tighten all the slider screws. Trailer Wiring Harness (Option) An optional 7-wire harness is stored under your vehicle along the rear frame crossmember. The harness has a 30 amp.
Step-Bumper Pad If your vehicle has a rear step bumper, it may be equipped with a rear step pad at thecenter of the bumper. Use this padto improve footing when you are stepping on the bumper step. If you will be using the bumper to tow a trailer, you must remove the center cutout circle to install the trailer ball. You must also remove both outer cutouts to attach the trailer safety chains. )c @ p.
Notes 2-82
Comfort Controls and Audio Systems Section - In this section you’ll find out how to operate the comfort control systems and audio systems offered with your vehicle.Be sure toread about the particular system supplied with your vehicle. For explanation of vehicle symbols in this section, referto “Vehicle Symbols” in the Introduction. . . . .... . . . . . . . . 3-2 Comfort Controls . . . . . . . . . . , * , . . . . . . . . . . . . . . . . . . . 3-2 Heating System . . . . . . . . . . . . . . . . . . . . .
Comfort Controls Flow-Through Ventilation System Your vehicle’s flow-through ventilation system supplies outsideair to the inside of your vehicle when it ismoving. I With the side windows closed, air will flow into the front I air inlet grilles, through the vehicle and out the rear air exhaust valves. F ” Outside air will also enter the vehicle when the heater or the air conditioning fan is running, unless your optional air conditioner is in the MAX mode.
Air Vents If your vehicle does not have air conditioning, there are air vents below the instrument panel. Use the handlesbelow your steering wheel, with the vent symbols on them, to open and close thevents. * 2,,.' ;.!"'." p*~$;mP$ %$ ,i* :' "X;.,'., 2 ,., I If your vehicle hasair conditioning, you will find air vents in the center and on the sides of your instrument panel. You can move the vents grilles from side to side or up and down to direct the flowof air, or closethe vents altogether.
Heater Output Engine Coolant Heater If your vehicle has a diesel engine, it is equipped with an engine coolant heater. An engine coolant heater is optional on gas engine vehicles. You can use an engine coolant heater during initial start-up in cold weather (20” F, -8” C, or lower) to help heat thepassenger compartment faster. Because an engine coolant heater warms theengine coolant, your vehicle’s heating system can provide some heat as soon as you start the engine.
Function Lever The upper lever on the control panel can be moved to three different heating functions. 0 Vent (Left): Air comes out at the vents on your instrument panel and at your front side windows. 0 Heater (Center): Air comes out near the floor. This setting, along with a heat setting, is best for cold weather. 0 Defrost (Right): This setting operates the defroster. Air comes out near the bottom ofthe windshield and at your front side windows.
When you first turn on your vehicle’s air conditioning, open the windows to clear the vehicle of hot air. Using theMAX button can also help. See “MAX Button” in this section for more information. . ‘ ‘ I s ...... Lj”. . ..-. ,OFF ..... . . . . .. . ... . : Function Display Your system has a lighted display showing each system whenit is operating. During normal operation, all the lights won’t come on at the same time. Only the ones displaying the current settings will light.
The air flow can be blended between the two positions. To blend between positions pressthe side of the buttonshowing the area where you would like more air flow. The system will automatically begin to blend toward the position chosen.To stop the system between positions, just press the SAME side of the button again. Right Button Defrost (Top) : This setting operates the defroster. Air comes out near the bottom of the windshield and at your front side windows.
Fan ControlButton This button is in the upper right corner of your system control panel.The fan has four settings - low, medium low, medium high and high. Press the top of the button (+) to increase the air flow.Press the bottom of the button (-) to decrease the air flow. The setting you select is shown on your display as LOW, MED LOW, MED HI or HI. OFF Button Press this button to turn the air conditioningheating system off.
To operate the rear air conditioning system, thefront air conditioning system must be on. With the front air conditioning system off, the rear system controls can be used to circulate air in the rear of the vehicle. To operate the rear system using the front control, justturn the knob to the blower positionyou want. To use the rear control, firstturn the front control knob to REAR CNTL. Then, the rear control can be used to increase and decrease the air flow.
Rear Air Conditioning and Rear Heater If your vehicle has a rear air conditioning and rear heater system combination, controls are provided to regulate the temperature, location and speed of the air flow. Front Control Rear Control 1 To adjust the air temperature, turn the temperature knob on the right side of the controlpanel. For warmer air, turn the knob to the right (red) side, and for cooler air, turn the knob to the left (blue) side.
Rear Window Defogger You can tell if your vehicle has this option by looking at the rear window. If you see lines running across the glass, you have it. These arethe wire-like elements which heat your window. 1 NOTICE: Scraping the insideof your rear window couldcut and damage the defogger. Your warranty wouldnot cover this damage. And, don't put decals there,you might have to scrape them off. For best results, clear the window of as much snow or ice as possible first.
A udia Systems Your Delco@audio system has been designedto operate easily and give years of listening pleasure. You will get the most enjoyment out of it if you acquaint yourself with it first. Find out what your Delco@system can do and how to operate all its controls, to be sure you’re getting the mostout of the advanced engineering that wentinto it. Be aware that hearing damage from loud noiseis almost undetectable until it is too late. Your hearing can adapt to higher volumes ofsound.
NOTICE: Before you add any sound equipment to your vehicle -like a tape player, CB radio, mobile telephone or two-way radio - be sure you can add what you want. If you can, it’s veryimportant to do it properly. Addedsound equipment may interfere with the operation of your vehicle’s engine, Delco@ radio or other systems, and even damage them. And,your vehicle’s systems may interfere with the operation of sound equipment that has been added improperly.
TUNE Button Press the side of the button with the down arrow to decrease the radio station frequency or the side of the button with the up arrow to increase the radio station frequency. Pushbuttons The fivepushbuttons let you return to favorite stations. Just: Tune in the station you want. Press the SET button. (SET appears in the electronic display for a few seconds). Within 5 seconds, press one of the five pushbuttons to store the station. Whenever you press that button, the preset station will return.
SEEK Button Press the SEEK button to make the receiver seek, and stop at, the next higher available station. SCAN Button Press the SCAN button to make the receiver scan, and momentarily pause at, all available stations. SCAN will appear in the electronic display while the receiver is in the scan mode. Press SCAN again to cancel the scan mode and hold the current station. AM-FM Button Press the AM-FM button to switch between AM and FM. VOL Button The VOL button controls the volume.
Pushbuttons The six pushbuttons let you return to favorite stations.You can set the pushbuttons for up to twelve favorite stations (6 AM and 6 FM). To set the pushbuttons, just: Tune in the station you want. Press the SET button. (SET appears in the electronic display for a few seconds.) 0 Within 5 seconds, push one of the six pushbuttons to store the station. After that, whenever you press that button, the preset station will re turn. Clock To set the clock,just: a Press the SET button.
Press the PWR button on the radioto turn the system on. The radio will play until a cassette is pushed into the cassette entry door (the tape side goes in first.) Once the tape is playing, use the radio control buttons for volume, tone, balance and fade, justas you do for theradio. The arrowson the player indicate which side of the tapeis being played. PROG To go from one sideof the tape to the other, press the PROG button. Observe the lighted arrows to determine which side of the tape is being played.
How to Operate Your AM-FM Stereo Audio System and Cassette Deck with Equalizer To Play The Radio Press the amber PWR button to switch theradio on and off. RCL Button When the ignition is off, press theRCL button to display the time. With the ignition in RUN or ACC, press RCL to recall the radio station frequency and volume setting when the time display is showing. After a few seconds, the readout will return to thetime display.
Stereo (AM) Your Delco@radio can receive C-QUAM@stereo broadcasts. Many AM stations around the country use C-QUAM@to produce stereo, though some do not. If your Delco@system can get C-QUAM@ signals, your “STEREO” light will come on when you are receiving stereo. (C-QUAM@ is a registered trademark of Motorola Inc.). VOL Button The VOL button controls the volume. Pressing VOL “+.I’ increases volume; VOL “-” decreases volume. TUNE Button To tune in radio stations, press the TUNE button.
Then, press and hold the SCAN button until the correct minute appears on the display. After you set the time, the word SET will remain in the electronic display for a few seconds. Cassette Deck with Graphic Equalizer If you have a cassette deck, it is built to work best with tapes thatare 30 to 45 minutes long on each side. Tapes longer than that are so thin that they may not work well inthis player. Press the PWR button on theradio to turn the system on.
0 0 2 Button For better sound when playing high biaschrome ormetal tapes, press the Cr02 button. The light in the button will be on while the player is in the Cr02 mode. When playing standard tapes, you will get better sound while in the standard mode. If the Cr02 button is lit, press it to return the player to standard mode (the light will go out). PROG Button To go from one side of the tape to the other, pressthe PROG button.
REPT Butfon Press the REPT button to repeat the currently playing selection on the tape. For the REPT mode to repeat a selection, there must be at least a 4-second gap between selections on the tape. Care of Your Cassette Tape Player A tape player that is not cleaned regularly can result in reduced sound quality, ruined cassettes, or a damaged player mechanism. Cassette tapes should be stored in their plasticcases away from contaminants, direct sunlight, and extreme heat.
Your Driving and the Road Section 1 Here you’ll find information about driving on different kinds of roads and in varying weather conditions. We’ve also included many other useful tips on driving. Defensive Driving . . . . . . . . . . . . . . . . . . . . . . . . . . . . . . . . . . . . . . . . 4-2 DrunkenDriving . . . . . . . . . . . . . . . . . . . . . . . . . . . . . . . . . . . . . . . . . . . 4-2 Control of a Vehicle Braking . . . . . . . . . . . . . . . . . . . . . . . . . . . . . . . . . . . . .
Defensive Driving The best advice anyone can give about driving is: Drive defensively. Please start with a very important safetydevice in your vehicle: Buckle up. (See “Safety Belts” in the Index.) Defensive driving really means “be readyfor anything.” On city streets, rural roads, or freeways, it means “always expectthe unexpected.” Assume that pedestrians or other drivers are going to be careless and make mistakes. Anticipate what they might do. Be ready for their mistakes.
According to the American Medical Association, a 180-pound (82 kg) person who drinks three 12-ounce (355 ml) bottles of beer in an hour will end up with a BAC of about 0.06 percent. The person would reach the same BAC by drinking three 4-ounce (120 ml)glasses of wine or three mixed drinks if each had 1-112 ounces (45 ml) ofya liquor like whiskey, gin or vodka. ~~ ~ It's the amount of alcohol that counts.
But it’s veryimportant to keep in mind that the abilityto drive is affected well below aBAC of 0.10 percent. Research shows that the driving skills of many people are impaired at a BAC approaching 0.05 percent, and thatthe effects are worse at night. All drivers are impaired at BAC levels above 0.05 percent. Statistics show that the chance of being in an accident increases sharply for drivers who have a BAC of 0.05 percent or above. A driver with a BAC level of 0.
Sometimes, as when you’re driving on snow or ice, it’s easyto ask more of those control systems than the tires and road can provide. That means you can lose control of your vehicle. Braking Brakmg action involves perception time and reaction time. First, you have to decide to push on the brake pedal. That’sperception. time. Then you have to bring up your foot and do it. That’s reaction time. Average reaction time is about 314 of a second. But that’sonly an average.
Anti-Lock Brakes (ABS) Your vehicle has an advanced electronic braking system that can helpyou keep it under control. When you start your vehicle and beginto drive away, you may hear a momentary motor or clicking noise. This is the ABS system testing itself. ..> Here's how anti-lock works. Let's say the road is wet. You're driving safely. Suddenly an animal jumps out in front of you. You slam on the brakes. Here's what happens with ABS. A computer senses that wheels are slowingdown.
Remember: Anti-lock doesn’t change thetime you need to get your foot up to the brake pedal. If you get too close to the vehicle in front of you, you won’t have time to apply your brakes if that vehicle suddenly slows or stops. Always leave enough roomup ahead to stop, even though you have anti-lock brakes. To Use Four-wheel Anti-Lock Don’t pump the brakes. Just hold the brake pedal down and let anti-lock work for you. You may feel the brakesvibrate, or you may notice some noise, but this is normal.
What should you do if this ever happens? Ease up on the accelerator pedal, steer the vehicle the wayyou want it to go, and slow down. Speed limit signs near curves warn that you should adjust your speed. Of course, the posted speedsare based on good weather and road conditions. Under less favorable conditions you’ll wantto go slower. If you need to reduce your speedas you approach acurve, do it before you enter the curve, while yourfront wheels are straight ahead.
Off-Road Recovery You may find sometime that your right wheels have dropped off the edgeof a road onto the shoulder while you’re driving. If the level of the shoulder is only slightly below the pavement, recovery should be fairly easy. Easeoff the accelerator and then,if there is nothing in the way, steer so that your vehicle straddles the edge of the pavement. You can turn the steering wheel up to 114 turn until the right front tire contacts the pavement edge.
0 Watch for traffic signs, pavement markings, andlines. If you can see a sign up ahead that might indicate a turn or an intersection, delay your pass. A broken center line usually indicates it’s all right to pass (providing the road aheadis clear). Never cross a solid lineon your side of the lane ora double solid line, even if the road seems empty of approaching traffic. 0 Do not get too close to the vehicle you want to pass while you’re awaiting an opportunity.
Skidding In a skid, a driver can lose control of the vehicle. Defensive drivers avoid most skids by taking reasonable caresuited to existing conditions, and by not “overdriving” thoseconditions. But skidsare always possible. The three types of skids correspond to your vehicle’s three control systems. In the braking skid your wheels aren’t rolling. In the steering or cornering skid, too much speed or steering in a curve causestires to slip and lose cornering force.
Off-Road Driving with Your Four- Wheel Drive Vehicle This off-road guide is for vehicles that have four-wheel drive. Also, see “Anti-lock Brakes” in the Index. If your vehicle doesn’t have four-wheel drive, you shouldn’t drive off-road unless you’re on a level, solid surface. Off-road driving can be great fun. But it does have some definite hazards. The greatest of these is the terrain itself. “Off-roading” means you’ve left the great North American roadsystem behind. Traffic lanes aren’t marked.
You’ll find other important information in this manual. See “Vehicle Loading,’’ “Luggage Carrier” and “Tires” in the Index. Traveling to Remote Areas It makes sense to plan your trip, especially whengoing to a remote area. Know the terrain and plan your route. You are much less likely to get bad surprises. Get accurate maps of trails and terrain. Tryto learn of any blocked or closed roads. It’s also a good idea to travel with at least one other vehicle.
Controlling your vehicle is the key to successful off-road driving. One of the best ways to control your vehicle is to control your speed. Here are some things to keep in mind. At higher speeds: you approach things faster and you have less time to scan the terrain for obstacles. you have less time to react. 0 you have more vehicle bounce when you drive over obstacles. 0 you'll need more distance forbraking, especially since you're on an unpaved surface.
When you drive overbumps, rocks, or other obstacles, your wheels can leave the ground. If this happens, even with one ortwo wheels, you can’t control the vehicle as well or atall. Because you will be on an unpaved surface, it’s especially important to avoid sudden acceleration, sudden turns, or sudden braking. In a way, off-road driving requires a different kind of alertness from driving on paved roads and highways. There are no road signs, posted speed limits or signal lights.
Here are some other things to consider as you approach a hill.
0 Sound thehorn as you approach the top of the hill to let opposing traffic know you’re there. Use your headlights even during the day. They make you more visible to oncoming traffic. Q: What should I do if my vehicle stalls,or is about to stall, andI can’t make itup the hill? A: If this happens, there are some things you should do, and there are some thingsyou must not do. First, here’s what youshould do: Push the brakepedal to stop the vehicleand keep it fromrolling backwards.
vehicle will rollbackwards very quickly and you could go out of control. Instead, apply the regular brake to stop the vehicle. Then apply the parking brake. Shift into reverse, release the parking brake, and slowly back straight down. Never attempt to turn around if you are about to stall when going up a hill. If the hill is steepenough to stall your vehicle, it’ssteep enough to cause you to roll over if you turn around. If you can’t make it up the hill, you must back straight down thehill.
If you decide you can go down a hillsafely, then try to keep your vehicle headed straight down, anduse a low gear. This way, engine drag canhelp your brakes and they won’thave to do all the work. Descend slowly, keeping your vehicle under control at all times. Q: Are there some thingsI should not do when drivingdown a hill? A: Yes! These are important becauseif you ignore them you could lose control and have aserious accident.
Driving Across an lncline Sooner orlater, an off-road trail will probably go across the incline of a hill. If this happens, you have todecide whether to try todrive across the incline. Here are some things to consider: 0 A hill that can be driven straight up or down may be toosteep to drive across. When you go straight up or downa hill, the length of the wheel base (the distance from the front wheels to the rear wheels) reduces the likelihood the vehicle will tumble end over end.
Stalling on an Incline If your vehicle stalls when you’re crossingan incline, be sure you (and your passengers) get out on the uphill side, even if the door there is harder to open. If you get out on the downhill side and the vehicle starts to roll over, you’ll be right in its path. Driving In Mud, Sand, Snow, Or Ice When you drive in mud, snow or sand, your wheels won’t get good traction. You can’t accelerate as quickly, turning ismore difficult, and you’ll need longer braking distances.
Hard packed snow andice offer the worst tire traction. Onthese surfaces, it’s very easy to lose control. On wet ice, for example, the traction is so poor that you will have difficulty accelerating. And if you do get moving, poor steering and difficult braking can cause you to slide out of control. Driving In Water Light rain causes no special off-road driving problems. But heavy raincan mean flash flooding, and flood waters demand extreme caution. Find out how deep the water is before you drive throughit.
After Off-Road Driving Remove any brush or debris that has collected on the underbody, chassis or under the hood. These accumulations can be a fire hazard. After operation in mud or sand, have the brake linings cleaned and checked. These substances can cause glazing and uneven braking. Check the body structure, steering, suspension, wheels, tires, and exhaust system for damage. Also, check the fuel lines and cooling system for any leakage. Your vehicle will require more frequent service due to off-road use.
Night Vision No one can see as well at nightas in the daytime. But as we get older these differences increase. A 50-year-old driver may require at least twice as much light to see the same thing at night asa 20-year-old. What you do in the daytime can also affect your night vision. For example, if you spend the day in bright sunshine you are wise to wear sunglasses. Your eyes will have less trouble adjusting to night. But if you’re driving, don’t wear sunglasses at night.
less traction. It’s always wise to go slower and be cautious if rain starts to fall while you are driving. The surfacemay get wet suddenly when your reflexes are tuned for drivingon dry pavement. The heavier therain, the harder it is to see. Even if your windshield wiper blades are in good shape, aheavy rain can makeit harder to see road signs and traffic signals, pavement markings, the edge of the road, and even people walking.
Hydroplaning is dangerous. So much water can build up under your tires that they can actually ride on the water.This can happen if the road is wet enough and you’re goingfast enough. When your vehicle is hydroplaning,it has little or no contact with the road. Hydroplaning doesn’t happenoften. But it can if your tires haven’tmuch tread or if the pressure in oneor more is low. It can happenif a lot of water is standing on the road.
e Know the best way to get to where you are going. Get a city map and plan your trip into an unknown part of the city just as you would for a cross-country trip. e Try to use the freeways that rim and crisscross most large cities. You’ll save time and energy. (See the next section, “Freeway Driving.”) e Treat agreen light as a warning signal. A traffic light is there because the corner is busy enough to need it.
Once you are moving on the freeway, make certain you allow a reasonable following distance. Expect to move slightly slower at night. When you want to leave the freeway, move to the proper lane well in advance. If you miss your exit do not, under any circumstances, stopand back up. Drive on to the next exit. The exitramp can be curved, sometimes quite sharply. The exit speed is usually posted. Reduce your speed according to your speedometer, not to your sense of motion.
Highway Hypnosis Is there actually such a condition as “highway hypnosis”? Or is just it plain falling asleep at the wheel? Call it highway hypnosis, lack of awareness, or whatever. There is something aboutan easy stretch of road with the same scenery, along with the hum of the tires on the road, the drone of the engine,and the rush of the wind against the vehicle that can make you sleepy.
Keep your vehicle in good shape. Check all fluid levels and also the brakes, tires, cooling system and transmission. These parts can work hard on mountain roads. Know how to go down hills. The most important thing to know is this: let your engine dosome of the slowing down. Shift to a lower gear when you go down a steep or long hill. 0 Know how togo uphill. You may want to shift down toa lower gear. The lowergears help cool your engine and transmission, and you can climb thehill better.
Winter Driving Here are some tips for winter driving: 0 Have your vehicle in good shape forwinter. Be sure your engine coolant mix is correct. 0 You may want to put winter emergency supplies in your vehicle. Include an ice scraper, a smallbrush or broom, a supply of windshield washer fluid, a rag, some winter outer clothing, a small shovel, a flashlight, a red cloth, and a couple of reflective warning triangles.
What’s the worst time for this? “Wet ice.” Very cold snow or ice can be slick and hard to drive on.But wet ice can be even moretrouble because it may offer the least traction of all. You can get “wet ice” when it’s about freezing (32°F; 0°C) and freezing rain begins to fall. Trv to avoid driving on wet ice until salt and sand crews can get there. Whatever the condition - smooth ice, packed, blowing ,or loose snow drive with caution. Accelerate gently. Try not to break the fragile traction.
If You’re Caughtin a Blizzard If you are stopped by heavy snow, you could be in a serious situation. You should probably stay with your vehicle unless you knowfor sure that you are near help and you can hike through the snow. Here are some things to do to summon help and keep yourself and your passengers safe: Turn on your hazard flashers. Tie a red cloth to your vehicle to alert police that you’ve been stopped by the snow. Put on extra clothing or wrap a blanket around you.
Run your engineonly as long as you must. This saves fuel. When you run the engine, make it go a little faster than just idle. That is, push the accelerator slightly. This uses less fuel forthe heat that you get and it keeps the battery (or batteries) charged. You will need a well-charged battery (or batteries) to restart the vehicle, and possibly for signaling later on with your headlights. Let the heater run for awhile.
Power Take-Off (PTO) NOTICE: If you will be using thePTO while the vehicle remains in one place, drive thevehicle to warm it up before operating thePTO. Don’t use the PTO for more than four hours without driving your vehicle again. If you don’t follow these guidelines, your transfer case or transmissioncould be damaged. NOTICE: Don’t have a PTO that will exceed 35 horsepower installed on your vehicle. It could damage your transmission or transfer case.
4. Engage the power take-off. If you are going to drive the vehicle, shift the transmissioninto the gear you want. Then shift the transfercase into the range you want, apply the regular brakes and release the parking brake. 5. Release the clutch (and the regular brakes) asyou normally would. When you release the clutch, the power take-off will start. Using a Transfer Case Mounted Power Take-Off (Automatic Transmission) 1. Set the parking brake. 2. Shift the transfer case into “N” (Neutral). 3.
I NOTICE: Pulling a trailer improperly can damage your vehicle and result in costly repairs not covered by your warranty. To pull a trailer correctly, follow the advice in this section, and see your GM dealer for important information about towing a trailer with your vehicle. Every vehicle is ready for some trailer towing. If it was built with trailering options, as many are, it’s ready for heavier trailers. But trailering is different than just driving your vehicle by itself.
Three important considerations have to do with weight: Weight of the Trailer How heavy can a trailer safely be? It depends on how you plan to use your rig. For example, speed, altitude, road grades, outside temperature andhow much your vehicle is usedto pull a trailer are all important. And, it can also depend on any special equipment that you have on your vehicle.
After you’ve loaded your trailer, weigh thetrailer and then the tongue, separately, to see if the weights are proper. If they aren’t, you may be able to get them right simply by moving some items around in the trailer. Total Weight on Your Vehicle’s Tires Be sure your vehicle’s tires are inflated to the limit for cold tires. You’ll find these numbers on the Certification label at the rearedge of the driver’s door or see “Tire Loading” in the Index.
Trailer Brakes If your trailer weighs more than 1,000 pounds (450 kg) loaded, then it needs its own brakes - and they mustbe adequate. Be sure to read and follow the instructions for the trailer brakes so you’ll be able to install, adjust and maintain them properly. Your trailer brake system cantap into your vehicle’s hydraulicbrake system, but consider the following: Will the trailer brake system use more than 0.02 cubic inch (0.
During your trip, check occasionally to be sure that the load is secure, and that the lights and any trailer brakes are still working. Following Distance Stay at least twice as farbehind the vehicle ahead as you would when driving your vehicle without a trailer. This can help you avoid situations that require heavy braking and sudden turns. Passing You’ll need more passing distance up ahead when you’re towing a trailer.
Making Turns When you’re turning with a trailer, make wider turns than normal. Do this so your trailer won’t strike soft shoulders, curbs, road signs, trees, or other objects. Avoid jerky or sudden maneuvers. Signal well in advance. Turn Signals When Towing a Trailer When you tow a trailer, your vehicle has to have a different turn signal flasher and extra wiring, The green arrows on your instrument panel will flash whenever you signal a turn or lane change.
4. Re-apply the regular brakes. Then apply your parking brake, and then shift to “P” (Park), or “ R ’ (Reverse) for a manual transmission. 5. If you have a four-wheel-drive vehicle, be sure the transfer case is in a drive gear-not in “N” (Neutral). 6. Release the regular brakes. When You Are Ready to Leave After Parking ona Hill 1. Apply your regular brakes and hold the pedal down while you: Start your engine; Shift into a gear; and Release the parking brake. 2. Let up on the brake pedal. 3.
Maintenance When Trailer Towing Your vehicle will need service more often when you’re pulling a trailer. See the Maintenance Schedule for more on this. Things that are especially important in trailer operation are automatic transmission fluid (don’t overfill), engine oil,axle lubricant, belt, cooling system, and brake adjustment. Each of these is covered in this manual, and the Index will help you find them quickly. If you’re trailering, it’s a good idea to review these sections before you start your trip.
Problems On The Road Section . . Here you’ll find what to do about someproblems that can occur on the road . Hazard Warning Flasher Other Warning Devices . . . . . . . . . . . . . . . . . . . . . . . . . . . . . . . . . . . . 5-2 . . . . . . . . . . . . . . . . . . . . . . . . . . . . . . . . . . . . .5-3 Jumpstarting . . . . . . . . . . . . . . . . . . . . . . . . . . . . . . . . . . . . . . . . . . . . . . 5-3 . . . . . . . . . . . . . . . . . . . . . . . . . . . . . . . . . . . . . . . .
Hazard Warning Flashers Your hazard warning flashers let you warn others. They also let police know you have a problem. Your front and rear turn signal lights will flash on and off. 1 But they won’t flashif you’re braking. Press the button in to make your front and rear turn signals flash on and off. Your hazard warning flashers work no matter what position your keyis in, and even if the key isn’t in. . . l o turn orr me flashers, pull out on the collar.
Other Warning Devices If you carry reflective triangles, you can use them to warn others. Set oneup at the side of the road about 300 feet (100 m) behind your vehicle. Jump Starting If your battery (or batteries) has run down, you may want to use another vehicle and some jumper cables to start your vehicle. But please follow the steps below to do it safely. NOTICE: Ignoring these steps could result costly in damage to your vehicle that wouldn’t be covered by your vehicle warranty.
Tu Jump Start Your Vehicle; 1. Check the other vehicle. It must have a 12-volt battery witha negative ground system. I NOTICE: I If the other system isn’ta 12-volt system with a negative ground, both vehicles can be damaged. If you have a diesel engine vehicle with two batteries(or more), you should know before you begin that, especially in cold weather, you may not be able to get enough power from a single battery in another vehicle to start your diesel engine.
5. Check that the jumper cables don’t have loose or missing insulation. If they do, you could get a shock. The vehicles could be damaged, too. Before you connect the cables, here are some basic things you should know. Positive (+) will go topositive (+) and negative (-) will go to negative (-) or a metal engine part. Don’t connect (+) to (-) or you’ll get a short that would damage the battery and maybe other parts, too.
6. Connect the red positive (+) cable to the positive (+) terminal of the vehicle with the dead battery.Use a remote positive (+>terminal if the vehicle has one. Dead Battery(+) Good Battery (+) b 7. Don't let the other end touch metal. Connect it to the positive (+) terminal of the good battery. Usea remote positive (+) terminal if the vehicle has one. 8. Now connect the black negative (-) cable to the good battery's negative (-) cable. Don't let the other end touch anything until the next step.
9. Attach the cable at least 18 inches (45 cm) away from the dead battery, but not near engine parts that move. The electrical connection is just as good there, but thechance of sparks getting back to the battery is much less. 10. Now start the vehicle with the good battery and run the engine for awhile. 1 1 . Try to start the vehicle with the dead battery. If it won't start after a few tries, it probably needs service. Remove Cables in this Order 1. HeavyMetal Engine Part 2. Good Battery (-) 3.
0 Whether you can move the shift lever for the transmission and transfer case, if you have one. If there was an accident, what was damaged. When your vehicle is being towed, have the ignition key off. The steering wheel should be clamped in a straight-ahead position, with a clamping device designed for towing service, Do not use the vehicle’s steering column lock for this. The transmission and transfer case, if you have one, should be in Neutral andthe parking brake released.
Towing From the Front If you have a two-wheel drive vehicle, don’t have your vehicle towed on the rear wheels, unless you must. If the vehicle must be towed on the rear wheels, don’t go more than 35 mph (56 km/h) or farther than 50 miles (80 km) or your transmission will be damaged. If these limits must be exceeded, then the rear wheels have to be supported on a dolly.
Towing From the Rear Engine Overheating You will find a coolant temperature gage on your vehicle instrument panel. If you have a diesel engine, you will also find a low coolant light on your instrument panel.
If Steam Is Coming From Your Engine I NOTICE: If your engine catches fire becauseyou keep driving with no coolant, your vehiclecan be badly damaged. The costly repairs would not be coveredby your warranty.
If No Steam Is Coming FromYour Engine If you get the overheat warning butsee or hear no steam, the problem may not be too serious. Sometimes the engine can get a little too hot when you: Climb a long hill on a hot day. Stop after high speed driving. Idle for long periods in traffic. Tow a trailer. If you get the overheat warning with no sign of steam, try this for a minute or so: 1. If you have an air conditioner, turn it off. 2.
If the coolant inside the coolant recovery tank is boiling, don’t do anything else until it cools down. The coolant level should be at or above the COLD mark. If it isn’t, you may have a leak in the radiator hoses, heater hoses, radiator, water pump or somewhere else in the cooling system. P NOTICE: Engine damage from running your engine without coolant isn’t covered by your warranty. If there seems to be no leak, start the engine again.
How to Add Coolant to the Coolant Recovery Tank If you haven’t found a problem yet, butthe coolant level isn’t at or above the COLD mark, add a 50/50 mixture of clean water (preferably distilled) and a proper antifreeze at the coolant recovery tank. (See “Engine Coolant” in the Index for more information about the proper coolant mix.) NOTICE: In cold weather, water can freeze and crack the engine, radiator, Use the recommended coolant. heater core and other parts.
When the coolant in the coolant recovery tank is ator above the COLD mark, start your vehicle. If the overheat warning continues, there’s one more thing you can try. You can add the proper coolant mix directly to the radiator but be sure the cooling system is cool before you do it. ”.
How to Add Coolant to the Radiator 1. You can remove the radiator pressure cap when the cooling system, including the radiator pressure cap and upper radiator hose,is no longer hot. Turn the pressure cap slowly to the left until it first stops. (Don't press down while turning the pressure cap.) If you hear a hiss, wait for that to stop. A hiss means there is stillsome pressure left. 2. Then keep turning the pressure cap, but now push down as you turn it. Remove the pressure cap.
3. Fill the radiator with the proper mix, up to the base of the filler neck. 4. Then fill the coolant recovery tank to the COLD mark. 5. Put the cap back on the coolant recovery tank, but leave the radiator pressure cap off.
6. Start the engine and let it run until you can feel the upper radiator hose getting hot. Watch out for the engine fan(s). By this time the coolant level inside the radiator filler neckmay be lower. If the level is lower, add moreof the proper mix through the filler neck until the level reaches the base ofthe filler neck. 8. Then replace the pressure cap. At any time during this procedure if coolant begins to flow out of the filler neck, reinstall the pressure cap.
If the coolant inside the coolant surge tank is boiling, don't do anything else until it cools down. The coolant level should be at or above the COLD mark. If it isn't, you may have a leak in the radiator hoses, heater hoses, radiator, water pump or somewhere else in the cooling system. NOTICE: Engine damagefrom running your engine without coolant isn't covered by your warranty. If there seems to be no leak, start the engifieagain.
How to Add Coolant to the Coolant Surge Tank If you haven’t found a problem yet, but the coolant level isn’t at the COLD mark add a 50/50 mixture of clean water (preferably distilled) and a proper antifreeze at the coolant surge tank, but be sure the cooling system, including thecoolant surge tank pressure cap,is cool before you do it. (See “Engine Coolant”in the Index for more information about the proper coolant mix.
NOTICE: In cold weather, water can freeze and crack the engine, radiator, So use the recommended coolant. heater core and other parts. 1. You can remove the coolant surge tank pressure cap when the cooling system, including the coolant surge tank pressure cap and upper radiator hose, is no longer hot.
Turn the pressurecap slowly to the left untilit first stops. (Don't press down while turning the pressurecap.) If you hear a hiss, waitfor that to stop. A hiss means there is still some pressure left. 2. Thenkeep turning the cap, but now push down as you turn it. Remove the pressure cap. 3. Open the air bleed valve located on the thermostat housing. 4. Fill the coolant surge tank with the proper mix, up to the COLD mark.
While filling the surge tank, watch to see if coolant begins to stream out the air bleed valve. When coolant beginsto stream out, close the valve. 5. With the air bleed valve closed and the coolant surge tank pressure cap off, start the engine and let it run until you can feel the upper radiator hose getting hot. Watch out forthe engine fan( s). 6. By this time, the coolant level inside the coolant surge tank may be lower.
Engine Fan Noise Your vehicle has a clutched engine cooling fan. When the clutch is engaged, the fan spins faster to provide more air to cool the engine. In most every day driving conditionsthe fan is spinning slower and clutch is not fully engaged. This improvesfuel economy and reduces fan noise. Under heavy vehicle loading, trailer towing and/or high outside temperatures, the fan speed increases as the clutch more fully engages. So you may hear an increase in fan noise.
Changing a Flat Tire If a tire goes flat, avoidfurther tire and wheel damage by driving slowly to a level place. Turn on your hazard warning flashers. The followingsteps will tell you how to use the jack and change a tire. The equipment you’ll need is located in the rear cargo area.You’ll also find your spare tire there.
Spare Tire Your spare tire is mounted on the driver side inside cargo area wall, at therear of the vehicle First open the tire cover, if you haveone. Turn the wing nutto the left and take it, and the adapter, off thebolt. Take the tireout of the vehicle and remove the tire cover. Jack and Tools-Utiliiy Models I If I 5-26 your utility model has ajack cover, turn the wing nutto the left to take it off, then take the cover off.
To take the jack out, turn the wing nut to the left and take it and the retainer off. Take the jack and storage box out and then take the tools out of the box. e Your vehicle may have a pair of emergency gloves secured to the jack. You can use them when changing the tire, or during other emergency situations. Remember to replace them with the jack, so you will have them handy if needed later. Jack and Tools -Wagon Models If your wagon model has a jack cover, lift the tab up to release the cover.
....... ..... ...... .. .. Your vehicle’s jack and jacking tools are stored in the compartment. To take the jack out, turn the wing nut to the left and take it and the retainer off. Take the jack and storage box out and then take the tools out of the box. Your vehicle may have a pairof emergency gloves secured to the jack. You can use them when changing the tire,or during other emergency situations. Remember to replace them with thejack, so you will have them handyif needed later.
Jack Storage -Utility Models 34 5 1. Retainer 4. Jack Stbrage Box 2. Nut 5. Bracket. 3. Jack - Secure Jack in Vehicle as Shown Jack Storage -Wagon Models 1 . Retainer 2. Nut 3. Jack - Secure Jack in Vehicle as Shown 5-29 4. Jack Storage Box 5. Bracket.
DOWN Marking UP Marking .:: . ,...." .....,....., '."I"' .? ,~ The ratchet has anUP and a DOWN marking. 5-30 . .,..,... .. .. i..... (.
With the UP marking on the ratchet facing you, rotate the ratchet to the right. That will lift the jack head a little. Before raising the vehicle,do the following things. Put your spare tire near the flat tire. Remove the wheel trim. If there is a wheel cover, pry along the edge until it comes off. i 2’ Be careful; the rim edges may be sharp. Don’t try to remove it with your bare hands.
If your vehicle has wheel nut caps, use the wheel wrench and ratchet, with DOWN facing you, to unscrew and take themoff. Then take the hub cap off. If the wheel has a trim ring, remove it by using the flat end of the wheel wrench. ... If the wheel has a smooth center piece or a center piece with recessed nuts, place the flat end of the wheel wrench in the slot on the wheeland pry out gently. 1 Using the wheel wrench and ratchet, with DOWN facing you, loosen all the wheel nuts.
NOTICE: Raising your vehicle with the jack improperly positioned will damage the vehicle or may allow the vehicle to fall off the jack. Be sureto fit the jack lift head into the proper location before raising your vehicle. Front Position Position Rear Raise the vehicleby rotating the ratchet to the right. Make surethe UP marking faces you. Use the jack handle extentions if the flat is on the rear of the vehicle. Raise the vehicle far enough off the ground so there is enough room for thespare tire to fit.
Remove all the wheel nuts and takeoff the flat tire. Remove any rustor dirt from the wheel bolts, mounting surfaces and spare wheel. Place the spare on the wheel mounting surface.
Replace the wheel nuts with the rounded end of the nuts toward the wheel. Tighten each wheel nut by hand until the wheel is held against the hub. Front Position Rear Position L Lower the vehicle by rotating the ratchet to the left. Lower the jack completely.
Tightening Sequence Tiqhten to the Left Tighten the nuts firmly in a criss-cross sequence as shown. Rotate the ratchet to the right with theUP marking facing you. For proper torque, see “Wheel Nut Torque” in the Index. Put the wheel trim backon. For vehicles with plastic nut caps, tighten the caps until they arefinger tight, then tighten theman additional one-half turn with the ratchet. Remove any wheel blocks.
Storing theJack and Tire Storing the Jack Put the tools into the storage box and close ittightly. Fit the storagebox into the bracketwith the bolt through the box. Put the jack onto the box. Be sure the jack pointsin the right direction as shown for your model. See the jack and jack tools storage diagramsearlier in this section. Secure theemergency gloves, if your vehicle has them, to the jackusing the provided strap. Slide theretainer over thebolt onto the jackand put the wing nut on.
Storing the Tire Be sure the J-bolt is hooked properly for your model or tire size as shown. Tire Storage -Wagon Model If you have a wagon model, use these locations. 1 , I-Bolt 2. J-Bolt 3. Carrier 4. Spare Tire 5. Adapter 6. Nut 7. Cover 8.
Tire Storage -Utility Model If you have a utility model, use these locations. 1. Carrier 2. J-Bolt 3. Adapter 4. Spare Tire 5. Nut 6. Cover 7. Pins 8. J-Bolt 9. Use Upper Hole and Pin for LT265 Tire or Lower Hole and Pin For LT225/245 Tires Put the cover back on the tireif your vehicle has one. Put the tire into the vehicle,over the bolt. Slide the adapter onto the bolt in the proper location for your model, and putthe wing nut on.
If You’re Stuck:In Sand, Mud, Iceor Snow What you don’t want todo when your vehicle is stuck is to spinyour wheels. The method known as “rocking” can help you get out when you’re stuck, butyou must use caution. NOTICE: Spinning your wheels can destroy parts of your vehicle as well as the tires. If you spin the wheels too fast while shifting your your transmission. transmission back and forth, you can destroy Rocking your vehicle to get it out: First, turn your steering wheel left and right.
Using the Recovey Hooks If you ever get stuck in sand, mud, ice or snow, your vehicle may be equipped with recovery hooks. The recovery hooks are provided at the front of your vehicle. You may need to use them if you're stuck off-road and need to be pulled to some place where you can continue driving. i.:.:::: 8 . ._ .
NOTICE: Never use the recovery hooks to tow the vehicle. Your vehicle could be damaged andit would not be coveredby warranty.
Service & Appearance Section I Here you will find information about the care of your vehicle . This section begins with service and fuel information. and then it shows how to check important fluid and lubricant levels . There is also technical information about your vehicle. and a section devoted to its appearance care. . . . . . . . . . . . . . . . . . . . . . . . . . . . . . . . . . . . . . . . . . . . . . . . . . . . 6-3 . . . . . . . . 6-4 Fuel (Gasoline Engines). . . . . . . . . . . . . . . . . . .
................................... 6-43 Replacing Brake System Parts . . . . . . . . . . . . . . . . . . . . . . . . . . . . . . 6-46 Other Maintenance Items .................................... 646 Brake Master Cylinder Lubrication ............. ...................... ..... 6 4 8 Battery . . . . . . . . . . . . . . . . . . . . . . . . . . . . . . . . . . . . . . . 6-49 Bulb Replacement ......................................... 6-50 Fuses and Circuit Breakers . . . . . . . . . . . . . . . . . .
Service Your GM dealer knows your vehicle best and wants you to be happy with it. We hope you’llgo to your dealer forall your service needs. You’ll get genuine GM parts and GM-trained and supported service people. We hope you’ll want to keep your GM vehicle all GM. Genuine GM parts have one of these marks: Doing Your Own Service Work If you want to do some of your own service work, you’ll want to get the proper GM Service Manual.
Maintenance Schedule Section 7 of this manual, “Scheduled MaintenanceServices”, explains the maintenance your new vehicle needs, and when it should be done. Italso has a form that you can use to record the maintenance work done on your vehicle. Be sure to read this information. Fuel (Gasoline Engine) If your vehicle has a dieselengine, see “Diesel Fuel Requirements and Fuel System” in this Section. For vehicles with gasoline engines, please read this.
Gasolines for Cleaner Air Your use of gasoline with deposit control additives will help prevent deposits from forming in your engine and fuel system. That helps keep your engine in tune and your emission control system working properly. It’s good for your vehicle, and you’ll be doing your part for cleaner air. Many gasolines are now blended with oxygenates. General Motors recommends that you use gasolines with these blending materials, such as MTBE and ethanol.
What Fuel to Use You can use either Number 1-D or Number 2-D diesel fuel, but you’ll get better fuel economy using 2-D. Diesel fuel may foam when you fill your tank. This can cause the automatic pump nozzle to shut off, even though your tankisn’t full. If this happens, just wait for the foamingto stop and then continue to fill your tank. Cold Weather Operation In cold weather (below 20”F, or -7”C), use 1-D or “Winterized” Number 2-D fuel (a blend of 1-D and 2-D). Be sure you get the right fuel.
Water in Fuel Sometimes, water can be pumped into your fuel tank along with your diesel fuel. This can happen if a service station doesn’t regularly inspect and clean its fuel tanks, or if it gets contaminated fuel from its suppliers. If this happens, a“WATER IN FUEL” light will come on. If it does,the excess water must be drained. Your dealer can do this for you. This light also should come on briefly when you start your engine, as a check.
To drain water: 1 . Stop and park the vehicle in a safe place. Turn off the engine and apply the parking brake. 2. Remove the fuel tank cap. 3. Place a fuel-resistant container under the filter drain hose. 4. With the engine off, open the water drain valve 2 to 3 turns. When standing in front of the vehicle, the valve is located on the right side of the thermostat housing. 5. Start the engine and allow it to idle until clear fuel is observed. 6. Stop the engine and close the water drain valve. 7.
NOTICE: If there is water in your diesel fuel and the weather is warm or humid, fungus and bacteria can grow in fuel. the They can to damage your fuelsystem. You’ll need a diesel fuel biocide sterilize your fuelsystem. Your dealer can adviseyou if you ever need this. If your fuel tank needs to be purged to remove water, see your dealer ora qualified technician. Improper purging can damage your fuel system.
3. Close the air bleed valve. 4. Turn the ignition key to “Start” for 10 to 15 seconas at a time until your engine starts. Fuel Filter Replacement (Diesel Engines) If you want to change the fuel filter yourself, here’s howto doit: Drain fuel fromthe filter by opening the air bleed valve andthe water drain valve. This prevents the fuel from spilling as you replace the filter. Drainthe fuel into a fuel-resistant container and dispose of it properly. 1. Turn off the engine and apply the parking brake. 2.
5. Lift the element out of the filter head. 6. If there is any dirt on the element sealing surface of the filter head, clean it off. 7. Line up the writing on the top of the filter so it faces (is readable from) thefront of the vehicle. Push the element in until the mating surfaces touch. 8. With the air bleed valve open, turn your ignition key to RUN for 10 to 15 seconds. Wait one minute for your starter to cool. Do this until you can see clear fuel coming from the air bleed valve. 9.
Fuels in Foreign Countries If you plan on driving in another country outside the U.S. or Canada, unleaded fuel may be hard tofind. Do not use leaded gasoline. If you use even one tankful, your emission controls won’t work well or atall. With continuous use, spark plugs can get fouled, the exhaust system can corrode, and your engine oil can deteriorate quickly. Your vehicle’s oxygen sensor will be damaged. All of that means costly repairs that wouldn’t be covered by your warranty.
While refueling, hang the capinside the fuel door. To take off the cap, turn it slowly to the left. , Be careful not to spill gasoline. Clean gasoline frompainted surfaces as soon as possible. See “Cleaning the Outside of Your Vehicle” inthe Index. When you put the cap back on, turn it to the right until you hear a clicking noise. I NOTICE: If you need a new cap, be sure to get the right type. Your dealer If’you get the wrong type, it may fit notor can get one for you.
Checking Things Underthe Hood Hood Release To open the hood, first pull the handle inside the vehicle. Then go to the front of the vehicle and pull up on the secondary hood release, located just to the passenger side of the center of the grill. Lift the hood. Your vehicle, if it has air conditioning, may have a auxiliary engine fan in addition to the belt driven fan.
Before closing the hood, be sure all filler caps are on properly. Pull down the hood and close it firmly. Cleaning Your Diesel Engine NOTICE: If you spray or pour water or any other liquidon your engine when it is warmor hot, or when it is running, you could cause If you ever clean the engine, clean it only serious damage to it. when it is cold.
Engine Oil(Except Diesel) It's a good idea to check your engine oil every time you get fuel. In order to get an accurate reading, the oil must be warm and the vehicle must beon level ground. r"' ' 1 ' Turn off the engine and give the oil a few minutes to drain back into the oil pan.If you don't, the oil dipstick might not showthe actual level. To Check Engine Oil I Pull out the dipstick and clean it with a paper towel or cloth, then push it back in all the way. Remove it again, keeping the tip lower.
NOTICE: Don’t add too much oil. If your enginehas so much oil that the oil level gets above the upper mark that shows the proper operating range, your engine could be damaged. The engine oil filler cap is located on the driver’s side engine valve cover. P Just fill it enough to put the level somewhere in the proper operating range. Push the dipstick all the way back in when you’re through.
You should look for this on the front of the oil container, and use only oils that display this new symbol. You should also use the proper viscosity oilfor your vehicle, as shown in the following chart: LIGHT DUTY EMISSIONS -GAS ENGINES RECOMMENDED SAE VISCOSITY GRADE ENGINE OILS FOR BEST FUEL ECONOMY AND COLD STARTING, SELECT THE LOWEST SAL VISCOSITY GRADE OIL FOR THE EXPECTED TEMPERATURE RANGE. LOOK FOR ONE OF THESE LABELS HOT WEATHER \ C F ' - +38 +80. . +27 +60 -+16 +4a. .
HEAVY DUTY EMISSIONS -GAS ENGINES RECOMMENDED SAE VISCOSITY GRADE ENGINE OILS FOR BEST FUEL ECONOMY AND COLD STARTING, SELECT THE LOWEST SAE VISCOSITY GRADE OIL FOR THE EXPECTED TEMPERATURE RANGE.
If you cannot find oils with the new “starburst” symbol on the front of the container, you should look for and use oils containing the following three things: SHorSG “SH’ or “SG’ must be on the oil container, either by itself or combined with other quality designations, such as “SWCD,” “SH,SG, CD,” “SGKD,” etc. These letters show American Petroleum Institute (API) levels of quality. e SAE 5W-30 -Vehicles with Light Duty Emissions (8500 GVWR or less) OR SAE 1OW-30 -Vehicles with more).
Engine Oil Additives Don’t add anything to your oil. Your GM dealer is ready to advise if you think something should be added. When to Change Engine Oil See if any one of these is true for you: Most trips are less than 4 miles (6 km). 0 It’s below freezing outside and most trips are less than 10 miles (16 km). The engine is at low speed most of the time (as in door-to-door delivery, or in stop-and-go traffic). You tow a trailer often. Most trips are through dusty places.
Used oil can be a real threat to the environment.If you change your own oil, be sure to drain all free-flowing oil from the filter before disposal. Don't ever dispose of oil by putting it in the trash, pouring iton the ground, intosewers, or into streams or bodiesof water. Instead, recycle itby taking it toa place that collects used oil. If you have a problem properly disposing of your used oil, ask your dealer,a service stationor alocal recycling centerfor help.
When to Add Oil If the oil is at or below the ADD line, then you’ll need to add some oil. But you must use the right kind. This section explains what kind of oil to use. For crankcase capacity, see “Capacitiesand Specifications” in the Index. NOTICE: Don’t add too much oil. If your engine hasso much oil that the your engine oil level gets above the proper operating range, could be damaged. The engine oil filler cap is located on a filler tube at the front of the engine.
What Kind of Oil to Use Look for these two things: 0 CF4SH CF-4/SH is the best oil for your vehicle. However, if you can not find CF-4/SH oil, you may use CF-4/SG or CE/SH or CE/SG oil. These may be listed as shown or in reverse order, for example SWCF-4. Other letters may also be listed, such as SH/CD, CE, CF-4. These letters show American Petroleum Institute (API) levels of quality. NOTICE: If you use oils that don’t have these designations, you can cause by your warranty.
DIESEL ENGINES I RECOMMENDED SAE VISCOSITY GRADE ENGINE OILS SELECT THE SAE GRADE 011 BASED ON THE EXPECTED TEMPERATURE RANGE BEFORE CHANGE NEXT OIL I HOT WEATHER +loo - +60 - - +16 +32 -- 0 -20 LABEL - - -18 -- r -SAE 30 0 SAE 15W-40 PREFERRED -29 above 0°F (-18%) SAE 1OW-30 \ ________ COLD WEATHER DO NOT USE SAE 1DW-40, SAE 2OW-50 OR ANY OTHER GRADE OIL NOT RECOMMENDED S A E 15W-40 As shown in the viscosity chart, SAE 15W-40 is best for your vehicle.
This doughnut-shaped logo (symbol) is used on most oil containers to help you select the correct oil. You should look for this on the oil container, and use only those oils that display the logo. GM Goodwrench@oil (in Canada, GM Engine Oil) meets all the requirements foryour vehicle. Engine Oil Additives Don’t add anything to your oil. Your GM dealer is ready to advise if you think somethingshould be added.
Air Cleaner Refer to the Maintenance Schedule to determine when to replace theair filter. See “Scheduled Maintenance Services” in the Index. NOTICE: If the air cleaner isoff, a backfire can cause a damaging engine fire. And, dirt can easily get into your engine, which will damage it. Always have the air cleaner in place when you’re driving.
To remove the air cleaner filter on a gas engine or a 6.5 liter naturally aspirated diesel, turn the wing nuts to the left. Remove the cover and change the filter. To remove the air cleaner filter on a 6.5 liter turbocharged diesel,first remove the rubber elbow. Remember to observe the caution about turbocharger blades on the rubber elbow, Then, unhook the cover retaining clips and push therear of the cover toward the engine.
NOTICE: Too much or too little fluid can damage your transmission. Too much can mean that some of the fluid could come out and on fall hot engine partsor exhaust system, startinga fire. Be sureto get an accurate reading if you check your transmission fluid. Wait at least 30 minutes before checking the transmission fluid level if you have been driving: 0 When outside temperaturesare above 90°F (32°C). 0 At high speed for quite a while. In heavy traffic -especially in hot weather.
1. Flip the handle up and then pull out the dipstick and wipe it with a clean rag or paper towel. 2. Push it back in all the way, wait three seconds and then pull it back out again. 3. Check both sides of the dipstick, and read the lower level. The fluid level must be in the COLD area for a cold check or inthe HOT area or cross-hatched area for a hot check. 4. If the fluid level is in the acceptable range, push the dipstick back in allthe way; then flip the handle down to lock the dipstick in place.
WOW to Add Fluid Refer to the Maintenance Schedule to determine what kind of transmission fluid to use. See “Recommended Fluids and Lubricants’’ in theIndex. If the fluid level is low, add only enough of the proper fluid to bring the level up to the COLD area for a cold check or the HOT area for a hot check. It doesn’t take much fluid, generally less than a pint. Don’t overfill.
Then, follow these steps: 1. Remove the filler plug. 2. Check that the lubricant level is up to the bottom of the filler plug hole. 3. If the fluid level is good, install the plug and be sure it is fully seated. If the fluid level is low, add more fluid as described in the next steps. How to Add Fluid Here’s how to add fluid. Refer to the Maintenance Schedule to determine what kind of fluid to use. See “Recommended Fluids and Lubricants” in the Index. 1. Remove the filler plug. 2.
When to Check and What to Use Refer to the Maintenance Schedule to determine how often you should check the fluid level in your clutch master cylinder reservoir and for the proper fluid. See “Owner Checks and Services” and “Recommended Fluids and Lubricants’’ in the Index. How to check The proper fluid should be added if the level does not reach the bottom of the diaphragm when it’s in place in the reservoir.See the instructions on the reservoir cap.
Whai to Use Refer to the MaintenanceSchedule to determine what kind of lubricant to use. See “Recommended Fluids and Lubricants” in the Index. Four- Wheel Drive Most lubricant checks in this section also apply to four-wheel-drive vehicles. However, they have two additional systems that need lubrication. Transfer Case When to Check Lubricant Refer to the Maintenance Schedule to determine how oftento check the lubricant. See “Periodic Maintenance Inspections” in the Index.
Front Axle When to Check and Change Lubricant Refer to the Maintenance Scheduleto determine how often to check the lubricant and when to changeit. See “Scheduled Maintenance Services”in the Index. How to Check Lubricant If the level is below the bottom of the filler plug hole, you’ll need to add some lubricant. If the differential is at operating temperature (warm), add enough lubricant to raise the level to the bottom of the fillerplug hole.
What to Use use a mixture of one-half clean water (preferably distilled) and one-half antifreeze that meets “GM Specification 6038-M,” which won’t damage aluminum parts. You can also use a recycled coolant conforming to “GM Specification 6038-M” with a completecoolant flush and refill. If you use this mixture, you don’t need to add anything else. NOTICE: If you use an improper coolant mix, your engine could overheat and be badly damaged. The repair cost wouldn’t be covered by your warranty.
Adding Coolant -Gas Engines The coolantrecovery tank is located on the passenger side at the rear comer of the engine compartment To Check Coolant When your engine is cold, the coolantlevel should be at COLD, or alittle higher. When your engine is warm, the level should be up to HOT, or a little higher. To Add Coolant If you need more coolant, add the propermix at the coolant recovery tank. Add coolant mix at the recovery tank, but be careful not to spill it.
Adding Coolant-Diesel Engines .. The coolant surge tank is located on the passenger side at the rear corner of the engine compartment To Check Coolant When your engine is cold, the coolant level should be at theCOLD mark, or a little higher. When your engine is warm, the level should be above the COLD mark. If this light comes on, it means you're low on engine coolant. To Add Coolant If you need more coolant, add the proper mix ut the surge tank, but only when the engine is cool.
Radiator Pressure Cap-Gas Engines The radiator pressure cap must be tightly installed with the arrows on the cap lined up with the ovefflow tube on the radiator filler neck. I I NOTICE: Your radiator capis a 15 psi (105 kPa) pressure-type cap and must be tightly installedto prevent coolantloss and possible engine damage from overheating. Be sure the arrows on the cap line up with the overflow tube on the radiator filler neck.
Surge Tank Pressure Cap- Diesel Engines The surge tank pressure cap must be tightly installed with the arrows on the cap lined up with the top tube of the coolant surge tank. NOTICE: Your surge tank pressure cap 1s a unique 15 psi (105 kPa) pressure-type cap foruse with surge tank cooling systems only. It must be tightly installedto prevent coolant loss and possible engine damage from overheating. Be sure the arrowson the cap line up with the top tube of the coolant surge tank.
How To CheckPower Steering Fluid Unscrew the cap and wipe the dipstick with a clean rag. Replace the cap and completely tighten it. Then remove the cap again and look at the fluid level on the dipstick. l 0 When the engine compartment is hot, the level should be at the FULL mark. When the engine compartment is cool, the level should be at the FULL COLD mark. Whaf fo Add Refer to the Maintenance Schedule to determine what kind of fluid to use. See “Recommended Fluids and Lubricants” in the Index.
Hydro-Boost Brake System (Hydraulic Pump) The power steering pump is also used as the Hydro-boost pump. Refer to “Power Steering System” in this section when checking fluid level or adding fluid. Windshield Washer Fluid To Add Open the cap labeled “WASHER FLUID ONLY.” Add washer fluid until the bottle is full. ~ NOTICE: 0 When using concentrated washer fluid, followthe manufacturer’s instructions for adding water. Don’t mix water with ready-to-use washer fluid.
Brakes Brake Master Cylinder 4 Your brake master cylinder is here. It is filled with DOT-3 brake fluid. There are only two reasons why the brake fluid level in your master cylinder might go down. Thefirst is that the brake fluid goes down to an acceptable level during normal brake lining wear. When new linings are put in, the fluid level goes backup. The other reason is that fluid is leakingout of the brake system.
To Check BrakeFluid m You can check the brake fluid without taking off the cap. Just look at the windows on the brake fluid reservoir. The fluid levels should be above “MIN.” If they aren’t, have your brake system checked to see if there is aleak. After work is done on the brake hydraulic system, make sure the levels are above ‘“IN‘’ and below the top of each window. What to Add When you do need brake fluid, use only DOT-3 brake fluid - such as Delco Supremel l @(GM Part No.1052535).
Brake Wear Your vehicle has front disc brakes and rear drum brakes. Disc brake pads have built-in wear indicators that make a high-pitched warning sound when the brake pads are worn and new pads are needed. The sound may come and go or be heard all the time your vehicle is moving (except when you are pushing on the brake pedal firmly). NOTICE: Continuing to drive withworn-out brake pads could resultin costly brake repair.
Replacing Brake System Parts The braking system on a modern vehicle is complex. Its many parts have to be of top quality and work welltogether if the vehicle is to havereally good braking. Vehicles we design and test have top-quality GM brake parts in them, as your vehicle does when it is new. When you replace parts of your braking system - for example, when your brake linings wear down and you have to have new ones put in - be sure you get new genuine GM replacement parts.
Wheel Nut Torque For vehicles with dual wheels, when the vehicle, wheel or fasteners are new, have the torque set at the first 100, 1,000 and 6,000 miles (160, 1600 and 9600 km). Use the torquespecified in the appropriate SpecificationChart later in this section. Single Belt Accessory Drive If your new vehicle uses a serpentine belt, it is lighter, and more durable than systems with several belts. The belt ruIl 'li'vkf br iir6und the pulleys or^ the engine.
Fluid Leak Check After the vehicle has been parked for a while, inspect the surface under the vehicle forwater, oil, fuel or other fluids. Water dripping from the air conditioning system after it has been used is normal. If you notice fuel leaks or fumes, the causes should be found and corrected at once. Lubrication Accelerator Control System Your maintenance schedule will tell you how often the accelerator linkage pivot points must be lubricated.
Your maintenance schedulewill tell you how often to lubricate these items. See “Recommended Fluids and Lubricants” in the Index for the proper lubricant to use. Lock Cylinders To be sure your locks operate properly, they must be lubricated. Your vehicle’s maintenance schedulewill tell you how often to lubricate them. See “Recommended Fluids and Lubricants” in the Index for theproper lubricant to use.
Bulb Replacement Before you replace any bulbs, be sure that all the lights are off and the engine isn't running. Sealed Beam Headlights 1. Remove the four screws from the headlight retainer. 2. Pull the headlight out and remove the retainer. 3. Unplug and remove the headlight. 4. Plug in the new headlight and put it inplace. 5. Install the retainer to the headlight and tighten the screws.
NOTICE: Avoid touching the bulb or letting it come in contact with anything damp. Oil fromyour skin or moisture on the bulb can cause the bulb to explode when isit turned on.If either comesin it with alcohol or a suitable contact with the bulb, clean degreaser and wipe the bulb dry. Composite Headlights i .' --6n k 1 . Remove the two screws at the top of the radiator support. 2. Pull the headlight lens assembly out. 3. Unplugthe electrical connector. 4. Turn the bulb to the left and remove it. 'I 5.
Front Parkingnurn Signal Lights with Sealed Beam Headlights 1. Remove the two screws at the inside edge of the parkinghurn signal light assembly. 2. Remove the light assembly by swinging it out from the inside edge and sliding it out at the outside edge. 3. Squeeze the tab on the side of the light socket while turning the socket to the left. 4. Pull the socket out of the light assembly. 5. Push in gently on thebulb, turn it to the left and remove it from the socket. 6.
the left and remove it from the socket. 5. Put the new bulb in the socket, gently press in on the bulb and turn it to the right until it is tight. 6. Put the socket back into the light assembly and turn it socket to the right until it locks. 7. Put the parking/turn signal light assembly back into the vehicle and tighten the screws. Side Marker Lights with Sealed Beam and Composite Headlights 1. Remove the screws and pull out the parking/tum signal light assembly. 2.
3. Pull the bulb straight out of the socket. 4. Put a new bulb into the socket and push it in until it istight. 5. Put the socket back into the side marker assembly and turn it to the right to tighten it. 6 . Replace the parking/turn signal light assembly and tighten the screws. Roof Marker Lights 1. Remove the screws and lift off the lens. 2. Pull the bulb straight out of the socket. 3. Put a new bulb into the socket and push it in until it is tight. 4. Replace the lens and tighten the screws.
Center High MountStop/amp (CHMSL) “,Gar-& ... “B3 The individualbulbs in theCHMSL are not replaceable. See your dealer forassistance. Rear Lights 1. Open the tailgate or rear doors. 2. Remove the two black plastic plugs in the rear light assembly access holes. 3. Remove the two I rear light assembly screws inside the fender and pull out the light assembly. You may want to use a magnetic screwdriver when removing the screws.
4. Remove the screws from the bulb retainer and take the bulb retainer off of the light assembly. 5. Pull the old bulb straight out of the socket. 6. Put in a new bulb and push it in until it is tight. 7. Replace the bulb retainer. 8. Replace the rear light assembly and tighten thescrews. You may want to use a magnetic screwdriver when installing the screws. 9. Close the tailgate or rear doors.
Power Windows and Other Power Options Circuit breakers in the fuse panel protect the power windows and other power accessories. When the current loadis too heavy, the circuit breaker opens and closes. This protects the circuit until the current loadreturns to normal or the problem is fixed . Trailer Wiring Harness The optionalseven-wire trailer wiring harness is protected by an in-line fuse in the battery feed wire. This fuseis near the junction block.
some feature of your vehicle that you can get along without-like the radio or cigarette lighter-and use its fuse, if it isof the value you need. Replace it as soon as you can. See “Fuses and Circuit Breakers’’ in the Index for more information. Exhaust System To help prevent damage to your exhaust system, do not continue to drive your vehicle if you notice: Engine misfiring Loss of performance Other unusual operating conditions Have your engine and exhaust system serviced regularly.
Malfunction Indicator (SERVICE ENGINE SOON) Lamp The Malfunction Indicator (SERVICE ENGINE SOON)Lamp on your instrument panel lets you know when your emission system needs service. The light will come on briefly when you start your engine to let you know that the system is working. If it does not come on when you start your engine, or if it comes on and stays on while you're driving, your system may need service. Your vehicle should still be driveable, but you should have your system servicedright away.
Never exceed the GVWR for your vehicle, or the GAWR for either the front or rearaxle. And, if you do have a heavy load, you should spread it out. Using heavier suspension components to get added durability might not change your weight ratings. Ask your dealer to help you load your vehicle the right way. NOTICE: Your warranty does not cover partsor components that fail because of overloading.
Trailering Package If your vehicle comes with the Trailering Package, there is also a load rating which includes the weight of the vehicle and the trailer it tows. This rating is called the Gross Combination Weight Rating (GCWR). When you weigh your trailer, be sure to include the weight of everything you put in it. And,remember to figure the weight of the people inside as part of your load. Your dealer can help you determine your GCWR.
Tires We don’t make tires. Your new vehicle comes with high quality tires made by a leadingtire manufacturer. These tires are warranted by the tire manufacturers and their warranties are delivered with every new vehicle. If your spare tire is a different brand than your road tires, you will have a tire warranty folder from each of these manufacturers.
You can operatesome vehicles at reduced inflation pressures only when you’ll be carryingreduced loads. On those vehicles, the minimum cold inflation pressures for atypical reduced load are printed on the “Improved Ride Tire Pressure”label located on thedriver’s door. Weigh the vehicleto find the loadon each tire and see thelabel for theminimum cold inflation pressures forthat load. Don’t let anyone tell youthat underinflation or overinflation is all right. It’s not.
Special Tire lnflation If you have 16 inch tires on your vehicle, and: - You’ll be driving for very long at speeds of 66 mph (105 k d h ) to 75 mph (120 km/h) where legal, inflate tires to 10 psi (70 kPa) more than the recommended cold inflation pressures. - You’ll be driving for very long at speeds of 76 mph ( 120 k d h ) to 85 mph (135 k d h ) where legal, cold inflation pressures should be increased by 10 psi (70 kPa) and you must also reduce axle load capacity by 10%.
When / t’s Time for New Tires TREAD WEAR INDICATORS L E One way to tell when it’s time for new tires is to check the treadwear indicators, which will appear when your tires have only 2/32 inch (1.6 mm) or less of tread remaining. You need a uew tire if 0 You can see theindicators at three or more places around the tire. You can see cord or fabric showing through the tire’s rubber. The tread orsidewall is cracked, cutor snagged deep enough to show cord or fabric. 0 The tirehas a bump, bulge or split.
Buying New Tires To find outwhat kind andsize of tires you need, look at the CertificatiodTire label. The tires installed on your vehicle when it was new had a Tire Performance Criteria Specification (TPC Spec) number on each tire’s sidewall. When you get new tires, get ones with that same TPC Spec number. That way, your vehicle will continue to have tires that are designed to give proper endurance, handling, speed rating, traction, ride and other things during normal service on your vehicle.
Traction - A, B, C The traction grades, from highest to lowest are: A, B, and C. They represent the tire’s ability to stop on wet pavement as measured under controlled conditions on specified governmenttest surfaces of asphalt and concrete. A tire marked C may have poor traction performance. Warning: The traction grade assigned to this tire is based on braking (straight-ahead) traction tests and doesnot include cornering (turning) traction.
Wheel Replacement Replace any wheel thatis bent, cracked or badly rusted. If wheel nuts keep coming loose, the wheel, wheel bolts, and wheel nuts should be replaced. If the wheel leaks air, replace it (except some aluminum wheels, which can sometimes be repaired). See your GM dealer if any of these conditions exist. Your dealer will know the kind of wheel you need. Each new wheel should have the same load carrying capacity, diameter, width, offset, and be mounted the same way as the one it replaces.
Tire Chains NOTICE: If your vehicle has LT265/75R16 sizetires, don’t use tire chains; they can damage your vehicle. If you have a tire size other thanLT265/75Rl6, usetire chains only where legaland only when you must. Use only SAE Class “S” type chains that arethe proper size for your tires. Install them on the tires of the rear axle. Tighten them as tightly as possible with the ends securely fastened. Drive slowly and follow the chain manufacturer’s instructions.
Never use these to clean your vehicle: 0 Gasoline 0 Benzene 0 0 Paint Thinner Turpentine Naphtha 0 Lacquer Thinner Carbon Tetrachloride 0 Nail Polish Remover Acetone They can all be hazardous - some more than others -and they can all damage your vehicle, too. NOTICE: Don’t use anyof these unlessthis manual says you can.
Using Foam-Type Cleaner on Fabric Vacuum and brush the area to remove any loose dirt. Always clean a whole trim panel or section. Mask surrounding trim along stitch or welt lines. Mix Multi-Purpose Powdered Cleaner followingthe directions on the container label. Use suds only and apply with a clean sponge. Don’t saturate the material. Don’t rub it roughly. As soon as you’ve cleaned the section, use a spongeto remove me suds. Rinse the section with a clean, wet sponge.
Fabric Protection Your vehicle has upholstery and trim cifpet that has been treated with Scotchgard" Fabric Protector, a 3M product. Scotchgard" protects fabrics by repelling oil and water, whichare the carriers of most stains. Even with this protection, you still need to clean your upholstery and trim carpet often to keep it looking new. Further information on cleaning is available by calling 1-800-433-3296 (in Minnesota, 1-800-642-6 167).
Cleaning Vinyl Use warm water and a cleancloth. Rub with a clean, damp clothto remove dirt. You may have to do it more than once. Things like tar, asphalt and shoe polish will stain if you don’t get them off quickly. Use a cleancloth and a solvent-type vinyl cleaner. Cleaning Leather Use a soft cloth with lukewarm water and a mild soap or saddlesoap. For stubborn stains, use a mild solution of 10%isopropyl alcohol (rubbing alcohol) and 90% water.
Glass Glass should be cleaned often. GM Glass Cleaner (GM Part No. 1050427) or aliquid household glass cleaner will remove normal tobacco smoke and dust films. Don’t use abrasive cleanerson glass, because they may cause scratches. Avoid placing decalson the inside rear window, since they may have to be scraped off later. If abrasive cleaners are used on theinside of the rear window, an electric defogger element may be damaged. Any temporary license should not be attached across the defogger grid.
Finish Care Occasional waxing or mild polishing of your vehicle may be necessary to remove residue fromthe paint finish. You can get GM approved cleaning products fromyour dealer. (See “Appearance Careand Materials” in the Index.) Your vehicle may have a “ba~ec~at/clearc~at” paint finish. The clearcoat gives more depth and gloss to the colored basecoat.Always use waxes and polishes that are non-abrasive and made for a basecoatklearcoatpaint finish.
Weatherstrips Silicone grease on weatherstrips will make them last longer, seal better, and not stick or squeak. Apply silicone grease with a clean cloth at least every six months. During very cold, damp weather more frequent application may be required. (See “Recommended Fluids & Lubricants’’ in the Index.
Although no defect in the paint job causes this, GM will repair, at no charge to the owner, the surfaces of new vehicles damaged by this fallout condition within 12 months or 12,000 miles (20 000 km) of purchase, whichever comes first. Appearance Care Materials Chart PART NO. 1050172 1050173 1050174 1050214 1050244 1050427 I050429 1050729 1051055 1051398 1052870 105020 1 SIZE PRODUCT 16 oz. (0.473L) Tar and Road Oil Remover USAGE Removes old waxes, polishes, tar and road oil 16 02. (0.
Vehicle Identification Number(VIN) This is the legal identifier for your vehicle. It appears on a plate in the front corner of the instrument panel, on the driver’s side. You can see it if you look through the windshield from outside your vehicle. The VIN also appears on the Vehicle Certification and Service Parts labels and the certificates of title and registration.
Engine Identification The eighth character in your VIN is the engine code.This code will help you identify your engine, specifications, and replacement parts.
Service Parts Identification Label You’ll find this label on the inside of the glove box. WHEELBASE I MODEL DESIGNATION OPTION CONTENT LC3 M X lM 3 1 K 1 9K 6 4 6 B6J2 6L2 U 67D 671 NA5 NB1 Q M X V K 3V C 2V Y V l Y 4V 7 3Y 1 9Z J 7 679 7BJ 8HJ BHJ I I PAINT TECHNOLOGY ORDER NUMBER EXTERIOR COLORS It’s very helpful if you ever need to order parts. On this label is: 0 your VIN, the model designation, paint information, and a list of all production options and special equipment.
Specification Charts Replacement Parts Replacement part numbers listed in this section are based on the latest information available at the time of printing, and are subject to change. If a part listed in this manual is not the same as the part used in your vehicle when it was built, or if you have any questions, please contact your GM truck dealer. Engine Identification-Gas Engines Engine Type VIN Code Fuel System Produced By Emissions 5.7L V8 K TBIT U.S., CAN.
Cooling System Capacity ENGINE VIN 5.7L 6.5L 6.5L 7.4L K S F N QTY Without AfC* 17.5 Quarts ( 1 6.5 Liters) 25 Quarts (23.5 Liters) QTY With A/C* 18 Quarts ( I7 Liters) 25 Quarts (23.5 Liters) 26.5 Quarts (25 Liters) 23 Quarts (22 Liters) 26.5 Quarts (25 Liters) 25 Quarts (23.5 Liters) After refill, the level MUST be checked as outlined under “Engine Cooling System” in Section 5. *All quantities are approximate. Crankcase Capacity ENGINE 5.7L 6.5L VIN K 6.5L 7.
Service Replacement Part and Filter Recommendations -Gas Engines Engine VIN 5.7L 7.4L K N PF35 A348C cv774c .CR43TS GF48 I RC36 Oil Filter PF353‘ Air Cleaner Filter A348C PCV Valve cv774c Spark Plugs‘% .CR43TS Fuel Filter GF48 1 Radiator Cap RC36 $Four Wheel Drive Vehicle -use a PFS 1 oil filter *Use AC copper-cored resister type spark plugs Service Replacement Part and Filter Recommendations -Diesel Engines VIN 6.5L S” Oil Filter PF3S Engine 6.
Fuse Block 1 FUSE LEGEND I 1 5 AMP I TAN 1 I 7.
Fuses and Circuit Breakers NAME CIRCUITS PROTECTED Cruise Control, 4 WD Display Illum. Rear Window Defogger Timer, Aux. Batt. Relay Feed, Safety Belt Buzzer Timer, Cluster Ign. Feed Back-up Lamps, Turn Signals Turn-B/U T.C.C., Air Diverter, E.S.C., EMC/Ign E.G.R., E.C.M. Ign. R.W.A.L. Brake Switch Throttle Body Injectors Inj. A A.B.S. Cluster-Speed0 Brake H.V.A.C. 4 WD, Aux. Batt. AC/Htr Relay Dome Lamp, Ctsy. and Glove Ctsy Box Lps.
Lamp and Bulb Data LAMP OR BULB TRADE NO. POWER RATING AT 12.8V, WATTS 6052 55/65 i H6054 35/65 2 6052 55/65 2 9005 65 2 HEADLAMPS 2 Headlamp System Halogen (Opt.) 4 Headlamp System Composite TRADE NO.
TRADE NO.
Notes ! 6-88
Scheduled Maintenance Services Section This section covers the maintenance required for your General Motors vehicle . Your vehicle needs these services to retain it’s safety. dependability. and emission control performance . A Word About Maintenance . . . . . . . . . . . . . . . . . . . . . . . . . . . . . . . . . . 7-3 Your Vehicle and the Environment . . . . . . . . . . . . . . . . . . . . . . . . . . . . . 7-3 Recording Maintenance Services . . . . . . . . . . . . . . . . . . . . . . . . . . . . . . .
A Word About Maintenance We at General Motors wantto help you keep your vehicle in good working condition. But we don’t know exactly how you’lldrive it. You may drive very short distances only a few times a week. Or you may drive long distances all the time in veryhot, dusty weather. You may use your vehicle in making deliveries. Or you may drive it to work, to do errands, or in many other ways. Because of all the different ways people use their GM vehicles, maintenance needs vary.
If you are skilled enough to do some work on your vehicle, you will probably want to get the service information GM publishes. For information on how to obtain various service publications for your vehicle, see “Service Publications” in the Index. You will find a list of publications and an order form in the back of the book. Scheduled Maintenance Services This part tells you the maintenance services that you should have done and the times you should schedule them.
Engine Emissions Classification- Gas Engines Engine Type VIN Fuel System Emissions 5.7L 7.44 V8 K V8 N TBIT TBIT LD*/HD** LD*/HD** *Light Duty Emissions with 8500 GVWR and belowor: **Heavy Duty Emissions with 8501 GVWR and above ?Throttle Body Injection Engine Emissions Classification- Diese/ Engines Engine Type VIN Fuel System Emissions 6.5L V8 S Turbo Diesel LD 7-4 6.
Selecting the Proper Maintenance Schedule Here is how to tell which schedule to follow once you find the proper maintenance chart to use. MAINTENANCE SCHEDULEI Is any one of these true for your vehicle? Most trips are less than 4 miles (6 kilometers.) Most trips are less than 10 miles (16 kilometers), and the outside temperatures are below freezing. The engine is at low speed most of the time (as in door-to-door delivery, stop-and-go traffic, or commercial use).
GASOLINE ENGINES WITH LIGHT DUTY EMISSIONS MAINTENANCE SCHEDULE tf - 23 Tire and Wheel Rotation** t 24 Drive Axle Service** t t t t t - t 25 Brake Systems Inspection** * An Emission Control Service ** See “Explanation of Scheduled Maintenance Services” in the Index $ The California Air Resources Board has determined that the failureto perform this maintenance item will not nullify the emission warranty or limit recall liability prior to the completion of vehicle useful life.
GASOLINE ENGINES WITH LIGHT DUTY EMlSSlONS - MAINTENANCE SCHEDULE fi (continued) THE SERVICES SHOWN ON THIS CHART UP TO 60,000 MILES (100 000 km) ARE TO BE DONE AFTER 60,000 MILES AT THE SAME INTERVALS.
GASOLINE ENGINES WITH LIGHT DUTY EMISSIONS MAINTENANCE SCHEDULEI v - Item Service No. 1 2 3 4 5 6 7 9 10 11 14 15 17 23 24 25 * P 1 Emission Control Service ** s 3e “Explanation of Scheduled Maintenance Services”in the Index. to perform this $ 7 le California Air Resources Board has determined that the failure n aintenance itemwill not nullify the emission warranty or limit recall liability priorto the )mpletion of vehicle useful life.
THE SERVICES SHOWN ON THIS CHART UP TO 60,000 MILES (100 000 km) ARE TO BE DONE AFTER 60,000 MILES AT THE SAME INTERVALS.
GASOLINE ENGINES WITH HEAVY DUTY EMISSIONS - MAINTENANCE SCHEDULEyf Miles (000) Kilometers (000) Item Service No.
GASOLINE ENGINES WITH HEAVY DUTY EMISSIONS - MAINTENANCE SCHEDULE # (continued) THE SERVICES SHOWN ON THIS CHART UP TO 60,000 MILES (100 000 km) ARE TO BE DONE AFTER 60,000 MILES AT THE SAME INTERVALS.
GASOLINE ENGINESWITH HEAVY DUTY EMISSIONS MAINTENANCE SCHEDULEIff - * An Emission Control Service ** See “Explanation of Scheduled Maintenance Services” in the Index. A A Noise Emission Control Service H Applicable only to vehicles sold in the United States t To determine the emissions classificationof your engine, refer to “Selecting the Proper Maintenance Chart” in this section.
GASOLINE ENGINES WITH HEAVYDUTY EMISSIONS - MAINTENANCE SCHEDULEIFl (continued) 7- 13
DIESEL ENGINES- MAINTENANCE SCHEDULEfi * conditions. Change filter every 15,000 miles 000 km), except when operating i dusty Dusty conditions may require more frequent filter replacemExtreme (24 I nt. tl be checkedas dust anddirt operating conditions (off-road), may require the air filter often as every300 miles (483 km) and replacedas necessary. * An Emission Control Service ** See “Explanation of Scheduled Maintenance Services” in this section.
DIESEL ENGINES- MAINTENANCE SCHEDULEt"f (continued) THE SERVICES SHOWN ON THIS CHART UP TO 60,000 MILES (I00 000 km) ARE TO BE DONE AFTER 60,000 MILES AT THE SAME INTERVALS.
Air DlES€L ENGINES - MAINTENANCE SCHEDULEI f i Item No.
DIESEL ENGINES- MAINTENANCE SCHEDULE1fl (continued) THE SERVICES SHOWNON THIS CHART UP TO 60,000 MILES (100 000 km) ARE TO BE DONE AFTER 60,000 MILES AT THE SAME INTERVALS.
Explanation Of Scheduled Maintenance Services Below are explanations of the services listed in the maintenance charts. The proper fluids and lubricants to use are listed in this section. Make sure whoever services your vehicle uses these.All parts should be replaced and all necessary repairs done before you or anyone else drives the vehicle. 1. ENGINE OIL AND OIL FILTER CHANGE*-ALWAYS USE SH ENERGY CONSERVIJTGTI (GASOLINE ENGINE) OR CF-4/SH (DIESEL ENGINE) QUALITY OILS OF THE PROPER VISCOSITY.
7. TRANSMISSION SERVICE;Automatic Transmission- Change the transmission fluid and filter every 15,000 miles (25 000 km) for vehicles under 8,600 GVWR or every 12,000 miles (20 000 km) for vehicles over 8,600 GVWR if the vehicle is mainly driven under one or more of these conditions: In heavy city traffic. 0 Where the outside temperature regularly reaches 90°F (32°C) or higher. In hilly or mountainous terrain. Frequent trailer pulling. 0 Uses such as taxi, police, delivery or other commercial service.
12. EGR SYSTEM INSPECTION*- Conduct EGR SYSTEM CHECK as described in the Service Manual. 13. ELECTRONIC VACUUM REGULATOR VALVE (EVRV) INSPECTION* - Inspect filter for excessive contamination or plugging. If required, clean element witha solution of biodegradable soap and water, let dry and reinstall element. 14. ENGINE TIMING CHECK AND DISTRIBUTOR CHECK (SOME MODELS)*$ - Adjust timing to underhood label specifications.
2 I . THERMOSTATICALLY CONTROLLED ENGINE COOLING FAN INSPECTIONAI/ - (If so equipped.) Inspect all hoses and ducts for proper hook-up. Be sure the valve works properly. 22. EXHAUST PRESSURE REGULATOR VALVE INSPECTION”Check that the valve works properly,Correct any binding. Inspect hoses for cracks, chafing or decay. Replace parts as needed. 23.
25. BRAKE SYSTEM INSPECTION?- When the engine oil is changed, inspect the lines and hoses for proper hookup, binding, leaks, cracks, chafing, etc. Check the parking brake adjust, and thefluid level in the master cylinder. A low fluid level can indicate worn disc brake pads which may need to be serviced. When the wheels are removed for rotation, inspect disc brakepads for wear and rotorsfor surface condition. Also inspect drum brakelinings for wear and cracks.
I . Before you start, be sure you have enough room around the vehicle. 2. Firmly apply both the manual parking brake and the Ye‘@lar brake. See “Brakes” and “Parking Brake” in the Index. Do not use the accelerator pedal. 3. Be ready to turn off the engine immediately if it starts. 4. On automatic transmission vehicles, try to start the engine in each gear. The starter should work only in “P’ (Park) or “N” (Neutral).
Lap and Shoulder Belts Condition and Operation - Inspect belt system, including webbing, buckles, latch plates, retractors, guide loops and anchors. Have a belt assembly replaced if the webbing has been cutor otherwise damaged. Body Lubrication Service- Lubricate all body door hinges with engine oil. Also lubricate the tailgate, tailgate handle pivot points, and tailgate mounted spare tire carrier (if equipped).
Recommended FIuids & Lubricants NOTE: Fluids and lubricants identified below by name, part number or specification may be obtained from your GM Dealer. USAGE FLUIDLUBRICANT Engine Oil -Gasoline Engines API service SH or SG Energy Conserving I1 oils of the recommended viscosity. The “SH” designation may be shown alone or in combination with others, such as “SH/CD,” “SH, SG, CD,”“SG/CD,” etc. To determine the preferred viscosity for your vehicle’s engine, see “Engine Oil” in the Index.
USAGE FLUIDLLUBRICANT Manual Transmission: 5-Speed (RPO MG5) Synchromesh Transmission Fluid (GM Part No. I2345349 or equivalent). Differential: a. Standard (Saginaw) Front and Rear Axle a. Axle Lubricant (GM Part No. 105227I ) or SAE-80W-90 Gear Lubricant. b. Locking b. Axle Lubricant (GM Part No. 1052271) or SAE-SOW-90 Gear Lubricant. Transfer Case D E X R O N ~111 or D E X R O N ~IIE Automatic Transmission Fluid. Gas Line De-Icer (GM Part No. 10515 16 or equivalent).
USAGE Key Lock Cylinders FLUIDLUBRICANT Engine Oil (GM Part No. 1050109 or equivalent) ora synthetic light weight engine oil (SAE 5W-30). Chassis Lubrication Chassis Lubricant(GM Part No. I2346003 or equivalent) orlubricant meeting requirements of NLGI Grade 2, Category LB or GC-LB. Windshield Washer Solvent and Anti-Freeze Weatherstrip Squeaks GM Optikleen washer solvent (GM Part No. 105I5 15 or equivalent). Spray-A-Squeek (GM Part No. 1052277). Dielectric Silicone Grease (GM Part No.
Maintenance Record After each of the preceding Scheduled Maintenance Services is performed, record the date, odometer reading, services performed (listitem numbers) and who performed the services in the appropriate column. In addition, retain copies of your receipts. Itis suggested that receipts be kept withyour Owner's Manual.
Service Station Checks It is important for you or a service station attendant to perform these under-hood checks at each fuel fill. Check the engine oil level and add if necessary. Check the engine coolantlevel in the recovery bottle and add if necessary. Check the windshield washer fluid level and add if necessary. See these items in the Index for information on how to check them.
' Secondary Hood Release See Page 6-14. Battery Your vehicle's Delco Freedom battery never needs t o have water added. See Page 6-49. ILL \ a Cooling System Check and add coolant only at the coolant recovery tank (gasoline engine) or only at the coolant surge tank (diesel engine). The fluid level should be at the COLD mark. See Page 6-35. \ 1 ~ Transmission Fluid See Page 6-28. \ Cold Tire Pressure See the Certificationflire label on the inside rear edge of the driver's door. See Page 6-62.
Customer AssistanceInformation Section Here you will find outhow to contact Chevroletif you need assistance. This section also tellsyou how to obtain service publications and how to report any safety defects. Customer Satisfaction Procedure . . . . . . . . . . . . . . . . . . . . . . . . . . . . . . . 8-2 Customer Assistance for the Hearing or Speech Impaired (TDD) . . . . . 8-3 GM Participation in BBB AUTO LINE - Alternative Dispute Resolution Program . . . . . . . . . . . . . . . . . . . . . . . . . .
Customer Satisfaction Procedure Your satisfaction and goodwill areimportant to your dealer and Chevrolet. Normally, any concern with the sales transaction or the operation of your vehicle will be resolved by your dealer’s Sales or Service Departments. Sometimes, however, despite the best intentions of all concerned, misunderstandings canoccur.
When contacting Chevrolet, please rememberthat your concern will likely be resolved in the dealership, using the dealership’s facilities, equipment and personnel. That iswhy we suggest you follow Step One firstif you have a concern. Customer Assistance for the Hearing or Speech Impaired (TDD) To assist customers whohave hearing difficulties, Chevrolet has installed special TDD (Telecommunication Devices for the Deaf) equipmentat its Customer Assistance Center.
To file a claim,you will be asked to provide your name and address, your vehicle identification number (VIN), and a statement of the nature of your complaint. Eligibility is limited by vehicle age and mileage, and other factors. We prefer you utilize the customer satisfaction procedure before you resort to AUTO LINE, but you may contact the BBB at any time. The BBB will attempt toresolve the complaint serving as an intermediary between you and Chevrolet.
REPORTING SAFETYDEFECTS TO THE CANADIAN GOVERNMENT If you live in Canada, and you believe that your vehicle hasa safety defect, you should immediately notify Transport Canada, in addition to notifying General Motors of Canada Limited. You may write to: Transport Canada,Box 8880 Ottawa, Ontario K1G 352 REPORTING SAFETY DEFECTSTO GENERAL MOTORS In addition to notifying NHTSA (or TransportCanada) in a situation like this, we certainly hope you’ll notify us.
Chevrolet Roadside Assistance Program To enhance Chevrolet’s strong commitment to customersatisfaction, Chevrolet is excited to provide the services of the ChevroletlGeo Roadside Assistance Center. 24-Hour Roadside AssistanceNumber Roadside Assistance is available 24 hours a day, 365 days a year, by calling I-800-CHEV USA (1-800-243-8872). This toll-free number will provide you over-the-phone roadside assistance with minor mechanical problems.
Courtesy Transportation Chevrolet/Geo offers Courtesy Transportationfor customers needing warranty service. Courtesy Transportation will be offered in TO conjunction with the coverage provided by the BUMPER BUMPER New Vehicle Limited Warranty to retail purchasers of1994 ChevroletIGeo passengercar and light duty trucks. In Canada, please consult yourGM Dealer for information on courtesy transportation. COURTESY TRANSPORTATION INCLUDES: 0 One way SHUTTLE RIDE for any warranty repair.
Bulletins cover various subjects. Some pertain to the proper use and care of your vehicle. Some describecostly repairs. Others describe inexpensive repairs which, if done on time with the latest parts, may avoid future costly repairs. Some bulletins tell a technician how to repair a new or unexpected condition. Others describe a quicker way to fix your vehicle. They can help a technician service your vehicle better. Most bulletins apply to conditionsaffecting a small number of cars or trucks.
Toll-Free Telephone Number If you want an additional orderingform for an index,just call toll-free and we’ll be happy to send you one. Automated recording equipment will take your name and mailingaddress. The number to callis 1-800-55 14123. Copies at Participating Dealers Copies of Indexes and individual PSP’s are at your participating Chevrolet dealer. You can ask to see them. A VERY IMPORTANT REMINDER: These PSP’s are meant for technicians. Theyare not meant for the “do-it-yourselfer.
I i s i= cn w c I 2 0 t 4 a P P L I I I I I
Index A Aircleaner . . . . . . . . . . . . . . . . . . . . . . . . . . . . . . . . . . . . . . . . . . . . . . . . . . . 6-27 Air Conditioning . . . . . . . . . . . . . . . . . . . . . . . . . . . . . . . . . . . . . . . . . . . . 36.5.8,3 Rear (Wagon Models) . . . . . . . . . . . . . . . . . . . . . . . . . . . . . . . . . . . . . . . . . . . 3-8 Refrigerant Capacity . . . . . . . . . . . . . . . . . . . . . . . . . . . . . . . . . . . . . . . . . . . 6-83 SystemControls . . . . . . . . . . . . . . . . . .
C Capacities and Specification Charts . . . . . . . . . . . . . . . . . . . . . . . . . . . . . . . . . . . . . . . . . . . . . . . . . . . . . . 6-81 Carbon Monoxide . . . . . . . . . . . . . . . . . . . . . . . . . . . . . . . . . . . . . 2-3 1,4-33, 4-4 1 Cassette Tape Player (see “Audio Systems” ) Catalytic Converter . . . . . . . . . . . . . . . . . . . . . . . . . . . . . . . . . . . . . . . . . . . . . . 6-58 CertificatiodTire Label . . . . . . . . . . . . . . . . . . . . . . . . . . . . . . . . . .
Driving (continued) Braking . . . . . . . . . . . . . . . . . . . . . . . . . . . . . . . . . . . . . . . . . . . . . . . . . . . . . . 4-5 4-4 Control of A Vehicle . . . . . . . . . . . . . . . . . . . . . . . . . . . . . . . . . . . . . . . . . . . . 4-2 Defensive . . . . . . . . . . . . . . . . . . . . . . . . . . . . . . . . . . . . . . . . . . . . . . . . . . . . Downhill . . . . . . . . . . . . . . . . . . . . . . . . . . . . . . . . . . . . . . . . . . . . . . . . . . . . 4-18 4-27 Freeway . . . . .
FanNoise . . . . . . . . . . . . . . . . . . . . . . . . . . . . . . . . . . . . . . . . . . . . . . . . . . . . . . 5-24 Filter Replacement Chart . . . . . . . . . . . . . . . . . . . . . . . . . . . . . . . . . . . . . . . . . . 6-83 Finish 6-69 Care . . . . . . . . . . . . . . . . . . . . . . . . . . . . . . . . . . . . . . . . . . . . . . . . . . . . . . . . Damage . . . . . . . . . . . . . . . . . . . . . . . . . . . . . . . . . . . . . . . . . . . . . . . . . . . . . 6-76 Fluid AutomaticTransmission .
HalogenBulbs . . . . . . . . . . . . . . . . . . . . . . . . . . . . . . . . . . . . . . . . . . . . . . . . . .6-50 Hazard Warning Flashers . . . . . . . . . . . . . . . . . . . . . . . . . . . . . . . . . . . . . . . . . . . 5-2 HeadRestraints . . . . . . . . . . . . . . . . . . . . . . . . . . . . . . . . . . . . . . . . . . . . . . . . . . 1-5 Headlights . . . . . . . . . . . . . . . . . . . . . . . . . . . . . . . . . . . . . . . . . . . . . . . . 2-47, 6-50 6-51 Composite . . . . . . . . . . . . . . .
L Lights . . . . . . . . . . . . . . . . . . . . . . . . . . . . . . . . . . . . . . . . . . . . . . . . . . . . . 2-47 Brake SystemWarning . . . . . . . . . . . . . . . . . . . . . . . . . . . . . . . . . . . . . . . . . 2-67 Bulb Replacement . . . . . . . . . . . . . . . . . . . . . . . . . . . . . . . . . . . . . . . . . . . . . 6-86 Charging System Light . . . . . . . . . . . . . . . . . . . . . . . . . . . . . . . . . . . . . . . . . 2-70 CheckGagesLight . . . . . . . . . . . . . . . . . . . . . . . .
Odometer . . . . . . . . . . . . . . . . . . . . . . . . . . . . . . . . . . . . . . . . . . . . . . . . . . . . . . 2-65 Off-Road Driving (See "Driving") Off-RoadRecovery . . . . . . . . . . . . . . . . . . . . . . . . . . . . . . . . . . . . . . . . . . . 4-23 Oil . . . . . . . . . . . . . . . . . . . . . . . . . . . . . . . . . . . . . . . . . . . . . . . . . . . . . .6-16.6-22 Additives . . . . . . . . . . . . . . . . . . . . . . . . . . . . . . . . . . . . . . . . . . . . . . .
Safety Belts (continued) Extender . . . . . . . . . . . . . . . . . . . . . . . . . . . . . . . . . . . . . . . . . . . . . . . . . . . . 1-42 Lapshoulder . . . . . . . . . . . . . . . . . . . . . . . . . . . . . . . . . . . . . . . . . . . . . . . . . 1-29 LargerChildren . . . . . . . . . . . . . . . . . . . . . . . . . . . . . . . . . . . . . . . . . . . . . . . 1-40 Properwear . . . . . . . . . . . . . . . . . . . . . . . . . . . . . . . . . . . . . . . . . . . . . . . . . 1-18 Questions & Answers . . .
T Tachometer . . . . . . . . . . . . . . . . . . . . . . . . . . . . . . . . . . . . . . . . . . . . . . . . . . . . . 2-74 Tailgate . . . . . . . . . . . . . . . . . . . . . . . . . . . . . . . . . . . . . . . . . . . . . . . . . . . . . . . . . 2-8 Theft . . . . . . . . . . . . . . . . . . . . . . . . . . . . . . . . . . . . . . . . . . . . . . . . . . . . . . . . . . 2-10 6-40 Thermostat . . . . . . . . . . . . . . . . . . . . . . . . . . . . . . . . . . . . . . . . . . . . . . . . . . . . . Tiltwheel .
W Warning Lights. Gages and Indicators . . . . . . . . . . . . . . . . . . . . . . . . . . . . . . . . 2-66 (Also See "Lights")Bevices. Other . . . . . . . . . . . . . . . . . . . . . . . . . . . . . . . . . 5-3 Wheels Alignment and Tire Balance . . . . . . . . . . . . . . . . . . . . . . . . . . . . . . . . . . . . . 6-67 Aluminum . . . . . . . . . . . . . . . . . . . . . . . . . . . . . . . . . . . . . . . . . . . . . . . . . . . 6-75 Hub CapsNheel Nut Caps . . . . . . . . . . . . . . . . . . . . . . . .
C - 9409 I t .' B CERTIFIED t -Y d WE SUPPORT VOLUNTARY TECHNICIAN CERTIFICATION THROUGH National Institute for AUTOMOTIVE SERVICE EXCELLENCE ..