A
Supplement to the 1995 C/K Series, Sierra, Suburban, Tahoe, Yukon, Safari, Astro, Rally, Vandura, Chevrolet Van, Lumina Minivan and Trans Sport Owner’s Manuals This supplement includesthe latest information at the time ofprinting. We reserve the right to make changes in the product afer that time withoutfirther notice. For vehiclescfirst sold in Canada, substitute the name “General Motors of Canada” for General Motors wherever it appears in this manual. @Copyright1995 General Motors Corporation.
As of SeptemberI , 1995, this information replaces Step 7 of the “Securing a Child Restraint in a Center Seat Position” portion of your owner’s manualon the following pages, depending onyour vehicle: CIK Series, Sierra:1-39 Suburban, Tahoe and Yukon:1-45 Rally, Vanduraand Chevy Van: 1-36 Astro and Safari: 1-37 Lumina and naris Sport: 1-56 7. Push and pull the child restraintin different directions tobe sure it is secure.
Table of Contents Introduction - How to Use this Manual This section tells you how to use your manual and includes safety and vehicle damage warnings and symbols. Section 1 - Seats and Restraint Systems This section tells you how to use your seats and safety belts properly. It also explainsthe air bag system. Section 2 - Features & Controls This section explains how to start and operate your vehicle.
Introduction 1995 Chevrolet Astro Owner’s Manual Welcome This manual was prepared to acquaint you with the operation and maintenance of your 1995 Chevrolet Astroand to provide important safety information. There is also a Chevrolet Truck Warranty and Owner Assistance Information booklet. In some vehicles, there can be information manuals from other manufacturers like body builders or special equipment companies. We urge you to review all these publications carefully.
Important Notesto Owners and Drivers Abouf This Manual Please keep this manual in your vehicle so it will be there if you ever need it when you’re on the road. If you sell the vehicle, please leave this manual in it so the new owner can use it. This manual includes the latest informationat the time it was printed. We reserve the right to make changes in the product after that time without further notice.
Model Reference This manual covers these models: Cargo Model Passenger Model How to Use This Manual Many people read their owner’s manual from beginning to end when they first receivetheir new vehicle. This will help you learn about the features and controls foryour vehicle. In this manual, you’ll find that pictures and words work together to explain things quickly. INDEX: A good place to look for what you need is the Index in back of the manual.
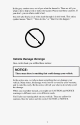
In the gray caution area,we tell you what the hazard is. Then we tell you what to do tohelp avoid or reduce the hazard. Please read these cautions.If you don’t, you or others could be hurt. You will also find a circlewith a slash through itin this book. This safety symbol means “Don’t,” “Don’t do this,’’ or “Don’t let this happen.” Vehicle Damage Warnings Also, in this book you will find these notices: NOTICE: These mean there is something that could damage your vehicle.
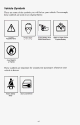
Vehicle Symbols These are some of the symbols you will find on your vehicle.
These symbols have to do with your lights: I Master Lighting Switch 1 P=Parking Lights I Turn Signal Direction I Hazard Warning Flasher I I Headlight High Beam I Daytime Running Lights These symbols are on some of your controls: Hood Release Windshield Wiper Windshield Washer r Ventilating Fan Rear Window Wiper 6: Washer Windshield Defroster l Rear Window Defogger vii Hatch Release
These symbols are used on warning and indicator lights: I I Engine Coolant Temperature Fue I System I I Brake (Digital Cluster) Engine Oil Pressure I 4 - Wheel Anti - Lock (Digital Cluster) Here are some other symbols you may see: I Fuse Lighter Horn viii Speaker
Seats and Restraint Systems Section Here you’ll find information about the seats in your vehicle and how to use your safety belts properly. You can also learn about some things you should nut do with air bags and safety belts. Seats and Seat Controls This section tells you about the seats-how to adjust them, take them out and put them back in. It also tells you about bucket and bench seats, power seats, and head restraints.
Manual Front Seat The bucket seats can be adjusted forward or rearward by the lever at the front of the seat. Move the seatadjustment lever at the front of the seat towards the driver's door to unlock it. Slidethe seat to where you want it. Then release the lever and try to move the seat with your body, to make sure the seat is locked into place. Power Driver's Seat You can adjust the seat before entering the vehicle. The front controlmakes the front of the seat go up and down.
Reclining Bucket Seats If you have this feature, you will have a lever on the inside of the seat to adjust the seatback. You can adjust the seatback by lifting the lever. Release the lever to lock the seat back where you want it. Pull up on the lever and the seat will go to an upright position. But don't have a seatback reclined if your vehicle is moving.
The lap belt can’t do its job either. In a crash thebelt could go Rear Seats Bucket Seats If you have rearbucket seats in your vehicle, they will recline and adjust the same way as the frontmanual bucket seats. See“Front Seats” earlier in this section or in the Index. Bench Seats If you have bench seats in your vehicle, each seat can carry up to three passengers. They can also be removed to increase storage space.
Move the seat adjustment leverat the front of the seat towards the passenger’s side to unlock it. Slide the seat towhere you want it. Then release the lever and try to move the seat with your body, to make sure the seat is locked into place. The non-touring center bench seat has a pivoting right armrest. The left armrest can also be used as a storage compartment. The storage compartment and beverage cooler can also be used as rear seat armrests. See “StorageCompartments” in the Index.
To raise or lower the center console,press the button between the beverage holders. Only sit in the center seating position when the console is in an upright position. For details about headrests, see “Head Restraints’’ inthis section. Seatback Latches (Non-Touring BenchSeats) To fold your non-touring seatback forward, pull up on the latch release lever while pulling the seatback toward you. The lever is on the right rear of your seat.
Removable Seats (Touring and Non-Touring Bench Seats) To Remove The Seat 1. Disconnect the quick release latch plates forthe lap-shoulder belt from the buckles in the roof. 1 BELTFOR \ SEAT REMOVAL II 1, I .-+- INTO HOLE :";=I I I I 2. If you are removing the center seat,remove the right lapshoulder belt. To do this, press the tipof a key into the release holeof the safetybelt attachment while pullingup on the safety belt.
3. If you have a safety belt guide on your seat, pull the safety belt all the way out through the guide. 4. Pull up on the seatback latch on the right rear of the front seat. Push the seatback down until it locks in place (non-touring bench seats only). 5. Lift up on the seat release latch. The latches are near the floor on the rear legs of the seat. To relieve pressure on the latch, pull back on the seat. 6. Lift up on the rear of the seat to remove the seat assembly from the rear latch pins.
To Install The Seat 1. Lower the seat into position. Make sure the front retainers are hooked onto the anchorpins. Pull the seatdown to latch the rear retainers. Make sure the seat islocked in by pulling up and down on the seat. ~~ A CAUTION: A seat that isn’t locked into place properly canmove around in a collision or sudden stop. Peoplein the vehicle could be injured. Be sure to lock the seat intoplace properly when installing it. 2.
3. Attach the quick release latch plateto the buckles in the roof. If you are installing the center seat, colinect the right lap-shoulder belt to the attachment on the seat cushion. If you have a safety belt guide on your seat, pull the belt through the guide before reattaching the lap-shoulder belt to the sideof the seat. The releasehole should be facing outward. NOTICE: Be sure to put the correct seats back in the proper positionsso the safety belts willwork properly.
A CAUTION: Don’t letanyone ride where he or she can’t wear a safety belt properly. If you are in a crash andyou’re not wearing a safety belt, your injuriescan be much worse.You can hit things inside the vehicle or be ejected from it. You can be seriously injured or killed. In the same crash, you might not be if you are buckled up. Always fasten your safety belt,and check that your passengers’ beltsare fastened properly too. Your vehicle has a light that comes on as a reminder to buckle up.
Why SafefyBelts Work When you ride in or on anything, you go as fast as it goes. Take the simplest vehicle. Suppose it's just a seat on wheels. 1 Put someone on it. . Get it up to speed. Then stop the vehicle. The rider doesn't stop. .
The person keeps going until stopped by something. In a real vehicle, it could be the windshield ... or the instrument panel ...
With safety belts, you slow down as the vehicle does. You get more time to stop. You stop overmore distance, and your strongest bones take the forces, That’s why safety belts make such good sense. Here Are QuestionsMany People Ask About Safety Belts and the Answers - 0:Won’t I be trapped in the vehicle after an accident if I’m wearing a safety belt? A: You could be - whether you’re wearing a safety belt or not. But you can unbuckle a safety belt, even if you’re upside down.
How to Wear Safety Belts Properly Adults This part is only for people of adult size. Be aware that there are special thingsknow to about safety belts and children. And there are different rules for smallerchildren and babies. If a child will be riding in your vehicle, see the partof this manual called “Children.” Follow those rules for everyone’s protection. First, you’ll want to know which restraint systems your vehicle has. We’ll start with the driver position.
Make surethe release button on the buckle is positioned so you would be able tounbuckle the safety belt quickly if you ever had to. 5. To make the lap part tight, pull down on the buckle end of the belt as you pull up on the shoulder belt. The lap part of the belt should be worn low and snug on the hips, just touching the thighs. In a crash, this applies force to the strong pelvic bones. And you’d be lesslikely to slide under the lap belt. If you slid under it, the belt would apply forceat your abdomen.
Shoulder Belt Height Adjuster Before you begin to drive, move the shoulder belt adjuster to the height that is right foryou. To move it down,push in at the top of the arrows and move the height adjuster tothe desired position.You can move the adjusterup just by pushing up on the shoulder belt guide. After you move the adjusterto where you want it, try to move it down without pushing in to make sure it has locked into position.
Q: What’s wrong with this? A: The belt is over an armrest.
Q: What's wrong with this? A: The shoulder belt is worn under the arm. It should be worn over the shoulder atall times. A CAUTION: , .. . , ... , ." . - . . . ._ : a-,- You can be seriouslyinjured if youpwear the shoulder belt under your arm.In a crash, your body would move toofar forward, which would increase the chance of head and neck injury. Also, the belt would apply too muchforce to the ribs, which aren't as strong as shoulder bones.
Q: What's wrong with this? A: The belt is twisted across the body. A I CAUTION: You can be seriously injured by a twisted belt. In a crash, you wouldn't have the full widthof the beltto spread impact forces. If a beltis twisted, makeit straight so it can work properly, or ask your dealerto fix it. To unlatch the belt, just push the button on the buckle. The belt should go back out of the way. Before you close the door, be sure the belt is out of the way.
1-21
There is an air bag readiness light on the instrument panel, which shows AIR BAG. The system checks the air bag’s electrical system for malfunctions. Thelight tells you if there is an electrical problem. See “Air Bag Readiness Light” in the Index for more information. How the Air Bag System Works Where is the air bag? The driver’s facial air bag is in the middle of the steering wheel.
A CAUTION: Don’t put anythingon, or attach anything to, the steering wheel. Also, don’t put anything (such as pets or objects) between the driver and the steering wheel. If something is between an occupant and an air bag, it could affect the performance of the air bag- or worse, it could cause injury. When should an air bag inflate? The air bag is designed to inflate in moderate to severe frontal or near-frontal crashes.
What will you seeafter an airbag inflates? After the airbag inflates, it quickly deflates. This occursso quickly that some people may not even realize the air bag inflated. Some components of the air bag module in the steering wheel hub will be hot for a short time, but the part of the bag that comes into contactwith you will not be hot to the touch. Therewill be some smoke coming from vents in the deflated air bag.
Servicing Your Facial Air Bag-Equipped Vehicle The facial air bag affects how your vehicle should be serviced.There are parts of the airbag system in several places around your vehicle. You don’t want the system to inflate while someone is working on your vehicle. Your GM dealer and the 1995 GM Service Manual have information about servicing your vehicle and the air bag system. To purchase a service manual, see “Service Publications”in the Index. The airbag system does not need regular maintenance.
Safety Belt Use During Pregnancy Safety belts work for everyone,including pregnant women. Like all occupants, they are more likely to be seriously injured if they don’t wear safety belts. A pregnant woman should wear a lap-shoulder belt, and the lap portion should be worn as low as possible throughout the pregnancy. A The best way to protect the fetus is to protect the mother. When a safety belt is worn properly, it’s more likely that the fetus won’t be hurt in a crash.
Rear Seat Outside Passenger Positions Lap-Shoulder Belt These positions have lap-shoulder belts. Here’s how to wear one properly. 1. Pick up the latch plate and pull it across you. Don’t let it get twisted. 2. Push the latch plate into the buckle until it clicks. If the belt stops before it reaches thebuckle, tilt the latch plate and keep pulling until you can buckle it. Pull up on the latch plate to make sure it is secure.
3. To make the lap part tight, pull down on the buckle end of the belt as you pull up on the shoulder part. The lappart of the belt should be worn low and snug on the hips, just touching the thighs. In a crash, this applies force to the strong pelvic bones. And you’d be less likely to slide under the lap belt. If you slid under it, the belt would apply force atyour abdomen. This could cause serious oreven fatal injuries. The shoulder belt should go over the shoulder and across the chest.
To unlatch the belt, just push the button on the buckle.
Lap Belt If your vehicle has rear bench seats, someone can sit in the center positions. When you sit in a center seating position, you have a lap safety belt, which has no retractor. To make the belt longer, tilt the latch plate and pull it along the belt. To make the belt shorter, pull its freeend as shown until the belt is snug. Buckle, position and release it the same way as the lap part of a lap-shoulder belt. If the belt isn’t long enough, see “Safety Belt Extender” at the end of this section.
Children Everyone in a vehicle needs protection! That includes infantsand all children smaller than adult size.In fact, the law in every state in the United States and in every Canadian province says childrenup to some age must be restrained while in a vehicle.
? Child Restraints Be sure to followthe instructions forthe restraint. You may find these instructions on therestraint itself or in a booklet, or both. These restraints use the belt system in your vehicle, but the child also has to be secured within the restraint to help reducethe chance of personal injury. The instructions that come with the infant or child restraint will show you how to do that.
Keep in mind that an unsecured child restraint can move around in a collision or sudden stop and injure people in the vehicle. Be sure toproperly secure any child restraint in your vehicle -even when no child is init. Top Strap If your child restraint has a top strap, it should be anchored. If YOU need to have an anchor installed, you can ask your GM dealer to put it in for you. If you want to install an anchor yourself, your dealer can tell you how to do it.
3. Pick up the latch plate, and run the lap and shoulder portions of the vehicle’s safety belt through or around the restraint. The child restraint instructions will show you how. Tilt the latch plate to adjust the belt if needed. If the shoulderbelt goes in front of the child’s face orneck, put it behind the child restraint. 4. Buckle the belt. Make sure the release button is positioned so you would be able tounbuckle the safety belt quickly if you ever had to.
5. To tighten the belt, pull up on the shoulder belt while you push down on the child restraint. 6. Push and pull the child restraint in different directions to be sure it is secure. To remove the child restraint, justunbuckle the vehicle’s safety belt and let it go back all the way. The safety belt will move freely again and be ready to work for an adult or larger child passenger. Securing a Child Restraint a inCenter Seat Position (Bench Seat) You’ll be using the lap belt.
1. Make the belt as long as possible by tilting the latch plate and pulling it along the belt. .. 2. Put the restraint on the seat. Follow the instructions for the child restraint. 3. Secure the child in the child restraint as the instructions say. 4. Run the vehicle’s safety belt through or around the restraint. The child restraint instructions will show you how. 5. Buckle the belt. Make sure the release button is positioned so you would be able tounbuckle the safety belt quickly if you ever had to.
6. To tighten the belt, pull its free end while you push down on the child restraint. 7. Push and pull the child restraint in different directions to be sure it is secure. If the child restraint isn’t secure, turn the latch plate over and buckle it again. Then see if it is secure. If it isn’t, secure the restraint in a different place in the vehicle and contact the child restraint maker for their advice about how to attach the child restraint properly.
4. Buckle the belt. Make sure the release button is positioned so you would be able to unbuckle the safety belt quickly if you ever had to. 5 . Pull the rest of the shoulder belt all the way out of the retractor to set the lock.
6. To tighten the belt, feed the shoulder belt back into the retractor while you push down on the child restraint. 7. Push and pull the child restraint in different directions to be sure it is secure. To remove the child restraint, justunbuckle the vehicle’s safety belt and let it go back all the way. The safety belt will move freely again and be ready to work for an adult or larger child passenger. Larger Children Children who have outgrown child restraints should wear the vehicle’s safety belts.
Accident statistics show that children are saferif they are restrained in the rear seat. But they need to use the safety belts properly. Children who aren’t buckled up can be thrown out in a crash. 0 Children who aren’t buckled up can strike other people who are.
Wherever the child sits, the lap portion of the belt should be worn low and snug on the hips, just touchingthe child’s thighs. This appliesbelt force to the child’s pelvic bones in a crash. Safety Belt Extender If the vehicle’s safety belt will fasten around you, you should use it. But if a safety belt isn’t long enough to fasten,your dealer will order you an extender. It’s free. When you go in to order it, take the heaviest coat you will wear, so the extenderwill be long enough for you.
Checking Your Restraint Systems Now and then, make sure all your belts, buckles, latch plates, retractors, anchorages and reminder systems areworking properly. Look for any other loose or damaged restraint system parts. If you see anything that might keep a restraint system from doing its job, have it repaired. Torn or frayedbelts may not protect you in a crash. They can rip apart under a one right away. impact forces.
Features & Controls Section Here you can learn about the many standard and optional featureson your vehicle, and information on starting, shifting and braking. Also explained are the instrumentpanel and the warning systems that tell you if everything is working properly - and what to do if you have a problem.
The square-shaped key is for the ignitic3n only. The oval-shaped key is for the doors andall other locks.
\ When a new vehicle is delivered,the dealer removes the plugs from the keys, and gives them to the first owner. how Each plug has a code on it that tells the dealer or a qualified locksmith to make extra keys. Keep the plugs in a safe place.If you lose your keys, you’ll be able to have new ones madeeasily using these plugs. I NOTICE: Your vehicle has a number of new features that can help prevent theft. Butyou can have a lot of trouble getting into your vehicle if you ever lock your keys inside.
Your Doors and How They Work Side Doors To open the front side door from the outside, graspthe handle and pull the door open. To open the front side door from the inside, pull the lever toward you and push the door open.
Sliding Side Door To open the sliding side door, pull the handle toward the back and slide the door to the rear until it latches in the open position. To close the sliding sidedoor, pull the handle toward the front to release the rear latch,and slide the door forward.
Rear Doors If you have the Dutch doors, you must open the hatch first. To open the rear doors from the outside, open the right rear door first. Grasp the handle and pull the door open. To open the left rear door, pull on the latch release handle in the inside of the door. To close therear doors, close theleft door first. Check to make sure both doors arecompletely closed. The rear doorshave a check assembly to keep the doors from opening beyond 90".
To fully open the doors, push in on the clip and lift the check assembly up off the mounting bracket. Do this on each door. Replace the assemblies the same way. ..^ See the cautionunder “Swing-Out Windows” in this section. Door Locks A CAUTION: Unlocked doorscan be dangerous.
There are several ways to lock and unlock your vehicle: From the outside: Use your door key. From the inside: To lock front doors and sliding side door, slide the lock levers down. To unlock the front doors and the sliding side door from the inside: Slide the lock levers up. Rear doors cannot be manually locked from the inside. To unlock the rear hatch and Dutch doors from the inside: Push the top of the HATCH REL switch.
Rear Hatch and Dutch Doors Release If you have this option,your vehicle must be in eitherPARK (P) or NEUTRAL (N) to release the hatchand unlock the Dutch doors. If your battery is dead, the hatchand doors will not open, even from the outside with a key. To release the hatch and unlock the doors from the insideof the vehicle, press the HATCH REL switch on the instrument panel. It is located on the driver’s side of the steering column. The hatch will release with or without the key in the ignition.
Power DoorLocks If your vehicle has power door locks, push the power door lock switch to lock or unlock all the doors at once. The power door lock switch will not lock or unlock the rear hatch and Dutch doors. You must use the HATCH REL switch. See “Rear Hatch and Dutch Doors Release’’ in this section. Every vehicle with power door locks has a pulse lock system.
This device complies with Part 15 of the FCC Rules. Operationis subject to the following two conditions:(1) This device may not cause harmful interference, and (2) This devicemust accept any interference received, including interferencethat may cause undesired operation. Should interference tothis system occur, try this: 0 Check to determineif battery replacement is necessary. See the instructions onbattery replacement. Check the distance. You may be too far from your vehicle.
Battery Replacement Under norlnal use, the batteries in your key chain transmitter should last about two years. You can tell the batteries are weak if the transmitter won’t work at the normal range in any location. If you have to get close to your vehicle before the transmitter works,it’s probably time to change the batteries. Your transmitter housing snaps apart for easein battery replacement. To open the housing: 1. Insert a dime between two halves of the transmitter housing near the key ring hole. 2.
Parking at Night Parking Lots If you park in a lot where someone will be watching your vehicle, it’s best to lock it up and take your keys. But what if you have to leave your ignition key? What if you have to leave something valuable in your vehicle? 0 Put your valuables in a storage area out of sight. 0 Lock all the doors except the driver’s. 0 Then take the door key with you. New Vehicle “Break-In” NOTICE: Your modern vehicle doesn’t need an elaborate“break-in.
Ignition Switch Use your ignition key to start your vehicle. The ignition key lets you turn the ignition switch to fivedifferent positions. 1. OFF 2 2. RUN 3. START 4. ACC 5 5. LOCK ACC (Accessory) -ACC lets you use things like the radio and the windshield wipers when the engine is off. To get intoACC, push in the key and turn it toward you. Your steering wheel will remain locked, justas it was before you inserted the key.
NOTICE: If your key seems stuck in LOCK and you can’t turn it, be sure it is all the way in. If it is, then turn the steeringwheel left and right while you turn the key hard. But turn thekey only with key or the your hand. Usinga tool to force it could break the ignition switch. If none of this works, then your vehicle needs service. Starting Your Engine Move your shift leverto PARK (P) or NEUTRAL (N). Your engine won’t start in any other position -that’s a safety feature.
3. If your engine still won’t start, wait 15 seconds to let the starter motor cool down and do it all again. When the engine starts, let go of the key and the accelerator pedal. NOTICE: Your engine is designed to work with the electronics in your vehicle. If you add electrical parts oraccessories, you could change theway the fuel injection system operates. Before adding electrical equipment, check with your dealer. you If don’t, your engine might not perform properly.
Engine Coolant Heater (Option) 1. Engine Coolant Heater Strap 2. Engine Coolant Heater Cap In very cold weather, 0"F (-1 8 C ) or colder, the engine coolant heatercan help. You'll get easier startingand better fueleconomy during engine warm-up. Usually, the coolant heatershould be plugged in a minimum of four hoursprior to starting your vehicle. O To use the coolant heater: 1. Turn off the engine. 2. Open the hood and unwrap the electrical cord. 3. Plug it into a normal, grounded 110-volt outlet.
How long should you keep the coolant heater plugged in? Theanswer depends on the weather, the kind of oil you have, and some other things. Instead of trying to list everything here, we ask that you contact your GM dealer in the area where you’ll be parking your vehicle. The dealer can give you the best advice forthat particular area. Automatic Transmission There are several different positions for your shift lever. 0 PARK (P) -This locks your rear wheels.
Ensure the shift leveris fully in PARK (P) range before startingthe engine. Your vehicle has abrake-transmission shift interlock.You have to fully apply your regular brakes beforeyou can shift from PARK (P) when the ignition key is in the RUN position. If you cannot shift out of PARK (P), ease pressure on the shift lever- push the shift leverall the way into PARK (P) as you maintain brake application.Then move the shift leverinto the gear you wish. See “Shifting Out of PARK (P)” in this section.
0 OVERDRIVE (0) This position is for normal driving. If you need more power for passing, and you’re: - Going less than about 35 mph (56 km/h), push your accelerator pedal about halfway down. - Going about 35 mph (56 km/h) or more, push the accelerator pedal all the way down. You’ll shift down to the next gear and have more power. should not be used when towing a trailer, carrying a OVERDRIVE (0) heavy load, or drivingon steep hills.
Parking Brake To Set the Parking Brake Hold the regular brake pedal down with your right foot. Push down the parking brake pedal with your left foot. If the ignition is on, the brake system warning light will come on. To Release the Parking Brake Hold the regular brake pedal down. Pull the brake release lever. NOTICE: Driving with the parking brake on can cause your rear brakes to overheat. You may have to replace them, and you could also damage other partsof your vehicle.
Locking Rear Axle If you have this feature, your rear axle can give you additional traction on snow, mud, ice, sand or gravel. It works like a standard axle most of the time, but when one of the rear wheels has no traction and the other does,the locking featurewill allow the wheel with traction to move the vehicle. Shifting Into PARK (P) 1 . Hold the brake pedal down with your right foot and set the parking brake. 2. Move the shift lever into PARK (P) position like this: Pull the lever toward you.
Leaving Your Vehicle With the Engine Running If you have to leave your vehicle with the engine running, be sureyour vehicle is in PARK (P) and your parking brake is firmly setbefore you leave PARK (P) position, hold the it. After you’ve moved the shift lever into the regular brake pedal down. Then, see if you can move the shift leveraway from PARK (P) without first pullingit toward you. If you can, it means that the shift leverwasn’t fully locked into PARK (P).
Shifting Out of PARK (P) Your vehicle has a brake-transmission shift interlock.You have to fully apply your regular brake before you can shift from PARK (P) when the ignition is in the RUN position. See “Automatic Transmission” in the Index, If you cannot shift outof PARK (P), easepressure on the shift lever- push the shift lever all theway into PARK (P) asyou maintain brake application. Then move the shiftlever into the gearyou want.
Engine Exhaust 2-25
Running Your Engine While You’re Parked It’s better not to park with the engine running. But if you ever have to, here are some things to know. Follow the proper steps to be sure your vehicle won’t move. See “Shifting Into PARK (P)” in the Index. If you’re pulling a trailer, see “Towing a Trailer” in the Index.
All- Wheel Drive (Option) If your vehicle has all-wheel drive, your engine’s driving power is sent to all four wheels for extra traction, This is like four-wheel drive, but there is no separate lever or switch to engage or disengage the front axle. It is fully automatic, and adjusts itself as needed for road conditions. Windows To open your manual windows, tt.u-n the hand crank on each door to raise or lower your side door windows.
Swing-Out Windows To open your swing-out windows, pull up on the latch and push the window out. To close the window, pull the latch toward you and push it down.
Horn To sound the horn, press the pads on the steering wheel with the horn symbols. Tilt Wheel (Option) A tilt steering wheel allows you to adjust the steering wheel before you drive. You can also raise it to the highest level to give your legs more room when you exit and enter the vehicle. To tilt the wheel, hold the steering wheel and pull the lever. Move the steering wheel to a comfortable level, then release the lever to lock the wheel in place.
Multifunction Lever The lever on the driver’s side of the steering column includes your: Turn Signal and Lane Change Indicator 0 Headlamp High-Low Beam 0 Windshield Wipers 0 Windshield Washer Cruise Control (Option) Turn Signal and Lane Change Indicator The turn signal has two upward (for Right) and two downward (for Left) positions. These positions allow you to signal a turn or a lane change. To signal a turn, move the lever all the way up or down.
A green arrow on the instrument panel will flash in the direction of the turn or lane change. To signal a lane change, justraise or lower the leveruntil the green arrow starts to flash.Hold it there until you complete your lane change. Thelever will return by itself when you release it. As you signal aturn or a lane change,if the arrows don’t flashbut just stay on, a signal bulbmay be burned out and other driverswon’t see your turn signal. If a bulb is burned out, replaceit to help avoidan accident.
I When the high beams are on, this blue indicator light on the instrument panel also will be on. Windshield Wipers You control the windshield wipers by turning the band with the wiper symbol on it. For a singlewiping cycle, turn the band to MIST. Hold it there until the wipers start, then let go. Thewipers will stop after onewipe. If you want more wipes, hold the band on MIST longer. You can set the wiper speed for a long or short delay between wipes. This can be very useful in light rain or snow.
Heavy snow or ice can overload your wipers. Thewindshield wiper motor is protected from overload by a circuit breakerand a fuse. If the motor overheats dueto heavy snow, etc., the wiper will stop until the motor cools. Although the circuitis protected from electrical overload, overload due to heavy snow, etc. may cause wiper linkage damage. Always clear ice and heavy snow from the windshield before using your windshield wipers.
NOTICE: When using concentrated washer fluid, follow the manufacturer’s instructions for adding water. Don’t mix water with ready-to-use washer fluid. Water can cause the solution to freeze and damage your washer fluid tank and other parts of the washer system.Also, water doesn’t clean as well as washerfluid. Fill your washer fluid tank only3/4 full when it’s very cold. This allows for expansion, which could damage the iftank it is completely full. Don’t use radiator antifreeze in your windshield washer.
Cruise Control (Option) I With cruise control, you can maintain a speed of about 25 mph (40 km/h) or more without keeping your foot on the accelerator. This can really help on long trips. Cruise control does not work at speeds below about 25 mph (40 km/h). When you apply your brakes, the cruise control shuts off.
To Set Cruise Control I 1. Move the cruise control switch to ON. 2. Get up to the speed you want. 3. Push in the set button at the end of the lever and release it. 4. Take your foot off the accelerator pedal.
Suppose you set your cruise control at a desired speed and then you apply the brake. This, of course, shuts off the cruise control.But you don’t need to reset it. Once you’re going about 25 mph (40 k d h ) or more, you can move the cruise control switchfrom ON to R/A (Resume/Accelerate) for about half a second. You’ll go right back up to your chosen speed and stay there.
Move the cruise switch from ON to WA (Resume/Accelerate). Hold it there until you get up to the speed you want, and then release the switch. To increase your speed in very small amounts, move the switch to R/A (Resume/Accelerate). Each time you do this, your vehicle will go about 1 mph (1.6 km/h) faster. To Reduce Speed While Using Cruise Control Push in the button at the end of the lever until you reach the lower speed you want, then release it.
To Get Outof Cruise Control There are two ways to turn off the cruise control: 0 Step lightly on the brakepedal. Move the cruise switch to OFF. To Erase Speed Memory When you turn off the cruise controlor the ignition, your cruise control set speed memory is erased.
Lamps Your lamp switches are on the driver’s side of your instrument panel. Push the top switch with the parking lamps symbol on it to turn on: 0 Parking Lamps 0 Taillamps License Plate Lamps Instrument Panel Lamps Push the bottom switch with the master lamps symbol on it to turn on all the lamps listed above as well as the headlamps. Push the side of the switch marked OFF to turn off your lamps. Turn the dial above the lamp switches counterclockwiseto dim your instrument panel lamps.
Daytime Running Lamps(DRL) Indicator Light If your vehicle was first sold, when new, in Canada, you will have this light on the instrument panel. It goes on whenever the Daytime Running Lamps are on. When it begins to get dark, the DRL indicator light is a reminder to turn on your headlamps. Daytime Running Lamps Daytime Running Lamps (DRL) make it easier to see the front of your vehicle during the day.
Headlamps-On Reminder A reminder tone will sound when your headlamps or parking lamps are turned on and your ignition is in OFF, LOCK or ACC. To turn the tone off, press the OFF switch, Dome Lamps The dome lamps may come on when you open any of the doors. You can also turn on the dome lamps by turning the dimmer dial clockwise until it clicks. Reading Lamps You may have the optional reading lamps next to the dome lamps. Turn the lamps on and off by pressing the switch next to the lamp.
If the switch isOFF, the interior lamps will not come on when any of the vehicle doors are open. The switch is located on the instrument panel above the radio. If you have the optional reading lamps, they will still operate if the switch is in the OFF position. If you have the optionalKeyless Illumination feature, the interior lamps will come on briefly when doors are lockedand unlocked or the door handles are lifted.
You can also adjust the mirror for day or night driving. Press the tab forward (away from you) for day driving. Pull the tab back (towards you) for night driving. I Outside Mirrors Adjust your outside mirrors so you can just see the side of your vehicle. Some mirrors are manually adjustable. mirrors come with a remote control adjustment switch. Find the switch on the instrument panel above the radio.
To move a mirror, slide the switch to L for the driver’s side mirror or to R for the passenger’s sidemirror. Then, press the four-way pad to move the mirror in the desired direction.To make sure you do not accidentally move a mirror, slide the switch to the middle (OFF) position. If you have the manually adjustable mirror, it can also be folded in or out. Push the mirror towards the vehicleto move it in. After pushing the mirror out, adjustmentwill be maintained.
Cigarette LighterIAshtrays The cigarette lighter is on the left of the engine cover console. To use the lighter, press it in all the way and let go. When it’s ready, it will pop back by itself. Don’t hold a cigarette lighter in with your hand while it is heating. If you do, it won’t be able to back away from theheating element when it’s ready. That can make it overheat, damaging the lighter and the heating element. To remove the smaller ashtrays on each sidewall, press down on the tabs inside and pull out.
Assist Handles Assist handlesmay be located on the inside passenger vehiclepillars. Grasp them as necessary to help you enter and exit your vehicle. If you have the optional rear hatch and Dutch doors, you will also havean assist handle on the inside hatch. Storage Compartments Your front storage compartment is at the center of the engine cover. To open the compartment, press the two tabs together and pull. If you have an optional sliding tray storage compartmen it isunder the front passenger seat.
If you have a beverage cooler, lift up on the armrest to open. The cooler has a drain system that drains off as much fluid as necessary. There is also has an ashtray and a cupholder for your convenience. If you have a rear storage compartment, pull up on the handle to open or remove the cover. To replace the cover, fit the notches on the cover into the storage compartment I slots and push down. Center Overhead Console The optional roof console has two storage compartments.
Instrument Cluster Your instrument cluster isdesigned to let you know at a glance how your vehicle is running. You’ll know how fast you’re going, abouthow much fuel remains,and many other thingsyou’ll need to know to drive safelyand economically. The optional digital cluster on your vehicle’s instrument panel is displayed electronically and will tell you everything the standard cluster does. The digital clusterwill give readings in either English or Metric.
Speedometer and Odometer Cluster Digital Cluster Standard Your speedometer lets you see your speed in both miles per hour (mph) and kilometers perhour ( k d h ) . Your odometer shows how far your vehicle has been driven, in either miles (used in the U.S.) or kilometers (used in Canada). Tamper Resistant Odometer Cluster Standard Digital Cluster I I Your odometer is tamper resistant. The odometer will show silver lines between the numbers if someone tries to turn it back.
Y O U may wonder what happens if your vehicle needs a new odometer installed. If the new one can be set to the mileage total of the old odometer, then it must be. But if it can't, then it's set at zero, and a label must be put on the driver's door to show the old mileage reading when the new odometer was installed. Trip Odometer Digital Cluster Standard Cluster 4 The trip odometer can tell you how far your vehicle has been driven since you last set the trip odometer to zero.
you know they’re working. If you are familiar with this section, you should not be alarmed when this happens. Gages can indicate when there may be or is a problem with one of your vehicle’s functions. Often gages and warning lights work together to let you know when there’s a problem with your vehicle. When one of the warning lights comes on and stays on when you are driving, orwhen one of the gages shows there may be a problem, check the section that tells you what to do about it.
You will see this light flash for few a seconds when you turn your ignition to RUN or START. Then the light should go out. Thismeans the system is ready. If the air bag readiness lightdoesn’t come on when you start your vehicle, or stays on, or comes on when you are driving, your air bag system may not work properly. Have your vehicle serviced right away. Brake System Warning Light Standard Cluster Digital Cluster Your vehicle’s hydraulic brake system is divided into two parts.
This light should come on briefly as you start the vehicle. If it doesn’t come on then, have it fixed so it will be ready to warn you if there’s a problem. If the light comes on while you are driving,pull off the road and stop carefully. You may notice that the pedal is harder to push. Or, the pedal may go closer to the floor. It may take longer to stop. If the light is still on, have the vehicle towed for service. (See “Towing Your Vehicle’’in the Index.
If the light stays on, or comes on when you’re driving, your vehicle needs service. If the regular brake system warning light isn’t on, you still have brakes, but you don’t have anti-lock brakes. If the regular brake system warning light is also on, you don’t have anti-lock brakes and there’s a problem with your regular brakes. See “Brake System Warning Light” earlier in this part.
Charging System Light Standard Cluster Digital Cluster m 1 I The red charging system light is on the bottom driver's-side corner of your standard cluster. It is part of the digital clustervoltmeter. The charging system light will come on briefly when you turn the ignition on, but the engine is not running, as acheck to show you the lightis working. Then it should go out once the engineis running.
For more details about DRL, see“Headlamps and Vehicle Lighting” in this section. The DRL indicator light ison whenever the ignition and the headlight switch and parking brake are off. For more details aboutDRL, see “Lights” in this part. Headlamp High Beam IndicatorLight This blue lightis on the driver’s sideof the standard cluster. If you have the digital cluster, it is on the top of the cluster. The high beam indicator lightis on whenever you use your high beam headlamps.
Englne Coolant Temperature Gage Digital Cluster Cluster Standard If you have the standard cluster, you have a gage that shows the engine coolant temperature. If the gage pointer moves to the “H” (red) side, your engine is too hot! It means that your engine coolant has overheated. If you have been operating your vehicle under normal driving conditions, you should pull off the road, stop your vehicle and turn off the engine as soon as possible.
Oil Pressure Gage Digital Cluster Standard Cluster The oil pressure gage shows the engine oil pressure in psi (pounds per square inch) when the engine is running. Canadian vehicles indicate pressure in kPa (kilopascals).Oil pressure may vary with engine speed, outside temperatureand oil viscosity, but readings abovethe low pressure zone indicate the normal operating range. A reading in the low pressure zone may be caused by a dangerouslylow oil level or other problems causing low oil pressure.
I The fuel gagetells you how much fuel you have remaining when the ignition is on. When the gage first indicates empty you still have a little fuel left, but you should get more fuel as soon as possible. A box around the fuel gage symbol on the digital cluster will begin to flash when your tank is 1/8 full or less. Here arethings some owners ask about. None of these indicate a problem with your fuel gage: 0 At the gas station, the gas pump shuts off before the gage reads full.
Voltmeter Digital Cluster Standard Cluster VOLTS When your engine is not running, but the ignition is on (in the RUN position), the gageshows your battery's state of charge in DC volts. When the ignition is running, thegage shows the condition of the charging system. Readings between the low and high warning zones indicate the normal operating range.
Luggage Carrier (Option) I If you have the luggage carrier, you can load things on top of your vehicle. The luggage carrier has slats attached to the roof, side rails, and tiedowns. NOTICE: Loading cargo that weighs morethan 200 pounds (91 kg) on the luggage carrier may damage your vehicle. When youcarry large things, never let them hang over the rear orthe sides of your vehicle. Load yourcargo so that itrests on the slats and does not scratch or damage the vehicle.
Trailer Wiring Harness If you have the optional trailering package,your vehicle will have an 8-wire harness, consistingof a 7-wire harness and one CHMSL battery feed wire. The harness is stored on the passenger sideof the van near the rear wheel well. This harnesshas a 30 amp battery feed wire and no connector, and should be wired by a qualified service person.Attach the harness to the trailer, then tape or strap it to your vehicle’s frame rail.
Notes 2-64
Comfort Controls & Audio Systems Section In this section you’ll find out how to operatethe comfort control systems and audio systemsoffered with your vehicle. Be sure to read about the particular system supplied with your vehicle. Comfort Controls Heater Controls If your vehicle does not have air conditioning, your heater controlswill look like this. Fan Lever - The top lever has four positions. To increase the air flow, move the levertoward HIGH. To decrease the air flow, move it toward OFF.
DEFROST-The setting with the defrost symbol operates the defroster. Most of the air comes out near the windshield, with some going to the floor vents and front side windows. Use this when you get fog or ice on the windshield. HTR (Heater) - Most of the air comes out near the floor. The rest comes out from the defroster vents under the windshield and at the front side windows. This isbest for cold weather. VENT -The aircomes out at the vents on your instrument panel.
BLEND - With this setting, the heated outside air comes out both the heater vents and defroster vents, with some air coming through the side window vents. Adjust the temperature lever for warmer or cooler air. This setting is useful for cold weather with a large number of passengers or very humid conditions to help keep the windshield clear. The A/C compressor may operate in this setting to dehumidify the air. HTR (Heater) - Most of the air comes out near the floor.
Rear Air Conditioning (Option) You may have rear air conditioning. The rear air conditioning switch is located above the radio at the top of the instrument panel. Slide the lever toward HI for cooler air in the rear area. Slide the lever to OFF to turn the system off. If your vehicle has rear air conditioning, setting it on LO may enhance front A/Cperformance by allowing trapped refrigerant in rear lines to circulate. The system will only send cooled air if the front system is on.
You can turn the defogger off at any time by pressing thebottom of the switch. not The defogger will shut itself off after severalminutes so that the glass does get too hot. If the window still isn’t clear, turn the defogger on again. NOTICE: Scraping the inside of your rear window could cut and damage the defogger.Your warranty would not cover this damage. And don’t put decals there, you might haveto scrape themoff.
You will find air vents in the center and on the sides of your instrument panel. You can move the vents to direct the flow of air, or closethe vents altogether. When you close a vent, it will increase the flow of air coming out of any vents that are open. If your vehicle doesn’t have air conditioning, there is an air vent in the passenger-side kick panel below the instrument panel. The vent has a handle toopen and close it.
How to Operate Your E T P AM Radio This part tells you how your ETR@AMradio works. Upper Knob (VOL-RECALL) - The upper knob has these four functions: 0 Turn it to switch the system on and off. 0 Turn it to control the volume. 0 Press it to display the time when the ignition is off. 0 Press it to change between the clock and the radio station frequency displayed when the radio is on. BAL (Balance) - The control ring behind the upper knob adjusts the left/right speakerb.cl1ance.
TREBLE - Slide the TREBLE lever up to increase the treble response. If a station is weak or noisy, slide the TREBLE lever down to reduce the noise. BASS - Slide the BASS lever up to increase the bass response. Adjust the BASS lever to give a pleasing sound to your ear. How to Operate Your ET* System AM-FM Stereo Audio This part tells you how your ETR@AM-FM stereo audiosystem works. Upper Knob (VOL-RECALL) - The upper knob has these four functions: Turn it to switch the system on and off.
SCAN - Press the SCAN button to hear each station for a few seconds. Push it again when you reach the station you want to listen to and the radio will stop scanning. “SCAN” appears in the display. Pushbuttons - The four pushbuttons letyou return to favorite stations.To (7 AM and 7 FM): set the pushbuttons for up to fourteen favorite stations 1. Tune in the desired station. 2. Press the SET button. “SET” appears in the display. 3. Within 5 seconds, press one of the four pushbuttons to store the station.
Upper Knob (VOL-PROG-RCL) -The upper knob has these five functions: Turn it to switch the system on and off. Turn it to control the volume, Press it todisplay the time when the ignition is off. Press it to change between the clock and the radio station frequency displayed when the radio is on. Press it to change sides of a tape when a cassette is playing. BAL (Balance)- The control ring behind the upper knob adjusts the leftkight speakerbalance.
To PIay A Cassette Your tape player is built to work best with tapes that are 30 to 45 minutes long on each side. Tapes longer than that are so thin they may not work well in this player. Once the tape is playing, use the upper and lower knobs for volume, balance and fade just asyou do for the radio. A lighted arrow shows which direction the tape is being played.
How to Operate Your E T P AM-FM Stereo Audio Cassette System with Equalizer This part tells you how your ETR@AM-FM stereo audio cassettesystem with equalizer works: Upper Knob (VOL-PROG-RCL) functions: 0 - The upper knob has these five Turn it to switch the system on and off. Turn it to control the volume. Press it to display the time when the ignition is off. Press it to change between the clock and the radio station frequency displayed when the radio is on.
Pushbuttons -The four pushbuttonslet you return to favorite stations. To set the pushbuttons for up to fourteen favorite stations(7 AM and 7 FM): 1. Tune in the desired station. 2. Push the SET button. “SET” appears in the display for about5 seconds. 3. Within the 5 seconds, push one of the four pushbuttons.Whenever you press that button, the preset station will return.
Press 4 or in the opposite direction that the amber arrow points and the tape will reverse to the beginning of the current selection. PROGRAM -To go from one side of the tape to the other, press the VOL-PROG-RCL knob. STOP- EJECT -To remove the tape or stopthe tape and switch to radio, press the STOP-EJECT button. If “Cln” (Clean) appears on the display when you insert your cassett.etape, your cassette player needs to be cleaned.
Rear/Front SpeakerControl - The control ring behind the lower knob fades the sound between your rear and front speakers. Fade levels will be briefly displayed. SEEK - Press the SEEK higher station. button to cause the receiver to seek the next Press the 4 SEEK button to cause the receiver to seek the next lower station. SCAN - Press the SCAN button to hear each station for afew seconds. Push it again when you reach the stationyou want to listen to and the radio will stop scanning.
If the disc player is very hot, or if you’re driving on a very rough road, a disc may come outor justnot play. If you see the word HOT on the display, the disc player is too hot to play the disc. Press RCL to make the word HOT go off the display. When things get back to normal, the disc should play again. If the disc comes back out, check whether: The disc is upside down. It is dirty, scratched, or wet. Too much moisture is in the air. (If there is, wait about one hour and try again.
Delco LOC /I Theft Deterent Feature Delco LOC II@is an anti-theft feature forthe compact discplayer. It can be used or ignored. If ignored, the system plays normally. If it is used, your player won’t be usable if it is ever stolen,because it will go to LOC mode any time the battery power is removed. After a loss of battery power, the player cannot be turned on unless an unlock code is entered. The instructionsbelow tell you how to enter a secret code into the system.
3. Enter the six digits of the code following steps 6-9 above. The display will show the numbers as entered. 4. Press the BAND knob and the time appears - indicating that the disabling sequence was successful. If the display indicates “SEC”, the numbers did not match and the unit is still secured. Disabling The Theft System 1. Press presets 1 and 4 for 5 seconds with ignition on and radio off. The display will show “SEC”, indicating the unit is in the secure mode. 2. Press the SET button.
To help avoid hearing loss ordamage: 1. Adjust the volume control to the lowest setting. 2. Increase volume slowly until you hear comfortably and clearly. NOTICE: Before you add any sound equipment to your vehicle - like a tape player, CB radio, mobile telephone or two-way radio - be sure you can add whatyou want. If you can, it’s very important to do it properly. Added sound equipment may interfere with the operation of your vehicle’s engine, Delco@radio or other systems, andeven damage them.
You may prefer to use a non-scrubbing action, wet-type cleaner. This type of cleaner uses a fabric belt to clean the tape head. This type of cleaner cassette will not cause an error, but it may not clean the tape player as thoroughly as the scrubbing type cleaner. A scrubbing action cleaner cassette is available through your retailer (SPO 12344600). Cassettes aresubject to wear and the sound quality may degrade over time.
Your Driving andthe Road Section Here you’ll find information about driving on different kindsof roads and in varying weather conditions. We’ve also includedmany other useful tips on driving. Defensive Driving The best adviceanyone can give about driving is:Drive defensively. Please start with avery important safety device in your vehicle: Buckle up. (See “Safety Belts” in the Index.) Defensive driving really means “be ready for anything.
Rear-end collisions are about the most preventable of accidents. Yet they are common. Allow enough following distance. It’s the best defensive driving maneuver, in both city and rural driving. You never know when the vehicle in front of you is going to brake or turn suddenly. Drunken Driving Death and injury associated with drinking and driving isa national tragedy. It’s the number one contributor to the highway death toll, claiming thousands of victims every year.
It’s the amount of alcohol that counts. For example, if the sameperson drank three double martinis (3 ounces or 90 ml of liquor each)within an hour, the person’s BAC would be close to0.12 percent. A person who consumes food just before or during drinkingwill have a somewhat lower BAC level. There is a gender difference, too.Women generally have a lower relative percentage of body water than men.
There’s something else about drinking and driving that many people don’t know. Medical research shows that alcohol in a person’s system can make crash injuriesworse, especially injuries tothe brain, spinalcord or heart. This means that when anyone who has been drinking - driver or passenger -is in a crash,that person’s chance of being killed or permanently disabled is higher than if the person had not beendrinking. Control of a Vehicle You have threesystems that make your vehicle go where you want it togo.
Braking Braking action involves perception time and reaction time. First, you have to decide to push on the brake pedal. That’s perception time. Then you have to bring up your foot and do it. That’s reaction time. Average reaction time is about 3/4 of a second. But that’s only an average. It might be less with one driver and as long as two or three seconds or more with another. Age, physical condition, alertness, coordination, and eyesight all play a part. So do alcohol, drugs and frustration.
Anti-Lock Brakes (ABS) Your vehicle has an advanced electronic braking system that can help you keep it under control. When you start your vehicle and begin to drive away, you may hear a momentary motor or clicking noise. This is the ABS system testing itself. nere s now anti-lock works. Let’s say the road is wet. You’re driving safely. Suddenly an animal jumps outin front of you. You slam on the brakes. Here’s what happens with ABS. A computer senses that wheels are slowing down.
Remember: Anti-lock doesn’t change the time you need to getyour foot up to the brake pedal.If you get too close to the vehicle in front of you, you won’t have time to apply your brakes if that vehicle suddenly slows or stops. Always leave enough room up ahead to stop, even though you have anti-lock brakes. To Use Anti-Lock Don’t pump the brakes. Just hold the brake pedal down and let anti-lock work for you. You may feel thebrakes vibrate, or you may notice some noise, but this is normal.
What should you do if this everhappens? Ease up on the accelerator pedal, steer the vehiclethe way you want it to go,and slow down. Speed limit signsnear curves warn that you should adjust your speed. Of course, theposted speeds arebased on good weather and road conditions. Under less favorableconditions you’ll want to go slower. If you need to reduceyour speed as you approach a curve, do it before you enter the curve,while your front wheels are straight ahead.
Off-Road Recovery You may find sometime that your right wheels have dropped off the edge of a road onto the shoulder while you’re driving. If the levelof the shoulderis only slightly below the pavement, recovery should be fairlyeasy. Ease off the accelerator and then, if there is nothing in the way, steer so that your vehicle straddles the edgeof the pavement. You can turn the steeringwheel up to 114 turn until the right front tire contacts the pavement edge.
0 Watch for traffic signs, pavement markings, and lines. If you can see a sign up ahead that might indicate a turn or an intersection, delay your pass. A broken center line usually indicates it’s all right to pass (providing theroad ahead is clear). Never cross a solid line on your side of the lane or a double solid line, even if the road seems empty of approaching traffic. 0 Do not get too closeto the vehicle you want to pass while you’re awaiting an opportunity.
Loss of Confrol Let’s review what driving expertssay about what happens when the three control systems (brakes,steering and acceleration) don’t have enough friction where the tiresmeet the road to dowhat the driverhas asked. In any emergency, don’t give up. Keeptrying to steerand constantly seek an escape route or area of less danger. Skidding In a skid, a driver can lose control of the vehicle.
Driving at Night Night driving is more dangerous than day driving. One reason is that some drivers are likely to be impaired - by alcohol or drugs,with night vision problems, orby fatigue. Here are some tips on night driving. 0 Drive defensively. 0 Don’t drink and drive. 0 Adjust your inside rearview mirror to reduce the glare from headlamps behind you. 0 Since you can’t see as well, you may need to slow down and keep more space between you and other vehicles.
You can be temporarily blinded by approaching lights. It can take a second or two, oreven several seconds, foryour eyes to readjust to the dark.When you are faced with severe glare (as from a driver who doesn’t lower the high beams, or a vehicle with misaimed headlamps), slow down a little. Avoid staring directly intothe approaching lights. Keep your windshield and all the glasson your vehicle clean - inside and out. Glare at night is made much worse by dirt on the glass.
It’s wise to keep your wiping equipment in good shape and keep your windshield washer tank filled. Replace your windshield wiper inserts when they show signs of streaking or missing areas on the windshield, or when strips of rubber start to separate from the inserts. Driving too fastthrough large water puddles or even going through some car washes can cause problems, too. The water may affect your brakes. Try to avoidpuddles. But if you can’t, try to slow down before you hit them. I A CAUTION: .
Some Other Rainy Weather Tips Turn on your low-beam headlamps - not just your parking lamps to help make you more visible to others. 0 Besides slowing down, allow some extra following distance.And be especially careful when you pass another vehicle. Allow yourself more clear room ahead, and be prepared to have your view restricted by road spray. Have good tires with proper tread depth. (See “Tires” in the Index.
Freeway Driving Mile formile, freeways (alsocalled thruways, parkways, expressways, turnpikes, orsuperhighways) are the safestof all roads. But they have their own special rules. The most important advice on freeway driving is: Keep up with traffic and keep to the right.Drive at the same speed most of the other drivers are driving. Too-fast or too-slow driving breaks a smooth traffic flow. Treat the a lane. left lane on a freeway as passing At the entrance there is usually a ramp that leads tothe freeway.
Before Leaving ona Long Trip Make sure you’reready. Try to be well rested. If you must start when you’re not fresh - such as after aday’s work - don’t plan to make toomany miles that first part of the journey.Wear comfortable clothingand shoes you can easily drive in. Is your vehicle ready for along trip? If you keep it servicedand maintained, it’s ready to go. If it needs service, have it done before starting out.
Then here are some tips: Make sure your vehicle is well ventilated, with a comfortably cool interior. Keep your eyes moving. Scan the road ahead and to the sides. Check your mirrors and your instruments frequently. If you get sleepy, pull off the road into a rest, service, orparking area and take anap, get some exercise, orboth. For safety, treat drowsiness on the highway as an emergency. Hill and Mountain Roads Driving on steep hills or mountains is different from driving in flat or rolling terrain.
0 Know how to go uphill. You may want to shift down to a lower gear. The lower gears help coolyour engine and transmission, and you can climb the hill better. 0 Stay in your own lane when driving on two-lane roads in hills or mountains. Don’t swing wide or cut across the center of the road.Drive at speedsthat let you stay in your own lane. 0 As you go over thetop of a hill, be alert. There could besomething in your lane, like a stalled car oran accident.
Include an ice scraper, a small brush or broom, a supply of windshield washer fluid, a rag, some winter outer clothing, a small shovel, a flashlight, a red cloth, and a couple of reflective warning triangles. And, if you will be driving under severe conditions,include a small bag of sand, a piece of old carpet ora couple of burlap bags to help provide traction. Be sure you properly secure these items in your vehicle.
Your anti-lock brakes improve your ability to make a hard stop on a slippery road.Even though you have an anti-lock braking system, you'll want to begin stopping soonerthan you would on dry pavement. See "Anti-Lock" in the Index. 0 Allow greater following distanceon any slippery road. 0 Watch for slippery spots. Theroad might be fine until you hit a spot that's covered with ice.
Run your engine only as long as you must. This saves fuel. When you run the engine, make it go a little faster than just idle. That is, push the accelerator slightly. This uses less fuel for the heat that you get and it keeps the battery charged. You will need a well-charged battery to restart the vehicle, and possibly for signaling later on with your headlarnps. Let the heater run for awhile. Then, shut the engine off and close the window almost all the way to preserve the heat.
Loading Your Vehicle PAYLOAD =-I PSI/KPA < SEE OWNER'S MANUAL -0 -0 (COLD) FOR ADDITIONAL INFORMATION The Certificatioflire label is found on the rear edge of the driver's door. The label shows the size of your original tires and the inflation pressures needed to obtainthe gross weight capacity of your vehicle. This is calledthe GVWR (Gross Vehicle Weight Rating). TheGVWR includes theweight of the vehicle, all occupants, fuel, cargo, and tongue weight, if pulling a trailer.
NOTICE: Your warrantydoes not cover parts or components that fail because of overloading. If you put things inside your vehicle -like suitcases,tools, packages, or anything else - they will go as fast as the vehicle goes. If you have to stop or turn quickly, or if there is a crash,they’ll keep going. Payload The Payload Capacity is shown on the Certification/Tire label. Thisis the maximum load capacity that your vehicle can carry.Be sureto include the weight of the people inside as part of your load.
Trailering Package If your vehicle comes with the Trailering Package, there is also a load rating which includes the weight of the vehicleand the trailerit tows. This rating is called the Gross Combination Weight Rating (GCWR). When you weigh your trailer,be sure to include the weight of everything you put in it. And, remember to figure theweight of the people insideas part of your load. Your dealer can help you determine your GCWR.
Towing a Trailer NOTICE: Pulling a trailer improperly can damage your vehicle and result in costly repairs not covered by your warranty.To pull a trailer correctly, follow the advice in this part, and see your GM dealer for important information about towing a trailer with your vehicle. Most vehicles areready for some trailer towing. If yours was built with trailering options, asmany are, it’s ready for heavier trailers. But trailering is different than just drivingyour vehicle by itself.
0 Don’t tow a trailer atall during the first 500 miles (800 km) your new vehicle is driven. Your engine, axle or other parts could be damaged. 0 Then, during the first500 miles (800 km) that you tow a trailer, don’t drive over50 mph (80 k d h ) and don’t make starts at full throttle. This helps your engine and other parts of your vehicle wear in at the heavier loads. 0 You should use DRIVE (D) (or, as you need to, a lower gear) when towing a trailer.
A If you’re using a “dead-weight” hitch, the trailer tongue (A) should weigh 10%of the total loaded trailer weight (B). If you have a “weight-distributing” hitch, the trailer tongue (A) should weigh 12% of the total loaded trailer weight (B). After you’ve loaded your trailer, weigh the trailer and then the tongue, separately, to see if the weights are proper. If they aren’t, you may be able to get them right simply by moving some items around in the trailer.
Safety Chains You should always attach chains between your vehicle and your trailer. Cross the safety chains under the tongue of the trailer so that the tongue will not drop to theroad if it becomes separated from the hitch. Instructions about safety chains may be provided by the hitch manufacturer or by the trailer manufacturer. Follow the manufacturer’s recommendation for attaching safety chains and do not attach them to the bumper. Always leave just enough slack so you can turn with your rig.
Driving with a Trailer Towing a trailer requires a certain amount of experience. Before setting out for the open road, you’ll want to get to know your rig. Acquaint yourself with the feelof handling and braking with the added weight of the trailer. And always keep in mind that the vehicle you are drivingis now a good deal longer and not nearly as responsive as your vehicle is by itself.
Passing You’ll need more passing distance upahead when you’re towing a trailer. And, because you’re a good deal longer, you’ll need to go much farther beyond the passed vehicle beforeyou can return to your lane. Backing Up Hold the bottom of the steeringwheel with one hand. Then, to move the just move that hand to the left. To move the trailer tothe trailer to the left, right, move your hand to theright. Always back up slowly and, if possible, have someone guide you.
Driving On Grades Reduce speed and shift to a lower gear before you start down a long or steep downgrade. If you don’t shift down, you might have to use your brakes so much that they would get hot and no longer work well. On a long uphill grade, shift down and reduce your speed to around 45 mph (70 km/h) to reduce the possibility of engine and transmission overheating.
Maintenance When Trailer Towing Your vehicle will need service more often when you’re pulling a trailer. See the Maintenance Schedule for more on this. Things that are especially important in trailer operation are automatictransmission fluid (don’t overfill), engine oil, axle lubricant, belt, cooling system,and brake adjustment. Each of these is covered in this manual, and the Index will help you find them quickly. If you’re trailering, it’s a good idea to review these sections beforeyou start your trip.
Notes 4-34
Problems on the Road Here you’ll find what to do about some problems that can occur on the road. Hazard Warning Flashers Your hazard warning flashers let you warn others. They also let police know you have a problem. Your front and rear turn signal lamps will flash on and off.
But they won’t flash if you’re braking. Press the button in to make your front and rear turn signal lights flash on and off. Your hazard warning flashers work no matter what position your key is in, and even if the key isn’t in. To turn off the flashers, pull out on the collar. When the hazard warning flashers are on, your turn signals won’t work. Other Warning Devices If you carry reflective triangles, you can set one up at the side of the road about 300 feet (100 m) behind your vehicle.
Jump Starting If your battery has run down, you may want to use another vehicle and some jumper cables to start your vehicle. But please follow the steps below to do it safely. I NOTICE: Ignoring these steps could result in costly damage to your vehicle that wouldn’t be coveredby your warranty. Trying to startyour vehicle by pushingor pulling it won’t work, and itcould damage your vehicle. To Jump Start Your Vehicle: 1. Check the other vehicle. It must have a 12-volt battery with a negative ground system.
2. Get the vehicles close enough so the jumper cables can reach, but be sure thevehicles aren’t touching each other. If they are, it could causea ground connection you don’t want. You wouldn’t be able tostart your vehicle, and the bad grounding could damage the electrical systems. You could beinjured if the vehicles roll. Set the parking brake firmly on each vehicle. Put an automatic transmission in PARK (P) or a manual transmission in NEUTRAL (N).
A CAUTION: Fans or other moving engine parts can injureyou badly. Keep the engines are your hands away from moving parts once running. 6. Connect the red positive (+) cable to the positive (+) terminal of the vehicle with the dead battery. Use a remote positive (+) terminal if the vehicle has one. Dead Battery (+) Good Battery (+) 7. Don’t let the other end touch metal. Connect it to the positive (+) terminal of the good battery. Use a remote positive (+) terminal if the vehicle has one. 8.
Good Battery (-) Heavy Metal Engine Part 9. Attach the cable at least 18 inches (45 cm) away from the dead battery, but not near engine parts that move. The electrical connection is just as good there, but the chance of sparks getting back to the battery is much less. 10. Now start the vehicle with the good battery and r ~ the ~ nengine for a while. 11. Try to start the vehicle with the dead battery. If it won’t start after a few tries, it probably needs service. 12.
Towing Your Vehicle Try to havea GM dealer ora professional towing service tow your vehicle. They can provide the right equipment and know how to tow it without damage. If your vehicle has been changed or modified since it was factory-new by adding aftermarket items like fog lamps, aero skirting, special or tires and wheels, these thingscan be damaged during towing. Before you do anything, turn on the hazard warning flashers.
If your vehicle has the all-wheel drive option,it can only be towed with all four wheels off the ground.If a vehicle with all-wheel drive must be towed with sling-type or wheel lift equipment,then either the front or rear wheels must be supported on a dolly. If your vehicle has rear-wheel drive, don’t have it towed on the rear wheels, unless you must.
Towing From the Front (Except All-Wheel Drive) NOTICE: Do not tow with sling-typeequipment or the front bumper system will be damaged. Use wheel lift or car-carrier equipment. Additional ramping may be required for car-carrier equipment. Use safety chains and wheel straps. If your vehicle has the all-wheel-drive option, a dolly MUST be used under the rearwheels when towingfrom the front.
Towing From the Rear (Except All- Wheel Drive) NOTICE: Do not tow withsling-type equipment or the rear bumper system will be damaged. Use wheel lift or car-carrier equipment. Additional ramping may be required for car-carrier equipment. Use safety chains and wheel straps. If your vehicle has the all-wheel-drive option, a dolly MUST be used under the frontwheels when towingfrom the rear.
Towing From the Front (All- Wheel-Drive) NOTICE: Do not tow with sling-type equipment or the front bumper system will be damaged. Use wheel liftor car-carrier equipment. Additional ramping maybe required for car-carrier equipment. Use safety chainsand wheel straps. If your vehicle has the all-wheel-drive option, a dolly MUST be used under the rearwheels when towingfrom the front.
Towing From the Rear (All- Wheel-Drive) NOTICE: Do not tow with sling-type equipmentor the rear bumper system will be damaged. Use wheel lift or car-carrier equipment. Additional ramping may be requiredfor car-carrierequipment. Use safety chainsand wheel straps. If your vehicle hasthe all-wheel-drive option, a dolly MUST be used under the front wheels when towingfrom the rear.
Engine Overheating - If Steam Is Corning From Your Engine 8 I NOTICE: If your engine catches fire because you keep driving with no coolant, your vehicle can be badly damaged. The costly repairs would not be covered by your warranty.
If No Steam Is Coming From Your Engine If you get the overheat warning but see or hear no steam, the problem may not be too serious. Sometimes the engine can get a little too hot when you: Climb a long hill on a hot day. Stop after high speed driving. Idle for long periods in traffic. Tow a trailer. See “Driving on Grades” in the Index. If you get the overheat warning with no sign of steam, try this for a minute or so: 1. If you have an air conditioner, turn it off. 2.
When you decide it’s safe to lift the hood, here’s what you’ll see: A. Coolant recovery tank B. Radiator pressure cap C. Engine fan If the coolant insidethe coolant recovery tank is boiling, don’t do anything else until it cools down. The coolant level should be at ADD. If it isn’t, you may have a leak in the radiator hoses, heaterhoses, radiator, water pump or somewhere else in the cooling system. NOTICE: Engine damage from running your engine without coolant isn’t covered by your warranty.
How to Add Coolant to the CoolantRecovery Tank If you haven’t found a problem yet, but the coolant level isn’t at ADD , add a 50/50 mixture of clean water (preferably distilled) and a proper antifreeze at the coolantrecovery tank. (See“Engine Coolant” in the Index for more information about the proper coolant mix.) NOTICE: In cold weather, water can freeze and crack the engine, radiator, heater core and other parts. Use the recommended coolant.
How to Add Coolant to the Radiator 1. You can remove the radiator pressure cap when the cooling system, including the radiator pressure cap and upper radiator hose, is no longer hot. Turn the pressure cap slowlyto the left until it first stops. (Don’t press down while turning the pressure cap.
If you hear a hiss, wait for that to stop. A hiss means there is still Some pressure left. 2. Then keep turning the pressure cap, but now push down as you turn it. Remove the pressure cap. 3. Fill the radiator with the proper mix, up to the base of the filler neck.
I 4. Then fill the coolant recovery tank to ADD. 5. Put the cap back on the coolant recovery tank, but leave the radiator pressure capoff. 6. Start the engine and let it run until you can feel the upper radiator hose getting hot. Watch out for the engine fan.
7. By this time the coolant level inside the radiator filler neck may be lower. If the level is lower, add more of the proper mix through the filler neck until the level reaches the base of the filler neck. 8. Then replace the pressure cap. At any time during this procedure if coolant begins to flow out of the filler neck, reinstall the pressure cap. Be sure the arrows on the pressure cap line up like this. Engine Fan Noise This vehicle has a clutched engine cooling fan.
A rear blowout, particularly on a curve, actsmuch like a skid and may require the samecorrection you’d use in a skid. In any rear blowout, remove your foot from theaccelerator pedal. Get the vehicle under control by steering theway you want the vehicle to go. It may be very bumpy and noisy, but you can still steer. Gently brake to a stop, well off the road if possible. If a tiregoes flat, thenext part shows how to useyour jacking equipment to change a flat tiresafely.
The following steps will tell you how to use the jack and change a tire. Jack Storage Thejacking equipment you'll need is stored by your vehicle's rear doors, along the passenger side wall. Remove your jack cover by turning the plastic wing nut counterclockwise. Lift up on the latch and pull the jack cover off e .*b " ' 5-22 "" 1 Remove the wheel blocks and jack by turning the wing nut counterclockwise. Remove the wing nut and washer then pull the wheel blocks and jack off the bolt.
Remove the ratchet and extension by turning the wing nut counterclockwise. Remove thewing nut and retainer and take out the ratchetand extension. c Jacking Equipment Storage 1. Nut 2. Washer 3. Wheel Blocks 4. Jack Lift Head 5. Jack 6. Jacking InstructionsTag 7. Nut 8. Retainer 9. Ratchet 10. Extension 11.
Spare Tire Your spare tire is stored underneath the rear of your vehicle. You will use the ratchet and extension to lower the spare tire. 1 NOTICE: Never remove or restow a tire frodto a stowage position under the vehicle while the vehicle is supported by a jack. Always tighten the tire fully against the underside of the vehicle when restowing. The ratchet has an UP side.
And a DOWN side. To Remove the Spare Tire 3 Attach the ratchet, with the DOWN side facing you,to the extension. The extension has a socket Put the flat end of the extension on an angle through thehole in the rear door frame, above the bumper. Be sure the flatend connects intothe hoist shaft. - 5-25 Turn the ratchet counterclockwise to lower the spare tire to the ground, Keep turning the ratchet until the spare tire can be pulled out from under the vehicle.
When the tire has been lowered, tilt the retainer at the end of the cable and pull it through the wheel opening. Pull the tire out fromunder the vehicle. I NOTICE: To help avoid vehicle damage, do not drive vehicle before cable is restored.
The jack has a bolt on the end. Attach the socketend of the extension to the jack bolt like this. Attach the ratchet to the extension with the UP side facingyou. Rotate the ratchet to the right. Thatwill raise the jack lift head a little. Before raising the vehicle, do the following steps. Before you start, block the frontand rear of the tire farthest away from the one being changed.Then put your spare tire near the flat tire.
Hub Caps andWheel Nut Caps You will have to take off hub caps or wheel nut caps to reach your wheel nuts. If you have a standard hub cap, remove it by using the flat end of the extension. Pry along the edge of the cap until it comes off. Be careful, the rim edges may be sharp. Don’t try to remove it with your bare hands. If the wheel has a plastic center cap, you do not have to remove the center cap to loosen the wheel nuts.
To remove the hub cap fromthe aluminum wheel, fit the flat end of the extension intothe notch. Remove the center I cap- With DOWN facing you, use the ratchet and socket to loosen all the wheel nuts. Don’t remove them yet. Do not jack up the vehicle with people in or near the vehicle. Position the jackunder the vehicle.
A. Front 5 -4 b- -4 6.5 in. (16.5 cm) A k-,l2.0 B B. Rear in. (30.0em) NOTICE: Raising your vehicle with the jack improperly positioned will damage the vehicle or may allow the vehicle to fall off the jack. Be sure to fit the jack lift head into the proper location before raising your vehicle. I Raise the vehicle by rotating the ratchet clockwise. Make sure the UP marking faces you. Raise the vehicle far enough off the ground so there is enough room for the spare tire to fit.
Take off the flattire. Remove any rust or dirt from thewheel bolts, mounting surfaces and spare wheel. Place the spareon the wheel mounting surface.
c Put on the spare tire. Put the nuts on by hand. Make sure the cone-shaped end is toward the wheel. Tighten each nut by hand until the wheel is held against the hub. If a nut can't be turned by hand, use the extension and see your dealer assoon as possible. Lower the vehicle by turning the ratchet counterclockwise. Lower the jack completely.
Tightening Wheel Tightening Nut Sequence I Tighten the wheel nuts firmlyin a criss-cross sequence as shown. Turn the ratchet clockwise with the UP marking facingyou. Remove the wheel blocks. A CAUTION: I NOTICE: Wheel covers won’t fit on your compact spare. If you try to put a wheel cover on your compact spare, you could damage the cover or the spare.
Storing The Jack and Spare Tire 1. Put the tire on the ground at the rear of the vehicle, with the valve stem pointed down. 2. Pull the retaining bar through the center of the wheel, making sure itis properly attached. Attach the ratchet, with the UP side facingyou, to the extension. 3. Put the flatend of the extension on an angle throughthe hole in the rear door frame,above the bumper. Turn the ratchet clockwise until the tire is against theunderside of the vehicle.
And don’t mix your compact spare orwheel with other wheels or tires. They won’t fit. Keep your spare and its wheel together. NOTICE: Tire chains won’t fit your compactspare. Using them will damage your vehicle and destroy the chains too. Don’t usetire chains onyour compact spare. If You’re Stuck: In Sand, Mud, Ice or Snow What you don’t want to do when your vehicle is stuck is tospin your wheels too fast. Themethod known as “rocking” can help you get out when you’re stuck, but you must use caution.
Notes 5-36
Service & Appearance Care Section Here you will find information about the care of your vehicle. This section begins with serviceand fuel information,and then it shows how to check important fluidand lubricant levels.There is also technical information about your vehicle, and a partdevoted to its appearance care. Service Your GM dealerknows your vehicle best and wants you to be happy with it. We hope you’ll go to your dealer forall your service needs.
YOUshould keep a record with all parts receipts and list the mileage and the date of any service work you perform. See “Maintenance Record” in the Index. I NOTICE: If you try to do your own service work without knowing enough about it, your vehicle could be damaged. Fuel Use regular unleaded gasoline rated at 87 octane or higher. Use premium unleaded gasoline rated at 9 1 octane orhigher for high power performance, when towing a trailer or with a high payload requirement.
In the United States and Canada, it’s easy to be sure you get the right kind of gasoline (unleaded).You’ll see UNLEADED right on the pump. And only unleaded nozzles will fit intoyour vehicle’s filler neck. Be sure the posted octane at is least 9 1 forpremium, 89 formiddle grade and 87 for regular. If the octane is less than 87, you may get aheavy knocking noise when you drive. If it’s bad enough, itcan damage your engine.
By doing so, you can help clean the air, especially in those parts of the country that have high ozone levels. You should ask your service station operators if their gasolines contain deposit controladditives and oxygenates, and if they have been reformulated to reduce vehicle emissions. Fuels in Foreign Countries If you plan on driving in another country outside the U.S. or Canada, unleaded fuel may be hard to find. Do not use leaded gasoline.
While refueling, hang the cap inside the fuel door. To take off the cap, turn it slowly to the left (counterclockwise). Be careful not to spill gasoline.Clean gasoline from painted surfaces as soon as possible. See “Cleaning the Outside of Your Vehicle” in the Index. When you put the cap back on, turn it to the right until you hear a clicking noise.
NOTICE: If you need a new cap, be sure to get the right type. Your dealer can get one for you. If you get the wrong type,it may not fit or have proper venting, and your fuel tank and emissions system might be damaged. Checking Things Under the Hood Hood Release To open the hood, first pull the handle inside the vehicle on the lower driver’s side of the instrument panel. Then go to the front of the vehicle and release the secondary hood release.
Lift the hood, release the hood prop from its retainer and put the hood prop into theslot in the hood. Before closingthe hood, be sure all the filler capsare on properly. Then lift the hood to relieve pressure on the hood Prop. Remove the hood prop from the slotin the hood and return the prop to its retainer.
Then just pull the hood down and close it firmly. Engine Oil - It’s a good idea to check your engine oilevery time you get fuel. In order to get an accurate reading, the oil must be warm and the vehicle must be on level ground. Turn off the engine and give the oil a few minutes to drain back into the oil pan. If you don’t, the oil dipstick might not show the actual level.
To Check Engine Oil Pull out the dipstick and clean itwith a paper towel or cloth,then push it back in all the way. Remove it again, keeping the tip down. When to Add Oil If the oil isat or below the ADD line, then you’ll need to add some oil. But you must use the right kind. This part explains what kind of oil to use. For crankcase capacity, see “Capacities and Specifications” in the Index. NOTICE: Don’t addtoo much oil.
Whaf Kind of Oil fo Use Oils of the proper quality for your vehicle can be identified by looking for the “Starburst” symbol. The“Starburst” symbol indicates that the oil has been certified by the American Petroleum Institute (API), and is preferred for use inyour gasoline engine. If you change your own oil, be sure you use oil that has the “Starburst” symbol on the front of the oilcontainer.
You should alsouse the proper viscosity oil for your vehicle, as shown in the following chart: RECOMMENDED SAE VISCOSITY QRADE ENGINE OILS FOR BEST FUEL ECONOMY AND COW STARTING, SELECT THE LOWEST SAP VISCOSITY GRADE OIL FOR THE EXPECTED TEMPERATURE RANGE. ~~ LOOK FOR THtS SYMBOL HOT WEATHER t 1 COLD WEATHER DO NOT USE SAE 2OW-50 OR ANY OTHER GRADE OIL NOT RECOMMENDED As shown in the chart, SAE 5W-30 is best for your vehicle. However, you can use SAE 1 OW-30 if it's going to be 0°F (-1 SOC) or above.
I NOTICE: Use only engine oil with the American Petroleum Institute Certified For Gasoline Engines “Starburst” symbol. Failure to use the proper oil can result in engine damage not covered by your warranty. GM Goodwrench@ oil (in Canada, GM Engine Oil) meets all the requirements foryour vehicle. Engine Oil Additr’ves Don’t add anything toyour oil. Your GM dealer is ready to adviseif you think something should be added.
Used oil can be a real threat to the environment. If you change your own oil, be sure to drainall free-flowing oil from the filter before disposal. Don’t ever dispose of oil by putting it in the trash, pouring it on the ground, into sewers, or into streams orbodies of water. Instead, recycle it by taking it to a place that collects used oil. If you have a problem properly disposing of your used oil, ask your dealer, a servicestation or a local recycling center for help.
3. Grasp the bottom of the extension. Lift it up and then pull it out. 4. Disconnect the electrical connector for the cigarette lighter. Set the extension aside. I 5. Remove the engine cover braces that are located to the right and left of the heater duct. 6. Your vehicle may have a screw that attaches the heater duct to the engine cover. If it does, remove the screw. Grasp the top of the heater duct and pull down gently to remove it.
7. Remove the bolt from the engine cover bracket. 8. Loosen the nut and move the bracket outof the way. 9. Lift up on each of the two latches at the bottom of the cover.
10. Remove the two screws at the engine cover. Some vehicles may have hex-head bolts instead of screws. The screws (or bolts) are not supposed to come out of the cover, only from the front of the dash. When removing the cover, be careful not to damage the instrument panel or the trim. I 1. Grasp the bottom of the cover and slide it backwards. Then, lift it up and out of the vehicle. To Install the Engine Cover: 1. Lift the engine cover into the vehicle and slide it all the way forward.
6. Put the heater duct over the engine cover studs. Push up on the duct gently until it snaps into place. 7. Reconnect the electrical connector for the cigarette lighter. 8. Grasp the bottom of the instrument panel extension and install the top into the groove first. Then,push the bottom of the extension intoplace. 9. Install the two nuts and two screws on the extension. Air Cleaner If you have the 4.
NOTICE: If the air cleaner off, is a backfire can causea damaging engine fire. And, dirt caneasily get into your engine,which will damage it. Always have theair cleaner in place when you’re driving. Automatic Transmission Fluid When to Check and Change A good time tocheck your automatic transmission fluid level is when the engine oilis changed. Refer to the Maintenance Schedule to determine when to change your fluid. See “Scheduled Maintenance Services” in the Index.
To check transmission fluid hot:Get the vehicle warmed up by driving about 15 miles (24 km) when outside temperatures areabove 50°F (10°C). If it's colder than 50°F (lO°C), drivethe vehicle in DRIVE (D) until the engine temperaturegage moves and then remains steady for ten minutes. Then followthe hot check procedures. To check transmission fluid cold: A cold check is made afterthe vehicle has been sitting for eighthours or more with the engine off and is used only as a reference.
3. Check both sides of the dipstick, and read the lower level. The fluid level must be in the COLD area for a cold check or in the HOT area or cross-hatched area for a hot check. 4. If the fluid level is in the acceptable range, push the dipstick back in all the way; then flip the handle down to lock the dipstick in place. How to Add Fluid Refer to the Maintenance Schedule to determine what kind of transmission fluid to use., See “Recommended Fluids and Lubricants” in the Index.
A//- Wheel Drive If you have an all-wheel-drive vehicle, be sure toperform the lubricant checks described in this section. However, they have two additional systems that need lubrication. Transfer Case When to Check Lubricant Refer to the Maintenance Schedule to determinehow often to check the lubricant. See “PeriodicMaintenance Inspections’’ in the Index. How to Check Lubricant If the levelis below the bottom of the filler plug hole, you’ll need to add some lubricant.
How to Check Lubricant If the level is below the bottom of the filler plug hole, you’ll need to add some lubricant. Add enough lubricant to raise the level to the bottom of the filler plug hole. What to Use Refer to the Maintenance Schedule to determine what kind of lubricant to use. See “Recommended Fluids and Lubricants’’ in the Index. Rear Axle When to Check and Change Lubricant Refer to the Maintenance Schedule to determine how often to check the lubricant and when to change it.
What to Use Refer to the Maintenance Schedule to determinewhat kind of lubricant to use. See “Recommended Fluids and Lubricants” in the Index. Engine Coolant The following explainsyour cooling system and how to add coolant when it is low. If you have a problem with engine overheating, see“Engine Overheating” in the Index. The proper coolantfor your vehicle will: 0 Give freezing protection down to -34°F (-37°C). 0 Give boiling protection up to 262 O F ( 1 28 O C). 0 Protect against rust and corrosion.
NOTICE: If you usean improper coolant mix,your engine couldoverheat and be badly damaged. The repair cost wouldn’t be covered by your warranty. Too much water in the mix can freezeand crack the engine, radiator, heater core and other parts. Some conditions,such as air trapped in the cooling system, can affect the coolant levelin the radiator. Check the coolant level when the engine iscold and follow thesteps under “Adding Coolant” for theproper way to add coolant.
To Check Coolant When your engine is cold, the coolant level should be at ADD, or a little higher. When your engine is warm, the level should be up to FULL HOT, or a little higher. To Add Coolant If you need more coolant, add the proper mix at the coolantrecovery tank. ~~ ~ Add coolant mix at the recovery tank,but be careful not to spill it.
Radiator PressureCap NOTICE: Your radiator cap is a15 psi (105 kPa) pressure-type cap and must be tightly installed to prevent coolant loss and possible engine damage from overheating. Be sure the arrows on the cap line up with the overflow tube on the radiator filler neck. ~ 1 1 l I When you replace your radiator pressure cap, aGM cap is recommended. See “Service Replacement Parts and Filler Recommendations” in the Index.
Power Steering Fluid How To Check Power Steering Fluid When the engine compartment is cool, unscrew the cap and wipe the dipstick with a clean rag. Replace the cap and completely tighten it. Then remove the cap again and look at the fluid level on the dipstick. The levelshould be at the FULL COLD mark. Add enough fluid to bring the level up to the mark. A fluid loss in this system could indicate a problem. Have the system inspected and repaired.
Windshield Washer Fluid What toUse When you need windshield washer fluid, be sure toread the manufacturer’s instructions before use. If you will be operating your vehicle in an area where the temperature may fall below freezing, use a fluid that has sufficient protection against freezing. To Add NOTICE: 0 When using concentrated washer fluid,follow the manufacturer’s instructions for adding water. DonV mix water with ready-to-use washer fluid.
Brakes Brake Master Cylinder Your brake master cylinder is here. It is filled with DOT-3 brake fluid. There are only two reasons why the brake fluid level in your master cylinder might go down. The firstis that the brake fluid goesdown to an acceptable level during normal brake lining wear. When new linings areput in, the fluid level goesback up. The otherreason is that fluid is leaking out of the brake system.
To Check Brake Fluid You can check the brake fluid without taking off the cap. Justlook at the windows on the brake fluid reservoir. The fluid levels should be above MIN. If they aren’t, have your brake system checked to see if there is a leak. After work is done on the brake hydraulic system, make sure the levels are above MIN and below the top of each window. What to Add When you do need brake fluid, use only DOT-3 brake fluid - such as Delco Supreme 11 (GM Part No. 1052535).
Brake Wear Your vehicle has front disc brakes and rear drum brakes. Disc brake pads have built-in wear indicators that make a high-pitched warning sound when the brake pads are worn and new pads are needed. The sound may come and go or be heard all the time your vehicle is moving (except when you are pushing on the brake pedal firmly). NOTICE: Continuing to drive with worn-out brake pads could result in costly brake repair.
Replacing Brake SystemParts The braking system on a modern vehicle is complex. Its many parts have to be of top qualityand work well together if the vehicleis to have really good braking. Vehicles we design and test have topquality GM brake parts in them, as your vehicle does when it is new. When you replace parts of your braking system -for example, when your brake liningswear down and you have to havenew ones put in -be sureyou get new genuine GM replacement parts.
For more information on vehicle storage, contactyour dealer’s service department, or write to: Adistra Corporation 171 Hamilton Street Plymouth, MI 48 170 In Canada, write to: General Motors of Canada, Limited Customer Services Department Oshawa, Ontario L l J 5Z6 Fluid Leak Check After the vehicle hasbeen parked for awhile, inspect the surface beneath the vehicle forwater, oil, fuel or other fluids.Water dripping from the air conditioning system is normal.
5. Pull the connector out and unplug the lamp. 6. Install the new bulb into the connector. 7. Reverse Steps 1-5 to reinstall the headlamp. Halogen Bulbs A CAUTION: Halogen bulbs have pressurized gas inside and can burst if you drop orscratch the bulb. You or others could beinjured. Take special care when handling and disposing of halogen bulbs. NOTICE: Avoid touching the bulb or letting it come in contact with anything damp.
Composite Headlamps 1. Open the hood. 2. Remove the two screws from the side markedturn signal lamp. 3. Completely remove the sidemarker/turn signal lamp by pulling out the assembly and disconnecting the side markedturn signal lamp sockets from the lamp. I 4. Remove the screw located behind the corner reflector in order to remove the entire corner reflector.
5 . Remove the remaining three screws; the first one from the corner reflector pocket and the two remaining from the composite assembly. 6. Remove the composite assembly. 7. Turn the halogen bulb counterclockwise to remove it from the assembly. 8. Install the new bulb into the composite assembly by turning it clockwise until it is completely tightened. 9. Replace the composite assembly by installing and tightening all of the screws previously removed.
Front Parlcrrurn Signal Lamps (Composite and Sealed Beam) 1. Remove the two screws at the inside edge of the parking/turn signal lamp assembly. 2. Remove +helamp awmbly. 3. Squeeze the tab on the sideof the lamp socket while turning the socket counterclockwise. 4. Pull the socket out of the lamp assembly. 5. Pull the bulb from the socket. 6. Gently push the new bulb into the socket. 7. h t the socket back into the lampassembly and turn it clockwise until it locks. 8.
Rear Lamps I . Open the rear door. n 2. Remove the two screws from behind the door. 3. Pull out the rear lamp assembly s you can see the socket. i 4. Press the tab and turn the socket counterclockwise to remove the socket from the bezel. If the socket does not have a tab, turn the socket counterclockwise to remove the socket from the bezel.
5. Pull out the bulb and replace it with the new bulb. 6. Reverse Steps 1-4 to reinstall the rear lamp. Center High Mounted Stop Lamp (CHMSL) I Other Maintenance Items Windshield Wiper Blade Replacement To replace your windshield wiper blade inserts, lift the wiper arm away from the windshield. Pinch the two tabs on the wiper arm and slide the insert out of the blade. Slide the new one in place. Make sure the tabs are locked into position.
Air Conditioning Every now and then have your dealership check your air conditioning system to be sure it has not lost any cooling ability. If you think the system is notworking properly, have your dealership check it out as soon as possible. The air conditioningwill not work when the temperature is below 40°F (4°C). Lock Cylinders To be sure your locks operateproperly, they must be lubricated. Refer to the Maintenance Schedule to determine how often to lubricatethem and what type of lubricant touse.
Malfunction lndicator Lamp (SERVICE ENGINE SOON LIGHT) This lighton your instrument panel lets you know when your emission system needs service. The lightwill come on briefly when you start your engine to let you know that the system is working. If it doesnot come on when you start your engine, or if it comes on and stays on while you’re driving, your system may need service. Your vehicle should still be driveable, but you should have your system serviced right away. Tires We don’t make tires.
lnflation - Tire Pressure The CertificatiodTirelabel which is on the rear edge of the driver’s door, shows the correct inflation pressures for your tires, when they’re cold. “Cold” means your vehicle has been sitting forat least three hours or driven no more than a mile. NOTICE: Don’t let anyone tell you that underinflation or overinflation is all right. It’s not.
Tire lnspection and Rotation Tires should be inspected every 6,000 to 8,000 miles ( 10 000 to 13 000 km) for any signs of unusual wear. If unusual wear is present, rotate your tires as soon as possible and check wheel alignment. Also check for damaged tires or wheels. See“When It’s Time for New Tires” and “Wheel Replacement” later in this section for more information. The purpose of regular rotation is to achieve more uniform wear for all tires on the vehicle. The first rotation is the most important.
When It’s Time for New Tires Tread Wear Indicators One way to tell when it’s time for new tires is to check the treadwear indicators, which will appear when your tires have only 1/16 inch (1.6 mm) or less of tread remaining. You need a new tire if: You can see the indicators at three or more places around the tire. You can see cord or fabricshowing through the tire’s rubber. The tread or sidewall is cracked, cut or snagged deep enough to show cord or fabric. The tire has a bump, bulge or split.
Uniform Tire Quality Grading The following information relates to the system developed by the United States NationalHighway Traffic Safety Administration which grades tires by treadwear, traction and temperature performance. (This applies only to vehicles sold in the United States.) Treadwear The treadwear gradeis a comparative rating based on the wear rate of the tire when tested under controlled conditionson a specified government test course.
sudden tire failure. The gradeC corresponds toa level of performance which all passenger cartires must meet under the Federal Motor Vehicle Safety StandardNo. 109. Grades B and A represent higher levels of performance on the laboratory test wheel than the minimum required by law. Warning: The temperature grade forthis tire is established for a tire that is properly inflated and not overloaded.
If you need to replace any of your wheels, wheel bolts, or wheel nuts, replace them only with new GM original equipment parts. This way, you will be sure to have the right wheel, wheel bolts, and wheel nuts for your GM model. A CAUTION: Using the wrong replacement wheels, wheel bolts,or wheel nuts on your vehicle can bedangerous. It could affectthe braking and handling of your vehicle, make your tires lose air and make you lose control.You could have a collisionin which you or others could be injured.
Tire Chains NOTICE: If your vehicle hasP235/65R15 size tires, don’t use tire chains; they can damage your vehicle. If you have othersize tires, use tire chains only where legal and only whenyou must. Use only SAE Class “S” type chains that are the propersize for yourtires. Install them on the rear axle tires and tighten themas tightly as possible with the ends securely fastened. Drive slowlyand follow the chain manufacturer’s instructions.
Don’t use any of these unless this manual says you can. In many uses, these will damage your vehicle: 0 Alcohol Laundry Soap Bleach 0 Reducing Agents Cleaning the Insideof Your Vehicle Use a vacuum cleaner often to get rid of dust and loose dirt. Wipe vinyl or leather with a clean, damp cloth. Your GM dealer has two GM cleaners, a solvent-type spot lifter and a foam-type powdered cleaner. They will clean normal spots and stains very well. Do not use them on vinyl or leather.
Rinse the section with a clean, wet sponge. Wipe off what’s left with a slightly damp paper towel or cloth. Then dry it immediately with a blow dryer or a heat lamp. NOTICE: Be careful. A blow dryer may scorch the fabric. Wipe with a clean cloth. Using Solvent-Type Cleaner on Fabric First, see if you have to use solvent-type cleaner at all. Some spotsand stains will clean off better with just water and mild soap.
Non-Greasy Stains Stains caused by catsup, coffee (black), egg, fruit,fruit juice, milk, soft drinks, wine, vomit, urine and blood can be removed as follows: 0 Carefully scrape off excess stain, then sponge the soiled area with cool water. 0 If a stain remains, follow the foam-type instructions describedearlier. 0 If an odor lingers after cleaningvomit or urine, treat the area with a watedbaking soda solution: 1 teaspoon ( 5 ml) of baking soda to 1 cup (250 ml) of lukewarm water.
Care of Safety Belts Keep belts clean and dry. Glass Glass shouldbe cleaned often. GM Glass Cleaner(GM Part No. 1050427) or a liquid household glass cleaner will remove normal tobacco smoke and dust films. Don’t use abrasive cleanerson glass, because they may cause scratches. Avoid placing decalson the inside rearwindow, since they may have to be scraped off later. If abrasive cleaners areused on the inside of the rear window, an electric defogger element may be damaged.
Cleaning the Outsideof Your Vehicle The paint finish on your vehicle provides beauty, depth of color, gloss retention and durability. Washing Your Vehicle The best way to preserve your vehicle’s finish is to keep it clean by washing it often with lukewarm orcold water. Don’t wash your vehicle in the direct raysof the sun. Don’t use strong soaps or chemical detergents.Use liquid hand, dish or car washing (mild detergent) soaps.
Protecting Exterior Bright Metal Parts Bright metal parts should be cleaned regularly to keep their luster. Washing with water is all that is usually needed. However,you may use GM Chrome Polish on chrome or stainlesssteel trim, if necessary. Use special care with aluminum trim. To avoid damaging protective trim, never use auto orchrome polish, steam or caustic soapto clean aluminum. A coating of wax, rubbed to high polish, is recommended for all bright metal parts.
Finish Damage Any stone chips, fractures or deep scratches in the finish should be repaired right away. Bare metal will corrode quickly and may develop into a major repair expense. Minor chips and scratches can berepaired with touch-up materials available from your dealer or other serviceoutlets. Larger areasof finish damagecan be corrected in your dealer’s body and paint shop. Underbody Maintenance Chemicals used for ice and snow removal and dust control can collect on the underbody.
Appearance Care Materials Chart PART NUMBER 1050172 SIZE PRODUCT USAGE 16 oz. (0.473L) TarandRoad Oil Remover Removes old waxes, polishes, tar and road oil 1050173 16 oz. (0.473L) Chrome Cleaner and Polish Removes rust and corrosion on chrome and stainless steel 1050174 16 oz. (0.473L) White Sidewall Tire Cleaner 32 oz. (0,9461) VinyVLeather Cleaner Cleans white and black tires Spot and stain removal on leather or vinyl I050244 16 oz. (0.
Vehicle IdentificationNumber (VIN) Q TESTVNXX3XXQ09696 0 This is the legal identifier for your vehicle. It appearson a plate in the front corner of the instrument panel, on the driver’s side.You can see itif you look through the windshield from outside your vehicle. The VIN also appears on theVehicle Certification and Service Parts labelsand the certificates of title and registration. Engine Identification The eighth character in your VIN is the engine code.
I- 0 0 I 7 I 6-58
Service Parts Identification Label You’ll find this label on the inside of the glove box door. WHEELBASE DO NOT REMOVE Service Parts Identification 7 OObbO 00000 89K C60 D1B D35 E 5 2 E6E E 9 2 FLT GU1 J M 7 LC3 M X l M 3 1 NA5 NE1 QMXVK3 VC2 VY1VY4 K19K64 1 MODELOESIGNATlON OPTIONCONTENT V 7 3 Y19 ZJ7 6BJ 62L 62U 6 7 0 6 7 1 6 7 9 7BJ 8HJ 9HJ 1 I I I PAINTTECHNOLOGY ORDER NUMBER EXTERIOR COLORS It s very helpful if you ever need to order parts.
Fuses and Circuit Breakers The wiring circuitsin your vehicle are protected from short circuits by a combination of fuses, circuit breakers, and fusible thermal links in the wiring itself. This greatly reduces the chance of fires caused by electrical problems. See “Fuses and Circuit Breakers” in the Index for more information. Headlamps The headlamp wiring is protected by a circuit breaker in the lamp switch. An electrical overloadwill cause the lamps to go on and off, or in some cases to remain off.
Fuse Block The fuse block is in the instrument panel on the driver’s side. Remove the cover with a screwdriver. You can remove fuses with a fuseextractor. To remove fuses if you don’t have a fuse extractor,hold the end of the fuse between your thumb and index fingerand pull straight out. Be sure to use the correct fuse. If you ever have a problem on the road and don’t have a spare fuse,you can “borrow” one of the correct value.
Engine identification Engine Description 4.3L Type VIN Code Fuel System V6 W CPI** Produced By us. Emissions L.D. **Central Port Fuel Injection Wheel Nut Torque DESCRIPTION Base or Optional Wheel TORQUE 100 ft. lbs. (140 Nom) Cooling System Capacity ENGINE CODE VIN 4.3L QUANTITY* Without Rear Heater 13.5 Quarts (12.8 Liters) W QUANTITY* With Rear Heater 16.5 Quarts ( 15.5 Liters) *All quantities areapproximate. After refill, the level MUST be checked. Crankcase Capacity ENGINE VIN CODE 4.
Lamp and Bulb Data EXTERIOR LAMPS Halogen Headlamps Sealed Beam Halogen Headlamps Composite Halogen Headlamps Composite Park, Signal Lamp Rear, Stop Lamps Marker Lamps Backup Lamp License Lamp CHMSL Assembly INTERIOR LAMPS Dome Lamp (w/oRoof Console) Dome Lamp(with Roof Console) Glove Box Lamp Heater & AC Control Visor Vanity Mirror Lamps Stepwell Lamp Reading Lamp (with Roof Console) Reading Lamp (w/o Roof Console) Ashtray Lamp Heater or N C Control QUANTITY 2 TRADE NO.
Instrument Cluster Lamps NOTE: A PC part number indicates that the bulb and base are one assembly and must be replaced as such. General Indicator Lamp? Instrument Cluster 1llum.
Fuses and Circuit Breakers 4673 ??BAT!? d ClRlERK INST LPS u ls.l 30 PWR ACC AUX HTR A/C CIG LTRlDM GAGES STOPlHAZ €9 1r E3 I- T I HRN/TL LPS TURN -B/U HTR A/C RADIO n r ' ECM 10 10 B ECM 1 30 PWR WDO AIR BAG BRAKE I 0 ClRiBRK % 4 2J u 25 WIPER I 3 FRONT Fuse Legend 0 5 Amp - Tan 0 7.
NAME INST LPS PWR ACCY CIG LTFUDM GAGES AUX HTR-A/C STOP-HA2 HORN/TL LMPS TURN-BAJ CIRCUITS PROTECTED Instrument Panel Lamps, Radio Dial Lamps, Heater Lamps Power Door Locks, Power Seat Digital Clock, Cigarette Lighter, Dome Lights, Radio Memory, Glove Box Lamp Instrument Cluster Gages, Brake Switch, Audio Alarm.
CIRCUITS PROTECTED FUSE HTR A/C Front Heater & Air Conditioning 20 Amp RADIO Radio Engine Control Module 15 Amp 10 Amp PWR WDO Engine Control Module Power Windows AIR BAG Air Bag WIPER Windshield Wiper Anti-Lock Brake System, Speedometer, Cruise Control 10 Amp 25 Amp NAME ECM B ECM I BRAKE CIRCUIT BREAKER 15 Amp 30 Amp 15 Amp DRL** Canadian Daytime Running Lamps 10 Amp PWR MIRRORS* TRAILER* rower Mirror 3 Amp Trailer Wiring Harness 30 Amp *In-line fuse **Canada only ***In-line
Service Replacement Part and Filter Recommendations ENGINE (VIN) OIL FILTER AIR CLEANER FILTER PCV VALVE SPARK PLUGS* FUEL FILTER RADIATOR CAP 4.3L (W) PF52 A1163C cv774c CR43TSM GF48 1 RC27 *Use copper-cored resistor type spark plugs. Air Conditioning Refrigerants Not all air conditioningrefrigerants are the same. If the air conditioning system in your vehicle needs refrigerant, be sure the proper refrigerant is used. If you’re not sure, ask your GM dealer.
Scheduled Maintenance Services Section IMPORTANT: KEEP ENGINE OIL AT THE PROPER LEVEL AND CHANGE AS RECOMMENDED This section covers themaintenance required foryour vehicle. Your vehicle needs these services to retain its safety, dependability and emission control performance. Protection I Have you purchased the GM Protection Plan? The Plan supplementsyour new vehiclewarranties. See your GM dealer for details.
How This Section is Organized The remainder of this section is divided into five parts: “Part A: Scheduled Maintenance Services”shows what to have done and how often. Someof these services can be complex, so unless you are technically qualified and have the necessary equipment, you should let your dealer’s service department or anotherqualified service center do these jobs. If you are skilled enough to do some work on your vehicle, you will probably want to get the service information GM publishes.
Part A: Scheduled Maintenance Services Using Your Maintenance Schedule We at GeneralMotors want to help you keep your vehicle in good working condition. But we don’t know exactly how you’ll driveit. You may drive very short distances onlya few times a week. Or you may drive long distances all the time in very hot, dusty weather. You may use your vehicle in making deliveries. Or you may drive it to work, to do errands orin many other ways.
I Schedule I Definition I Follow Maintenance Schedule I if any one of these is true for your vehicle: Most trips are less than 5 to 10 miles (8 to 16 km). This is particularly important when outside temperatures are below freezing. Most trips include extensiveidling (such as frequent driving in stop and go traffic). Most trips are through dusty areas. You frequently tow a trailer or use a carrier on top of your vehicle.
Every 60,000 Miles (100 000 km) Engine Accessory Drive Belt Inspection Spark Plug Wire Inspection Engine Timing Check Fuel Tank. CaD and Lines Inspection I Schedule 11 Definition Follow Schedule I1 only if none of the conditions from Schedule I is true.
I Maintenance Schedule I The services shown in this schedule up to 100,000 miles ( 166 000 km) should be performed after 100,000 miles (166 000 km) at the same intervals. Footnotes f The CaliforniaAir Resources Board has determined that the failure to perform this maintenance item will not nullify the emission warranty or limit recall liabilityprior to the completion of vehicle useful life.
I Schedule Maintenance I I 6,000 Miles (10 000 km) 0 Change engine oiland filter (orevery 3 months, whichever occurs first). An Emission ControlService. and king pin bushings, 0 Lubricate the front suspension, ball joints steering linkageand transfer case shift linkage, parking brake cable guides, and brake pedal springs atevery oil change (orevery 6 months, whichever occurs first). and add fluid as needed. Check 0 Check readfront axle fluid level constant velocity jointsand axle seals for leaking.
I ~ Maintenance Schedule I 12,000 Miles (20 000 km) 0 Change engine oil and filter (or every 3 months, whichever occurs first). An Emission Control Service. 0 Lubricate the front suspension,ball joints and king pin bushings, steering linkageand transfer case shift linkage, parking brake cable guides, and brake pedal springs at every oil change (or every 6 months, whichever occurs first). 0 Check readfront axle fluid level and add fluid as needed.
I Schedule Maintenance I I 18,000 Miles (30 000 km) 0 Change engine oil and filter (or every 3 months, whichever occurs first). An Emission ControlService. 0 Lubricate the front suspension, ball joints and king pin bushings, steering linkage and transfer case shift linkage, parking brake cable guides, and brake pedal springs at every oil change (or every 6 months, whichever occurs first). Check readfront axle fluid level and add fluid as needed. Check constant velocity joints and axle seals for leaking.
I I Maintenance Schedule I 24,000 Miles(40 000 km) 0 Change engine oil and filter (or every 3 months, whichever occurs first). An Emission Control Service. 0 Lubricate the front suspension, ball joints and king pin bushings, steering linkageand transfer case shift linkage, parking brake cable guides, and brake pedal springs atevery oil change (or every 6 months, whichever occurs first), 17 I Check readfront axle fluid level and add fluid as needed.
Maintenance ScheduleI 30,000 Miles (50 000 km) Change engine oil and filter (or every 3 months, whichever occurs first). An Emission Control Service. Lubricate the front suspension,ball joints and king pin bushings, steering linkageand transfer case shiftlinkage, parking brake cable guides, and brake pedal springs at every oil change (or every 6 months, whichever occurs first). 0 Check redfront axle fluidlevel and add fluid as needed. Check constant velocity joints and axle seals forleaking.
Maintenance Schedule I 33,000 Miles (55000 km) 0 Change engine oil and filter (or every 3 months, whichever occurs first). An Emission Control Service. 0 Lubricate the front suspension,ball joints and king pin bushings, steering linkageand transfer case shift linkage,parking brake cable guides, and brake pedal springs at every oil change (or every 6 months, whichever occurs first). 0 Check readfront axle fluidlevel and add fluid as needed. Check constant velocity joints and axle seals forleaking.
I Schedule Maintenance I I 39,000 Miles (65 000 km) rI1 Change engine oiland filter (or every 3 months, whichever occurs first). An Emission Control Service. 0 Lubricate the front suspension, ball joints and king pin bushings, steering linkageand transfer case shift linkage, parking brake cable guides, and brake pedal springs at every oilchange (or every6 months, whichever occurs first). 0 Check readfront axle fluid level and add fluid as needed.
I Schedule Maintenance I I 45,000 Miles (75 000 km) 0 Change engine oil and filter (or every 3 months. whichever occurs first). An Emission Control Service. 0 Lubricate the front suspension,ball joints and king pin bushings, steering linkage and transfer case shift linkage, parking brake cable guides, and brake pedal springs at every oil change (or every 6 months, whichever occurs first). 0 Check readfront axle fluid level and add fluid as needed.
I Schedule Maintenance I I 50,000 Miles (83 000 km) 0 Change automatic transmission fluidand filter if the vehicle is mainly driven under one ormore of these conditions: - In heavy city traffic where the outside temperatureregularly reaches 90°F (32°C) or higher. - In hilly or mountainous terrain. - When doing frequent trailer towing. - Uses such as found in taxi, police or delivery service.
I Schedule Maintenance I I 54,000 Miles (90 000 km) 0 Change engine oil and filter (or every 3 months, whichever occurs first). An Emission Control Service. 0 Lubricate the front suspension, ball joints and king pin bushings, steering linkageand transfer caseshift linkage, parking brake cable guides, and brake pedal springs atevery oil change (or every 6 months, whichever occurs first). 0 Check readfront axlefluid level and add fluid as needed. Check constant velocity joints and axle seals for leaking.
60,000 Miles (100 000 km) 0 Change engine oil and filter (or every3 months, whichever occurs first). An Emission Control Service. 0 Lubricate the front suspension, ball joints and king pin bushings, steering linkageand transfer case shiftlinkage, parking brake cable guides, and brake pedal springs at every oil change (or every 6 months, whichever occurs first). 0 Check readfront axle fluid level and add fluid as needed. Check constant velocity joints and axle seals for leaking.
I Schedule Maintenance I I 63,000 Miles (105 000 km) 0 Change engine oil and filter (or every 3 months, whichever occurs first). An Emission Control Service. 0 Lubricate the front suspension,ball joints and king pin bushings, steering linkageand transfer case shift linkage, parking brake cable guides, and brake pedal springs atevery oil change (or every 6 months, whichever occurs first). 0 Check readfront axlefluid level and add fluid as needed.
I Schedule Maintenance I I 69,000 Miles (115 000 km) 0 Change engine oil and filter (or every3 months, whichever occurs first). An Emission ControlService. 0 Lubricate the front suspension,ball joints and king pin bushings, steering linkage and transfer case shift linkage, parking brake cable guides, and brake pedal springs at every oil change (or every6 months, whichever occurs first). 0 Check readfront axle fluid level and add fluid as needed. Check constant velocity joints and axle seals forleaking.
I Schedule Maintenance I I 75,000 Miles (125 000 km) 0 Change engine oil and filter (or every 3 months, whichever occurs first). An Emission Control Service. 0 Lubricate the front suspension,ball joints and king pin bushings, steering linkageand transfer case shift linkage, parking brake cable guides, and brake pedal springs at every oil change (or every 6 months, whichever occurs first).
I Schedule Maintenance I I 81,000 Miles(135 000 km) 0 C h i f i g iifigine oil and filter (or every 3 months, whichever occurs first). An Emission Control Service. 0 Lubricate the front suspension,ball joints and king pin bushings, steering linkageand transfer case shift linkage, parkingbrake cable guides, and brake pedal springs at every oil change (or every 6 months, whichever occurs first). 0 Check readfront axle fluid level and add fluid as needed.
I Schedule Maintenance I I ~~~ ~ 87,000 Miles (145 000 km) 0 Change engine oil and filter (or every 3 months, whichever occurs first). An Emission Control Service. 0 Lubricate the front suspension, ball joints and king pin bushings, steering linkageand transfer case shift linkage, parking brake cable guides, and brake pedal springs at every oil change (or every 6 months, whichever occurs first). 0 Check readfront axle fluid level and add fluid as needed.
Maintenance Schedule I (Continued) 0 Replace spark plugs.An Emission Control Service. 0 Replace fuel filter. An Emission Control Service. 0 Replace air cleanerfilter. Replace filtermore often under dusty conditions. An Emission Control Service. 0 Rotate tires. See“Tire Inspection and Rotation” in the Index for proper rotation pattern and additional information. SERVICED B Y DATE ACTUAL MILEAGE 93,000 Miles (155 000 km) 0 Change engine oiland filter (or every 3 months, whichever occurs first).
r I Maintenance Schedule I 1 96,000 Miles(160 000km) 0 Change engine oil and filter (or every 3 months, whichever occurs first). An Emission Control Service. 0 Lubricate the front suspension,ball joints and king pin bushings, steering linkageand transfer case shift linkage, parking brake cable guides, and brake pedal springs at every oil change (or every 6 months, whichever occurs first). 0 Check readfront axle fluidlevel and add fluid as needed.
I Schedule Maintenance 1 I 100,000 Miles (166 000 km) 0 Change automatic transmission fluid and filter if the vehicle is mainly driven under one ormore of these conditions: - In heavy city traffic where the outside temperatureregularly reaches 90°F (32°C) or higher. - In hilly or mountainous terrain. - When doing frequent trailer towing. - Uses such as found in taxi, police or delivery service.
Maintenance Schedule II The services shown in this schedule up to 100,000 miles (166 000 km) should beperformed after 100,000 miles (1 66 000 km) at the same intervals. Footnotes 3- The CaliforniaAir Resources Board has determined that the failure to perform this maintenance item will not nullify the emission warranty or limit recallliability prior to the completion of vehicle useful life.
I Maintenance Schedule I I 15y000Miles (25 000 km) 0 Change engine oiland filter (or every 12months, whichever occurs first). An Emission Control Service. 0 Lubricate the front suspension, ball joints and king pin bushings, steering linkageand transfer case shift linkage, parkingbrake cable guides, and brake pedal springs at every oil change (or every 12 months, whichever occurs first). 0 Check readfront axle fluid level and add fluid as needed. Check constant velocity joints and axle seals for leaking.
IMaintenance Schedule II 30,000 Miles (50 000 km) 0 Change engine oil and filter (or every 12 months, whichever occurs first). An Emission Control Service. 0 Lubricate the front suspension,ball joints and king pin bushings, steering linkageand transfer caseshift linkage, parking brake cable guides, and brake pedal springs at every oil change (or every 12 months, whichever occurs first). 0 Check readfront axle fluid level and add fluid as needed. Check constant velocity joints and axle seals for leaking.
II ISchedule Maintenance I (Continued) 0 Check readfront axle fluid level and add fluid as needed. Check constant velocity joints and axle seals for leaking.** 0 Rotate tires. See“Tire Inspection and Rotation’’ in the Index for proper rotation pattern and additional information. I DATE I ACTUALMILEAGE I SERVICED BY: 45,000 Miles (75 000 km) 0 Change engine oiland filter (or every 12 months, whichever occurs first). An Emission Control Service.
I Maintenance Schedule II 50,000 Miles (83000 km) 0 Change automatic transmission fluid and filter if the vehicle is mainly driven under one ormore of these conditions: - In heavy city traffic where the outside temperature regularly reaches 90°F (32°C) or higher. - In hilly or mountainous terrain. - When doing frequent trailer towing. - Uses such as found in taxi, police or delivery service. If you do not use your vehicle under any of these conditions,the fluid and filter do not require changing.
ISchedule Maintenance I II 60,000 Miles (100 000 km) Change engine oil and filter (or every I2 months, whichever occurs first). An Emission Control Service. Lubricate the front suspension, ball joints and king pin bushings, steering linkageand transfer case shift linkage, parking brake cable guides, and brake pedal springs at every oil change (or every 12 months, whichever occurs first). cl Check readfront axle fluid level and add fluid as needed.
I Maintenance nSchedule II 67,500 Miles (112 500 km) 0 Change engine oiland filter (orevery 12 months, whichever occurs first). An Emission Control Service. Lubricate the front suspension,ball joints and king pin bushings, steering linkageand transfer case shift linkage, parking brake cable guides, and brake pedal springs at every oil change (or every 12 months, whichever occurs first). 0 Check readfront axle fluidlevel and add fluid asneeded. Check constant velocity joints and axle seals for leaking.
I Maintenance Schedule II 82,500 Miles (137 500 km) 0 Change engine oil and filter (or every 12 months, whichever occurs first). An Emission Control Service. 0 Lubricate the front suspension,ball joints and king pin bushings, steering linkageand transfer case shift linkage, parking brake cable guides, and brake pedal springs at every oil change (or every 12 months, whichever occurs first). 0 Check readfront axle fluid level and add fluid as needed.
Schedule IMaintenance I II (Continued) 0 Replace spark plugs. AFIEmission Control Service. 0 Replace fuel filter. An Emission Control Service. Replace air cleaner filter. An Emission Control Service. 0 Inspect fuel tank, cap and lines. Inspect fuel cap gasket forany damage. Replace parts as needed. An Emission Control Service. DATE ACTUAL MILEAGE SERVICED BY: 97,500 Miles (162 500 km) Change engineoil and filter (orevery 12 months, whichever occurs first). An Emission Control Service.
I Maintenance ScheduleII I 100,000 Miles (166000 km) Change automatic transmission fluidand filter if the vehicle is mainly driven under one or more of these conditions: - In heavy city traffic where the outside temperatureregularly reaches 90°F (32°C) or higher. - In hilly or mountainous terrain. - When doing frequent trailer towing. - Uses such as found in taxi, police or delivery service. I f you do not use your vehicle under anyof these conditions, the fluid and filter donot require changing.
Engine Coolant Level Check the enginecoolant level and add the proper coolant mix if necessary. See “Coolant” inthe Index for furtherdetails. Windshield WasherFluid Level Check the windshield washer fluid level in the windshield washer tank and add the proper fluidif necessary. See “Windshield Washer Fluid” in the Index for furtherdetails. At Least Once a Month Tire lnflation Check tire inflation.
Starter Switch 1. Before you start, be sure you have enough room around the vehicle. 2. Firmly apply both the parking brake (see “Parking Brake” in the Index if necessary) and the regularbrake. NOTE: Do not use the accelerator pedal,and be ready to turn off the engine immediately if it starts. 3. Try to start the engine in each gear. The starter should work only in PARK (P) or NEUTRAL (N). If the starterworks in any other position, your vehicle needs service. Brake-Transmission Shift Interlock- BTSI 1.
Steering ColumnLock While parked, and with the parking brake set, try to turn the key to LOCK in each shift lever position. The key should turn to LOCK only when the shift lever is in PARK (P). The key should come out only in LOCK. Parking Brake and Automatic Transmission PARK (P) Mechanism Check I CAUTION: Whenyou are doingthischeck,yourvehiclecouldbegin to move. You or others could be injured and property could be damaged. Make sure thereis room in front of your vehiclein case it begins to roll.
Part C: Periodic Maintenance Inspections Listed below are inspections and services which should be performed at least twice ayear (for instance, each springand fall). You should let your GM dealer’s service department or other qualified service centerthese do jobs. Make sure any necessary repairs arecompleted at once. Steering and Suspension Inspection Inspect the front and rear suspensionand steering system for damaged, loose ormissing parts, signsof wear, or lack of lubrication.
NOTE:Fluids and lubricants identified below by name, part number or specification may be obtained from your GM dealer. USAGE Engine Oil FLUID/LUBRICANT Engine oilwith the American Petroleum Institute CertifiedFor Gasoline Engines “Starburst” symbol of the proper viscosity. To determine the preferred viscosity for your vehicle’s engine, see“Engine Oil” in the Index.
USAGE Front Wheel Bearings Differential, Standard, Front and Rear Axle FLUID/LUBRICANT Wheel bearing lubricant meeting requirements of NLGI Grade 2, Category GC orGC-LB (GM Part No. 1051344 or equivalent). Axle Lubricant (GM PartNo. 1052271) or SAE 80W-90 GL-5 Gear Lubricant. Differential, Locking Axle Lubricant (GM PartNo. 1052271) or SAE 8OW-90 GL-5 Gear Lubricant. Transfer Case DEXKON@-I11Automatic Transmission Fluid.
Part E: Maintenance Record After the scheduled services are performed, record the date, odometer reading and who performed the service in the boxes provided after the maintenance interval. Any additional information from “Owner Checks and Services” or“Periodic Maintenance” can be added on the following record pages. Also, you should retain all maintenance receipts. Your owner information portfolio is a convenient placeto store them.
TO001 7-43
TOO01 7-44
Customer Assistance Information Section Here you will find out how to contact Chevroletif you need assistance. This section also tellsyou how to obtain service publications and how to report any safety defects. This section includesinformation on: The Customer Satisfaction Procedure, Customer Assistance forHearing or Speech Impaired, BBB Auto Line Alternative DisputeResolution Program, Reporting Safety Defects, Roadside Assistance, and Service Publications.
STEP TWO - If after contacting a member of dealership management, it appears your concern cannot be resolved by the dealership without further help, contact the Chevrolet Customer Assistance Center by calling 1-800-222-1020. In Canada, contact GM of Canada Customer Assistance Center in Oshawa by calling 1-800-263-3777 (English) or 1-800-263-7854 (French). In Mexico, call (525) 254-3777. In Puerto Rico, call 1-800-496-9992 (English) or 1-800496-9993 (Spanish). In the U.S. Virgin Islands, call 1-800-496-9994.
Customer Assistancefor the Hearingor Speech Impaired(TDD) To assist customers who have hearing difficulties, Chevrolet has installed special TDD (Telecommunication Devices for the Deaf) equipment at its Customer Assistance Center. Any hearing or speech impaired customer who has access to a TDD or a conventional teletypewriter (TTY) can communicate with Chevrolet by dialing: 1-800-TDD-CHEV (1-800-833-2438). (TDD users in Canada can dial 1-800-263-3830.
‘Tofile a claim, you will be asked to provideyour name and address, your Vehicle Identification Number (VIN), and a statement of the nature of your complaint. Eligibility is limited by vehicle age and mileage, and other factors. We prefer you utilize the Customer Satisfaction Procedure before you resort to AUTO LINE, but you may contact the BBB at any time. The BBB will attempt to resolvethe complaint serving as an intermediary between you and Chevrolet.
REPORTING SAFETY DEFECTS TO THE CANADIAN GOVERNMENT If you live in Canada, and you believe that your vehicle has a safety defect, you should immediatelynotify Transport Canada,in addition to notifying General Motorsof Canada Limited.You may write to: Transport Canada Box 8880 Ottawa, OntarioK 1G 352. REPORTING SAFETYDEFECTS TO GENERAL MOTORS In addition to notifying NHTSA (or Transport Canada)in a situation like this, we certainly hope you’ll notify us.
Roadside offers two levels of service to thecustomer, Basic Care and Courtesy Care: TM ROADSIDE Basic Care PROVIDES Toll-free number, 1-800-CHEV-USA Free towing for warranty repairs Basic over-the-phone technical advice Available dealer services at reasonable costs (i.e., wrecker services, locksmith/key service, glass repair, etc.) Note: Roadside Basic Care applies toall ChevroletIGeo vehicles regardless of age or miles.
0 0 0 Telephone number where you can be reached Vehicle mileage Description of the problem For complete program details, see your Chevrolet/Geo dealer to obtain a Roadside Assistance Center brochure. Canadian Roadside Assistance Vehicles purchased in Canada have an extensive Roadside Assistance program accessible from anywhere in Canada or the U.S.A. Please refer to the separate brochure provided by the dealer or call 1-800-268-6800 for emergency services.
Service and Owner Publications Service manuals, service bulletins, owner’s manuals and other service literature areavailable for purchase for all current and many past model General Motors vehicles. Toll-free telephone numbers for ordering information: United States , . . . . . . , . 1-800-551-4123 Canada . . . . . . . . . . . . . . 1-800-668-5539 Service Manuals Service manuals contain diagnosis and repair information for all chassis and body systems.
k IU
I I I I I I I I I I I I I I I I I I I I I I I I I I I I I I I I I I I I I I
index A Adding Equipment to Your Air Bag-Equipped Vehicle (See “Supplemental Inflatable Restraint System (SIR)”) Air Bag (See “Supplemental Inflatable Restraint System (SIR)”) Readiness Light (See “Lights”) Air Cleaner (See “Engine-Air Cleaner”) Air Conditioning (See “Heater/Air Conditioning Controls”) All-Wheel Drive (Option) . . . . . . . . . . . . . . . . . . . . . . . . . . . . . . . . . . . . 2.27,6.21 How to Check . . . . . . . . . . . . . . . . . . . . . . . . . . . . . . . . . . . . . . . . . . . .
Braking . . . . . . . . . . . . . . . . . . . . . . . . . . . . . . . . . . . . . . . . . . . . . . . . . . . . . . . . . 4-5 In Emergencies . . . . . . . . . . . . . . . . . . . . . . . . . . . . . . . . . . . . . . . . . . . . . . . . 4-7 Break-In,NewVehicle ........................................... 2-13 Bulb Replacement Center High Mounted Stop Lamp (CHMSL) ........................ 6-39 Composite Headlamps . . . . . . . . . . . . . . . . . . . . . . . . . . . . . . . . . . . . . . . . .
Cruise Control (continued) ToReduceSpeed . . . . . . . . . . . . . . . . . . . . . . . . . . . . . . . . . . . . . . . . . . . . . . 2-38 ToResume . . . . . . . . . . . . . . . . . . . . . . . . . . . . . . . . . . . . . . . . . . . . . . . . . . 2-36 ToSet . . . . . . . . . . . . . . . . . . . . . . . . . . . . . . . . . . . . . . . . . . . . . . . . . . . . . . 2-36 Cupholder . . . . . . . . . . . . . . . . . . . . . . . . . . . . . . . . . . . . . . . . . . . . . . . . . . . . . .
Engine (continued) Oil (See “Oil”) Overheating . . . . . . . . . . . . . . . . . . . . . . . . . . . . . . . . . . . . . . . . . . . . . . . . . . RunningWhileParked . . . . . . . . . . . . . . . . . . . . . . . . . . . . . . . . . . . . . . . . . Starting . . . . . . . . . . . . . . . . . . . . . . . . . . . . . . . . . . . . . . . . . . . . . . . . . . . . . Exhaustsystem . . . . . . . . . . . . . . . . . . . . . . . . . . . . . . . . . . . . . . . . . . . . . . . . .
Hood Checking Under. Hood Release . . . . . . . . . . . . . . . . . . . . . . . . . . . . . . . . . . . 6-6 Horn . . . . . . . . . . . . . . . . . . . . . . . . . . . . . . . . . . . . . . . . . . . . . . . . . . . . . . . . . . 2-29 Hydroplaning (See “Driving in the Rain”) I If You’re Stuck in Sand. Mud. Ice. or Snow . . . . . . . . . . . . . . . . . . . . . . . . . . . 5-35 Ignitionswitch . . . . . . . . . . . . . . . . . . . . . . . . . . . . . . . . . . . . . . . . . . . . . . . . . .
Lock Cylinders (See “Key Lock Cylinders”) Loss of Control (See “Driving-Loss of Control”) Lubrication (See “Recommended Fluids and Lubricants”) Luggage Carrier (Option) . . . . . . . . . . . . . . . . . . . . . . . . . . . . . . . . . . . . . . . . . . 2-62 M Malfunction Indicator Lamp (See “Lights”) Maintenance (See “Scheduled Maintenance Services”) Master Cylinder (See “Brakes”) Mirrors ConvexOutside . . . . . . . . . . . . . . . . . . . . . . . . . . . . . . . . . . . . . . . . . . . . . . .
Replacement Parts . . . . . . . . . . . . . . . . . . . . . . . . . . . . . . . . . . . . . . . . . . . . . . . 6-6 1 Reporting Safety Defects To The United States Government (See “Safety Defects”) Roadside Assistance . . . . . . . . . . . . . . . . . . . . . . . . . . . . . . . . . . . . . . . . . . . . . . . 8-5 Rocking YourVehicle . . . . . . . . . . . . . . . . . . . . . . . . . . . . . . . . . . . . . . . . . . . . 5-35 1-10 SafetyBelts . . . . . . . . . . . . . . . . . . . . . . . . . . . . . . . . .
Seats (continued) Power Driver’sSeat . . . . . . . . . . . . . . . . . . . . . . . . . . . . . . . . . . . . . . . . . . . . 1-2 Rearseats . . . . . . . . . . . . . . . . . . . . . . . . . . . . . . . . . . . . . . . . . . . . . . . . . . . . 1-4 Reclining Bucket Seats . . . . . . . . . . . . . . . . . . . . . . . . . . . . . . . . . . . . . . . . . . 1-3 Removable Seats (Touring and Non-Touring Bench Seats) . . . . . . . . . . . . . . 1-7 Seatback Latches (Non-Touring Bench Seats) . . . . . . . . . . . . .
Towing ATrailer . . . . . . . . . . . . . . . . . . . . . . . . . . . . . . . . . . . . . . . . . . . . . . . . . . . . 4-26 Driving on Grades . . . . . . . . . . . . . . . . . . . . . . . . . . . . . . . . . . . . . . . . . . 4-32 Driving with a Trailer . . . . . . . . . . . . . . . . . . . . . . . . . . . . . . . . . . . . . . . 4-30 ParkingonHills . . . . . . . . . . . . . . . . . . . . . . . . . . . . . . . . . . . . . . . . . . . . 4-32 4-31 Passing . . . . . . . . . . . . . . . . . . . . . . . . . . .
Windows . . . . . . . . . . . . . . . . . . . . . . . . . . . . . . . . . . . . . . . . . . . . . . . . . . . . . . Swing-Out . . . . . . . . . . . . . . . . . . . . . . . . . . . . . . . . . . . . . . . . . . . . . . . . . . Windshield Rear Window Wipermasher-Dutch Door .......................... Washer ...................................................... WasherFluid . . . . . . . . . . . . . . . . . . . . . . . . . . . . . . . . . . . . . . . . . . . . . . . . . Wipers . . . . . . . . . . . . . . . . .