2V Lithium-Ion Multifunction Tool Model 67707 Set up and Operating Instructions Visit our website at: http://www.harborfreight.com Read this material before using this product. Failure to do so can result in serious injury. Save this manual. Copyright© 2010 by Harbor Freight Tools®. All rights reserved. No portion of this manual or any artwork contained herein may be reproduced in any shape or form without the express written consent of Harbor Freight Tools.
NOTICE is used to address practices not related to personal injury. Save This Manual Keep this manual for the safety warnings and precautions, assembly, operating, inspection, maintenance and cleaning procedures. Write the product’s serial number in the back of the manual near the assembly diagram (or month and year of purchase if product has no number). Keep this manual and the receipt in a safe and dry place for future reference.
a power tool while you are tired or under the influence of drugs, alcohol or medication. A moment of inattention while operating power tools may result in serious personal injury. 4. a. Do not force the power tool. Use the correct power tool for your application. The correct power tool will do the job better and safer at the rate for which it was designed. b. Use personal protective equipment. Always wear eye protection.
7. c. Keep cutting tools sharp and clean. Properly maintained cutting tools with sharp cutting edges are less likely to bind and are easier to control. 1. d. Use the power tool and accessories in accordance with these instructions, taking into account the working conditions and the work to be performed. Use of the power tool for operations different from those intended could result in a hazardous situation. Maintain labels and nameplates on the tool. These carry important safety information.
flammable, but they also obstruct vents under the Battery Pack. Place the Battery Pack on a stable, solid, nonflammable surface (such as a stable metal workbench or concrete floor) at least 1 foot away from all flammable objects, such as drapes or walls. Keep a fire extinguisher and a smoke detector in the area. Frequently monitor the Battery Pack and Charger while charging. 10. This product is not a toy. Keep it out of reach of children. 11.
4. Inspect Battery Pack before every use; do not use or charge if damaged. abnormal vibration occurs, stop use immediately. Save these instructions. Vibration Safety This tool vibrates during use. Repeated or long-term exposure to vibration may cause temporary or permanent physical injury, particularly to the hands, arms and shoulders. To reduce the risk of vibration-related injury: 1.
the applicable standards of Underwriters Laboratories, Inc., the Canadian Standard Association, and the National Electrical Code. 2. Double insulated tools may be used in either of the 120 volt outlets shown in the preceding illustration. (See Outlets for 2-Prong Plug.) Extension Cords Note: Extension cords must not be used with this item’s Charger. Symbology Double Insulated Canadian Standards Association Underwriters Laboratories, Inc.
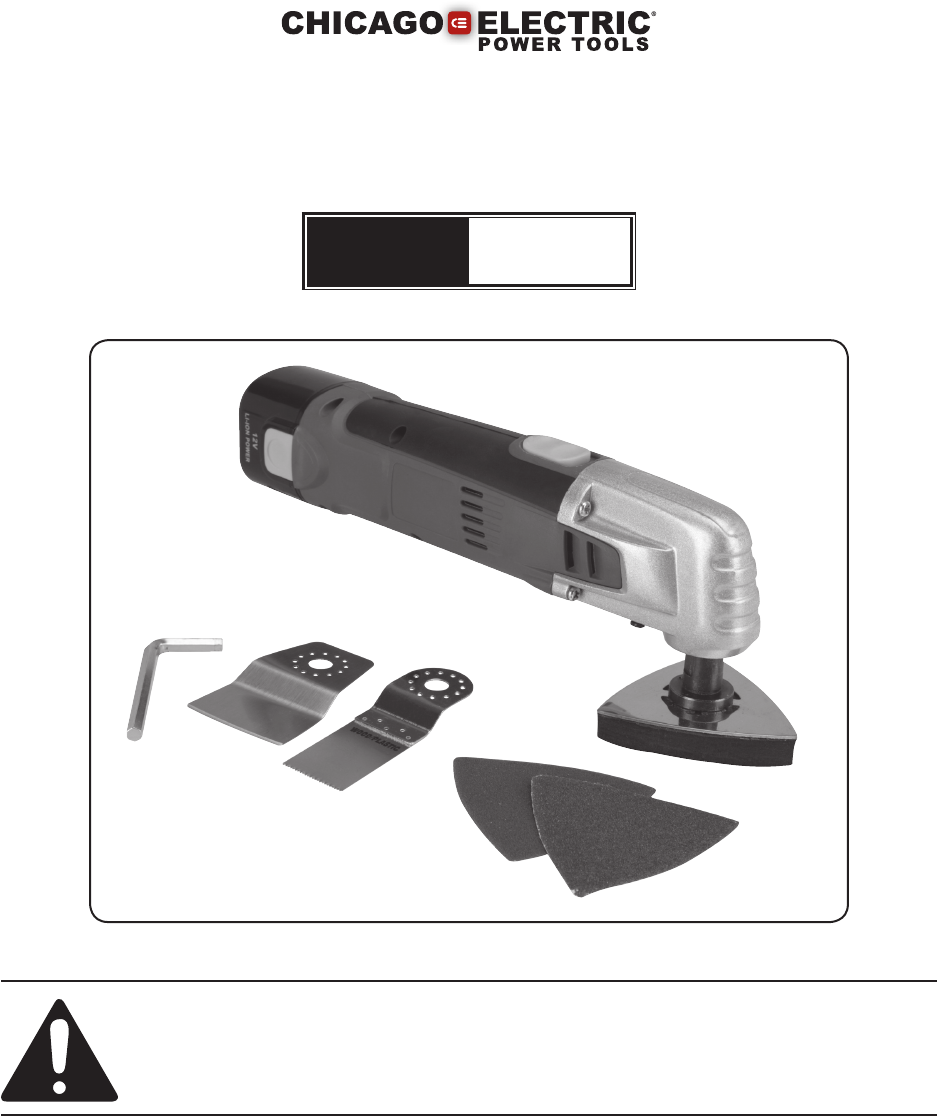
assembling or making any adjustments to the tool. Specifications Charger Input 120 VAC Battery Type 12 V Lithium, 1.3 Ah Motor Speed 15,000 OPM (No Load) Accessories Sandpaper (2 pieces for wood and 2 pieces for metal) Sanding Pad Cutting Blade Scraper Blade Hex Wrench Note: For additional information regarding the parts listed in the following pages, refer to the Assembly Diagram near the end of this manual. Components Unpacking When unpacking, make sure that the item is intact and undamaged.
Work Piece and Work Area Set Up 1. 2. Designate a work area that is clean and well-lit. The work area must not allow access by children or pets to prevent distraction and injury. Route the power cord of the Charger along a safe route without creating a tripping hazard or exposing the power cord to possible damage. 5. Note: Do not use a battery pack immediately after charging. Allow it to cool first. Store the Charger and Battery Packs not in use indoors, away from children.
Scraper Blade (501) Cap Screw (1) Figure 4 General Operating Instructions Spindle (3) 1. Secure loose work pieces using a vise or clamps (not included) to prevent movement while working. 2. Install desired accessory. OFF Retainer (2) Note: When attaching the angled Cutting Blade (502) or Scraper Blade (501), orient the accessory as shown in Figure 4 above, so the Cap Screw (1) will be out of the way when working. c. Replace the Retainer and Cap Screw while holding the accessory.
ON Power Switch (26) Figure 7 5. While holding the Tool with both hands, slide the Power Switch (26) forward to activate. 6. Do not allow contact between Sandpaper, Scraper, or Blade and workpiece until tool is at full speed. 7. Avoid contact with foreign objects such as metal screws and nails when sanding, scraping, or cutting. 8. Do not apply excessive pressure on the Tool. Allow the Tool to do the work. OFF Power Switch (26) Figure 8 9. When finished using, slide the Power Switch (26) OFF.
Maintenance And Servicing or Battery Pack. Keep Charger and Battery Pack dry. Procedures not specifically explained in this manual must be performed only by a qualified technician. To prevent serious injury from accidental operation: Turn the Power Switch off and remove the Battery Pack from the tool before performing any inspection, maintenance, or cleaning procedures. Unplug the Charger before performing any inspection, maintenance or cleaning procedures.
Troubleshooting Problem Tool will not start. Possible Causes Likely Solutions 1. Battery Pack needs charging 1. Charge Battery Pack. 2. Battery Pack not properly seated. 2. Check that Battery Pack is fully inserted into tool so that it snaps into place. 3. Connection to Battery Pack 3. Check that the terminals inside the tool are not damaged. bent or missing. Have repaired by a qualified technician if needed. Tool operates slowly. 1. Battery Pack needs charging. 1. Charge Battery Pack. 2.
Parts List & ASSEMBLY DIAGRAM Part 1 2 3 4 5 6 7 8 9 10 11 12 13 14 15 16 17 18 19 20 21 22 23 Description Cap Screw M8 x 12 Retainer Spindle Rubber Casing Circlip for shaft 26 Spring Washer Bearing 6000 Block Bushing Screw ST4 x 20 Reducer Circlip for Shaft 4 Bearing 625 Shaft Bearing 608 Screw M3 x 18 Seal Packing Collar Middle Cover Seal Packing Collar Motor Trigger Spring Right Housing Page 14 Qty 1 1 1 1 1 1 1 1 1 4 1 1 1 1 1 2 2 1 2 1 1 1 1 Part 24 26 27 28 29 30 31 32 33 34 35 36 37 38 39 41 501
LIMITED 90 DAY WARRANTY Harbor Freight Tools Co. makes every effort to assure that its products meet high quality and durability standards, and warrants to the original purchaser that this product is free from defects in materials and workmanship for the period of 90 days from the date of purchase.