
Installation instructions


Model: FTP-Series Installation Instructions
4
FTP-220, 320, And 440 Assembly
To assemble the FTP-220, 320, and 440:
1. Assemble pole (50) to base (40) using one 3/8-16 x 1"
FHCS (90). (see Figure 2)
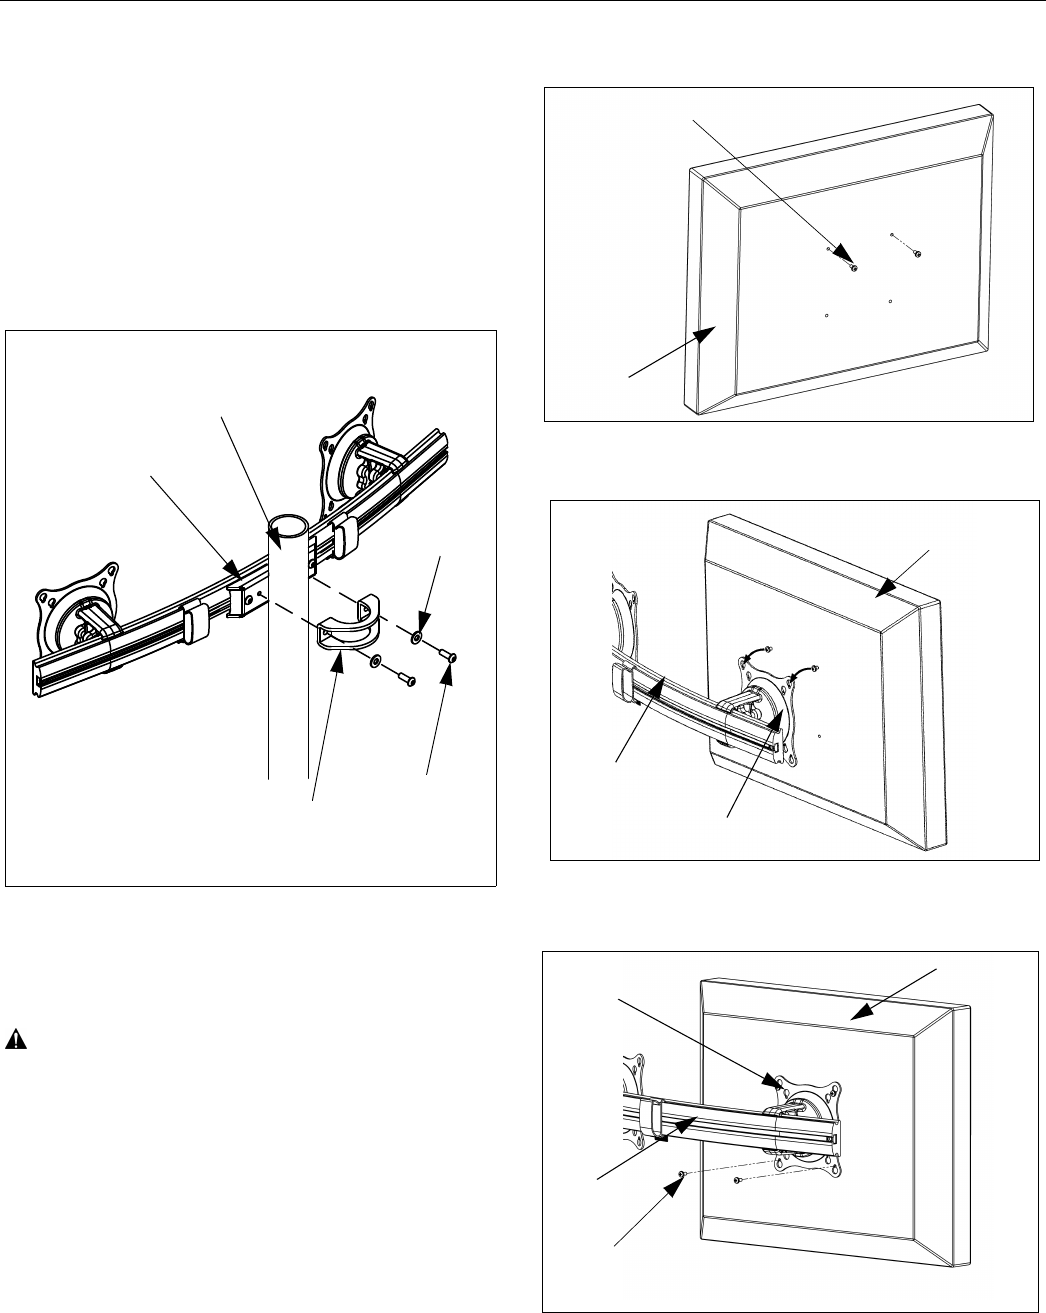
2. Assemble pole clamp back (240) to pole mount front
using two FW (250) and two BHCS (260) using a
5/32" hex key. (see Figure 4)
3. Secure pole mount back (240) to pole mount front and
pole by tightening two BHCS (260) using a 5/32" hex
key.
Figure 4: Assemble Array Rail to Pole
Display Installation
Attach Centris Head to Flush Mount Display
CAUTION!
CAUTION: If display uses a screw size other than
those included in the kit, DO NOT use the screws
provided. Using the wrong screws could result in
damage to your monitor.
1. Install two M4 x 12mm Phillips pan head screws (160)
into two upper mounting holes in display back.
(see Figure 5)
NOTE: DO NOT fully tighten at this time.
2. Hang display on Centris head. (see Figure 6)
3. Install bottom two M4 x 12mm Phillips pan head
screws (160) through Centris head mounting holes
and into lower mounting holes in display back.
4. Tighten ALL four M4 x 12mm Phillips pan head
screws (160). (see Figure 7)
Figure 5: Prepare Display
Figure 6: Hang Display
Figure 7: Secure Display to Centris Bracket
Pole Clamp Back (240)
Pole
(250)
(260)
Pole Mount front
with Array
Display
M4 x 12mm Phillips Pan Head Screw (30)
Display
Centris Head
(20, 30)
Display
Centris Head
(20, 30)
(160)