
User Manual


Table Of Contents
- Manual
- Preface
- Chapter 1: Quick Start Guide
- Chapter 2: Storage Devices, Mouse, Audio & Printer
- Chapter 3: Power Management
- Chapter 4: Drivers & Utilities
- What to Install
- Driver Installation
- Manual Driver Installation
- Updating/Reinstalling Individual Drivers
- User Account Control (Win Vista)
- Windows Security Message
- New Hardware Found
- Driver Installation Procedure
- Chipset
- Video
- Audio
- Modem
- LAN
- TouchPad
- Card Reader/ExpressCard
- Hot Key
- Intel MEI Driver
- e-SATA Support
- Optional Drivers
- Wireless LAN
- PC Camera
- 3.5G Module
- Fingerprint Reader Module
- Intel Turbo Memory Technology Driver
- Chapter 5: BIOS Utilities
- Overview
- The Power-On Self Test (POST)
- The Setup Utility
- Main Menu
- Advanced Menu
- Installed O/S (Advanced Menu)
- SATA Mode Selection (Advanced Menu)
- DFOROM (Robson) Support (Advanced Menu > SATA Mode Selection [AHCI]
- Boot-time Diagnostic Screen: (Advanced Menu)
- Legacy OS Boot: (Advanced Menu)
- Reset Configuration Data: (Advanced Menu)
- Power On Boot Beep (Advanced Menu)
- Battery Low Alarm Beep: (Advanced Menu)
- Fan Control (Advanced Menu)
- Security Menu
- Boot Menu
- Exit Menu
- Chapter 6: Upgrading The Computer
- Chapter 7: Modules
- Chapter 8: Troubleshooting
- Appendix A: Interface (Ports & Jacks)
- Appendix B: NVIDIA Video Driver Controls
- Appendix C: Specifications
- Appendix D: Windows XP Information
- DVD Regional Codes
- Windows XP Start Menu & Control Panel
- Audio Features
- Function/Hot Key Indicators
- Video Features
- NVIDIA Video Driver Controls
- Power Management Features
- Configuring the Power Button
- Battery Information
- Driver Installation
- Bluetooth Module
- Wireless LAN Module
- PC Camera Module
- 3.5G Module
- Fingerprint Reader Module
Storage Devices, Mouse, Audio & Printer
Optical Device 2 - 3
2
Optical Device
There is a bay for a 5.25" optical (CD/DVD) device (12.7mm height). The actu al de-
vice will depend on the model you purchased (see “Storage” on page C - 3). The
optical device is usually labeled “Drive D:” and may be used as a boot device if
properly set in the BIOS (see “Boot Menu” on page 5 - 13).
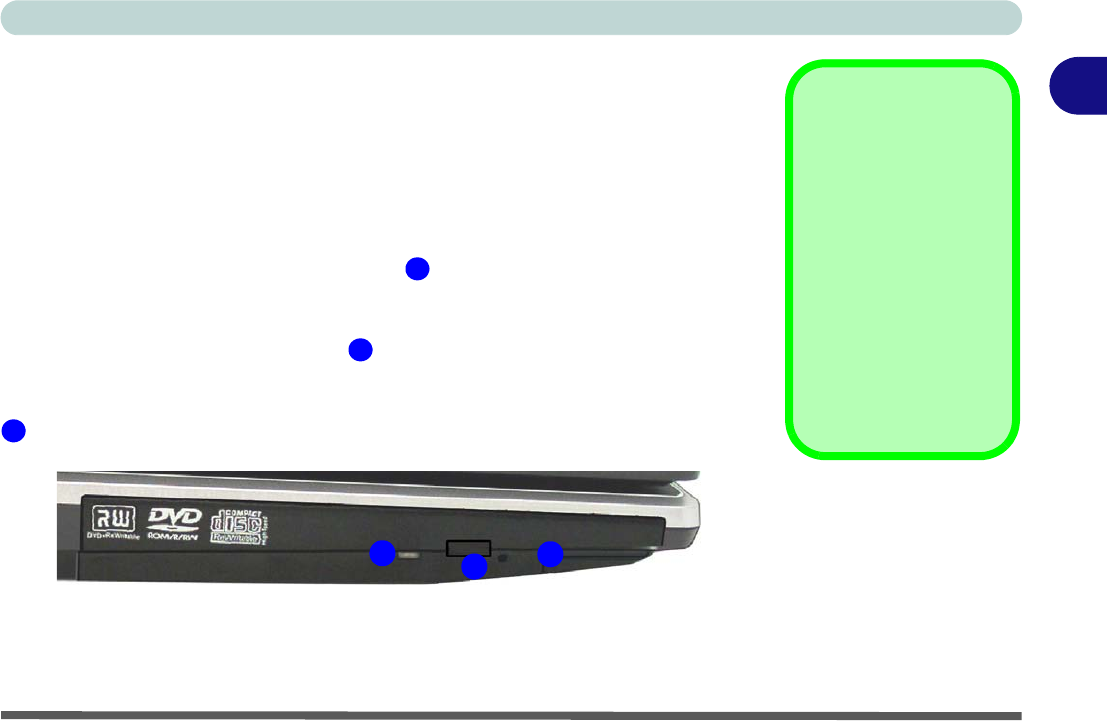
Loading Discs
To insert a CD/DVD, press the open button and carefully place a CD/DVD onto
the disc tray with label-side facing up (use just enough force for the disc to click onto
the tray’s spindle). Gently push the CD/DVD tray in until its lock “clicks” and you
are ready to start. The busy indicator will light up while data is being accessed,
or while an audio/video CD, or DVD, is playing. If power is unexpectedly interrupt-
ed, insert an object such as a straightened paper clip into the emergency eject hole
to open the tray.
Sound Volume
Adjustment
How high the sound vol-
ume can be set depends
on the setting of the vol-
ume control within Win-
dows. Click the Volume
icon on the taskbar to
check the setting.
Peripherals must be
connected before you
turn on the system.
Figure 2 - 2
Optical Device
1
2
3
1
2
3