
Specifications

13
Introduction to ChipPC ThinX OS
Ref: DL128B-1.0
Chip PC Technologies
www.chippc.com
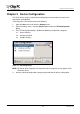
1.5 Creating a PNAgent Connection
To create a PNAgent connection, perform the following:
1. Select PNAgent View from the My Citrix View menu. The PNAgent menu will appear
on the left side of the menu bar.
2. If this is not the first time the PNAgent is configured, skip to step 5.
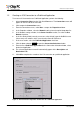
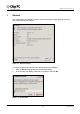
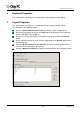
3. If this is the first time a PNAgent connection is configured, the PNA Configuration
dialog will automatically appear. In the PNA Configuration dialog, type the URL of the
server that the PNAgent will connect to.
NOTE When using XenDesktop, enter the URL of the XenDesktop server.
4. Click Update to accept the PNA Configuration settings.
Figure 10 – PNA Configuration Dialog
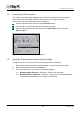
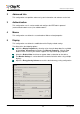
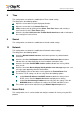
5. The Program Neighborhood Agent Logon dialog will automatically appear.
6. In the Program Neighborhood Agent Logon dialog, type the following credentials for
connecting to the PNAgent server:
6.1. Username.
6.2. Password.
6.3. Domain.
7. The Save Password option may be selected in order to save the credentials for future
PNAgent connections.
8. Click OK to complete the creation of the PNAgent connection
Figure 11 – Program Neighborhood Agent Logon