
Setup guide

3-10 J Series 2.0, 2.4, and 3.0 kW Setup Guide
020-100751-03 Rev. 1 (02-2014)
Section 3: Operation
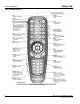
Slide Bars In Menus: The current value for a given parameter,
such as size or vertical stretch, appears to the left of its slide bar
icon (adjustment window). This number often expresses a
percentage, or it may have units associated with it (such as
pixels), depending on the specific option. Press L
EFT/RIGHT ARROW KEY to gradually adjust the setting up or
down; both the number and the length of the bar change accordingly. Hold for continuous adjustment. Or press
E
NTER to activate a slide bar text box for specific number entry via the keypad and then press ENTER to save
(or press E
XIT to cancel).
“Direct” Slide Bars: For quick access, to Gamma, Brightness, and Contrast slide bars without traveling the
menu system. Press Gamma, Brightness, or Contrast to display the contrast slide bar.
Use the arrow keys to adjust a direct slide bar, or press E
NTER and enter a specific number from the keypad,
then E
NTER or LEFT ARROW KEY or RIGHT ARROW KEY to save (or EXIT to cancel). When you are done, press
E
XIT to save and return to your presentation.
NOTES: 1) You can still adjust a direct slide bar as usual if the display is turned off (see OSD or Menu
Preferences menu) — the slide bar just won’t be visible. 2) A direct slide bar disappears if it is not used within
five seconds.
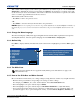
Check Boxes: Conditions are present if its adjacent check box
contains a check mark. To toggle the check box, highlight and press
E
NTER, or highlight and use RIGHT ARROW KEY to check and LEFT
A
RROW KEY to clear. If a check box is numbered, enter its number
to immediately toggle the check box.
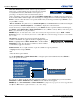
Pull-Down Lists: To see a pull-down list of options available for a given parameter:
• Highlight the list and press E
NTER
-OR-
• Enter the menu option number
Use the U
P ARROW KEY or DOWN ARROW KEY to navigate up and down within the list. Press ENTER to
choose an option from the list.
If you prefer to quickly scroll through a list without first pulling it down, highlight the option and use L
EFT
A
RROW KEY or RIGHT ARROW KEY. Press ENTER when the desired choice appears.
NOTES: 1) Press L
EFT ARROW KEY or RIGHT ARROW KEY to jump between pages in an extra long pull-down
list. 2) Press E
XIT while in a pull-down list to cancel any change.
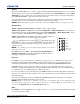
White Uniformity
Left Side1. 35.6
Edge Blending
Blending Enable1.
1.
2.
3.
4.
5.
6.
7.
8.
9.
10.
Serial (RS-232 IN) Options
Serial (RS-232 OUT) Options
Serial (RS-422) Options
Projector Address
Network Routing
Ethernet Settings
Broadcast Key
Front IR Enable
Back IR Enable
Wired Keypad Enable
Communications
Separate
Separate
RS-232 and RS-422 Joined
RS-232 and Ethernet Joined
All Joined
1.
2.
3.
4.