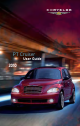
PT Cruiser User Guide 2010
IMPORTANT: This User Guide is intended to familiarize you with the important features of your vehicle. The DVD enclosed contains your Owner’s Manual, Navigation Radio or Multimedia Radio Manual, Warranty Booklets, Tire Warranty and 24-Hour Towing Assistance (new vehicles purchased in the U.S.) or Roadside Assistance (new vehicles purchased in Canada) in electronic format. We hope you find it useful.
TABLE OF CONTENTS INTRODUCTION/WELCOME WELCOME FROM CHRYSLER GROUP LLC . . . . . . . . . 2 CONTROLS AT A GLANCE DRIVER COCKPIT . . . . . . . . . . . . . 4 INSTRUMENT CLUSTER . . . . . . . . . 6 GETTING STARTED KEY FOB . . . . . . . . . . . . THEFT ALARM . . . . . . . . SEAT BELT . . . . . . . . . . CHILD RESTRAINTS . . . . . FRONT SEATS . . . . . . . . . TILT STEERING COLUMN . . PROGRAMMABLE FEATURES . . . . . . . . . . . . . . . . . . . . . . . . . . . . . . . . . . . . 8 . 8 . 9 . 9 . 11 . 13 .
INTRODUCTION/WELCOME WELCOME FROM CHRYSLER GROUP LLC Congratulations on selecting your new Chrysler Group LLC vehicle. Be assured that it represents precision workmanship, distinctive styling, and high quality - all essentials that are traditional to our vehicles. This guide illustrates and describes the operation of features and equipment that are either standard or optional on this vehicle.
INTRODUCTION/WELCOME CAUTION! Never park your vehicle over dry grass or other combustible materials. The heat from your vehicle exhaust system could cause a fire. CHRYSLER, DODGE, JEEP, ATF+4, MOPAR and Uconnect are registered trademarks of Chrysler Group LLC.
CONTROLS AT A GLANCE DRIVER COCKPIT 4
CONTROLS AT A GLANCE 5
CONTROLS AT A GLANCE INSTRUMENT CLUSTER Warning Lights - Low Fuel Warning Light - Charging System Light** - Oil Pressure Warning Light** - Anti-Lock Brake (ABS) Light** - Airbag Warning Light** - Tire Pressure Monitoring System (TPMS) Light - Engine Temperature Warning Light - Seat Belt Reminder Light BRAKE - Brake Warning Light** - Malfunction Indicator Light (MIL)** - Traction Control System (TCS) Indicator Light** 6
CONTROLS AT A GLANCE Indicators - Turn Signal Indicators - High Beam Indicator - Front Fog Light Indicator - Vehicle Security Indicator* - Cruise Indicator Odometer Messages door - Door Ajar gate - Liftgate Ajar gASCAP - Fuel Cap Fault LoW TirE - Low Tire Pressure * If equipped ** Bulb Check with Key On 7
GETTING STARTED KEY FOB Locking And Unlocking The Doors/Liftgate • Press the LOCK button once to lock all the doors and the liftgate. Press the UNLOCK button once to unlock the driver’s door only and twice within five seconds to unlock all the doors and liftgate. • All doors can be programmed to unlock on the first press of the UNLOCK button. Refer to Programmable Features in this guide. WARNING! Leaving unattended children in a vehicle is dangerous for a number of reasons.
GETTING STARTED SEAT BELT • Be sure everyone in your vehicle is in a seat and using a seat belt properly. WARNING! In a collision, you and your passengers can suffer much greater injuries if you are not properly buckled up. You can strike the interior of your vehicle or other passengers, or you can be thrown out of the vehicle. Always be sure you and others in your vehicle are buckled up properly.
GETTING STARTED • The tether strap should be routed under the center of the head restraint and attached to the tether anchor on the rear of the seatback. • Tighten all three straps as you push the child restraint rearward and downward into the seat. WARNING! • Improper installation of a child restraint to the LATCH anchorages can lead to failure of an infant or child restraint. The child could be badly injured or killed.
GETTING STARTED FRONT SEATS WARNING! Adjusting a seat while the vehicle is moving is dangerous. The sudden movement of the seat could cause you to lose control. The seat belt might not be properly adjusted, and you could be injured. Only adjust a seat while the vehicle is parked. Manual Seat Adjustment Forward/Rearward • Lift up on the adjusting bar located at the front of the seat near the floor and release at the desired position.
GETTING STARTED Six-Way Power Seats • The power seat switch is located on the outboard side of the seat near the floor. Use the switch to move the seat up, down, forward, rearward, or to tilt the seat. CAUTION! DO NOT place any article under a power seat or impede its ability to move as it may cause damage to the seat controls. Seat travel may become limited if movement is stopped by an obstruction in the seat’s path.
GETTING STARTED CAUTION! Repeated overheating of the seat could damage the heating element and/or degrade the material of the seat. Fold-Flat Front Passenger Seat • The front passenger seat can be folded flat. Pull up on the recliner lever, to the full upward position, to fold down the seat back. TILT STEERING COLUMN • The tilt lever is located on the steering column, below the turn signal lever. • Push down on the lever to unlock the steering column.
GETTING STARTED PROGRAMMABLE FEATURES Electronic Vehicle Information Center (EVIC) - If Equipped • Press the EVIC button, located below the speedometer, until Personal Settings is displayed on the EVIC. Use the EVIC button to select one of the following, then press and hold the EVIC button to select either “ON” or “OFF”.
OPERATING YOUR VEHICLE TURN SIGNAL/LIGHTS LEVER Headlights/Parking Lights • Rotate the end of the lever to the first detent for parking lights second detent for headlights . and to the Instrument Panel Dimmer • Rotate the center portion of the lever to the extreme bottom position to fully dim the instrument panel lights and prevent the interior lights from illuminating when a door is opened.
OPERATING YOUR VEHICLE Turn Signals/Lane Change Assist • Tap the lever up or down once and the turn signal (right or left) will flash three times and automatically turn off. WIPER/WASHER LEVER Front Wipers Intermittent, Low And High Operation • Rotate the end of the lever to the first detent position for one of five intermittent settings, the second detent for low wiper operation and the third detent for high wiper operation.
OPERATING YOUR VEHICLE SPEED CONTROL LEVER Cruise ON/OFF • Push the ON/OFF button to activate the Speed Control. • CRUISE will appear on the instrument cluster to indicate the Speed Control is on. • Push the ON/OFF button a second time to turn the system off. WARNING! Leaving the Electronic Speed Control system on when not in use is dangerous. You could accidentally set the system or cause it to go faster than you want. You could lose control and have an accident.
OPERATING YOUR VEHICLE POWER WINDOWS • The front controls for all power windows are located on the instrument panel. • Press the window lock switch, located between the window switches, down to disable the rear window switches. • Both front windows have an Auto Down feature. Push the switch down past the detent and immediately release to fully lower the window. • The rear controls are located on the back of the center console. • Push the switch down to lower to a desired setting.
OPERATING YOUR VEHICLE TUMBLING REAR SEAT/SEAT REMOVAL • The rear seats can be removed to increase storage capacity. • Push and hold the folding rear seat button to fold the rear seatback down (toward the front of the vehicle). • Pull the release strap located on the outboard side of the seat. Lift up the seat and tumble the seat forward. • Attach the tether, located at the base of the seat cushion, onto the hook bar on the center trim panel to hold the seat in place.
OPERATING YOUR VEHICLE CLIMATE CONTROLS Air Recirculation • For maximum cooling, rotate the temperature control to the MAX A/C position, then push the A/C and recirculation buttons. • For window defogging, turn the recirculation button off. • Recirculation is not allowed in defrost, floor, defrost/floor (mix) modes. POWER SUNROOF • The power sunroof switch is located on the overhead console. WARNING! • Never leave children in a vehicle with the key in the ignition switch.
OPERATING YOUR VEHICLE Closing Sunroof Express • Press the switch forward and release. The sunroof will close automatically from any position. Manual Open/Close • Press and hold the switch rearward to open or forward to close the sunroof. Any release of the switch will stop the movement, and the sunroof will remain in a partially open or closed position until the switch is pressed again. Venting Sunroof • Press and release the “VENT“ button, and the sunroof will open to the vent position.
ELECTRONICS NON-TOUCH-SCREEN RADIO Sales Code REF • The radio sales code is located on the lower right side of the radio faceplate. Seek Up/Down Button • Press and release to search for and stop at the next listenable station in AM/FM mode. • Press the right side of the button to seek up and the left side of the button to seek down. • Holding the button will bypass stations without stopping until you release it.
ELECTRONICS • After adjusting the hours, press the right side TUNE/AUDIO control knob and the minutes will begin to blink. • Adjust the minutes using the right side TUNE/AUDIO control knob, then press the TUNE/AUDIO control knob to save the time change. • To exit, press any button/knob or wait five seconds. Station Presets • Press the SET/RND button once and SET 1 will show in the display. Then select the button (1–6). • A second station may be added to each push button.
ELECTRONICS • Park your vehicle outside of the garage and turn the ignition switch to the ON/RUN position. • Place the hand-held transmitter 1 to 3 in (3 to 8 cm) from the HomeLink® buttons while keeping the indicator light in view. • Simultaneously, press and hold both the chosen HomeLink® button and the hand-held transmitter button until the HomeLink® indicator flash rate changes from a slow to a rapidly blinking light, then release both the HomeLink® and the hand-held transmitter buttons.
ELECTRONICS Using HomeLink® • To operate, simply press and release the programmed HomeLink® button and the trained device will operate. • Refer to your Owner’s Manual on the DVD for further details. If you have any problems programming HomeLink®, or require assistance, please call toll-free 1–800–355–3515 or, on the Internet, at www.HomeLink.com. POWER OUTLET • There is one 12–volt power outlet located in the center console below the radio.
UTILITY TRAILER TOWING WEIGHTS (MAXIMUM TRAILER WEIGHT RATINGS) Trailer Towing Weights Max. GTW (Gross Max. Tongue Wt. Engine/Transaxle Frontal Area Trailer Wt.) (See Note) 2.4L/Automatic 20 sq ft (1.9 sq m) 1,000 lbs (454 kg) 110 lbs (50 kg) Note: The trailer tongue weight must be considered as part of the combined weight of occupants and cargo, and should never exceed the weight referenced on the Tire and Loading Information placard. Refer to local laws for maximum trailer towing speeds.
WHAT TO DO IN EMERGENCIES 24 HOUR TOWING ASSISTANCE - U.S. ONLY • Dial toll-free 1-800-521-2779. • Provide your name, vehicle identification number and license plate number. • Provide your location, including telephone number, from which you are calling. • Briefly describe the nature of the problem and answer a few simple questions. • You will be given the name of the service provider and an estimated time of arrival. If you feel you are in an “unsafe situation”, please let us know.
WHAT TO DO IN EMERGENCIES • We recommend you drive to the nearest Service Center and have the vehicle serviced immediately. WARNING! Driving a vehicle with the red brake light on is dangerous. Part of the brake system may have failed. It will take longer to stop the vehicle. You could have an accident. Have the vehicle checked immediately. - Malfunction Indicator Light (MIL) • Certain conditions, such as a loose or missing gas cap, poor fuel quality, etc., may illuminate the MIL after engine start.
WHAT TO DO IN EMERGENCIES Fuel Cap/Loose Gas Cap Message • If a “gas cap” message (shown as gASCAP) appears, tighten the gas cap until a “clicking” sound is heard. • If the message continues to appear for more than three days after tightening the gas cap, see your authorized dealer. IF YOUR ENGINE OVERHEATS • In any of the following situations, you can reduce the potential for overheating by taking the appropriate action. • On the highways — slow down.
WHAT TO DO IN EMERGENCIES JACKING AND TIRE CHANGING WARNING! • Being under a jacked-up vehicle is dangerous. The vehicle could slip off the jack and fall on you. You could be crushed. Never put any part of your body under a vehicle that is on a jack. Never start or run the engine while the vehicle is on a jack. If you need to get under a raised vehicle, take it to a service center where it can be raised on a lift. • The jack is designed to use as a tool for changing tires only.
WHAT TO DO IN EMERGENCIES Spare Tire Removal • Lift up the cover and fit the jack-handle over the drive nut. Rotate the nut to the left until you can remove the swivel hook from the stowage basket. Swing the basket down to remove the compact spare tire. CAUTION! The hook is designed for use with the jack handle only. Use of an air wrench or other power tools is not recommended and can damage the winch. Preparations For Jacking • Park the vehicle on a firm, level surface. Avoid ice or slippery areas.
WHAT TO DO IN EMERGENCIES • Block both the front and rear of the wheel diagonally opposite the jacking position. For example, if changing the right front tire, block the left rear wheel. NOTE: Passengers should not remain in the vehicle while the vehicle is being jacked.
WHAT TO DO IN EMERGENCIES CAUTION! Do not attempt to raise the vehicle by jacking on the cross-member below the radiator, on the front suspension cross-member, or on the rear axle assembly. • There are two jacking locations on each side of the body, one at the front of the vehicle and one in the rear on the trailing arm bracket under the triangular cut out symbol. Turn the jack screw to the right until the jack head is properly engaged with the lift area closest to the wheel to be changed.
WHAT TO DO IN EMERGENCIES NOTE: The wheel cover is held on the wheel by the wheel nuts. When reinstalling original wheel, properly align the wheel cover to the valve stem, place the wheel cover onto the wheel, then install the wheel nuts. • Lower the vehicle by turning the jack screw to the left. • Finish tightening the nuts. Push down on the wrench while tightening the wheel nuts. Alternate nuts until each nut has been tightened twice. The correct wheel nut torque is 100 ft lbs (135 N m).
WHAT TO DO IN EMERGENCIES WARNING! When temperatures are below the freezing point, electrolyte in a discharged battery may freeze. Do not attempt jump-starting because the battery could rupture or explode and cause personal injury. Battery temperature must be brought above the freezing point before attempting a jump-start. Preparations for Jump-Start • The battery in your vehicle is located in the engine compartment just behind the left front headlight assembly.
WHAT TO DO IN EMERGENCIES Jump-Starting Procedure WARNING! Failure to follow this procedure could result in personal injury or property damage due to battery explosion. CAUTION! Failure to follow these procedures could result in damage to the charging system of the booster vehicle or the discharged vehicle. • Connect the positive (+) end of the jumper cable to the positive (+) post of the discharged vehicle.
WHAT TO DO IN EMERGENCIES CAUTION! Accessories that can be plugged into the vehicle power outlets draw power from the vehicle’s battery, even when not in use (i.e., cellular phones, etc.). Eventually, if plugged in long enough, the vehicle’s battery will discharge sufficiently to degrade battery life and/or prevent the engine from starting.
With a Key Without a Key Model Shift lever must be in *NEUTRAL. The distance to be traveled must not exceed 15 mi (25 km), and the towing speed must not exceed 25 mph (40 km/h).
WHAT TO DO IN EMERGENCIES FREEING A STUCK VEHICLE NOTE: If your vehicle is equipped with Traction Control, turn the system OFF before attempting to “rock” the vehicle. • If your vehicle becomes stuck in mud, sand or snow, it can often be moved by a rocking motion. Turn your steering wheel right and left to clear the area around the front wheels. Then shift back-and-forth between REVERSE and DRIVE.
WHAT TO DO IN EMERGENCIES EVENT DATA RECORDER (EDR) • This vehicle is equipped with an Event Data Recorder (EDR). The main purpose of an EDR is to record, in certain crash or near crash-like situations, such as an air bag deployment or hitting a road obstacle, data that will assist in understanding how a vehicle’s systems performed. The EDR is designed to record data related to vehicle dynamics and safety systems for a short period of time, typically 30 seconds or less.
MAINTAINING YOUR VEHICLE OPENING THE HOOD • Pull the release lever located below the instrument panel and in front of the driver’s door. • Raise the hood and locate the safety latch, in the middle of the hood opening. • Move the safety latch while lifting the hood at the same time. • Insert the support rod into the slot on the hood. • To close the hood, remove the support rod and place it in the retaining clip, then lower the hood slowly.
2.
MAINTAINING YOUR VEHICLE FLUIDS AND CAPACITIES Component Fluid, Lubricant, or Genuine Part Capacities Engine Coolant 2.4L MOPAR® Antifreeze/ Coolant Five Year/100,000 Mile Formula HOAT (Hybrid Organic Additive Technology) or equivalent. 6.5 Quarts (6.2 Liters) Includes heater and coolant recovery bottle filled to MAX level. Engine Oil with Filter 2.4L API Certified SAE 5W-20 engine oil, meeting the requirements of Chrysler Material Standard MS-6395.
24 30 44 36 42 48 54 60 X X X X X X X X X 66 72 78 X X X X X X X X X X X X X X X • Refer to the Owner’s Manual on the DVD for the complete maintenance schedule. NOTE: Change the engine oil and engine oil filter every 3,000 miles or 5,000 kilometers if using your vehicle under any of these severe duty conditions: Short trips, stop and go driving, dusty or off-road conditions, police, taxi, fleet, or frequent trailer towing. Replace the spark plugs.
MAINTAINING YOUR VEHICLE Maintenance Record Odometer Date Signature, Authorized Service Center 6,000 Miles (10,000 km) or 6 Months 12,000 Miles (20,000 km) or 12 Months 18,000 Miles (30,000 km) or 18 Months 24,000 Miles (40,000 km) or 24 Months 30,000 Miles (50,000 km) or 30 Months 36,000 Miles (60,000 km) or 36 Months 42,000 Miles (70,000 km) or 42 Months 48,000 Miles (80,000 km) or 48 Months 54,000 Miles (90,000 km) or 54 Months 60,000 Miles (100,000 km) or 60 Months 66,000 Miles (110,000 km) or 66 Mon
MAINTAINING YOUR VEHICLE FUSES Integrated Power Module (IPM) • The Integrated Power Module (IPM) is located in the engine compartment near the air cleaner assembly. This center contains cartridge fuses and mini-fuses.
MAINTAINING YOUR VEHICLE Cavity 24 25 26 27 28 29 30 31 32 33 34 35 36 37 Cartridge Fuse Mini-Fuse 25 Amp Natural 10 Amp Red 15 Amp Lt Blue 10 Amp Red 10 Amp Red 20 Amp Yellow 10 Amp Red 30 Amp Pink 10 Amp Red 30 Amp Pink 40 Amp Green 30 Amp Pink 25 Amp Natural Description Power Sunroof Feed Heated Mirror ENG ASD Relay Feed 2 IGN RUN Only ORC Feed IGN RUN ORC/OCM Feed Hot Car (No Fuse Required) Heated Seat Headlamp Washer Relay Control ENG ASD Control Feed 1 ABS MOD/J1962 Conn/PCM ABS Valve Feed ABS Pum
MAINTAINING YOUR VEHICLE WHEEL AND WHEEL TRIM CARE • All wheels and wheel trim, especially aluminum and chrome plated wheels, should be cleaned regularly with a mild soap and water to prevent corrosion. • To remove heavy soil and/or excessive brake dust, use MOPAR® Wheel Cleaner or equivalent or select a non-abrasive, non-acidic cleaner. CAUTION! Do not use scouring pads, steel wool, a bristle brush, or metal polishes. Do not use oven cleaner. These products may damage the wheels protective finish.
CONSUMER ASSISTANCE CHRYSLER GROUP LLC CUSTOMER CENTER WARNING! Engine exhaust, some of its constituents, and certain vehicle components contain, or emit, chemicals known to the State of California to cause cancer and birth defects, or other reproductive harm. In addition, certain fluids contained in vehicles and certain products of component wear contain, or emit, chemicals known to the State of California to cause cancer and birth defects, or other reproductive harm. P.O.
CONSUMER ASSISTANCE In Canada NOTE: • The Owner’s Manual and User Guide electronic files are also available on the Chrysler, Jeep and Dodge websites. • Click on the “For Owners“ tab, select “Owner/Service Manuals“, then select your desired model year and vehicle from the drop down lists. • If you believe that your vehicle has a safety defect, you should contact the Customer Service Department immediately.
CONSUMER ASSISTANCE Disclaimer: WARNING! • THE TIRE MANUFACTURER’S LIMITED WARRANTY PROGRAM, THE DETAILS OF WHICH CAN BE FOUND, ON THE OWNERS MANUAL DVD, THE TIRE MANUFACTURER’S WEBSITE OR AT ANY AUTHORIZED SERVICE CENTER ARE IN LIEU OF ALL OTHER REMEDIES OR WARRANTIES, EXPRESS OR IMPLIED, ARISING BY LAW OR OTHERWISE, INCLUDING FITNESS FOR A PARTICULAR PURPOSE OR MERCHANTABILITY.
CONSUMER ASSISTANCE Using Lift Kits WARNING! • Use of lift kits with some vehicle/tire combinations can cause instability or loss of control. When changing tire sizes, always consult an installer for optimum rim width and carefully check vehicle/tire clearances. Tires and the spare tire should be replaced after six years, regardless of the remaining tread. Failure to follow this warning can result in sudden tire failure. You could lose control and have an accident resulting in serious injury or death.
MOPAR ACCESSORIES MOPAR® ACCESSORIES • The following highlights just some of the authentic Chrysler Accessories by MOPAR® that have been engineered to customize your Chrysler PT Cruiser. • To see the full line of accessories, stop by your Chrysler dealer or visit MOPAR.com.
NOTES 54
NOTES 55
NOTES 56
This guide has been prepared to help you get quickly acquainted with your new Chrysler and to provide a convenient reference source for common questions. However, it is not a substitute for your Owner’s Manual. For complete operational instructions, maintenance procedures and important safety messages, please consult your Owner’s Manual, Navigation Radio User Manual, Multimedia User Manual and other Warning Labels in your vehicle. Not all features shown in this guide may apply to your vehicle.