
User's Manual


WLANTPBG 54M Wireless Mini-PCI Adapter User Guide
- 2 -
Chapter 2: Installation Guide
2.1 Hardware Installation
Open the mini-PCI slot cover of host PC Notebook housing (please observe the
necessary ESD precautions); Insert the adapter into the mini-PCI slot; Connect the
host PC notebook antennas to the adapter antenna connectors; Close the mini-PCI slot
cover of host PC Notebook housing.
The Wireless Mini-PCI adapter has a standard Mini-PCI interface for attaching to the
Mini-PCI connector on others embedded system. And this adapter has connector to
connect to the antenna.
2.2 Software Installation
2.2.1 Overview
This adapter also come with a wireless utility, following describe how to use the utility. For
example, software installs using in notebook.
The Adapter’s Setup Wizard will guide you through the Installation procedure for Windows
2000, XP. The Setup Wizard will install the Wireless Client Utility (WCU) and drivers.
The Setup steps for Windows 2000 and Windows XP are very similar. The following setup
steps are for Windows 2000.
2.2.2 Software Installation for Windows 2000
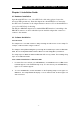
1. Insert the Resource CD into your CD-ROM drive, click Start and choose Run. In the
field that appears, enter F:\WCU\Setup.exe (if “F” is the letter of your CD-ROM drive),
figure 2-1 should then appear.
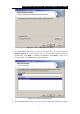
2. You can click Cancel to end the installation on the Preparing Setup screen, figure 2-1.
Otherwise, the Setup Wizard will display a screen similar to that shown in figure 2-2
after a moment.