
Quick Start Guide


AirFinder Quick Start Guide
9
▪ To remove the Access Point from the Power Cradle AC Power or the Location
Beacon AC Power, access the underside of the combined unit to release the
attaching clip.
▪ Acquire a ballpoint pen or paperclip.
▪ Find the slot underneath the Access Point. Insert the pen or paperclip into the
circular opening.
▪ While keeping the pen or paperclip inserted, pull the paperclip or pen gently
away from the Power Cradle AC Power or the Location Beacon AC Power. This
releases the attaching clip without breaking the Access Point or attachment.
▪ After detaching the Access Point, reattach it.
▪ When successfully reset, the device will return to the initial LED Behavior laid
out above (“LED Behavior when unit is powered”)
4. AirFinder 3.0 Location Beacon (WF-402A)
a. Hardware Verification
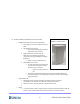
i. Remove AirFinder Location Beacon (WF-402A) from packaging.
ii. Visibly inspect front and back of unit (see Figures 13 and 14 below)
1. If not damaged, proceed to the next step.
iii. If the unit has visible damage, do not install. Instead, immediately put unit aside
and RMA.
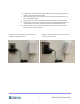
Figure 1: LB IN DC POWER CRADLE
Figure 2: REPLACE WITH PIC OF LB IN DC
POWER CRADLE
iv. Slide attaching pegs of LB into slots of DC Power Cradle.
v. See Figures 15 and 16 for verification of proper installation of Location Beacon.
vi. Verify proper functioning of LB by observing proper LED behavior of unit
according to the Power and Reset Conditions described below in b.
vii. After verification of the proper functioning of LB, then the LB has been properly
installed.