Terminal Reference Manual Tap or to close an active window, a dialog box, or a running application. If on the physical keypad. the button is not displayed on the toolbar, press to save the current settings and exit the application (or minimize the Tap window in some applications). If the button is not displayed on the toolbar, press on the physical keypad. Note: Some programs, such as the Reader Configuration Utility (94ReaderCfg.exe), may create an associated icon on the taskbar.
Chapter 2 Warning: Only the files stored in the Flash File System are retained during a hardware reset. 2.5.3 AUTO RUN Upon a hardware or software reset, the OS shall automatically execute AutoRun.exe and/or AutoRun.ini if any of the two files can be found in the “\DiskOnChip” folder or on SD card. IF AUTORUN.EXE EXISTS Upon cold boot, the OS shall automatically execute AutoRun.exe Upon warm boot, the OS shall automatically execute AutoRun.exe IF AUTORUN.
Terminal Reference Manual 2) Run DLDR.exe on your computer. 3) Press [Reset] + to perform a hardware reset on 9400. 4) Press + simultaneously in three seconds so that 9400 can enter the "Download" mode. 5) Seat 9400 in the cradle. 6) Press on 9400 to start image update. It will take approximately 5 minutes to update the image. A message will be displayed on the mobile computer to indicate the OS update is completed successfully.
Chapter 2 51
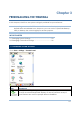
Chapter 3 PERSONALIZING THE TERMINAL In this chapter, a brief on the system settings is provided for your reference. Note: User settings are stored in SDRAM and will be overwritten by the system defaults after a hardware reset. However, you can use the CipherLab Backup Utility to backup the current registry for restore purpose. IN THIS CHAPTER 3.1 Changing System Settings .................................................... 53 3.2 Changing Connection Settings ...........................................
Terminal Reference Manual Keyboard tab: Select StickyKeys to enable simultaneous keystrokes while pressing one key at a time; select ToggleKeys to emit sounds when certain locking keys are pressed. Sound tab: Select SoundSentry to provide visual warnings for system sounds. Display tab: Select High Contrast to improve screen contrast with alternative colors.
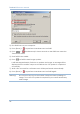
Chapter 3 Connect a mouse to the cradle via the USB Host port. In the [Mouse Properties] dialog box, you may configure and test your double-click settings. In the [Network and Dial-up Connections] window, you may configure settings for the mobile computer connects to a network directly or through a modem. Alternatively, you may tap Start > Settings > Network and Dial-up Connections. USB Connection (via USB device port on the cradle) WLAN (via 802.
Terminal Reference Manual In the [Storage Properties] dialog box, Storage Manager tab: You may reformat the available storage device, either the DiskOnChip folder or storage card. Actions include "Dismount the storage device", "Format the storage device", and "Set up disk partitions". The Storage Manager is for the use of system administrators only. In the [Stylus Properties] dialog box, Double-Tap tab: You may configure and test your double-tap settings.
Chapter 3 CONNECTION S DESCRIPTION SEE ALSO This is a shortcut to USB Connection, and the Start > Settings > Control selected interface is USB for factory setting. This connection is reflected in the control panel for direct PC connection. Panel > / This is the control of 802.11b module for wireless local area networking (WLAN) connection, which is disabled by default.
Terminal Reference Manual Tap this button to delete the connection you select. Tap this button to view the properties of the connection you select. 3.2.1 USB CONNECTION The USB connection is specifically for performing the ActiveSync operation via the cradle. Generally, it will automatically establish the connection and start the ActiveSync operation when you seat the mobile computer in the cradle. To stop the ActiveSync operation, simply remove the mobile computer. Tap and hold "USB Connection".
Chapter 3 Note: Please ignore [Properties] as the associated settings will not take effect. STATUS - DISCONNECT If you want to stop the ActiveSync operation without removing the mobile computer from the cradle, select [Status] and tap [Disconnect]. Alternatively, you may double-tap from the taskbar and tap [Disconnect]. When connected, the status icon will appear on the taskbar. When disconnected, this icon will disappear. 3.2.3 WLAN Tap and hold "WLAN1".
Terminal Reference Manual CONNECT/DISCONNECT Turn on the power to the 802.11b/g module through the Wireless Power Manager. Wait a few seconds for the mobile computer to automatically connect to the preferred network you have configured. CONNECTION ICONS DESCRIPTION By default, the 802.11b/g module is disabled. No status icon. Enable the 802.11b/g module through the Wireless Power Manager. The icon status icon on the taskbar will become , and the will appear.
Chapter 3 Otherwise, you may double-tap [Add New...] and add a new network option. For more network settings, tap [Advanced] on the Wireless Information tab. If you need to change the network settings, double-tap the selected network, and the Wireless Properties dialog box appears for configuration.
Terminal Reference Manual RSSI TRIGGER RSSI stands for Received Signal Strength Indication. Use an RSSI value to determine when it comes below a certain threshold at which point the mobile computer will seamlessly switch the network connection, for example, while moving in and out of range between different access points. Select [Adaptive Connection] and pick up a suitable value.
Chapter 3 3.2.4 BTPAN Tap and hold "BTPAN1". The pop-up menu provides a number of options. ENABLE/DISABLE CONNECTION ICONS DESCRIPTION This is the control of Bluetooth module for wireless personal area networking (WPAN) connection, which is not available until the Bluetooth Manager is executed. When enabled, the status icon will become . Tap and hold "BTPAN1" to select [Disable] from the pop-up menu. The status icon will disappear. Note: By default, DHCP is enabled.
Terminal Reference Manual 64
Chapter 4 USING APPLICATIONS The terminal provides several utilities and key applications which are made accessible from the desktop or the taskbar. Wireless Power Manager lets you determine whether the power is supplied to the WLAN module, along with its associated driver installed. Bluetooth Manager lets you configure the Bluetooth settings and use the Bluetooth services provided on the remote devices. 94ReaderCfg lets you manage the barcode or RFID reader.
Terminal Reference Manual 4.1 WIRELESS POWER MANAGER Wireless Power Manager is a control panel applet, which allows you to choose and enable 802.11b/g Note: Meanwhile, you may enable Bluetooth connectivity through the Bluetooth Manager. 1) Double-tap the associated icon Manager. on the taskbar to run Wireless Power 2) Select the wireless connectivity you desire, and then tap . Double-tap any of the following icons to access power management. The icon indicates that 802.11b/g Power is turned on.
Chapter 4 4.2 BLUETOOTH MANAGER Bluetooth Manager is a utility that helps you access and manage the available Bluetooth services efficiently. 4.2.
Terminal Reference Manual 4.2.2 BLUETOOTH TOOLBAR BUTTONS SEE ALSO DESCRIPTION Tap this button to view shortcuts to preferred Bluetooth services, which may be provided on different Bluetooth devices. Then tap a desired Bluetooth service to establish a quick link. You will have to make a connection and created a shortcut to a specific Bluetooth service first. Tap this button to view the Bluetooth devices discovered during this session.
Chapter 4 Serial Port If "Auto Server COM Port" is enabled, the COM port providing Properties Serial Port service will be assigned automatically (COM6 by default). If "Auto Server COM Port" is disabled, you can select a COM port by following these steps: File You can change the FTP folder. Transfer By default, uploading files to the mobile computer is allowed. Properties You can cancel the check box to prohibit uploading.
Terminal Reference Manual You can change the Bluetooth exchange folder. Object Push Properties Tap this button to view Bluetooth properties. General tab It displays device name, MAC address, as well as the device type. If you wish to change the device name of the mobile computer, go to Start > Settings > Control Panel and select System. Security tab Authentication Setting: It is disabled by default. When enabled, PIN code is required. Discoverability: It is set discoverable by default.
Chapter 4 Options tab Start minimized: When selected, once you run the Bluetooth Manager program, its window will be minimized to an icon on the taskbar, which serves as a toggle to open or close the Bluetooth Manager window. It works the same as the "Minimized" button below. Auto Client COM Port: When enabled, the default COM port for remote Serial Port service will be assigned automatically. When disabled, you can select a COM port.
Terminal Reference Manual Tap this button to view the Bluetooth profiles supported - SPP for Serial Port Profile OPP for Object Push Profile FTP for File Transfer Profile DUN for Dial-Up Networking Profile (supports Client only) Note that the mobile computer also supports the following profiles - PAN Service Profile Human Interface Device (HID) Profile 4.2.3 STARTING BLUETOOTH SERVICES 1) Go to Start > Programs > BTManager to open the Bluetooth Manager.
Chapter 4 STOPPING BLUETOOTH SERVICES You may need to stop using the Bluetooth services, in order to conserve battery power, or in situations where the use of radio is prohibited, such as on airplanes, in hospitals, etc. Tap on the toolbar of the window to stop all Bluetooth connections and exit the application. The LED on the mobile computer will go off. When the Bluetooth window is minimized, tap on the taskbar to maximize the window. 4.2.4 DISCOVERING BLUETOOTH DEVICES Tap devices.
Terminal Reference Manual 4.2.5 PAIRING When authentication is enabled on the target device, you will have to pair with it before starting a connection. 1) From the device list, tap and hold the desired device to select [Pair] from the pop-up menu. (left below) 2) Enter the PIN code that is specified on the remote device.
Chapter 4 3) Once paired successfully, the paired device will be displayed along with a lock icon " ". UNPAIR DEVICES To unpair with a device from the device list, you will have to tap and hold the desired device to select [Unpair] from the pop-up menu. Note: The mobile computer must be unpaired on the remote device as well. (Both devices must be unpaired!) 4.2.6 CONNECTING 1) From the device list above, double-tap a device to find out the available Bluetooth services.
Terminal Reference Manual 3) If you wish to add a service to the Q_Link list for establishing a quick connection in the future, tap and hold the service to select [Create Shortcut] from the pop-up menu.
Chapter 4 BLUETOOTH ACTIVESYNC For ActiveSync via Bluetooth, tap and hold Serial Port Service to select [Connect to Activesync] from the pop-up menu. It uses COM8 to connect to your computer by default. To stop ActiveSync via Bluetooth, tap and then tap [Connect via Cradle].
Terminal Reference Manual USING SERIAL PORT SERVICE Tap and hold Serial Port Service to select [Connect] from the pop-up menu. If "Auto , you will need to select a COM port. Once the Client COM Port" is disabled in connection has been established, the connected service will be displayed along with a plug icon " ". USING OBJECT PUSH SERVICE 1) Tap and hold the Object Push service. 2) Select [Push file] to send a file or PIM item, e.g. a business card. (left below) 3) Choose the file you wish to send.
Chapter 4 2) Select [Connect] (and assign COM port if necessary). 3) Tap and hold anywhere blank to select [Add file] from the pop-up menu. 4) Choose the file you wish to upload to the remote device. 5) The mobile computer will start transferring the file. 6) To download a file from the remote device, tap and hold a desired file to select [Get file] from the pop-up menu.
Terminal Reference Manual 4.3 READER CONFIGURATION UTILITY The Reader Configuration Utility is the control applet and tool to manage the barcode and RFID readers integrated on the mobile computer. 1) Go to Start > Programs > 94ReaderConfig to open the Reader Configuration Utility. The associated icon will appear on the taskbar. to access the menu that allows you to choose and 2) Tap and hold the icon enable one or both of the readers. There will be a check mark in front of the reader if it is enabled.
Chapter 4 4.3.1 BARCODE READER SETTINGS The barcode reader configurations depend on the scan engine(s) installed. You can tell which reader is currently in use and make necessary changes on the General tab. BARCODE READER DESCRIPTION CCD/Laser Reader If enabled, tap the [Barcode Reader] button to configure the reader settings for CCD or Laser scan engine. Refer to the Reader Settings Table in Appendix II – CCD/Laser Scan Engine.
Terminal Reference Manual 0 Tag-it HF-I (ISO 15693) 0 Others (ISO 15693) 5 ICODE (Phillips) Note: Please refer to the specifications of your RFID tags for memory organization. READ OPERATION By default, the RFID tag is read from byte 0 of the default page. However, the default page, amount of bytes and number of pages of each tag may be different. Specify how many bytes of data you want to read from the tag. Generally, the read data is user data obtained from the user block.
Chapter 4 Keyboard Emulation Data is emulated as typed text and sent to the active Window. Enable Simply run your application or Pocket PC built-in program, such as Pocket Excel, to start with data collection. Windows Message When selected, a Windows message will be broadcasted after decoding. Disable Intercept the decode message in your application. Call Windows API (ReadMsgQueue) in your application to retrieve the decoded data.
Terminal Reference Manual Display Select the check box to display the code length after Code Length decoding a barcode. Disabled Display RFID UID Select the check box to display UID after decoding an RFID tag. Enabled Display RFID User Data Select the check box to display user data after decoding an RFID tag. Disabled Use Delimiter Decide whether or not to use a delimiter to separate to separate UID from user data when decoding an RFID tag. UID from data Disabled 4.3.
Chapter 4 4.4.1 CREATING AN E-MAIL BOX 1) Go to Start > Programs > Inbox to open the Inbox application. Tap and drag the toolbar handle to move it under the menu bar. 2) Select Services > Options from the menu bar. (left below) 3) Tap and drag the dialog box to show the right edge. Tap [Add] to create an e-mail service. 4) In the Service Name dialog box, select POP3 Mail or IMAP4 Mail for the service type. (right below) Change the name of e-mail service if necessary. Tap [OK].
Terminal Reference Manual 5) Proceed with the POP3 or IMAP4 Mail Service Definition (from 1/3 to 3/3). Network Connection: Send and Receive e-mail through Ethernet, 802.11b/g or Bluetooth PAN connection. USB Connection: Send and Receive e-mail through USB connection via the cradle. 6) After you have successfully created an e-mail service, you may start using it now.
Chapter 4 TOOLBAR BUTTON DESCRIPTION SEE ALSO Compose a new message Compose > New Message Reply to sender Compose > Reply to Sender Reply to all Compose > Reply to All Forward this message Compose > Forward Delete this message File > Delete Synchronize folders (multiple mailboxes for IMAP4) Services > Synchronize Folders Send and receive mail manually Services > Send/Receive Mail Connect or disconnect Services > Connect When connected, it will send and receive mail automatically.
Terminal Reference Manual 4.4.
Chapter 4 When you seat the mobile computer in the cradle and connect it to your computer for the first time, ActiveSync 3.7.1 will guide you through setting up a partnership between the mobile computer and your desktop computer. Refer to ActiveSync with a Computer. Select the check box of Inbox as shown above, and click [Settings] to configure it. Note: ActiveSync 4.x does not support Inbox Synchronization. We recommend that you have ActiveSync 3.7.1 installed on your computer. 4.
Terminal Reference Manual 4.5.1 MANAGING THE REGISTRY If you are using this backup utility for the first time, you must manually save the system registry to the DiskOnChip folder first! Tap [Save] now to save the current system registry to "\DiskOnChip\Sysbak\Registry.dat". Warning: As long as you make any changes to the system configurations and settings, you must tap [Save] to update the system registry here. Otherwise, it will reload the old registry values in use after a cold boot.
Chapter 4 91
Terminal Reference Manual 4.5.2 GETTING READY FOR BACKING UP FILES Tap the Backup tab and it will automatically start scanning the file system. Within a few minutes, it will generate a list for the backup operation. IF THE ITEMS "WIFI" AND "REGISTRY" ARE NOT LISTED... This means no Registry.dat and Wifi.dat are found in "\DiskOnChip\Sysbak\". Take necessary steps before you tap [Refresh] to refresh the list of available items.
Chapter 4 WiFi - Turn on the power to the 802.11b/g module through the Wireless Power Manager, and then select an available network to connect. Registry - Go to the Registry tab and tap [Save]. Warning: You may not be able to backup all data when programs are still running! It is suggested that you exit all the applications before backup. 4.5.3 BACKING UP FILES 1) Select the items you wish to backup, and tap [Backup]. 2) Tap (.bkp).
Terminal Reference Manual 4.5.4 USING BACKUPS FOR RESTORE After the backup operation, tap the Restore tab and specify how to use these backups for automatic or manual restore operation.
Chapter 4 FILE MANIPULATION Tap [Refresh] to refresh the list of available backups. If a backup file is not desired any more, select it and tap [Delete]. AUTO RESTORE Select a desired backup file from the list and tap [AutoRestore]. It will prefix an asterisk to the selected file, indicating the specific file will be used in the restore process that starts automatically right after a cold boot.
Terminal Reference Manual Partial Restore Operation 1. Double-tap a desired backup file from the list. 2. Select the desired items. 3. Tap [Restore]. 4. Tap [Start] to run the restore process. 5. Once the restore process is completed, you will be asked to perform a warm boot. Tap [No] if you wish to warm boot later. You may tap [Report] to view the log file if necessary.
Chapter 4 4.6 BUTTON ASSIGNMENT UTILITY The CipherLab Button Assignment Utility allows the following keys to be re-defined as another key or to serve as a shortcut key for launching a specific program. P1 and P2 on the keypad (Programmable key 1 & key 2) SCAN key on the keypad Side triggers on each side of the touch screen – Left-Up, Left-Down, Right-Up, and Right-Down keys Note: By default, the four side triggers are programmed to serve as ENTER keys (upper ones) as well as SCAN keys (lower ones).
Terminal Reference Manual 2) You may assign one of the following key values to the upper-left side trigger or have it serve as a shortcut key to launch a specific program. Enter Scan Esc Delete Backspace Space Tab F1 ~ F12 3) Tap [OK] for the change to take effect. 4) Tap 98 on the toolbar to save the current settings and exit the application.
Chapter 4 99
101 SPECIFICATIONS PLATFORM, PROCESSOR & MEMORY OPERATING SYSTEM Microsoft Windows CE 5.0 CPU Intel PXA270 at 520 MHz MEMORY ROM 128 MB non-volatile NAND flash memory RAM 128 MB on-board SDRAM memory Ordering Option - 64 MB on-board SDRAM memory Expansion Slot One miniSD card slot for inserting memory card, optional COMMUNICATIONS & DATA CAPTURE COMMUNICATIONS USB via Cradle USB 1.
Terminal Reference Manual ELECTRICAL CHARACTERISTICS BATTERIES Main Battery Pack Rechargeable Li-ion battery – 3.7 V, 1800 mAh Backup Battery Rechargeable Lithium battery – 3.7 V, 70 mAh Data retention for at least 20 hours POWER ADAPTER For Cradle AC 110/220 V (Input) to DC 6 V, 3.3 A (Output) WORKING TIME (LASER, ONE SCAN PER 5 SECONDS) Batch Mode with backlight 10 hours Wi-Fi Mode with backlight 8 hours PHYSICAL CHARACTERISTICS COLOR TOUCH SCREEN DISPLAY Display 3.
ENCLOSURES Materials Rubber & ABS plastic Dimensions 170 mm (L) 90 mm (W) 38 mm (H) Weight Approx. 400 g (configuration-dependent) ENVIRONMENTAL CHARACTERISTICS TEMPERATURE Operating -10 °C to 50 °C Storage -20 °C to 60 °C HUMIDITY Operating 10% to 90%, non-condensing Storage 5% to 95%, non-condensing RESISTANCE Impact Resistance 1.
Terminal Reference Manual SOFTWARE & UTILITIES Reader Configuration Utility Terminal Emulation for VT100/220 or IBM 5250 Application Generator STREAM Wireless Studio Web Browser Third-party software – Wavelink Avalanche Enabler & Telnet Client MCL Collection - MCL Client 104