
Installation Guide


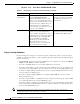


Table Of Contents
- Cisco Aironet 1240AG Series Access Point Hardware Installation Guide
- Contents
- Preface
- Overview
- Installing the Access Point
- Safety Information
- Warnings
- Unpacking the Access Point
- Basic Installation Guidelines
- Before Beginning the Installation
- Installation Summary
- Mounting Overview
- Mounting on a Horizontal or Vertical Surface
- Mounting Below a Suspended Ceiling
- Mounting Above a Suspended Ceiling
- Mounting Access Point on a Desktop or Shelf
- Connecting the Ethernet and Power Cables
- Powering Up the Access Point
- Cable Security Bracket
- Attaching the Access Point to the Mounting Plate
- Securing the Access Point
- Securing the Access Point to the Mounting Plate
- Configuring the Access Point for the First Time
- Using the Web-Browser Interface
- Using the Command-Line Interface
- Troubleshooting
- Translated Safety Warnings
- Declarations of Conformity and Regulatory Information
- Manufacturers Federal Communication Commission Declaration of Conformity Statement
- Department of Communications—Canada
- European Community, Switzerland, Norway, Iceland, and Liechtenstein
- Declaration of Conformity for RF Exposure
- Guidelines for Operating Cisco Aironet Access Points in Japan
- Declaration of Conformity Statements
- Declaration of Conformity Statements for European Union Countries
- Access Point Specifications
- Channels and Power Levels
- Console Cable Pinouts
- Glossary
- Index

Draft 1A - CISCO CONFIDENTIAL
3-5
Cisco Aironet 1240AG Series Access Point Hardware Installation Guide
OL-7293-01
Chapter 3 Configuring the Access Point for the First Time
Assigning Basic Settings
Assigning Basic Settings
After you determine or assign the access point’s IP address, you can browse to the access point’s Express
Setup page and perform an initial configuration:
Step 1 Open your web-browser.
Note The access point web-browser interface is fully compatible with Microsoft Internet Explorer
version 6.0 on Windows 98 and 2000 platforms, and with Netscape version 7.0 on Windows 98,
Windows 2000, and Solaris platforms.
Note When using the access point browser interface, you should disable your browser pop-up blocker.
Step 2 Enter the access point’s IP address in the browser address line and press Enter. An Enter Network
Password page displays.
Step 3 Enter Cisco in the username field and advance to the Password field.
Step 4 Enter the case-sensitive password Cisco and press Enter. The Summary Status page displays.
Figure 3-2 shows the Summary Status page.
Figure 3-2 Summary Status Page