
User's Guide


Table Of Contents
- Introduction
- Package Inventory
- Ripwave Models
- Minimum Computing Requirements
- Physical Characteristics
- Installing an Ethernet Modem
- Installing a USB Modem
- Accessing the Internet
- Troubleshooting
- Installing Ripwave Monitor
- TroubleshootingUsing Ripwave Monitor
- Uninstalling Ripwave Monitor
- Installing Navini Diagnostics (NavDiag)
- TroubleshootingUsing Navini Diagnostics (NavDiag)
- Uninstalling Navini Diagnostics
- Installing & Charging the Battery
- Care & Maintenance
- Upgrading the Modem
- ADDENDUM 1: Ripwave™ Modem - PC Troubleshooting
- ADDENDUM 2: End User Software License Agreement
Ripwave Modem User Guide Navini Networks, Inc.
Installing an
Ethernet Modem
(See, also, Addendum 1)
The following instructions are for the installation of a Ripwave
Modem that has a USB connection. Please read all instructions
before attempting the installation. It is advisable to turn off the
computer and the Ripwave Modem before performing the
installation.
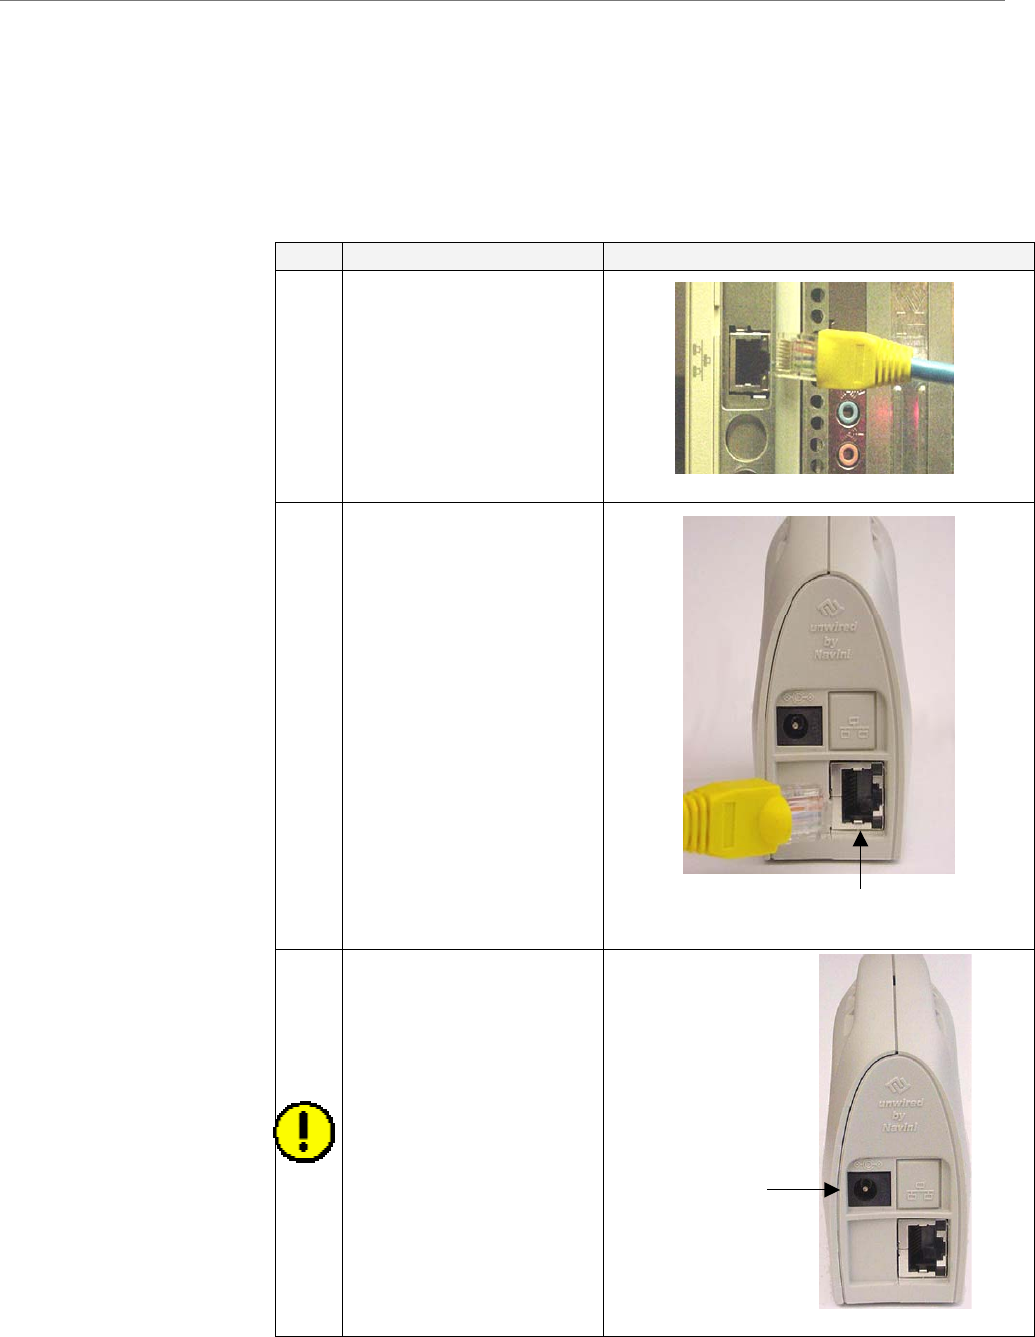
Step Action Illustration (using LED Modem)
1. Connect the Ethernet
cable to the Ethernet
port on the computer.
2. Connect the other end of
the Ethernet cable to the
Ripwave Modem.
3. Connect the AC power
adapter to the Ripwave
Modem. Plug the other
end into a 110/220 VAC
60/50 Hz outlet.
CAUTION! Only use
the AC power adapter
specifically supplied
with the Ripwave
Modem. Using any other
adapter may cause
damage to the Modem.
Ethernet
AC Power
adapter cable
j
ack
12 Part #40-00097-00 Rev F v1.0
May 21, 2004