
User's Guide


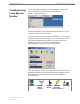


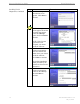
Table Of Contents
- Introduction
- Package Inventory
- Ripwave Models
- Minimum Computing Requirements
- Physical Characteristics
- Installing an Ethernet Modem
- Installing a USB Modem
- Accessing the Internet
- Troubleshooting
- Installing Ripwave Monitor
- TroubleshootingUsing Ripwave Monitor
- Uninstalling Ripwave Monitor
- Installing Navini Diagnostics (NavDiag)
- TroubleshootingUsing Navini Diagnostics (NavDiag)
- Uninstalling Navini Diagnostics
- Installing & Charging the Battery
- Care & Maintenance
- Upgrading the Modem
- ADDENDUM 1: Ripwave™ Modem - PC Troubleshooting
- ADDENDUM 2: End User Software License Agreement
Ripwave Modem User Guide Navini Networks, Inc.
Part #40-00097-00 Rev F v1.0
May 21, 2004
stalling Navini
iagnostics, Continued
In
D
Step Action Illustration
6. The Navini Diagnostics
Introduction screen
appears. Click Next to
continue.
7. The License Agreemen
screen appears. Read th
Licensing Agreement.
Select the I Accept
option, and
t
e
click Next to
continue.
NOTE: If the License
not
e.
Agreement is not
accepted, you can
install the softwar
8.
appears.
Enter the name of the
folder where you wish to
install the software.
Click Next to continue.
The default installation
folder provided by the
software is shown in the
The Choose Install
Folder screen
illustration.
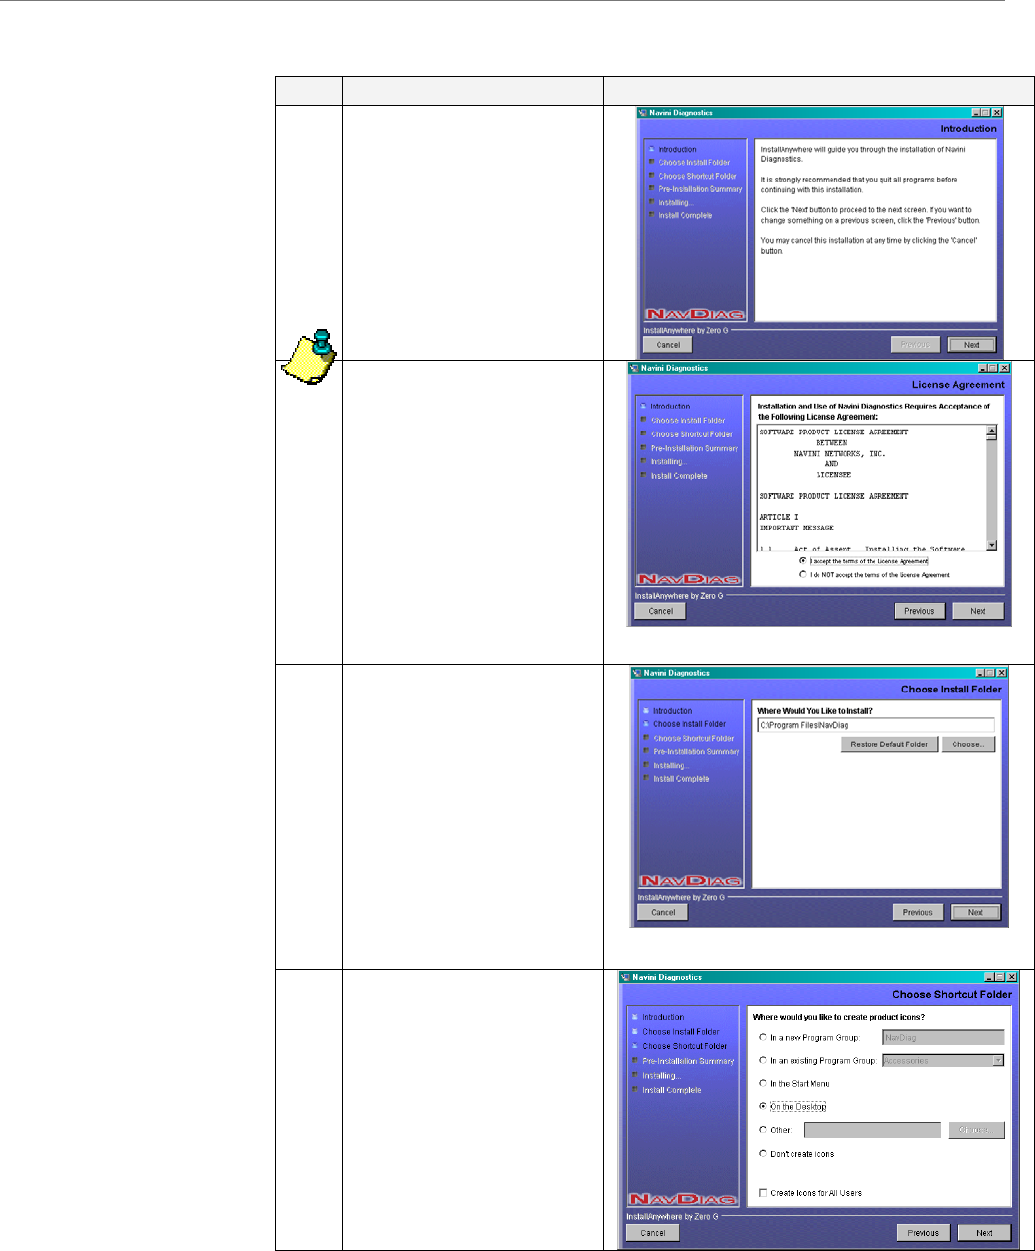
9. eThe Choos Shortc t
e rs.
Select On the Desktop
and click Next to
continue.
u
aFolder screen app
30