Catalyst 3550 Multilayer Switch Hardware Installation Guide November 2004 Corporate Headquarters Cisco Systems, Inc. 170 West Tasman Drive San Jose, CA 95134-1706 USA http://www.cisco.
THE SPECIFICATIONS AND INFORMATION REGARDING THE PRODUCTS IN THIS MANUAL ARE SUBJECT TO CHANGE WITHOUT NOTICE. ALL STATEMENTS, INFORMATION, AND RECOMMENDATIONS IN THIS MANUAL ARE BELIEVED TO BE ACCURATE BUT ARE PRESENTED WITHOUT WARRANTY OF ANY KIND, EXPRESS OR IMPLIED. USERS MUST TAKE FULL RESPONSIBILITY FOR THEIR APPLICATION OF ANY PRODUCTS.
C O N T E N T S Preface vii Audience Purpose vii vii Conventions vii Related Publications xiii Obtaining Documentation xiv Cisco.
Contents CHAPTER Switch Installation 2 3-1 Preparing for Installation 3-1 Warnings 3-1 Site Requirements 3-4 Verifying Package Contents 3-4 Installing the Switch 3-5 Rack-Mounting 3-5 Attaching Brackets to the Catalyst 3550-12T and 3550-12G Switches 3-6 Attaching Brackets to the Catalyst 3550-24, 3550-24-DC, 3550-24-FX, 3550-24PWR, and 3550-48 Switches 3-8 Mounting the Switch in a Rack 3-12 Wall Mounting 3-12 Attaching the Brackets to the Switch 3-13 Attaching the RPS Connector Cover 3-13 Mounting th
Contents Cable and Adapter Specifications B-3 Two Twisted-Pair Cable Pinouts B-3 Four Twisted-Pair Cable Pinouts for 10/100 Ports B-3 Four Twisted-Pair Cable Pinouts for 1000BASE-T Ports B-4 Rollover Cable and Adapter Pinouts B-5 Identifying a Rollover Cable B-5 Adapter Pinouts B-5 APPENDIX C DC Power Connections C-1 Connecting to DC Power C-1 Preparing for Installation C-1 Grounding the Switch C-2 Wiring the DC-Input Power Source APPENDIX D C-4 Configuring the Switch with the CLI-Based Setup Prog
Contents Catalyst 3550 Multilayer Switch Hardware Installation Guide vi OL-6155-01
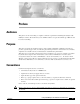
Preface Audience This guide is for the networking or computer technician responsible for installing the Catalyst 3550 multilayer switches. We assume that you are familiar with the concepts and terminology of Ethernet and local area networking. Purpose This guide documents the hardware features of the Catalyst 3550 family of multilayer switches.
Preface Conventions Caution Warning Means reader be careful. In this situation, you might do something that could result in equipment damage or loss of data. IMPORTANT SAFETY INSTRUCTIONS This warning symbol means danger. You are in a situation that could cause bodily injury. Before you work on any equipment, be aware of the hazards involved with electrical circuitry and be familiar with standard practices for preventing accidents.
Preface Conventions Warnung WICHTIGE SICHERHEITSHINWEISE Dieses Warnsymbol bedeutet Gefahr. Sie befinden sich in einer Situation, die zu Verletzungen führen kann. Machen Sie sich vor der Arbeit mit Geräten mit den Gefahren elektrischer Schaltungen und den üblichen Verfahren zur Vorbeugung vor Unfällen vertraut. Suchen Sie mit der am Ende jeder Warnung angegebenen Anweisungsnummer nach der jeweiligen Übersetzung in den übersetzten Sicherheitshinweisen, die zusammen mit diesem Gerät ausgeliefert wurden.
Preface Conventions Varning! VIKTIGA SÄKERHETSANVISNINGAR Denna varningssignal signalerar fara. Du befinner dig i en situation som kan leda till personskada. Innan du utför arbete på någon utrustning måste du vara medveten om farorna med elkretsar och känna till vanliga förfaranden för att förebygga olyckor. Använd det nummer som finns i slutet av varje varning för att hitta dess översättning i de översatta säkerhetsvarningar som medföljer denna anordning.
Preface Conventions Aviso INSTRUÇÕES IMPORTANTES DE SEGURANÇA Este símbolo de aviso significa perigo. Você se encontra em uma situação em que há risco de lesões corporais. Antes de trabalhar com qualquer equipamento, esteja ciente dos riscos que envolvem os circuitos elétricos e familiarize-se com as práticas padrão de prevenção de acidentes. Use o número da declaração fornecido ao final de cada aviso para localizar sua tradução nos avisos de segurança traduzidos que acompanham o dispositivo.
Preface Conventions Catalyst 3550 Multilayer Switch Hardware Installation Guide xii OL-6155-01
Preface Related Publications Related Publications These documents provide complete information about the switch and are available from this URL: http://www.cisco.com/univercd/cc/td/doc/product/lan/c3550/index.htm You can order printed copies of documents with a DOC-xxxxxx= number from the Cisco.com sites and from the telephone numbers listed in the “Ordering Documentation” section on page xv. • Note Release Notes for the Catalyst 3550 Multilayer Switch (not orderable but available on Cisco.
Preface Obtaining Documentation • Device manager online help (available on the switch) • Getting Started with Cisco Network Assistant (not orderable but available on Cisco.com) • 1000BASE-T Gigabit Interface Converter Installation Note (not orderable but is available on Cisco.com) • Catalyst GigaStack Gigabit Interface Converter Hardware Installation Guide (order number DOC-786460=) • Installation Notes for the CWDM Passive Optical System (not orderable but available on Cisco.
Preface Obtaining Technical Assistance Ordering Documentation You can find instructions for ordering documentation at this URL: http://www.cisco.com/univercd/cc/td/doc/es_inpck/pdi.htm You can order Cisco documentation in these ways: • Registered Cisco.com users (Cisco direct customers) can order Cisco product documentation from the Networking Products MarketPlace: http://www.cisco.com/en/US/partner/ordering/index.shtml • Nonregistered Cisco.
Preface Obtaining Additional Publications and Information Opening a TAC Case The online TAC Case Open Tool (http://www.cisco.com/tac/caseopen) is the fastest way to open P3 and P4 cases. (Your network is minimally impaired or you require product information). After you describe your situation, the TAC Case Open Tool automatically recommends resources for an immediate solution. If your issue is not resolved using these recommendations, your case will be assigned to a Cisco TAC engineer.
Preface Obtaining Additional Publications and Information • Packet magazine is the Cisco quarterly publication that provides the latest networking trends, technology breakthroughs, and Cisco products and solutions to help industry professionals get the most from their networking investment. Included are networking deployment and troubleshooting tips, configuration examples, customer case studies, tutorials and training, certification information, and links to numerous in-depth online resources.
Preface Obtaining Additional Publications and Information Catalyst 3550 Multilayer Switch Hardware Installation Guide xviii OL-6155-01
C H A P T E R 1 Product Overview The Catalyst 3550 family of multilayer switches—also referred to as the switches—are stackable Ethernet switches to which you can connect workstations, Cisco IP Phones, and other network devices such as servers, routers, and other switches. These switches also can be deployed as backbone switches, aggregating Gigabit Ethernet traffic from other network devices. This chapter provides a functional overview of the Catalyst 3550 switch models.
Chapter 1 Product Overview Features Figure 1-2 Catalyst 3550-24, 3550-24-DC, 3550-FX, 3550-24PWR, and 3550-48 Switch Models Switch WS-C3550-24-SMI WS-C3550-24-EMI Description 24 autosensing 10/100 Ethernet ports 1 2 3 4 5 1X SYSTEM 6 7 8 9 RPS MODE 10 11 12 STATUS 1 15X UTIL DUPLX SPEED 2 3 4 1X 5 6 7 8 9 2X 10 11 12 15X 16X Catalyst 2X 2 GBIC-based Gigabit module slots WS-C3550-24-DCSMI 1 2 24 autosensing 10/100 Ethernet ports 1 2 3 4 5 1X SYSTEM 6 7 8
Chapter 1 Product Overview Features Table 1-1 Switch Features Feature Hardware Description • 2 or 10 Gigabit Ethernet 10BASE-T/100BASE-TX/1000BASE-T ports and 2 or 10 GBIC 1-based Gigabit Ethernet slots (Catalyst 3550-12T and 3550-12G switches) • 24 or 48 10BASE-T/100BASE-TX Ethernet ports and 2 GBIC-based Gigabit Ethernet slots (Catalyst 3550-24, 3550-24DC, 3550-24PWR, and 3550-48 switches) • 24 100BASE-FX ports (Catalyst 3550-24-FX switch) • Supports GBIC modules: – 1000BASE-SX – 1000BASE-LX/L
Chapter 1 Product Overview Front-Panel Description Table 1-1 Switch Features (continued) Feature Description Inline Power 2 • Power for Cisco IP Phones and access points from all 10/100 Ethernet ports • Auto-detection and control of inline power on a per-port basis on all 10/100 ports • Support for fan-fault and overtemperature detection through the Network Assistant and the device manager. 1. Gigabit Interface Converter 2.
Chapter 1 Product Overview Front-Panel Description 10/100 and 10/100/1000 Ports The Fast Ethernet (10/100-Mbps) and Gigabit Ethernet (10/100/1000-Mbps) ports use standard RJ-45 connectors and Ethernet pinouts with internal crossovers. The maximum cable length is 328 feet (100 meters). 100BASE-TX and 1000BASE-T traffic requires twisted four-pair Category 5 cable. 10BASE-T traffic can use Category 3 or Category 4 cable. Fast Ethernet ports operate at 10 or 100 Mbps in either full- or half-duplex mode.
Chapter 1 Product Overview Front-Panel Description GBIC Module Slots You cannot configure speed or duplex mode on GBIC slots, but for certain types of GBICs, you can configure speed to not negotiate (nonegotiate) if connected to a device that does not support autonegotiation. The GBIC module slots support these modules to provide flexibility in media and distance options: • 1000BASE-T GBIC module for copper connections of up to 328 feet (100 meters).
Chapter 1 Product Overview Front-Panel Description Table 1-2 System LED (continued) Color System Status Green System is operating normally. Amber System is receiving power but is not functioning properly. RPS LED The RPS LED shows the RPS status. Table 1-3 lists the LED colors and their meanings. Table 1-3 RPS LED Color RPS Status Off RPS is off or not properly connected. Solid green RPS is connected and ready to provide back-up power, if required.
Chapter 1 Product Overview Front-Panel Description Table 1-4 Port Mode LEDs (continued) Mode LED SPEED LINE PWR 2 Port Mode Description Port speed The port operating speed: 10, 100, or 1000 Mbps. Port inline power The inline power status: on or off. 1. Not available on Catalyst 3550-24PWR switches 2.
Chapter 1 Product Overview Front-Panel Description Bandwidth Utilization The UTIL mode on the switch shows the current bandwidth in use by the switch. (See Figure 1-4 to Figure 1-8.) If all possible port LEDs are green, bandwidth utilization is in the 50 to 100 percent range. Every port LED that is off (black) divides this range by two. Note The port LEDs on the Catalyst 3550-24PWR switch do not show bandwidth utilization.
Chapter 1 Product Overview Rear-Panel Description Figure 1-7 Bandwidth Utilization for the Catalyst 3550-48 Catalyst 3550 SERIES 1 2 3 24 5 6 7 8 9 10 11 12 13 14 15 16 17 18 19 20 21 22 23 24 25 26 27 28 29 31 31 32 33 34 35 36 37 38 39 40 41 42 43 44 45 46 47 48 1X 15X 17X 31X 33X 47X 2X 16X 18X 32X 34X 48X RPS STATUS UTIL 2 DUPLX SPEED MODE 74024 1 SYSTEM < 25% + 25% – 49% + 50% + Figure 1-8 shows the bandwidth utilization percentages displayed by the L
Chapter 1 Product Overview Management Options AC Power Connector For AC-powered switches, the internal power supply is an autoranging unit that supports input voltages between 100 and 240 VAC. For the Catalyst 2440-24-DC power information, see Appendix C, “DC Power Connections.” Cisco RPS Connector For protection against a power supply failure, you can connect a Cisco RPS to the switch. The Cisco RPS can support six external network devices and provide power to one failed device at a time.
Chapter 1 Product Overview Management Options • Device manager You can use the device manager, which is in the switch memory, to manage individual and standalone switches. The device manager is accessible after you have run the Express Setup program (see the getting started guide for more information about running Express Setup). Use the device manager to perform basic switch configuration and monitoring. You can access the device manager from anywhere in your network through a web browser.
C H A P T E R 2 Switch Installation This chapter describes how to prepare for installation, how to install the switch, and how to make connections to it.
Chapter 2 Switch Installation Preparing for Installation Warning Installation of the equipment must comply with local and national electrical codes. Statement 1074 Warning Before working on equipment that is connected to power lines, remove jewelry (including rings, necklaces, and watches). Metal objects will heat up when connected to power and ground and can cause serious burns or weld the metal object to the terminals. Statement 43 Warning Do not stack the chassis on any other equipment.
Chapter 2 Switch Installation Preparing for Installation Warning The Catalyst 3550-24-DC contains no field-replaceable units (FRUs). Do not open the chassis or attempt to remove or replace any components. For information about obtaining service for this unit, contact your reseller or Cisco sales representative. Statement 121B Warning This unit is intended for installation in restricted access areas.
Chapter 2 Switch Installation Preparing for Installation Site Requirements When determining where to place the switch, be sure to observe these requirements: • Operating environment is within the ranges listed in Appendix A, “Technical Specifications.” • Clearance to front and rear panels is such that – Front-panel indicators can be easily read. – Access to ports is sufficient for unrestricted cabling. – Rear-panel power connector is within reach of an AC power receptacle.
Chapter 2 Switch Installation Installing the Switch – One cable guide and one black Phillips machine screw for attaching the cable guide to one of the mounting brackets – One RPS connector cover (for wall mounting) – Two Phillips pan-head screws (for attaching the RPS cover) – Four Phillips truss-head screws (for wall-mounting brackets) – One DC terminal block plug (also called a terminal block header; only Catalyst 3550-24-DC switches) Installing the Switch This section describes these installation pr
Chapter 2 Switch Installation Installing the Switch Attaching Brackets to the Catalyst 3550-12T and 3550-12G Switches The bracket orientation and the brackets that you use depend on whether you are attaching the brackets for a 19-inch or a 24-inch rack. For 19-inch racks, use bracket part number 700-11523-01; for 24-inch racks, use bracket part number 700-12398-01. Figure 2-1 through Figure 2-6 show how to attach each type bracket to one side of the switch.
Chapter 2 Switch Installation Installing the Switch Figure 2-3 Attaching Brackets for 19-Inch Racks, Rear Panel Forward Phillips flat-head screws Figure 2-4 51365 19" Configuration Attaching Brackets for 24-Inch Racks, Rear Panel Forward Phillips flat-head screws 60914 24" Configuration Catalyst 3550 Switch Hardware Installation Guide OL-6155-01 2-7
Chapter 2 Switch Installation Installing the Switch Figure 2-5 Attaching Brackets for 19-Inch Telco Racks 2 3 Catalyst 4 5 6 3550 SER IES 7 8 9 10 11 12 Phillips flat-head screws Figure 2-6 74035 19" Configuration Attaching Brackets for 24-Inch Telco Racks 2 3 4 Catalyst 5 6 3550 SER IES 7 8 9 10 11 12 Phillips flat-head screws 74040 24" Configuration Attaching Brackets to the Catalyst 3550-24, 3550-24-DC, 3550-24-FX, 3550-24PWR, and 3550-48 Switches The bracket orientation and
Chapter 2 Switch Installation Installing the Switch Figure 2-7 Attaching Brackets for 19-Inch Racks, Front Panel Forward 1 SYSTEM 2 3 1X 4 5 6 7 8 9 RPS MODE 10 11 12 STATUS UTIL DUPLX SPEED 11X 2X 60138 12X 19" Configuration Phillips flat-head screws Attaching Brackets for 24-Inch Racks, Front Panel Forward 1 SYSTEM 1X 2 3 4 5 RPS MODE Phillips flat-head screws STATUS UTIL DUPLX SPEED 6 7 8 9 10 11 12 11X 2X 12X 24" Configuration 60139 Figure 2-8 Catalyst 3550
Chapter 2 Switch Installation Installing the Switch Figure 2-9 Attaching Brackets for 19-Inch Racks, Rear Panel Forward CONSO LE Phillips flat-head screws 49809 19" Configuration Figure 2-10 Attaching Brackets for 24-Inch Racks, Rear Panel Forward CONSO LE Phillips flat-head screws 49810 24" Configuration Catalyst 3550 Switch Hardware Installation Guide 2-10 OL-6155-01
Chapter 2 Switch Installation Installing the Switch Figure 2-11 Attaching Brackets for 19-Inch Telco Racks 1 Catalyst 3550 SE RIES 2 Phillips flat-head screws 74036 19" Configuration Figure 2-12 Attaching Brackets for 24-Inch Telco Racks 1 Catalyst 3550 SE RIES 2 Phillips flat-head screws 74037 24" Configuration Catalyst 3550 Switch Hardware Installation Guide OL-6155-01 2-11
Chapter 2 Switch Installation Installing the Switch Mounting the Switch in a Rack After the brackets are attached to the switch, use the four supplied number-12 Phillips machine screws to securely attach the brackets to the rack, as shown in Figure 2-13.
Chapter 2 Switch Installation Installing the Switch Attaching the Brackets to the Switch Figure 2-15 shows how to attach a 19-inch bracket to one side of the switch. Follow the same steps to attach the second bracket to the opposite side. Note On the Catalyst 3550-24-FX switch, remove the screws that are in the side of the chassis before you attach the brackets.
Chapter 2 Switch Installation Installing the Switch Mounting the Switch on a Wall For the best support of the switch and cables, make sure that the switch is attached securely to wall studs or to a firmly attached plywood mounting backboard. Mount the switch with the front panel facing up, as shown in Figure 2-17. Warning To comply with safety regulations, mount the switches on a wall with the front panel facing up.
Chapter 2 Switch Installation Installing the Optional Ground Kit Installing the Optional Ground Kit For switches that require a two-hole lug for grounding, you can order a kit containing the ground lug and hardware from Cisco. For the Catalyst 3550-12G, 3550-24, and 3550-24-FX switches, order part number NEBS-LUG-3550=. Note When you install the ground-lug kit, you cannot connect an RPS to the switch.
Chapter 2 Switch Installation Powering the Switch and Connecting Devices Step 6 Using a ratcheting torque screwdriver, torque each ground-lug screw to 15 lbf-in. (240 ozf-in.) Figure 2-18 Torquing Ground-Lug Screws on the Switch 1 100-240V 5-3A 50/60Hz ~ 93286 DC OUT PUT CONSOL E Torque to 15 lbf-in. Powering the Switch and Connecting Devices These sections describe powering the switch, connecting an RPS, connecting cables, and inserting GBICs.
Chapter 2 Switch Installation Powering the Switch and Connecting Devices Connecting a Cisco RPS Use the cable supplied with the RPS to connect to the switch rear panel. Connect the switch and the RPS to the same AC power source. Always put the RPS in standby mode when you connect devices to it and in active mode during normal operation. Note Make sure to connect the switch and the RPS to the same AC power source.
Chapter 2 Switch Installation Powering the Switch and Connecting Devices The switch 10/100 and 10/100/1000 port default setting is autonegotiate. If the attached device does not support autonegotiation, you can explicitly set the speed and duplex parameters. After connecting the cable, the port LED turns green when both the switch and the connected device have established a link.
Chapter 2 Switch Installation Powering the Switch and Connecting Devices Caution Do not remove the rubber plugs from the fiber-optic ports or the rubber caps from the fiber-optic cable until you are ready to connect the cable. The plugs and caps protect the fiber-optic ports and cables from contamination and ambient light. You can connect a 100BASE-FX port to an SC or ST connector on a compatible device by using one of the MT-RJ fiber-optic patch cables listed in Table B-1 on page B-2.
Chapter 2 Switch Installation Powering the Switch and Connecting Devices Catalyst 3550 Switch Hardware Installation Guide 2-20 OL-6155-01
C H A P T E R 3 Troubleshooting This chapter describes these troubleshooting topics: • Understanding POST Results, page 3-1 • Clearing the Switch IP Address and Configuration, page 3-1 • Diagnosing Problems, page 3-2 Understanding POST Results While the switch powers on, it automatically begins POST, a series of tests that verifies that the switch functions properly. POST lasts approximately 1 minute.
Chapter 3 Troubleshooting Diagnosing Problems The switch LEDs begin blinking after about 2 seconds. Note Step 2 If the switch is not configured, the LEDs are all green. You can omit Step 2 and run Express Setup to configure the switch. Continue holding down the Mode button. The LEDs stop blinking after 8 additional seconds, and then the switch reboots. The switch now behaves like an unconfigured switch. You can configure the switch by using Express Setup as described in the getting started guide.
Chapter 3 Troubleshooting Diagnosing Problems Table 3-1 describes some common problems and their solutions. Table 3-1 Common Problems and Solutions Problem System LED is not on, and the switch does not run POST. System LED is amber. Solution • Check that the power cable is connected to the switch and to a known power source. • Test the power cable on another switch. • Connect a working power cable from another switch. • An internal fan fault is detected.
Chapter 3 Troubleshooting Diagnosing Problems Table 3-1 Common Problems and Solutions (continued) Problem No connectivity Poor performance or excessive errors Solution • Verify that the devices at both ends of the link are connected and powered. • Verify that the autonegotiation settings are the same at both ends. • Verify that you are using the appropriate Ethernet cable for the connected device. See Table 2-1 on page 2-17 for cabling requirements.
A P P E N D I X A Technical Specifications This appendix lists the switch technical specifications in Table A-1 to Table A-5.
Appendix A Table A-2 Technical Specifications Power Requirements for the Catalyst 3550-12T, 3550-12G, 3550-24, 3550-24-FX, and 3550-48 Switches Power Requirements AC input voltage Catalyst 3550-12T and 3550-12G: 100 to 127/200 to 240 VAC (autoranging) 2 A/1 A, 50 to 60 Hz Catalyst 3550-24, 3550-24-FX, and 3550-48: 100 to 127/200 to 240 VAC (autoranging) 1.6 A/0.
Appendix A Technical Specifications Table A-5 Fiber-Port Specifications for Catalyst 3550-24-FX Switches Fiber-Port Power Levels Optical transmitter wavelength 1300 nm1 Optical receiver sensitivity for 50/125-micron cabling –33.5 to –11.8 dBm2 Optical receiver sensitivity for 62.5/125-micron cabling –33.5 to –11.8 dBm Optical transmitter power for 50/125-micron cabling –23.5 to –14 dBm Optical transmitter power for 62.5/125-micron cabling –20 to –14 dBm 1. nm = nanometers 2.
Appendix A Technical Specifications Catalyst 3550 Multilayer Switch Hardware Installation Guide A-4 OL-6155-01
A P P E N D I X B Connector and Cable Specifications This appendix describes the Catalyst 3550 switch ports and the cables and adapters that you use to connect the switch to other devices. Connector Specifications These sections describe the connectors used with the Catalyst 3550 switches. 10/100 and 10/100 /1000 Ports The 10/100 and 10/100/1000 Ethernet ports on Catalyst 3550 switches use standard RJ-45 connectors and Ethernet pinouts with internal crossovers.
Appendix B Connector and Cable Specifications Connector Specifications 10/100/1000 Port Pinouts Pin Label 1 TP0+ 2 TP0- 3 TP1+ 4 TP2+ 5 TP2- 6 TP1- 7 TP3+ 8 TP3- 1 2 3 4 5 6 7 8 60915 Figure B-2 100BASE-FX Ports The 100BASE-FX ports use MT-RJ connectors, as shown in Figure B-3. The 100BASE-FX ports use 50/125- or 62.5/125-micron multimode fiber-optic cabling.
Appendix B Connector and Cable Specifications Cable and Adapter Specifications Cable and Adapter Specifications These sections describe the cables and adapters used with the Catalyst 3550 switches. Two Twisted-Pair Cable Pinouts Figure B-4 and Figure B-5 show the schematics of two twisted-pair cables for ports running 10 Mbps traffic.
Appendix B Connector and Cable Specifications Cable and Adapter Specifications Four Twisted-Pair Crossover Cable Schematic for 10/100 Ports Switch Switch 1 RD+ 1 RD+ 2 RD- 2 RD- 3 TD+ 3 TD+ 6 TD- 6 TD- 4 NC 4 NC 5 NC 5 NC 7 NC 7 NC 8 NC 8 NC 65273 Figure B-7 Four Twisted-Pair Cable Pinouts for 1000BASE-T Ports Figure B-8 and Figure B-9 show the schematics of four twisted-pair cables for ports running 1000 Mbps traffic.
Appendix B Connector and Cable Specifications Cable and Adapter Specifications Rollover Cable and Adapter Pinouts This section describes how to identify a rollover cable (used to connect to the console port) and also describes the adapter pinouts. Identifying a Rollover Cable To identify a rollover cable, compare the two modular ends of the cable. Hold the cable ends side-by-side, with the tab at the back.
Appendix B Connector and Cable Specifications Cable and Adapter Specifications Table B-3 lists the pinouts for the console port, RJ-45-to-DB-25 female DTE adapter, and the console device. The RJ-45-to-DB-25 female DTE adapter is not supplied with the switch. You can order a kit (part number ACS-DSBUASYN=) containing this adapter from Cisco.
A P P E N D I X C DC Power Connections This appendix describes how to make DC power connections to the Catalyst 3550-24-DC switch. See the “Installing the Switch” section on page 2-5 for instructions on installing the switch.
Appendix C DC Power Connections Connecting to DC Power • 6-gauge copper ground wire (insulated or noninsulated) • Four leads of 18-gauge copper wire • Wire-stripping tools for stripping 6- and 18-gauge wires Grounding the Switch Warning This equipment is intended to be grounded. Ensure that the host is connected to earth ground during normal use.
Appendix C DC Power Connections Connecting to DC Power Step 4 Using a Panduit crimping tool, crimp the ground lug to the 6-gauge wire, as shown in Figure C-2. Crimping the Ground Lug 60529 Figure C-2 Step 5 Use the two number-10-32 screws to attach the ground lug and wire assembly to the switch rear panel RPS connector, as shown in Figure C-3. Step 6 Using a ratcheting torque screwdriver, torque each ground-lug screw to 15 lbf-in. (240 ozf-in.
Appendix C DC Power Connections Connecting to DC Power Wiring the DC-Input Power Source Warning Only trained and qualified personnel should be allowed to install, replace, or service this equipment. Statement 1030 Warning Before performing any of the following procedures, ensure that power is removed from the DC circuit. Statement 1003 Caution You must connect the Catalyst 3550-24-DC switch only to a DC-input power source that has an input supply voltage from –36 to –72 VDC.
Appendix C DC Power Connections Connecting to DC Power Step 2 Identify the positive and negative feed positions for the terminal block connection. The wiring sequence is positive to positive and negative to negative for both the A and the B feed wires. The switch rear panel identifies the positive and negative positions for both the A and B feed wires, as shown in Figure C-5.
Appendix C DC Power Connections Connecting to DC Power Figure C-7 Inserting Wires in the Terminal Block Plug Feed A Feed B 60532 Return Negative Return Negative Step 5 Use a ratcheting torque screwdriver to torque the terminal block captive screw (above the installed wire lead) to 4.5 lbf-in. (72 ozf-in.), as shown in Figure C-8. Caution Do not overtorque the terminal-block captive screws. The recommended maximum torque is 4.5 lbf-in. (72 ozf-in.
Appendix C DC Power Connections Connecting to DC Power Figure C-9 Completed Wiring of Terminal Block Plug Feed A Feed B 60534 Return Negative Return Negative Step 7 Caution Insert the terminal block plug in the terminal block header on the switch rear panel, as shown in Figure C-10. Secure the wires coming in from the terminal block so that they cannot be disturbed by casual contact. For example, use tie wraps to secure the wires to the rack.
Appendix C DC Power Connections Connecting to DC Power Catalyst 3550 Multilayer Switch Hardware Installation Guide C-8 OL-6155-01
A P P E N D I X D Configuring the Switch with the CLI-Based Setup Program This appendix provides a command-line interface (CLI)-based setup procedure for a standalone switch. Before connecting the switch to a power source, review the safety warnings in Chapter 2, “Switch Installation.” For an unconfigured switch, you can access the CLI either through Express Setup or through the console port.
Appendix D Configuring the Switch with the CLI-Based Setup Program Accessing the CLI Through the Console Port Note While in Express Setup mode, the IP address 10.0.0.1 is active until you enter the write memory command. You lose the Telnet connection after entering the write memory command. For more information about using the CLI, see the switch command reference for this release.
Appendix D Configuring the Switch with the CLI-Based Setup Program Accessing the CLI Through the Console Port Figure D-1 Connecting a Switch Console Port to a PC 1 1 100-240V 5-3A 50/60Hz ~ 101825 DC OUT PUT CONSOL E 3 2 1 Catalyst 3550 switch 3 RJ-45-to-DB-9 adapter cable 2 Power cord Starting the Terminal-Emulation Software Before you power on the switch, start the terminal emulation session so that you can see the output display from the power-on self-test (POST).
Appendix D Configuring the Switch with the CLI-Based Setup Program Entering the Initial Configuration Information Powering on the Switch Complete these steps to power on the switch: Step 1 Connect one end of the supplied AC power cord to the power connector on the switch rear panel. See Figure D-1. Step 2 Connect the other end of the power cable to a grounded AC outlet. As the switch powers on, it begins POST, a series of tests that run automatically to ensure that the switch functions properly.
Appendix D Configuring the Switch with the CLI-Based Setup Program Entering the Initial Configuration Information Completing the Setup Program Follow these steps to complete the setup program and to create an initial configuration for the switch: Step 1 Enter Yes at these two prompts. Would you like to enter the initial configuration dialog? [yes/no]: yes At any point you may enter a question mark '?' for help. Use ctrl-c to abort configuration dialog at any prompt.
Appendix D Configuring the Switch with the CLI-Based Setup Program Entering the Initial Configuration Information Step 9 Enter Y to configure the switch as the cluster command switch. Enter N to configure it as a member switch or as a standalone switch. If you enter N, the switch appears as a candidate switch in the Network Assistant. You can configure the switch as a command switch later through the CLI or the Network Assistant interface. To configure it later, enter no.
Appendix D Configuring the Switch with the CLI-Based Setup Program Entering the Initial Configuration Information After you complete the setup program, the switch can run the default configuration that you created.
Appendix D Configuring the Switch with the CLI-Based Setup Program Entering the Initial Configuration Information Catalyst 3550 Multilayer Switch Hardware Installation Guide D-8 OL-6155-01
I N D EX Numerics B 10/100/1000 ports bandwidth utilization cable lengths 2-5 connecting to 3-17 described pinouts brackets See mounting brackets 2-5 B-2 recommended cables C 3-17 10/100 ports cable guide, attaching cable lengths 2-5 connecting to 3-17 described crossover pinouts recommended 2-5 B-1 3-17 B-5 straight-through pinouts 3-17 cautions 1000BASE-LX/LH GBICs, described 1000BASE-SX GBIC, described 2-6 1000BASE-T GBICs, described 2-6 1000BASE-ZX GBICs, described 100BAS
Index configuration documentation by using the CLI ordering D-4 completing the setup program related publications D-5 starting the terminal emulation software URLs, Cisco D-3 connecting xiii to xiv xiv document conventions to 10/100/1000 ports to 10/100 ports duplex LED 3-17 vii 2-7 3-17 to 100BASE-FX ports 3-18 to AC power 3-16 to DC power C-1 to C-7 to RPS xv E electrical noise, avoiding 3-17 3-4 Express Setup to the console port D-2 accessing CLI by using connectivity
Index H M HP OpenView management options 2-12 humidity, relative CiscoView A-1 CLI 2-12 IE2100 I 2-12 2-12 SmartPort macros IE2100 SNMP 2-12 2-12 Mode button inline power connecting to Cisco Aironet access point connecting to Cisco IP Phone described LED 2-12 3-18 clearing switch IP address with described 3-18 2-6 mounting, table or shelf 2-5 3-14 mounting, wall mounting 2-8 4-1 3-12 mounting brackets installation rack-mounting attaching 3-5 to 3-12 site requirements r
Index RPS connector P 2-10 specifications packing list 3-4 powering the switch performance problems, solving 4-2 10/100/1000 ports 10/100 ports B-1 console port B-6 crossover cable B-2 B-5 3-5 to 3-14 xiii, xiii to xiv B-5 R rack-mounting B-3, B-4 clearance 3-4 description 2-6 3-5 to 3-12 rear panel port modes 2-10 to 2-11 redundant power supply 2-7 See RPS See also Mode button related publications ports xiii to xiv RJ-45 connector, console port 10/100 RJ-45 console port
Index slots See ports SmartPort macros 2-12 SNMP network management platforms software management options specifications 2-12 2-11 A-1 straight-through cable See cables B-3 SunNet Manager system LED 2-12 2-6 T table-mounting 3-14 technical assistance xv to xvi technical specifications telco racks A-1 3-5 temperature, operating A-1 terminal emulation software troubleshooting D-3 4-1 to 4-4 U URLs, Cisco xiv W wall mounting 3-12 warnings defined vii installation weight 3-1 A-1
Index Catalyst 3550 Multilayer Switch Hardware Installation Guide IN-6 OL-6155-01