
User's Manual
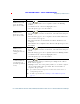


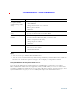
Table Of Contents
- Cisco Unified Wireless IP Phone 7925G, 7925G-EX, and 7926G Quick Reference for Cisco Unified Communications Manager 8.0(1)
- Contents
- Getting Started
- Connecting Your Phone
- An Overview of Your Phone
- Cisco Unified Wireless IP Phone 7925G and 7926G
- Cisco Unified Wireless IP Phone 7925G-EX
- Understanding Buttons and Hardware
- Understanding Phone Screen Features
- Understanding Feature Buttons and Menus
- Understanding Lines vs. Calls
- Understanding Out-of-Range Alerts
- Understanding Feature Availability
- Bluetooth Wireless Headset Support
- Cleaning the Phone
- Basic Call Handling
- Advanced Call Handling
- Speed Dialing
- Picking Up a Redirected Call on Your Phone
- Storing and Retrieving Parked Calls
- Logging Out of Hunt Groups
- Using a Shared Line
- Using BLF to Determine a Line State
- Making and Receiving Secure Calls
- Tracing Suspicious Calls
- Prioritizing Critical Calls
- Using Cisco Extension Mobility
- Using the Application Button
- Using the Barcode Scanner
- Using a Handset, Headset, and Speakerphone
- Changing Phone Settings
- Using Call Logs and Directories
- Accessing Voice Messages
- Accessing Your User Options Web Pages
- Understanding Additional Configuration Options
- Troubleshooting Your Phone
- Cisco One-Year Limited Hardware Warranty Terms

Accessing Your User Options Web Pages
Cisco Unified Wireless IP Phone 7925G, 7925G-EX, and 7926G User Guide for Cisco Unified Communications Manager
FCS REVIEW DRAFT - CISCO CONFIDENTIAL
Note You can also access PAB and Fast Dials from your phone. See Using Personal Directory on
Your Phone, page 85.
Using Your Personal Address Book on the Web
This section describes how to use your PAB from your User Options web pages.
Configuring Fast Dials on the Web
This section describes how to assign Fast Dials from your User Options web pages.
If you want to... Then, do this after you log in...
Add a new PAB entry 1. Choose User Options > Personal Address Book.
2. Click Add New.
3. Enter information for the entry.
4. Click Save.
Search for a PAB entry 1. Choose User Options > Personal Address Book.
2. Specify search information and click Find.
Note To locate all entries, leave search information blank and click
Find.
Edit a PAB entry 1. Search for a PAB entry.
2. Click a name or nickname.
3. Edit the entry as needed and click Save.
Delete a PAB entry 1. Search for a PAB entry.
2. Select one or more entries.
3. Click Delete Selected.
If you want to... Then, do this after you log in...
Assign a Fast Dial code
to a PAB entry
1. Create a PAB entry. See Using Your Personal Address Book on the
Web, page 99.
2. Choose User Options > Fast Dials.
3. Click Add New.
4. Change the Fast Dial code, if desired.
5. Use the Search Options area to find the appropriate PAB entry.
6. Click a phone number in the Search Results area.
7. Click Save.