
User's Manual


Ripwave Base Station I&C Guide Navini Networks, Inc.
74 Part #40-00047-00 Rev D v1.0
February 28, 2003
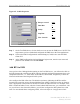
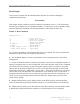
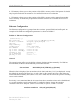
Figure 45: COM1 Properties
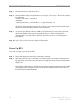
Step 7. On the Test EMS Server, click on the Server icon to start the EMS Server. NOTE: This
step assumes you have loaded and configured the EMS Server & Client applications.
Step 8. Click on the EMS Configuration & Alarm Manager (CAM) icon to start the EMS
Client GUI.
Step 9. At the EMS Configuration & Alarm Manager login screen, enter the user name and
password. The defaults are both emsAdmin.
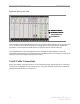
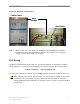
Add BTS in EMS
Once you have the CAM application running on the Test EMS server, you will need to click on
the BTS element tab to add the new BTS. Only the minimal configuration parameters have to be
completed at this time - i.e., BTS name, ID, IP address, subnet mask, and gateway. Follow the
Network Architecture Plan designed for this system.
Also configure the GPS offset time. The default is 0 minutes, indicating the BTS would be
located in the same time zone as Greenwich Mean Time (GMT). Change this value to whatever
time is appropriate to the location of the BTS in relation to GMT time zone. For example, if the
BTS is located in Dallas, Texas, which is 6 hours behind GMT time zone, you would enter -360.
As you will see in the section that follows, you will also configure the RFS splitter loss at this
time. For more details about configuring a BTS, refer to the Ripwave Configuration Guide.
Bits per second: 9600
Data Bits: 8
Parity: None
Stop Bits: 1
Flow Control: None
Bits per second: 9600
Data Bits: 8
Parity: None
Stop Bits: 1
Flow Control: None