QUICK START Quick Start Guide for Cisco Digital Media Player 4305G 1 2 3 4 5 6 7 8 9 10 11 Checking the Package Contents Finding a Suitable Location to Set Up Your DMP Participating in a DHCP Network Connecting to a DMP Display Connecting to an AC Socket Checking the LEDs Logging in to DMPDM and Changing its Passwords Configuring Video Output Setting Up Centralized Management Learning About the Remote Control for DMPs Obtaining Documentation, Obtaining Support, and Security Guidelines
Revised: July 10, 2008 78-18681-02 Contains Macromedia® Flash™ technology by Adobe Systems, Inc. Copyright 1995-2003 Adobe Systems, Inc. All Rights reserved. Macromedia, Flash, Macromedia Flash, and Macromedia Flash Lite are trademarks or registered trademarks of Adobe Systems, Inc. in the United States and other countries. Note 2 For information about supported features, see the Release Notes for Cisco Digital Media System on Cisco.com.
Glossary Cisco Digital Media System (Cisco DMS) is a family of products and technologies, including the ones that this guide describes. A Digital Media Player (DMP) is a compact, solid state, addressable network device that delivers digital signage content and enterprise TV content to a DMP display, which is any directly attached television screen or other kind of monitor or projector that shows media to an audience. The display might be analog or digital and might be standard-definition or high-definition.
Learn More To learn more about DMS products, related technologies, and Cisco in general: Description Go To DMS overview http://www.cisco.com/go/dms Release notes for Cisco DMS products http://www.cisco.com/en/US/products/ ps6681/prod_release_notes_list.html User documentation for Cisco DMS products http://www.cisco.com/en/US/products/p s6681/products_documentation_roadm aps_list.html FAQs and troubleshooting http://www.cisco.com/en/US/products/p s6681/prod_troubleshooting_guides_lis t.
1 Checking the Package Contents The product package for one DMP 4305G should contain all of the following: • A proof of purchase certificate that contains important legal information, which you should keep. • This quick start guide and other product documentation. • One DMP 4305G. • Two signal cables: – HDMI – Composite/RCA • One AC adapter and four snap-on plugs. If anything is missing from the package or appears to be defective, contact the Cisco Technical Assistance Center (TAC).
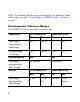
240V. To understand the supported lengths for different video cable types, see the “Connecting to a DMP Display” section on page 8. Environmental Tolerance Ranges The DMP 4305G is intended for indoor use. Temperature1 US Customary Unit Modern Metric Unit Min. Max. Min. Max. Operating — long-term or short-term 41°F 104°F 5°C 40°C Nonoperating or storage –4°F 140°F –20°C 60°C Relative Humidity2 Min. Max.
1. Ambient. 2. Noncondensing; ambient. 3. Above sea level. 3 Participating in a DHCP Network The factory default for a DMP 4305G is to obtain its IP address automatically from a DHCP server. If you will deploy your DMP at a physical location that does not have a DHCP server and you must configure your DMP to use a static IP address, complete the “Preconfiguring Your DMP To Run Without a Local DHCP Server” procedure in the user guide on Cisco.com for the version of DMPDM that you use: http://www.cisco.
Step 2 Plug the other end of the Ethernet cable into a network hub, network switch, or router that participates in a DHCP network. 4 Connecting to a DMP Display We recommend that you use a digital display, not analog. For the type of digital display, we recommend LCD, not plasma. Digital signage uses static images more often than it uses full-motion video. Most often, content is web-based or animated in Flash.
– MultiSync® LCD4010 – MultiSync® LCD4020 • 46" — MultiSync® LCD4610 • 57" — MultiSync® LCD5710 The maximum supported length for a video cable is: • 10 feet — Composite/RCA and S-Video • 16 feet — HDMI To attach a digital display to your DMP, we recommend that you use the provided HDMI cable for video and audio.
Step 1 On the back of your DMP chassis, do one of the following: • If you will connect your DMP to a digital display that has an HDMI interface, plug the male end of the HDMI cable into the HDMI interface on your DMP. • If you will connect your DMP to one of the recommended NEC display models that does not have an HDMI interface, do all of the following: – Plug the male end of the HDMI cable into the HDMI interface on your DMP, then connect an HDMI-to-DVI adapter to the other end of your HDMI cable.
• If you will connect your DMP to an analog display, do all of the following: – Plug the yellow jack on the RCA cable into the CVBS interface on your DMP. – Plug the red jack on the RCA cable into the AUDIO/RIGHT interface on your DMP. – Plug the white jack into the AUDIO/LEFT interface on your DMP. Step 2 Connect the other end of the cable (or cables) to the corresponding interface (or interfaces) on your DMP display. Step 3 If the DMP display is not already turned on, turn it on now.
Step 1 Assemble the DMP power cord: a. Identify the correct plug type for your region (U.S., E.U., U.K., or Australia). b. Snap that plug into the AC adapter. Step 2 Connect the DC barrel connector to the 5V DC power supply on the DMP chassis. Step 3 Connect to an AC electrical outlet that you know is grounded, and that uses the correct voltage level for your locale. Supported levels range from 100V to 240V.
The LEDs tell you if your DMP has power and if it has obtained an IP address. • A solid green LED indicates that a power source is available. • A solid red LED indicates that your DMP is trying to obtain an IP address. After your DMP has an IP address, it turns off the red LED. The LEDs do not blink unless they are exposed to infrared signal interference.
Tip 14 To reconfigure this splash screen in the future to persist for less than or more than the factory-default duration of 30 seconds, select Settings > Browser, enter a new duration in milliseconds in the Splash Screen Display Time (in milliseconds) field, then click Apply. Next, select Administration > Save Configuration, then click Save.
Step 2 Point your browser to the IP address that you wrote down. Step 3 At the login prompt for DMPDM, to log in as the “DMP Web Account” user, enter the username admin and the password default. Caution Security in your network might be compromised unless you change the factory-default passwords in DMPDM for both of these: • The DMP Web Account user. • The DMP Service Account user. To protect your network against this vulnerability, you must complete the rest of this procedure.
DMP Service Account is a user account with FTP login privileges. (The DMP Service Account account is available only when the FTP service is enabled on a DMP.) Alternatively, if you have many DMPs and will manage them centrally, you can use the fully licensed DMM-DSM software on your DMM appliance to change both of these passwords globally for all of the DMPs that you have added to a DMP group.
To understand URI encoding and its recommended syntax for submitting query strings, see RFC 1630 at http://tools.ietf.org/html/rfc1630. Step 4 To change the DMP Web Account password on one DMP by using DMPDM, select Administration > DMP Web Account. Enter your new password in the Password field, enter it again in the Repeat Password field, then click Apply. Next, select Administration > Save Configuration, then click Save.
d. To save the task so that it becomes available for your use, click Submit. e. To send the password changing instruction simultaneously to multiple DMPs in your digital signage network, do the following: – Select Schedules > Play Now. (Alternatively, users of DMM-DSM 4.1.x should select Schedules > Immediate Deployment.) – Select a group from the DMP Groups object selector. – Select the check box for each DMP where the DMP Web Account password should change.
made to credentials will prevent your trusted DMM appliance temporarily from communicating with your DMPs. To restore proper communication, you must now repeat Step 3 in the “Setting Up Centralized Management” section on page 23. Step 5 To change the DMP Service Account password on one DMP by using DMPDM, select Administration > DMP Service Account. Enter your new password in the Password field, enter it again in the Repeat Password field, then click Apply.
d. To save the task so that it becomes available for your use, click Submit. e. To send the password changing instruction simultaneously to multiple DMPs in your digital signage network, do the following: – Select Schedules > Play Now. (Alternatively, users of DMM-DSM 4.1.x should select Schedules > Immediate Deployment.) – Select a group from the DMP Groups object selector. – Select the check box for each DMP where the DMP Service Account password should change.
8 Configuring Video Output Step 1 In the Settings area, click DMP Display Attributes. The display autodetection feature is enabled by default. If you are satisfied with the selections and entries that DMPDM made for you, you are done with this section and you can go now to the “Setting Up Centralized Management” section on page 23. Otherwise, if you are not satisfied, do the following: a. From the DMP Display Autodetection (requires HDMI) list, select Disable. b.
Step 3 If you selected RGB as the color space, select an option from the Color Component Order list to define the order in which to store red, green, and blue data. This definition is sometimes called the left-to-right additive color model. Step 4 (Optional) Move any or all of the sliders to compensate for DMP display deficiencies in video (brightness, contrast, or saturation) or audio (channel volume).
9 Setting Up Centralized Management If your DMP will be managed centrally as part of a digital signage network, you must configure DMPDM and DMM-DSM to work together. Caution Step 1 To stop untrusted DMM appliances from being able to seize control of your DMPs, you must configure your network firewall to restrict which devices you will permit to send inbound traffic to your DMP over TCP port 7777.
c. In the DMM Appliance IP Address field, enter the routable IP address or DNS-resolvable hostname of the trustworthy DMM appliance. The DMM Appliance IP Address field might already be populated with the correct IP address for your DMM appliance if you used DMM-DSM to autodiscover your new DMP. d. To confirm your selections and to implement them until you change them or until you restart your DMP, click Apply. e.
To learn how to make these credentials identical, see the “Logging in to DMPDM and Changing its Passwords” section on page 13. Step 3 Specify in DMM-DSM the correct user credentials for your centrally managed DMPs. a. Select Settings > Server Settings. b. Enter the required values: – Servlet Server Address — If you have not already done so, enter the DNS-resolvable hostname and domain for the appliance that is serving DMM-DSM, like dmm.example.com.
identical to the new credentials for your DMPs. Otherwise, if you do not update this information, DMM-DSM will use obsolete credentials when it tries to communicate with your DMPs and, when communication fails, will consider your DMPs to be unreachable and unmanageable. 10 Learning About the Remote Control for DMPs The remote control features require that your DMPs use firmware release 5.0 or later and that your DMM appliances use DMM software release 5.0 or later.
11 Obtaining Documentation, Obtaining Support, and Security Guidelines For information on obtaining documentation, obtaining support, providing documentation feedback, security guidelines, and also recommended aliases and general Cisco documents, see the monthly What’s New in Cisco Product Documentation, which also lists all new and revised Cisco technical documentation, at: http://www.cisco.com/en/US/docs/general/whatsnew/whatsnew.
Americas Headquarters Cisco Systems, Inc. San Jose, CA Asia Pacific Headquarters Cisco Systems (USA) Pte. Ltd. Singapore Europe Headquarters Cisco Systems International BV Amsterdam, The Netherlands Cisco has more than 200 offices worldwide. Addresses, phone numbers, and fax numbers are listed on the Cisco Website at www.cisco.com/go/offices.