Cisco Unified IP Phone 7965G and 7945G Phone Guide for Cisco Unified Communications Manager 7.0 (SCCP and SIP) Americas Headquarters Cisco Systems, Inc. 170 West Tasman Drive San Jose, CA 95134-1706 USA http://www.cisco.
Common Phone Tasks Softkey Definitions View online help on phone Press AbbrDial Dial using a speed dial index number Place a call Go off-hook before or after dialing a number. Answer Answer a call Back Return to the previous Help topic Redial a number Press Redial. Barge Switch to handset during a call Pick up the handset.
GPickUp Answer a call that is ringing in another group or on another line iDivert Divert or redirect a call to a voice message system Join Join together existing calls to create a conference Phone Screen Icons Call Forwarding enabled Call on hold Connected call Video enabled (SCCP only) Feature assigned to button Mobility assigned to button Hold assigned to button Links View related Help topics Main Display the Help main menu MeetMe Host a Meet-Me conference call Off-hook more Display additi
Contents Getting Started 1 Using this Guide 1 Finding Additional Information 2 Accessing Cisco Unified IP Phone 7900 Series eLearning Tutorials 2 Safety and Performance Information 2 Cisco Product Security Overview 3 Accessibility Features 3 Connecting Your Phone 4 An Overview of Your Phone 8 Understanding Buttons and Hardware 8 Understanding Lines and Calls 13 Understanding Line and Call Icons 13 Understanding Phone Screen Features 15 Choosing Phone Screen Items 16 Cleaning and Maintaining the Phone Screen
Using Hold and Resume 25 Using Mute 26 Switching Between Multiple Calls 27 Switching an In-Progress Call to Another Phone 27 Viewing Multiple Calls 27 Transferring Calls 28 Sending a Call to a Voice Message System 29 Forwarding Calls to Another Number 30 Using Do Not Disturb 31 Making Conference Calls 32 Using Conference Features 32 Using Conference 33 Using Join 34 Using cBarge 34 Using Meet-Me 35 Viewing or Removing Conference Participants 36 Starting or Joining a Meet-Me Conference Call 36 Placing or Rec
Prioritizing Critical Calls 47 Using Cisco Extension Mobility 49 Managing Business Calls Using a Single Phone Number 49 Using a Handset, Headset, and Speakerphone 52 Using a Handset 52 Using a Headset 52 Using a Speakerphone 53 Using AutoAnswer with a Headset or Speakerphone 54 Changing Phone Settings 55 Customizing Rings and Message Indicators 55 Customizing the Phone Screen 56 Using Call Logs and Directories 57 Using Call Logs 57 Directory Dialing 59 Using Corporate Directory on Your Phone 59 Using Person
Understanding Additional Configuration Options 79 Troubleshooting Your Phone 82 General Troubleshooting 82 Viewing Phone Administration Data 83 Using the Quality Reporting Tool 83 Cisco One-Year Limited Hardware Warranty Terms 85 Index 87 vi OL-15896-01
Getting Started Using this Guide This guide provides you with an overview of the features available on your phone. You can read it completely for a solid understanding of your phone’s capabilities or refer to the table below for pointers to commonly used sections. If you want to... Then... Explore your phone on your own Press Review safety information See Safety and Performance Information, page 2. Connect your phone See Connecting Your Phone, page 4. on the phone when you need assistance.
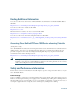
Finding Additional Information You can access the most current Cisco Unified IP Phone documentation on the World Wide Web at this URL: http://www.cisco.com/en/US/products/hw/phones/ps379/products_user_guide_list.html You can access the Cisco website at this URL: http://www.cisco.com/ International Cisco websites can be accessed from this URL: http://www.cisco.com/public/countries_languages.shtml You can access the most current Licensing Information at this URL: http://www.cisco.
Using External Devices The following information applies when you use external devices with the Cisco Unified IP Phone: Cisco recommends the use of good quality external devices (such as headsets) that are shielded against unwanted radio frequency (RF) and audio frequency (AF) signals. Depending on the quality of these devices and their proximity to other devices such as mobile phones or two-way radios, some audio noise may still occur.
Connecting Your Phone Your system administrator will likely connect your new Cisco Unified IP Phone to the corporate IP telephony network. If that is not the case, refer to the graphic and table below to connect your phone.
Removing the Hookswitch Clip (Required) 185165 Before you use your phone, remove the hookswitch clip from the cradle area. With the clip removed, the hookswitch lifts slightly when you pick up the handset. Adjusting the Handset Rest (Optional) Cisco recommends adjusting the handset rest, particularly when wall-mounting the phones, as this will ensure that the receiver will not readily slip out of the cradle. See the table below for instructions.
Adjusting the Footstand (Optional) To change the angle of the phone base, adjust the footstand while pressing the footstand button. Registering with TAPS After your phone is connected to the network, your system administrator might ask you to auto-register your phone using TAPS (Tool for Auto-Registered Phones Support). TAPS might be used either for a new phone or to replace an existing phone.
For information about wireless headsets that work in conjunction with the wireless headset remote hookswitch control feature, got to the following URL: http://www.cisco.com/pcgi-bin/ctdp/Search.pl 1. Choose IP Communications from the Enter Solution drop-down list box. The Select a Solution Category drop-down list box displays. 2. Choose IP Phone Headsets to see a list of Technology Development Program partners.
An Overview of Your Phone Your Cisco Unified IP Phone is a full-feature telephone that provides voice communication over the same data network that your computer uses, allowing you to place and receive phone calls, put calls on hold, transfer calls, make conference calls, and so on. In addition to basic call-handling features, your Cisco Unified IP Phone can provide enhanced productivity features that extend your call-handling capabilities.
Cisco Unified IP Phone 7965G 17 1 2 16 3 4 5 6 7 8 15 14 13 12 11 10 186422 9 Cisco Unified IP Phone 7965G and 7945G Phone Guide for Cisco Unified Communications Manager 7.
Cisco Unified IP Phone 7945G 1 17 2 16 1 3 4 5 6 7 8 15 10 14 13 12 11 10 186421 9 OL-15896-01
1 Item Description For more information, see...
6 Help button Activates the Help menu. Accessing the Help System on Your Phone, page 17 7 Settings button Opens/closes the Settings menu. Use it to change phone screen and ring settings. Changing Phone Settings, page 55 8 Services button Opens/closes the Services menu. Using the User Options Web Pages, page 64 9 Volume button Controls the handset, headset, and speakerphone volume (off-hook) and the ringer volume (on-hook).
16 Handset light strip Indicates an incoming call or new voice message. Accessing Voice Messages, page 63 17 Phone screen Shows phone features. Understanding Phone Screen Features, page 15 Understanding Lines and Calls To avoid confusion about lines and calls, refer to these descriptions: • Lines—Each corresponds to a directory number or intercom number that others can use to call you. Each line corresponds to a directory number or intercom number that others can use to call you.
Icon 14 Line or call state Description Encrypted call See Making and Receiving Secure Calls, page 46. BLF- monitored line is idle See Using BLF to Determine a Line State, page 45. BLF- monitored line is in-use See Using BLF to Determine a Line State, page 45. BLF- monitored line is ringing (BLF Pickup) See Using BLF to Determine a Line State, page 45. Line in Do Not Disturb (BLF) See Using BLF to Determine a Line State, page 45. Idle Intercom line The intercom line is not in use.
Understanding Phone Screen Features This is what your main phone screen might look like with active calls and several feature menus open. 7 1 6 5 4 3 186423 2 1 Primary phone Displays the phone number (directory number) for your primary phone line. line 2 Programmable Programmable buttons can serve as phone line buttons, intercom line buttons, speed-dial buttons, phone service buttons or phone feature buttons. button Icons and labels indicate how these buttons are configured.
Choosing Phone Screen Items There are two ways to choose items on your phone’s screen. To choose a phone screen item... Do this... By item number Press the corresponding number on your keypad. For example, press 4 to choose the fourth item in a menu. By scrolling Use the Navigation button to highlight an item. Press the Select button to select the item, or a softkey to finish the action. Cleaning and Maintaining the Phone Screen Use only a soft, dry cloth to wipe the phone screen.
Understanding Feature Buttons and Menus Press a feature button to open or close a feature menu. If you want to... Then... Open or close a feature menu Press a feature button: Messages Services Help Directories Settings Scroll through a list or menu Press the Navigation button. Go back one level in a feature menu Press Exit. Pressing Exit from the top level of a menu closes the menu. Switch between open feature menus Press a feature button on your phone.
Understanding Feature Availability Depending on your phone system configuration, features included in this Phone Guide might not be available to you or might work differently on your phone. Contact your support desk or system administrator for information about feature operation or availability. You can access many features either by using a softkey or by pressing a line button. You can configure some features but your system administrator controls most of them.
Understanding SIP vs. SCCP Your phone can be configured to work with one of two signaling protocols: SIP (Session Initiation Protocol) or SCCP (Skinny Call Control Protocol). Your system administrator determines this configuration. Phone features can vary depending on the protocol. This Phone Guide indicates which features are protocol-specific. To learn which protocol your phone is using, you can ask your system administrator > Model Information > Call Control Protocol on your phone.
Basic Call Handling You can perform basic call-handling tasks using a range of features and services. Feature availability can vary; see your system administrator for more information. Placing a Call—Basic Options Here are some easy ways to place a call on your Cisco Unified IP Phone. For more information, see... If you want to... Then... Place a call using the handset Pick up the handset and enter a number.
Tips • You can dial on-hook, without a dial tone (pre-dial). To pre-dial, enter a number, then go , or . off-hook by lifting the handset or by pressing Dial, • When you pre-dial, your phone tries to anticipate the number you are dialing by displaying matching numbers (if available) from your Placed Calls log. This is called Auto Dial. To call a number displayed with Auto Dial, press the number, or scroll to it and go off-hook. • If you make a mistake while dialing, press << to erase digits.
For more information, see... If you want to... Then... Use CallBack to receive notification when a busy or ringing extension is available 1. Press CallBack while listening to the Your system busy tone or ring sound. administrator 2. Hang up. Your phone alerts you when the line is free. 3. Place the call again. See if a line associated with a Look for Busy Line Feature indicators.
If you want to... Then... Place a call using Fast Dial Note For more information, see... Before using this option, your Configuring Fast Dials on system administrator must the Web, page 67 configure this feature and assign a service URL to the line button. Contact your system administrator for more information. 1. Press the Fast Dial line button. 2. Scroll to or press the index number to find the entry. 3. Press Dial.
If you want to... Then... For more information, see... Answer using call waiting Press Answer. Using Hold and Resume, page 25 Send a call to a voice message system Press iDivert. Sending a Call to a Voice Message System, page 29 Auto-connect calls Use AutoAnswer. Using AutoAnswer with a Headset or Speakerphone, page 54 Retrieve a parked call on another phone Use Call Park or Directed Call Park. Storing and Retrieving Parked Calls, page 41 Use your phone to answer Use Call Pickup.
Ending a Call To end a call, hang up. Here are some more details. If you want to... Then... Hang up while using the handset Return the handset to its cradle. Or press EndCall. Hang up while using a wired headset Press . Or, to keep headset mode active, press EndCall. If you are using a wireless headset, refer to the wireless headset documentation. Hang up while using the speakerphone Press or EndCall. Hang up one call, but preserve another Press EndCall.
If you want to... Then... Remove a call from hold on a different line 1. Press the appropriate line button: or (flashing). Doing so might cause a held call to resume automatically: • If there is a reverting call on the line, that call will resume. • If there is more than one reverting call on the line, the oldest reverting call will resume. • If a non-reverting held call is the only call on the line, it will resume. 2. If necessary, scroll to the appropriate call and press Resume.
Switching Between Multiple Calls You can switch between multiple calls on one or more lines. If the call that you want to switch to is not automatically highlighted, scroll to it. If you want to... Then... Switch between connected calls on one line 1. Make sure the call that you want to switch to is highlighted. Switch between connected calls on different lines Press Switch from a connected call to answer a ringing call Press Answer, or if the call is ringing on a different line, press (flashing).
In standard viewing mode, your phone displays calls as follows for the highlighted line: • Calls with the highest precedence and longest duration display at the top of the list. • Calls of a similar type are grouped together. For example, calls that you have interacted with are grouped near the top, and calls on hold are grouped last. You can use these additional methods to view multiple calls on multiple lines: If you want to... Then... View calls on another line 1.
If you want to... Then... Transfer two current calls to each other (direct transfer) without staying on the line (SCCP phones only) 1. Scroll to highlight any call on the line. 2. Press Select. 3. Repeat this process for the second call. 4. With one of the selected calls highlighted, press DirTrfr. (To display DirTrfr you might need to press more.) The two calls connect to each other and drop you from the call.
Tip If your phone displays a menu that disappears before you make your selection, you can press iDivert again to re-display the menu. You can also ask your system administrator to configure a longer timeout value. Forwarding Calls to Another Number You can use the call forwarding features to redirect incoming calls from your phone to another number.
• You can forward your calls to a traditional analog phone or to another IP phone, although your system administrator might restrict the call forwarding feature to numbers within your company. • Call forwarding is phone line specific. If a call reaches you on a line where call forwarding is not enabled, the call will ring as usual. • Your system administrator can enable a call forward override feature that allows the person receiving your forwarded calls to reach you.
Turn off DND Press Do Not Disturb or DND. Customize DND settings If your system administrator configured DND settings to appear on the User Options page, follow these steps: 1. Log in to your User Options web pages. See Accessing Your User Options Web Pages, page 64. 2. From the drop-down menu, choose User Options > Device. 3. Set the following options: – Do Not Disturb—Set to enable/disable DND.
Using Conference Conference allows you to call each participant. Conference is available on most phones. If you want to... Then... Create a conference 1. From a connected call, press Confrn or Conference. (You may need to press the more softkey to see Confrn.) 2. Enter the participant’s phone number. 3. Wait for the call to connect. 4. Press Confrn or Conference again to add the participant to your call. 5. Repeat to add additional participants.
Using Join Join allows you to combine two or more existing calls to create a conference in which you are a participant. If you want to... Then... Create a conference by joining together existing calls that are on a single phone line 1. From an active call, highlight another call that you want to include in the conference and press Select. Selected calls display this icon . 2. Repeat this step for each call that you want to add. 3. Press Join. (You may need to press the more softkey to see Join.
If you want to... Then... Create a conference by Press the line button for the shared line. barging a call on a shared line In some cases, you must highlight the call and press cBarge to complete the action. See Using Barge to Add Yourself to a Shared-Line Call, page 43 for more information. See a list of participants or remove participants See Viewing or Removing Conference Participants, page 36.
Viewing or Removing Conference Participants During a standard (ad hoc) conference, you can view a list of participants and remove participants. View a list of conference participants Press ConfList or Conference List. Get an updated list of conference participants While viewing the conference list, press Update. See who initiated the conference While viewing the conference list, locate the participant listed at the bottom of the list with an asterisk (*) next to the name.
If you want to... Then... Join a Meet-Me conference Dial the Meet-Me conference number (provided by the conference initiator). Note End a Meet-Me conference You will hear a busy tone if you call the conference before the initiator has joined. In this case, try your call again. All participants must hang up. The conference does not automatically end when the conference initiator disconnects.
If you want to... Then... Place an intercom call to a preconfigured intercom target Press (intercom target line) and, after you hear the intercom-alert tone, begin speaking. Place an intercom call to any intercom number Press (an intercom line). Enter the intercom target number or press a speed-dial number for your target. After you hear the intercom-alert tone, begin speaking.
Advanced Call Handling Advanced call-handling tasks involve special features that your system administrator might configure for your phone depending on your call-handling needs and work environment. Speed Dialing Speed dialing allows you to enter an index number, press a button, or select a phone screen item to place a call.
Picking Up a Redirected Call on Your Phone Call PickUp allows you to answer a call that is ringing on a coworker’s phone by redirecting the call to your phone. You might use Call PickUp if you share call-handling tasks with coworkers. If you want to... Then... Answer a call that is ringing on another extension within your call pickup group 1. Press the PickUp softkey or button. (You might have to go off-hook to display the softkey.) If your phone supports auto-pickup, you are now connected to the call.
• Depending on how your phone is configured, you might receive an audio and/or visual alert about a call to your pickup group. • If you use the BLF Pickup feature on your phone, see Using BLF to Determine a Line State, page 45. Storing and Retrieving Parked Calls You can park a call when you want to store the call so that you or someone else can retrieve it from another phone in the Cisco Unified Communications Manager system (for example, a phone at a co-worker’s desk or in a conference room).
• Your system administrator can assign Directed Call Park buttons to available line buttons on your Cisco Unified IP Phone 7965G that has a Cisco Unified IP Phone Expansion Module (the Cisco Unified IP Phone 7945G does not support the Cisco Unified IP Phone Expansion Module). • You can dial directed call park numbers if you do not have Directed Call Park buttons on your phone. However, you will not be able to see the status of the directed call park number.
Sharing Call Information and Barging Phones that share a line each display information about calls that are placed and received on the shared line. This information might include caller ID and call duration. (See the Privacy section for exceptions.) When call information is visible in this way, you and coworkers who share a line can add yourselves to calls using either Barge or cBarge. See Using Barge to Add Yourself to a Shared-Line Call, page 43.
Using Barge Features The table below describes how to use barge features to add yourself to a call on a shared line. If you want to... Then... See if the shared line is in use Look for the remote-in-use icon Add yourself to a call on a shared line Press the red line button next to a red line button . for the shared line. One of the following occurs: • You are added to the call. • A window opens on your phone screen prompting you to select the call that you want to barge.
Tips • If the phone that shares your line has Privacy enabled, you can make and receive calls using the shared line as usual. • The Privacy feature applies to all shared lines on your phone. Consequently, if you have multiple shared lines and Privacy is enabled, coworkers cannot view or barge calls on any of your shared lines.
Tips • Your phone might play an audible indicator to alert you when a call is ringing on the monitored line (BLF Pickup only). • BLF Pickup answers the oldest ringing call first (if the line that you are monitoring has more than one ringing call). Making and Receiving Secure Calls Depending on how your system administrator has configured your phone system, your phone might support making and receiving secure calls.
If you want to... Then... Verify that the phone on the other end of the connection is also secure Look for the encrypted lock icon and listen for a security tone at the beginning of the call. When encrypted calling is configured on your phone, the lock icon is displayed. However, the conversation is protected only when the security tone plays at the beginning of a call, indicating that the call is protected on both ends of the call.
Keep these terms in mind: • Precedence indicates the priority associated with a call. • Preemption is the process of ending an existing, lower priority call while accepting a higher priority call that is sent to your phone. If you... Then... Want to choose a priority Contact your system administrator for a list of (precedence) level for an outgoing call corresponding precedence numbers for calls.
Using Cisco Extension Mobility Cisco Extension Mobility (EM) allows you to temporarily configure a Cisco Unified IP Phone as your own. Once you log in to EM, the phone adopts your user profile, including your phone lines, features, established services, and web-based settings. Your system administrator must configure EM for you. If you want to... Then... Log in to EM 1. Choose > EM Service (name can vary). 2. Enter your user ID and PIN (provided by your system administrator). 3.
If you want to... Then... Put a call that has been picked up on your mobile phone on hold 1. Press the Enterprise Hold (name may vary) softkey. Connect to Mobile Voice Access 1. From any phone, dial your assigned Mobile Voice Access number. Turn on Mobile Connect from your mobile phone 1. Dial your assigned Mobile Voice Access number. The other party is placed on hold. 2. On your mobile phone, press the Resume (name may vary) softkey. See Switching an In-Progress Call to Another Phone, page 27. 2.
– The number is not accurately matched in the Cisco Unified Communications Manager database; for example, if your number is 510-666-9999, but it is listed as 666-9999 in the database, or your number is 408-999-6666, but it is entered as 1-408-999-6666 in the database. • If you incorrectly enter any requested information (such as mobile phone number or PIN) three times in a row, the Mobile Voice Access call disconnects, and you are locked out for a period of time.
Using a Handset, Headset, and Speakerphone You can use your phone with these audio devices: a handset, headset, or speakerphone. The phone is off-hook when the handset is lifted or another audio device is in use. The phone is on-hook when the handset is in its cradle and other audio devices are not in use. Using a Handset If you want to... Then... Go off-hook Lift the handset. Go on-hook Replace the handset in the cradle.
Using a Wireless Headset Refer to the wireless headset documentation for information about using the wireless headset’s remote features. Also, check with your system administrator to be sure your phone is enabled to use a wireless headset with the wireless headset remote hookswitch control feature.
Using AutoAnswer with a Headset or Speakerphone When AutoAnswer is enabled, your phone answers incoming calls automatically after a few rings. Your system administrator configures AutoAnswer to use either the speakerphone or a headset. You might use AutoAnswer if you receive a high volume of incoming calls. If you... Then... Use AutoAnswer with a headset Keep headset mode active (in other words, keep when you are not on a call.
Changing Phone Settings You can personalize your Cisco Unified IP Phone by adjusting the ring tone, background image, and other settings. Customizing Rings and Message Indicators You can customize how your phone indicates an incoming call and a new voice mail message. You can also adjust the ringer volume for your phone. If you want to... Then... Change the ring tone per line 1. Choose > User Preferences > Rings. 2. Choose a phone line or the default ring setting. 3.
Customizing the Phone Screen You can adjust the characteristics of the phone screen. If you want to... Then... Change the phone screen brightness 1. Choose > User Preferences > Brightness. 2. To make adjustments, press Up, Down or . 3. Press Save, or press Cancel. Change the background image 1. Choose > User Preferences > Background Images. 2. Scroll through available images and press Select to choose an image. 3. Press Preview to see a larger view of the background image. 4.
Using Call Logs and Directories This section describes how you can use call logs and directories. To access both features, use the . Directories button Using Call Logs Your phone maintains logs of your missed, placed, and received calls. If you want to... Then... View your call logs Choose > Missed Calls, Placed Calls, or Received Calls. Each stores up to 100 records. Display details for a single call record 1. Choose > Missed Calls, Placed Calls, or Received Calls. 2. Highlight a call record. 3.
If you want to... Then... Dial from a call log (while connected to another call) 1. Choose > Missed Calls, Placed Calls, or Received Calls. 2. Highlight a call record. Note If the Details softkey appears, the call is the primary entry of a multiparty call. See the Tips section below. 3. If you need to edit the displayed number, press EditDial followed by << or >>. To delete the number, press EditDial followed by Delete. (You may need to press the more softkey to display Delete.) 4. Press Dial. 5.
– The second logged entry is the name/number of the first completed call of a multiparty call received on your phone. Directory Dialing Depending on configuration, your phone can provide corporate and personal directory features: • Corporate Directory—Corporate contacts that you can access on your phone. Your system administrator sets up and maintains your Corporate Directory.
Tip Use the numbers on your keypad to enter characters on your phone screen. Use the Navigation button on your phone to move between input fields. Using Personal Directory on Your Phone The Personal Directory feature set contains your Personal Address Book (PAB) and Fast Dials. This section describes how to set up and use Personal Directory on your phone. Alternately, see the “Using Personal Directory on the Web” section on page 65. If you want to... Then...
If you want to... Then... Add a new PAB entry 1. Access Personal Directory, then choose Personal Address Book. 2. Access the Search page by choosing Submit. (You do not need to input search information first.) 3. Press New. 4. Use your phone keypad to enter a name and email information. 5. Choose Phones and use the keypad to enter phone numbers. Be sure to include any necessary access codes such as a 9 or 1. 6. Choose Submit to add the entry to the database. Assign a Fast Dial code to a PAB entry 1.
Tips • Your system administrator can provide you the user ID and PIN that you need to log in to Personal Directory. • Personal Directory automatically logs you out after a certain amount of time. This time limit can vary. Ask your system administrator for more information. • Use the numbers on your keypad to enter characters on your phone screen. Use the Navigation button on your phone to move between input fields.
Accessing Voice Messages To access voice messages, use the Messages button Note . Your company determines the voice message service that your phone system uses. For the most accurate and detailed information, refer to the documentation that came with your voice message service. If you want to... Then... Set up and personalize your voice message service Press Check for your new voice messages Look for: and follow the voice instructions.
Using the User Options Web Pages Your Cisco Unified IP Phone is a network device that can share information with other network devices in your company, including your personal computer. You can use your computer to log in to your Cisco Unified CM User Options web pages, where you can control features, settings, and services for your Cisco Unified IP Phone. For example, you can set up speed-dial buttons from your User Options web pages.
Configuring Features and Services on the Web The topics in this section describe how to configure features and services from your User Options web pages after logging in. See Accessing Your User Options Web Pages, page 64.
If you want to... Then do this after you log in... Delete a PAB entry 1. Search for a PAB entry. 2. Select one or more entries. 3. Click Delete Selected. Assign a line button for PAB Note Before you can assign a line button for PAB, your system administrator must configure the phone to display services. Contact your system administrator for more information. 1. Choose User Options > Device. 2. Click Service URL. 3. Choose the Personal Address Book service from the Button drop-down list box. 4.
Configuring Fast Dials on the Web This section describes how to assign Fast Dials from your User Options web pages. If you want to... Then do this after you log in... Assign a line button for Note Fast Dial Before you can assign a line button for Fast Dial, your system administrator must configure the phone to display services. Contact your system administrator for more information. 1. Choose User Options > Device. 2. Click Service URL. 3.
If you want to... Then do this after you log in... Edit a Fast Dial phone number 1. Choose User Options > Fast Dials. 2. Search for the Fast Dial entry that you want to edit. 3. Click on a component of the entry. 4. Change the phone number. 5. Click Save. Delete a Fast Dial entry 1. Search for a Fast Dial. 2. Select one or more entries. 3. Click Delete Selected. Tips • You can create up to 500 Fast Dial and PAB entries. • You can create a new Fast Dial entry without using a PAB entry.
Note For help using speed-dial features, see Speed Dialing, page 39. If you want to... Then do this after you log in... Set up speed-dial buttons 1. Choose User Options > Device. 2. Choose a phone from the Name drop-down menu. 3. Click Speed Dials. 4. Enter a number and label for a speed-dial button (programmable button) on your phone. 5. Click Save. Note Set up Abbreviated Dialing Your phone uses the ASCII Label field. 1. Choose User Options > Device. 2. Choose a phone from the Name drop-down menu.
Setting Up Phone Services on the Web Phone services can include special phone features, network data, and web-based information (such as stock quotes and movie listings). You must first subscribe to a phone service before accessing it on your phone. If you want to... Then do this after you log in... Subscribe to a service 1. Choose User Options > Device. 2. Choose a phone from the Name drop-down menu. 3. Click Phone Services. 4. Click Add New. 5. Choose a service from the drop-down list and click Next.
If you want to... Then do this after you log in... Add a service to an available programmable phone button 1. Choose User Options > Device. 2. Choose a phone from the Name drop-down menu. 3. Click Service URL. Note If you do not see this option, ask your system administrator to configure a service URL button for your phone. 4. Choose a service from the Button Service drop-down list. 5. If you want to rename the service, edit the label fields.
Controlling User Settings on the Web User settings include your password, PIN, and language (locale) settings. If you want to... Then do this after you log in... Change your password 1. Choose User Options > User Settings. 2. In the Browser Password area, enter information. 3. Click Save. Change your PIN 1. Choose User Options > User Settings. 2. In the Phone PIN area, enter information. 3. Click Save. Change the language (locale) for your User Options web pages 1.
If you want to... Then do this after you log in... Set up call forwarding per line 1. Choose User Options > Device. 2. Choose a phone from the Name drop-down menu. 3. Click Line Settings. 4. If you have more than one directory number (line) assigned to your phone, choose a line from the Line drop-down menu. 5. In the Incoming Call Forwarding area, choose call forwarding settings for various conditions. 6. Click Save. Change the voice message indicator (lamp) setting per line 1.
If you want to... Then do this after you log in... Change the audible voice message indicator setting per line 1. Choose User Options > Device. 2. Choose a phone from the Name drop-down menu. 3. Click Line Settings. 4. If you have more than one directory number (line) assigned to your phone, choose a line from the Line drop-down menu. 5. In the Audible Message Waiting Indicator area, choose from various settings.
Setting Up Phones and Access Lists for Mobile Connect When using Cisco Mobile Connect, you must add your mobile and other phones that you want to use to make and receive calls using the same directory numbers as your desk phone. These phones are called remote destinations. You can also define access lists to restrict or allow calls from certain numbers to be sent to your mobile phone. If you want to... Then do this after you log in... Create an access list 1.
If you want to... Then do this after you log in... Add a new remote destination 1. Choose User Options > Mobility Settings > Remote Destinations. 2. Click Add New. 3. Enter the following information: – Name—Enter a name for the mobile (or other) phone. – Destination Number—Enter your mobile phone number. 4. Select your remote destination profile from the drop-down list box. Your remote destination profile contains the settings that apply to remote destinations that you create. 5.
Using Cisco WebDialer Cisco WebDialer allows you to make calls on your Cisco Unified IP Phone to directory contacts by clicking items in a web browser. Your system administrator must configure this feature for you. If you want to... Then... Use WebDialer with your User Options directory 1. Log in to your User Options web pages. See Accessing Your User Options Web Pages, page 64. 2. Choose User Options > Directory and search for a coworker. 3. Click the number that you want to dial. 4.
If you want to... Then... Log out of WebDialer Click the logout icon in the Make Call or Hang Up page. Set up, view, or change WebDialer preferences Access the Preferences page. The Preferences page appears the first time that you use WebDialer (after you click the number that you want to dial.) To return to Preferences in the future, click the preferences icon from the Make Call or Hang Up page.
Understanding Additional Configuration Options Your system administrator can configure your phone to use specific button and softkey templates along with special services and features, if appropriate. This table provides an overview of some configuration options that you might want to discuss with your phone system administrator based on your calling needs or work environment. Note You can locate Phone Guides and other documents listed in this table on the web: http://www.cisco.
If you... Then... Work with (or work as) Consider using: an administrative • Cisco Unified Communications assistant Manager Assistant • A shared line For more information... See: • Using a Shared Line, page 42 • Cisco Unified Communications Manager Assistant User Guide Want to use one extension for several phones Request a shared line. This allows you to use one extension for your desk phone and lab phone, for example. See Using a Shared Line, page 42.
If you... Then... For more information... Determine the state of a Ask your administrator to set up the phone line associated Busy Lamp Field (BLF) feature for with a speed-dial your phone. button, call log, or directory listing on your phone See Using BLF to Determine a Line State, page 45. Want to temporarily apply your phone number and settings to a shared Cisco Unified IP Phone See Using Cisco Extension Mobility, page 49. Ask your system administrator about the Cisco Extension Mobility Service.
Troubleshooting Your Phone This section provides troubleshooting information for your Cisco Unified IP Phone. General Troubleshooting This section provides information to help you troubleshoot general problems with your phone. For more information, see your system administrator. Symptom Explanation You cannot hear a dial tone or complete a call One or more of the following factors might apply: • You must log into the Extension Mobility service.
Symptom Explanation You are disconnected from a call that you joined using Barge You will be disconnected from a call that you have joined using Barge if the call is put on hold, transferred, or turned into a conference call. CallBack fails The other party might have call forwarding enabled.
84 OL-15896-01
Cisco One-Year Limited Hardware Warranty Terms There are special terms applicable to your hardware warranty and various services that you can use during the warranty period. Your formal Warranty Statement, including the warranties and license agreements applicable to Cisco software, is available on Cisco.com at the following URL: http://www.cisco.com/en/US/docs/general/warranty/English/1Y1DEN__.html Cisco Unified IP Phone 7965G and 7945G Phone Guide for Cisco Unified Communications Manager 7.
86 OL-15896-01
Index A C Abbreviated Dialing 39, 68 call activity area 15 access lists call forwarding creating 75 setting up 75 configuring from web page 72 call logs Address Book Synchronization Tool 68 dialing from a URL entry in 58 answering calls 23 erasing 57 ASCII label field support 69 viewing and dialing from 57 audible message waiting indicator 63 call overview mode 27 audio, quality of 6 call park 41 authenticated calls 46 call pickup 40 Auto Dial 21 call waiting 24 AutoAnswer 54 CallBack
icons for 13 Cisco WebDialer 77 maximum per line 13 Client Matter Code, see CMC multiple parties on 32 CMC 22, 82 multiple, switching between 27 conference calls muting 26 Meet-Me 35, 36 parking 41 removing participants from 36 placing 20, 21 security-level for 36 prevent barging of 44 types of 32 prioritizing 47 viewing participants for 36 redirecting while ringing 40 connected 14 reporting problems with 83 corporate directory secure 46 using from web page 77 storing and retrieving
encrypted calls 46 securing in cradle 5 ending a call, options for 25 using 52 Extension Mobility 49 hanging up, options for 25 headset answering calls with 23 F answering calls with wireless 23 FAC 22, 82 button for 12 Fast Dials hanging up with 25 configuring from web page 67 placing calls with 20 using on phone 60 using 52 feature buttons headset performance, general 6 directories 11 help button 12, 28 display of 17 help, using 17 help 12 hold messages 11 and switching calls 27
K messages button 11 missed calls, records of 57 keypad 12 MLPP, using 47 Mobile Connect 49 mobile connect L access to remote destinations 50 language (locale) settings 72 configuring 49 line buttons 11 enabling 76 lines making call from mobile phone 50 and call forwarding 72 putting call on hold 50 and call states 13 setting up access lists 75 and using BLF 45 turning off from mobile phone 50 buttons for 11 description of 13 icons for 13 mobile phone make call from 50 turning off mobile c
on-hook dialing 21 description of 11 online help, using 17 labels for 15 P Q PAB QRT 83 using from web page 65 Quality Reporting Tool 83 using on phone 60 password, changing 72 Personal Address Book, see PAB Personal Directory R received calls, records of 57 using from web page 65 redial 20 using on phone 60 remote destination 49 phone lines creating 76 buttons for 11 ring schedule 76 description of 13 turn off access 50 viewing 15 phone screen remote-in-use icon for shared lines 42 r
sleep mode 16 subscriptions, for phone services 70 secure calls 46 suspicious calls, tracing 47 secure conferences 36 switching calls 27, 49 security, for calls 46 Select button 12 services button 12 T services, subscribing to 70 TABSynch 68 settings button 12 TAPS 6 settings, customizing 55 telephony features shared lines audible message waiting indicator 63 and remote-in-use icon 42 Tool for Auto-Registered Phones Support 6 description of 42 transferring with barge 43 with privacy 44 s
for phone ringer 55 volume button 12 W warnings, safety 2 web-based services configuring 64 see also User Options web pages WebDialer 77 whisper 14 wideband headset 53 Cisco Unified IP Phone 7965G and 7945G Phone Guide for Cisco Unified Communications Manager 7.
94 OL-15896-01
Americas Headquarters Cisco Systems, Inc. San Jose, CA Asia Pacific Headquarters Cisco Systems (USA) Pte. Ltd. Singapore Europe Headquarters Cisco Systems International BV Amsterdam, The Netherlands Cisco has more than 200 offices worldwide. Addresses, phone numbers, and fax numbers are listed on the Cisco Website at www.cisco.com/go/offices.