RipwaveÔ CPE Installation and User Guide For use with all Ripwave 2400 and 2600 CPE models For Installation With Windows® 95 or later Operating Systems Part Number 40-00097-00 Revision A, Version 1.0 June 20, 2002 Proprietary & Confidential All information disclosed by this document is confidential, and is the proprietary property of Navini Networks, Inc. All rights therein are expressly reserved.
Ripwave Unit Installation and User Guide Navini Networks, Inc.
Ripwave CPE Installation and User Guide Navini Networks, Inc. TABLE OF CONTENTS Permissions, Trademarks, and Distribution ............................................................................. iii Symbols ......................................................................................................................................... iv Safety..............................................................................................................................................
Ripwave Unit Installation and User Guide Navini Networks, Inc. Care and Maintenance ....................................................................Error! Bookmark not defined. Glossary ............................................................................................Error! Bookmark not defined. End User Software License Agreement .........................................Error! Bookmark not defined. Hardware Warranty........................................................................
Ripwave CPE Installation and User Guide Navini Networks, Inc. Permissions, Trademarks, and Distribution Copyright© November 2001 - 2002, Navini Networks, Inc. All information contained herein and disclosed by this document is confidential and the proprietary property of Navini Networks, Inc. and all rights therein are expressly reserved.
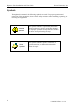
Ripwave Unit Installation and User Guide Navini Networks, Inc. Symbols Throughout this manual, the following symbols are used. For proper operation and protection of the equipment, observe these safety measures when installing, operating, or servicing the equipment. Caution Symbol Notes Symbol iv This symbol indicates a potentially hazardous situation that may result in equipment damage or improper operation. Safety measures need to be taken when performing the step.
Ripwave CPE Installation and User Guide Navini Networks, Inc. Safety To optimize safety when using the Navini equipment, please read before using. When using the Navini electronic equipment, always follow the basic safety precautions to reduce the risk of electrical shock, fire, and injury to people and/or property. Follow all warnings and instructions that come with the equipment. 1. Do not use the equipment while you are in a bathtub, shower, pool, or spa.
Ripwave Unit Installation and User Guide Navini Networks, Inc. Safety (continued) 10. Do not disassemble the equipment. Removing covers exposes dangerous voltages or other risks and also voids the warranty. Incorrect reassembly can cause equipment damage or electrical shock. Only an authorized repair technician should service this product. 11. Do not expose the equipment to extreme hot or cold temperatures. 12.
Ripwave CPE Installation and User Guide Navini Networks, Inc. Regulatory Information FCC Compliance and Advisory Statements Caution: This device is a Radio Frequency transmitter. It is required to comply with FCC RF exposure requirements for transmitting devices. A minimum separation distance of 8 inches (20 cm) or more must be maintained between the antenna and all persons during device operations to ensure compliance with the FCC’s rules for Radio Frequency Exposure.
Ripwave Unit Installation and User Guide viii Navini Networks, Inc. 0-00098-00 Rev A v1.
Ripwave CPE Installation and User Guide Navini Networks, Inc. Battery Cautionary Procedures CAUTION: To reduce risk of injury or fire, follow these instructions when handling the battery. 1. Risk of explosion is possible if the battery is replaced with one not supplied by Navini Networks. 2. Do not dispose of the battery in a fire. They may explode. Check with the local codes for battery disposal guidelines. 3. Do not open or mutilate the battery.
Ripwave Unit Installation and User Guide x Navini Networks, Inc. 0-00098-00 Rev A v1.
Ripwave CPE Installation and User Guide 0-00098-00 Rev A v1.0 Navini Networks, Inc.
Ripwave Unit Installation and User Guide Navini Networks, Inc. Introduction Congratulations on your purchase of the Navini Networks Ripwave Customer Premise Equipment (CPE). It provides complete wireless broadband Internet access to residential and small office/home office (SOHO) customers without any professional hardware installation or an external antenna.
Ripwave Unit Installation and User Guide Navini Networks, Inc. You must have the Ripwave CPE model with the appropriate connection for your PC port – either a USB or an Ethernet connection. At first glance, the models appear the same, but the ports and cables for the connections are different. · A USB connection will function only with Windows® 98, Windows® 98SE, Windows® 2000, Windows® ME, or Windows® XP. It will not work with Windows® 95 or Windows NT®.
Ripwave Unit Installation and User Guide Navini Networks, Inc. Location of Controls and Features 2400 Ripwave CPE Antenna On/Off Switch Power Adapter Input Ethernet Cable Input Indicator Lights USB Cable Input 2400E 2400U 2600 Ripwave CPE Antenna Power Adapter Input Indicator Lights Ethernet Cable Input USB Cable Input 2600E 40-00098-00 Rev A v1.
Ripwave Unit Installation and User Guide Navini Networks, Inc. Ripwave CPE Installation USB Connections The following instructions are for the installation of the Ripwave CPE using a USB connection. Please read all instructions before attempting installation. It is recommended that the computer and the Ripwave CPE be turned off before performing the installation. 1. Connect the USB cable to the USB port on the computer as shown. 2. Connect the other end of the USB cable to the Ripwave CPE as shown.
Ripwave Unit Installation and User Guide Navini Networks, Inc. 4. Rotate the antenna on the Ripwave CPE clockwise 180 degrees to the ‘UP’ position. This reveals the Ripwave CPE indicator lights. CAUTION: Rotation or movement of the antenna in any other direction may cause damage to the Ripwave CPE. Rotate antenna clockwise 180 degrees Signal Strength Indicator Battery Indicator On/Off switch Power Indicator 5. Push the On/Off switch on the Ripwave CPE to turn the CPE ON. 6.
Ripwave Unit Installation and User Guide Navini Networks, Inc. · The Ripwave CPE is not turned on. · The Ripwave CPE is not properly connected to the computer. 9. The Add New Hardware Wizard dialog box appears. Click Next to continue. 10. Insert the Navini Networks Ripwave installation CD in the CD-ROM drive. 11. Select the ‘Search for the best driver for your device’ option. Click Next to continue. 6 0-00098-00 Rev A v1.
Ripwave Unit Installation and User Guide Navini Networks, Inc. 12. Select the ‘CD-ROM drive’ checkbox. Click Next to continue. 13. Confirm that the drive location is correct (the CD-ROM drive letter may be different than shown below) and that the file to be installed is NETNNUSB.INF. Click Next to continue. 40-00098-00 Rev A v1.
Ripwave Unit Installation and User Guide Navini Networks, Inc. 14. Click Finish. Note: For Windows® 98, a window may appear asking for drivers to be installed from the Windows® 98 setup disk. If so, insert the Windows® 98 setup disk in the CDROM drive and accept the defaults. 15. After clicking Finish, the System Settings Change window appears asking if you want to restart your computer now. Click Yes. Note: You must restart your computer at this point before proceeding. 16.
Ripwave Unit Installation and User Guide Navini Networks, Inc. Ethernet Connections The following instructions are for the installation of the Ripwave CPE using an Ethernet connection. Please read all instructions before attempting installation. It is recommended that the computer and the Ripwave CPE be turned off before performing the installation. 1. Connect the Ethernet cable to the Ethernet port on the computer as shown. 2. Connect the other end of the Ethernet cable to the Ripwave CPE as shown.
Ripwave Unit Installation and User Guide Navini Networks, Inc. 4. Rotate the antenna on the Ripwave CPE clockwise 180 degrees to the ‘UP’ position. This reveals the Ripwave CPE indicator lights. CAUTION: Rotation or movement of the antenna in any other direction may cause damage to the Ripwave CPE. Signal Strength Indicator Rotate antenna clockwise 180 degrees Battery Indicator On/Off switch Power Indicator 5. Push the On/Off switch on the Ripwave CPE to turn the CPE ON. 6.
Ripwave Unit Installation and User Guide Navini Networks, Inc. Ripwave Monitor Software Installation The Ripwave Monitor provides information on the strength and quality of the incoming signal and battery strength. It also checks the connectivity to the Internet Service Provider (ISP) network. Notes: · For Windows NT® and Windows® 2000, you must be logged into an account having administrative privileges to install the Ripwave Monitor software.