Ripwave 2.6 GHz User Guide For Windows® 95 or later Note: This User Guide is for Beta Users only. The contents are subject to change at any time during the Beta test. Version 1.0.1 Produce Release 1.
Ripwave 2.6 GHz User Guide i Navini Networks, Inc.
Ripwave 2.6 GHz User Guide Navini Networks, Inc. TABLE OF CONTENTS PERMISSIONS, TRADEMARKS, AND DISTRIBUTION.......................................VI REGULATORY INFORMATION ............................................................................. VII SAFETY........................................................................................................................VIII INTRODUCTION.............................................................................................................
Ripwave 2.6 GHz User Guide iii Navini Networks, Inc.
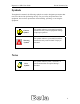
Ripwave 2.6 GHz User Guide Navini Networks, Inc. Symbols Throughout this manual, the following symbols are used to designate precautions that need to be taken when performing the step. For your safety and protection of the equipment, observe these precautions when installing, operating, or servicing the equipment. Caution Symbol This symbol indicates a potentially hazardous situation that may result in equipment damage or improper operation.
Ripwave 2.6 GHz User Guide v Navini Networks, Inc.
Ripwave 2.6 GHz User Guide Navini Networks, Inc. Permissions, trademarks, and distribution Copyright© November 2001 - 2002, Navini Networks, Inc. All information contained herein and disclosed by this document is confidential and the proprietary property of Navini Networks, Inc. and all rights therein are expressly reserved.
Ripwave 2.6 GHz User Guide Navini Networks, Inc. Regulatory Information Caution: This device is a radio frequency transmitter. It is required to comply with FCC RF exposure requirements for transmitting devices. A minimum separation distance of 8 inches (20 cm) or more must be maintained between the antenna and all persons during device operations to ensure compliance with the FCC’s rules for Radio Frequency Exposure.
Ripwave 2.6 GHz User Guide Navini Networks, Inc. Safety To optimize safety when using the Navini equipment, please read before using. When using the Navini electronic equipment, always follow the basic safety precautions to reduce the risk of electrical shock, fire, and injury to people and/or property. 1. Follow all warnings and instructions that come with the equipment. 2. Do not use the equipment while you are in a bathtub, shower, pool, or spa.
Ripwave 2.6 GHz User Guide Navini Networks, Inc. Safety (continued) 11. Do not dispose of the equipment or the battery in a fire. They may explode. Check with the retailer for battery disposal guidelines. 12. Do not open or mutilate the battery. The battery contains substances that are toxic, corrosive, or harmful to humans. If battery substances come in contact with the skin, seek medical help immediately. 13. Do not disassemble the equipment.
Ripwave 2.6 GHz User Guide Navini Networks, Inc.
Ripwave 2.6 GHz User Guide xi Navini Networks, Inc.
Ripwave 2.6 GHz User Guide Navini Networks, Inc. Introduction Congratulations for being selected to test the Navini Networks Ripwave product. This manual will guide you through the simple process of installing the Navini Networks Ripwave unit and software, which has been developed to optimize the ease and convenience for you, our valued customer. The Ripwave Unit Installation includes instructions for both USB and Ethernet connections. Be sure to use the instructions that apply to your Ripwave model.
Ripwave 2.6 GHz User Guide Navini Networks, Inc. Ripwave Unit Installation USB connections The following instructions are for the installation of the Ripwave Unit model 2600U using a USB connection. Please read all instructions before attempting installation. It is recommended that the computer and the Ripwave unit be turned off before performing the installation. 1. Connect the USB cable to the USB port on the computer as shown. 2. Connect the other end of the USB cable to the Ripwave unit as shown. 3.
Ripwave 2.6 GHz User Guide Navini Networks, Inc. 4. Connect the AC power adapter cable to the Ripwave unit. Plug the other end of the AC power adapter cable into a 110 VAC outlet. Caution: Only use the AC power adapter supplied with the Ripwave unit. Using any other adapter may cause damage to the Ripwave Unit. AC Power adapter cable jack 5. Push the On/Off switch to turn the Ripwave unit ON. USB Port 6. If the green power-indicator light is on, proceed to step 7.
Ripwave 2.6 GHz User Guide Navini Networks, Inc. 9. The Add New Hardware Wizard dialog box appears. Click Next to continue. 10. Insert the Navini Networks Ripwave installation CD in the CD-ROM drive. 11. In the next dialog box, select the ‘Search for the best driver for your device’ option. Click Next to continue.
Ripwave 2.6 GHz User Guide Navini Networks, Inc. 12. In the next dialog box, select the ‘CD-ROM drive’ checkbox. Click Next to continue. 13. In the next dialog box, confirm that the drive location is correct (the drive letter may be different than shown below) and that the file to be installed is NETNNUSB.INF. Click Next to continue.
Ripwave 2.6 GHz User Guide Navini Networks, Inc. 14. In the next dialog box, click Finish. Note: For Windows® 98, a window may appear asking for drivers to be installed from the Windows® 98 setup disk. If so, insert the Windows® 98 setup disk in the CD-ROM drive and accept the defaults. 15. After clicking Finish, the System Settings Change window appears asking if you want to restart your computer now. Click Yes. Note: You must restart your computer at this point before proceeding. 16.
Ripwave 2.6 GHz User Guide Navini Networks, Inc. Ethernet connections The following instructions are for the installation of the Ripwave Unit model 2600E using an Ethernet connection. Please read all instructions before attempting installation. It is recommended that the computer and the Ripwave unit be turned off before performing the installation. 1. Connect the Ethernet cable to the Ethernet port on the computer as shown. 2. Connect the other end of the Ethernet cable to the Ripwave unit as shown. 3.
Ripwave 2.6 GHz User Guide Navini Networks, Inc. 4. Connect the AC power adapter cable to the Ripwave unit. Plug the other end of the AC power adapter cable into a 110 VAC outlet. Caution: Only use the AC power adapter supplied with the Ripwave unit. Using any other adapter may cause damage to the Ripwave Unit. AC Power adapter cable jack 5. Push the On/Off switch on the Ripwave unit to turn the unit ON. 6. If the green power-indicator light is on, proceed to step 7.
Ripwave 2.6 GHz User Guide Navini Networks, Inc. Ripwave Monitor Software Installation Notes: For Windows NT® and Windows® 2000, you must be logged into an account having administrative privileges to install the Ripwave monitor software. For Ripwave monitor software installation on Windows® 95, Windows® 98, and Windows® 98SE Operating Systems, the operating system CD will be needed to complete the installation. If prompted, insert the operating system CD in the CD-ROM drive and accept the defaults.
Ripwave 2.6 GHz User Guide Navini Networks, Inc. 4. The InstallAnywhere window appears. The progress bar indicates that InstallAnywhere has initialized. 5. The Ripwave Monitor Introduction screen appears. Click Next to continue.
Ripwave 2.6 GHz User Guide Navini Networks, Inc. 6. The License Agreement screen appears. Read the Licensing Agreement. Select the I accept option, and click Next to continue. Note: If the License Agreement is not accepted, you cannot install the software. 7. The Ripwave Positioning screen appears. Read the screen for positioning the Ripwave unit for optimum performance. Click Next to continue.
Ripwave 2.6 GHz User Guide Navini Networks, Inc. 8. The Choose Install Folder screen appears. Enter the name of the folder where you wish to install the software and click Next to continue. Note: The default installation folder provided by the installation software is shown below. 9. The Pre-Installation Summary screen appears. Review the contents for accuracy. Click Install to continue. Note: For your installation, this screen may have different information.
Ripwave 2.6 GHz User Guide Navini Networks, Inc. 10. The Installing screen will display as the application files are loaded. 11. At the Install Complete screen, click Done to close the window.
Ripwave 2.6 GHz User Guide Navini Networks, Inc. 12. After clicking Done, the System Settings Change window appears asking if you want to restart your computer now. Click Yes. Note: You must restart your computer at this point before proceeding. Accessing the Internet To access the Internet, open the web browser that is installed on the computer. You should be able to surf the Internet.
Ripwave 2.6 GHz User Guide Navini Networks, Inc. Ripwave Unit Indicator Lights The Ripwave unit has three LEDs that indicate the operating status of the unit. The indicator lights, along with the graphical representation next to it on the case, are as follows: Signal Strength Indicator Battery Indicator Power Indicator The indicator lights change color to designate the state of the item that it represents.
Ripwave 2.6 GHz User Guide Navini Networks, Inc. Displaying the Ripwave Monitor Navini Networks provides Ripwave monitor software to assist you in solving problems that you encounter with reception or network connections. The Ripwave monitor provides information on the strength and quality of the incoming signal, battery strength, and checks the connectivity to the Internet Service Provider (ISP) network. The following steps will aid in using the Ripwave Monitor software. 1.
Ripwave 2.6 GHz User Guide Navini Networks, Inc. If a problem is detected with one of these components or if a connection is down, a red circle with a slash ( ) will be positioned over the icon. For example, if the Ripwave to Base Station wireless connection goes down, the icon will change to: When the system is on, the signal strength and quality strength will be displayed as dynamic bar graphs in the window. To increase the strength and quality of the signal, change the location of the Ripwave unit.
Ripwave 2.6 GHz User Guide Navini Networks, Inc. Notes: If the connection from the Base Station to the Ripwave Unit is down, the Advanced button will be disabled (grayed out). The connections listed in the Advanced window will vary depending on your ISP network. The above connections are used as an example. 4. Click on the Run Tests button to check the connections. A blue checkmark indicates that the connection to the network is valid.
Ripwave 2.6 GHz User Guide Navini Networks, Inc. Uninstall Ripwave Software 1. To uninstall the Ripwave monitor software, click Start > Programs > Navini Ripwave Monitor > Uninstall Ripwave Monitor. The InstallAnywhere Uninstaller screen appears. Click Uninstall. 2. The screen will cycle through as the application files are uninstalled.
Ripwave 2.6 GHz User Guide Navini Networks, Inc. 3. The Uninstall Complete screen appears when finished. Click on Quit to close the Uninstall screen. 4. Restart the computer to complete the uninstall process. This will ensure that the computer functions properly after the uninstall process.
Ripwave 2.6 GHz User Guide Navini Networks, Inc. Installing / Charging the Battery Note: The battery is an option and is not included with the unit. The battery is installed in the bottom of the Ripwave unit. To install and charge the battery, follow the steps below. 1. Using the battery pack tab, remove the battery cover from the Ripwave unit. Battery pack tab 2. Install the battery pack into the Ripwave unit, ensuring that the contacts on the battery pack mate with the contacts in the Ripwave unit.
Ripwave 2.6 GHz User Guide Navini Networks, Inc. 3. Reinstall the battery cover on the Ripwave unit. To charge the battery, install it in the Ripwave unit. Connect the AC adapter (see Ripwave unit installation) to the Ripwave unit. The battery will begin charging immediately with the on/off switch in either position. The middle indicator light on the front of the Ripwave unit (under the antenna) will be constant yellow, indicating that the battery is being charged.
Ripwave 2.6 GHz User Guide Navini Networks, Inc. Beta User Guide Frequently Asked Questions 1) What is the Ripwave unit? Ripwave is a new and exciting product that allows end users to access the Internet at broadband speeds through a small wireless device that is self installed and is non-line-of-sight to the tower. 2) What does it cost? As a beta user, there is no charge for using the service.
Ripwave 2.6 GHz User Guide Navini Networks, Inc. Frequently Asked Questions (continued) 9) Do I need to turn off the Ripwave unit when I am finished using it? It is recommended that you turn off the Ripwave unit when it is not in use. The switch is located on the front of the unit. 10) I have a friend/family member/co-worker who also wants to beta test the Ripwave unit. Can they sign up? All Beta users have been identified for this specific trial. No additional Beta users are needed at this time.
Ripwave 2.6 GHz User Guide Navini Networks, Inc. End User License Agreement ---- NOTICE TO USER ---END-USER LICENSE AGREEMENT FOR RIPWAVE SOFTWARE BY USING THE RIPWAVE SOFTWARE (INCLUDING THE COMPUTER SOFTWARE, THE ASSOCIATED MEDIA, ANY PRINTED MATERIALS, THE RIPWAVE MODEM, AND ANY ELECTRONIC OR “ONLINE” DOCUMENTATION) YOU ACCEPT THE TERMS AND CONDITIONS OF THIS LICENSE AGREEMENT.
Ripwave 2.6 GHz User Guide Navini Networks, Inc. 1. GRANT OF LICENSE. This AGREEMENT grants to you a personal, non-exclusive, non-transferable license as follows: 1.1 Storage, Installation and Use. Except as otherwise expressly provided in this AGREEMENT, you will be allowed to install, use, access, run, or otherwise interact with the SOFTWARE on multiple COMPUTERS. This SOFTWARE may only be used with a Ripwave Digital Modem ("MODEM"). 2. DESCRIPTION OF OTHER RIGHTS AND LIMITATIONS. 2.
Ripwave 2.6 GHz User Guide Navini Networks, Inc. beneficiary under this License Agreement and may independently enforce its Intellectual Property rights. 2.8 Remote Digital Access. Licensor reserves the right, but is not obligated to digitally access the CPE and/or the Ripwave Software for the purposes of upgrading and maintaining the software. 3. UPGRADES.
Ripwave 2.6 GHz User Guide Navini Networks, Inc. nuclear, chemical, or biological weapons; or (iii) to any person or entity who has been prohibited from participating in U.S. export transactions by any federal agency of the U.S. government. 8. WARRANTY.
Ripwave 2.6 GHz User Guide Navini Networks, Inc. 9. LAW. This Agreement and each Order shall be construed in accordance with the laws (including the Uniform Commercial Code) of the State of Texas, without giving effect to principles of conflicts of laws. Any legal action arising here from will be brought within the state or federal courts located in Dallas county, Texas, which is agreed by the parties to be a convenient forum.