
User Manual

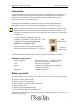
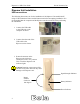
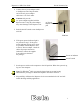
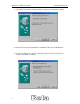
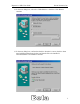
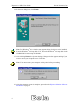
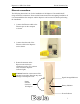
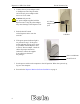
Table Of Contents
- Permissions, trademarks, and distribution
- Regulatory Information
- Safety
- Introduction
- Ripwave Unit Installation
- Ripwave Monitor Software Installation
- Accessing the Internet
- Ripwave Unit Indicator Lights
- Displaying the Ripwave Monitor
- Uninstall Ripwave Software
- Installing / Charging the Battery
- Beta User Guide Frequently Asked Questions
- End User License Agreement

Ripwave 2.6 GHz User Guide Navini Networks, Inc.
Ripwave Unit Installation
USB connections
The following instructions are for the installation of the Ripwave Unit model 2600U
using a USB connection. Please read all instructions before attempting installation. It is
recommended that the computer and the Ripwave unit be turned off before performing
the installation.
1. Connect the USB cable
to the USB port on the
computer as shown.
2. Connect the other end of the
USB cable to the
Ripwave unit as shown.
3. Rotate the antenna on the
Ripwave unit clockwise
180 degrees to the ‘UP’ position.
This reveals the Ripwave unit
indicator lights.
Caution: Rotation or movement of the
antenna in any other direction may cause
damage to the Ripwave unit.
Rotate
antenna
clockwise
180 degrees
Signal Strength Indicator
Battery Indicator
Power Indicator
2