USER GUIDE Cisco Small Business Pro IP Phone SPA525G (SIP)
Contents FCC and IC Statement 7 Federal Communication Commission Interference Statement 7 IMPORTANT NOTE 7 Industry Canada Statement 8 About This Document 9 Purpose 9 Organization 9 Finding Information in PDF Files 10 12 Chapter 1: Getting Started 13 Overview of the Cisco SPA525G IP Phone Caring for Your Phone Understanding Your Phone’s Lines and Buttons 14 15 16 Phone Components 16 Softkey Buttons 18 Using the Keypad and Buttons with Menus 21 Using Keypad Shortcuts 21 Using th
Contents Chapter 2: Installing Your Phone 27 Before You Begin 28 Connecting the Handset 28 (Optional) Attaching the Desk Stand 30 (Optional) Mounting the Phone to the Wall 31 Connecting Your Phone’s Power 33 Connecting Your Phone to the Computer Network 34 Connecting Your Phone to the Wired Network 34 Connecting Your Phone to the Wireless Network 34 Determining Your Wireless Router Security Type 35 Using Wi-Fi Protected Setup with the SPA525G 38 Manually Adding a Wireless Profile on t
Contents Viewing and Returning Missed Calls 49 Returning a Missed Call 49 Viewing a List of Missed Calls 49 Turning the Missed Calls Shortcut On and Off 50 Forwarding Calls 50 Forwarding Calls to a Single Number 51 Forwarding Calls When Your Phone is Busy 51 Forwarding Calls When You Don’t Answer the Phone 52 Delaying Call Forwarding When You Don’t Answer the Phone 52 Stopping Call Forwarding 52 Setting Do Not Disturb 52 Configuring Call Waiting 53 Picking Up a Call 54 Parking a C
Contents Setting or Changing a Phone Password Logging In and Logging Out of Your Phone Accessing Voicemail Chapter 4: Using Advanced Phone Features Configuring Privacy and Security Features 63 64 64 66 67 Blocking Caller ID 67 Blocking Anonymous Calls 67 Using Secure Call 68 Enabling Dial Assistance 68 Creating and Using Speed Dials 69 Playing MP3 Files on Your Phone 70 Creating the Playlist 70 Playing Songs 71 Changing the Left and Right Channel for Stereo Headsets 72 Using the Pag
Contents Viewing Phone, Network, and Call Information 82 Viewing Phone Information 82 Viewing Network Information 83 Viewing Phone Line and Extension Information 83 Viewing Peripheral Status 84 Viewing the Wireless Connection Status 84 Advanced Menus for Technical Support Personnel 85 Chapter 5: Using the Web Interface 86 Logging in to the Web Interface 87 Configuring Your Address Book 87 Setting Do Not Disturb 88 Configuring Call Forwarding 89 Configuring Call Waiting 90 Blocking
Contents Appendix A: Additional Information 103 Regulatory Compliance and Safety Information 103 Warranty 103 End User License Agreement (EULA) 103 Support Contacts 103 Appendix B: Where to Go From Here 104 Product Resources 104 Related Documentation 105 Cisco Small Business Pro IP Phone SPA525G (SIP) 6
FCC and IC Statement Federal Communication Commission Interference Statement This equipment has been tested and found to comply with the limits for a Class B digital device, pursuant to Part 15 of the FCC Rules. These limits are designed to provide reasonable protection against harmful interference in a residential installation.
This transmitter must not be co-located or operating in conjunction with any other antenna or transmitter. Industry Canada Statement This device complies with RSS-210 of the Industry Canada Rules. Operation is subject to the following two conditions: 1. This device may not cause harmful interference, and 2. This device must accept any interference received, including interference that may cause undesired operation. © 2008 Cisco Systems, Inc. All rights reserved.
Preface About This Document Purpose This guide describes the concepts and tasks necessary to use and configure your Cisco SPA525G IP Phone. NOTE The SPA525G features vary, depending on the type of call control system that you are using. This document describes using the SPA525G with a SIP phone system, such as the Cisco SPA9000 Voice System or a Broadsoft or Asterisk system.
Preface Chapter Title Description Chapter 5 Using the Web Interface Accessing the web user interface for your phone to configure your address book, speed dials, and other phone features. Chapter 6 Using the SPA932 Attendant Console Installing and using the SPA932 Attendant Console. Appendix A Additional Information Additional information for your product. Appendix B Where to Go From Here Provides URLs for related product documentation and resources available on Cisco.com.
Preface STEP 2 Optionally, click the arrow next to the Find text box to refine your search by choosing special options such as Whole Words Only. STEP 3 Press Enter. STEP 4 Acrobat displays the first instance of the search term. STEP 5 Press Enter again to continue to more instances of the term. Finding Text in Multiple PDF Files The Search window lets you search for terms in multiple PDF files that are stored on your PC or local network. The PDF files do not need to be open.
Preface STEP 4 When the Results appear, click + to open a folder, and then click any link to open the file where the search terms appear. For more information about the Find and Search functions, see the Adobe Acrobat online help.
1 Getting Started This chapter provides an overview of your SPA525G IP phone. contains the following sections: • Overview of the Cisco SPA525G IP Phone, page14 • Understanding Your Phone’s Lines and Buttons, page16 • Using the Keypad and Buttons with Menus, page 21 • Entering Numbers and Text in Fields, page 22 • Using Phone Hardware and Accessories, page 23 NOTE The SPA525G features vary, depending on the type of call control system you are using.
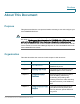
Getting Started Overview of the Cisco SPA525G IP Phone 1 Overview of the Cisco SPA525G IP Phone The Cisco SPA525G IP Phone is a full-featured VoIP (Voice over Internet Protocol) phone that provide voice communication over an IP network. It provides traditional features, such as call forwarding, redialing, speed dialing, transferring calls, conference calling and accessing voice mail. Calls can be made or received with a handset, headset or speaker.
Getting Started Overview of the Cisco SPA525G IP Phone 1 The SPA525G has a 320 x 240 color, 3.2" inch LCD screen and provides up to five telephone extensions. It provides the following hardware features: • 2 Ethernet 10/100 Mbps ports • 802.3af Power over Ethernet support • USB 2.0 host port for connecting a USB memory device to play MP3 music files • AUX port (to attach a SPA932 attendant console) • Bluetooth capability for headset support • 2.
1 Getting Started Understanding Your Phone’s Lines and Buttons Understanding Your Phone’s Lines and Buttons Use the following graphic and table to identify the parts of your phone. Phone Components Figure 1 SPA525G Phone Components Table 1 IP Phone Components # Phone Feature Description 1 Handset Pick up to answer or place calls. 2 Speaker Speaker for phone.
1 Getting Started Understanding Your Phone’s Lines and Buttons Table 1 IP Phone Components # Phone Feature Description 4 LCD Screen Your phone may vary, but typically displays: • • • • • 5 Line keys Date and time Phone station name Line extensions Softkey options Startup logo, screen saver, background photo, and photo album Indicates phone line status. Your phone may vary, but typically, when lit: • • • • • Green: Line is idle. Red (steady): Line is active or in use.
1 Getting Started Understanding Your Phone’s Lines and Buttons Table 1 IP Phone Components # Phone Feature Description 13 Volume button Press + to increase the volume and press - to lower the volume of the handset, headset, speaker (when the handset is off hook), or ringer (when the handset is on hook). 14 Headset button Press to turn the headset on or off. When the headset is on, the button glows green. 15 Speaker button Press to turn the speaker on or off.
1 Getting Started Understanding Your Phone’s Lines and Buttons Table 2 SPA525G Softkey Buttons Button Function Connect Connects to the selected item (for example, to the wireless network or Bluetooth device). Copy Copies the selected item (for example, a contact in the Address Book). delChar Deletes the last number or letter. Delete Deletes an entire item (for example, a number from the Call History list).
1 Getting Started Understanding Your Phone’s Lines and Buttons Table 2 SPA525G Softkey Buttons Button Function Play Plays a selected item such as a song or a ringtone. Previous Moves to a previous item in a list (for example, a song in the MP3 Playlist). Redial Brings up the list of recently dialed numbers. See “Redialing,” on page 48. Refresh Refreshes the screen. Useful after changing a configuration or when you want to update information (such as weather).
Getting Started Using the Keypad and Buttons with Menus 1 Using the Keypad and Buttons with Menus You press a softkey button or other buttons to enter menus on the LCD screen. Using Keypad Shortcuts Use the keypad to enter the number of the menu or sub-menu item. For example, to reach the Call History menu, press the Setup button and press 2. NOTE Menus and options can change depending on the software release.
1 Getting Started Entering Numbers and Text in Fields Entering Numbers and Text in Fields Some fields on the IP phones require you to enter numbers and text using the keypad and/or softkey buttons. In general, the following guidelines apply: • Use the keypad to enter numbers and characters, pressing the key multiple times to select the correct number or letter. • Press the number key multiple times to move to a different letter under that number.
Getting Started Using Phone Hardware and Accessories 1 Using Phone Hardware and Accessories Using the Speakerphone The SPA IP Phones provide a speakerphone. To use the speakerphone, press the Speaker button (the handset can be either on or off hook). Using Wired and Wireless Headsets The SPA IP Phones support headsets from different manufacturers. For the latest supported models, contact your reseller. Additional information can be found at the manufacturer’s websites: http://www.plantronics.
Getting Started Using Phone Hardware and Accessories • 1 For wired headsets: Connect the 2.5mm connector from the headset into the headset port on the right side of the IP phone as shown in the following graphic: Connecting Bluetooth Headsets Your phone is Bluetooth compatible and works with Bluetooth devices such as headsets. To configure the phone to work with your headset, first enable Bluetooth: STEP 1 Press the Setup button. STEP 2 Select User Preferences.
1 Getting Started Using Phone Hardware and Accessories STEP 4 Scroll to PIN and enter the PIN for your Bluetooth headset. STEP 5 Scroll to Connect Automatically and press the Right Arrow key to turn to On. STEP 6 Press Connect. The profile screen displays and a check mark appears next to the headset if the connection was successful. Using a Headset with Your IP Phone NOTE: Steps to use your headset with the SPA IP Phone may vary. Consult the user documentation for your headset for more information.
Getting Started Using Phone Hardware and Accessories 1 To switch from the handset to the speakerphone, press the Speakerphone button and place the handset back on the hook. To switch from the speakerphone to a headset, press the Headset button. To switch from the speakerphone to the handset, pick up the handset. To switch from the headset to the speakerphone, press the Speakerphone button.
2 Installing Your Phone This chapter describes how to install and connect your Cisco SPA525G IP Phone.
2 Installing Your Phone Before You Begin Before You Begin Before you install and connect your phone, verify with your System Administrator (if applicable) that the network is ready for the phone, read the safety notices, and make sure you have all the phone parts and documentation available. NOTE: The RJ-11 port marked “AUX” is reserved for connection with the SPA932 Attendant Console that works with the SPA525G. It is not for use as a telephone line port.
2 Installing Your Phone Connecting the Handset Figure 1 Cisco SPA525G IP Phone Connections Cisco Small Business Pro IP Phone SPA525G (SIP) User Guide 29
2 Installing Your Phone (Optional) Attaching the Desk Stand Number Component 1 Auxiliary port. Only for use with the SPA932 attendant console. 2 Power port. Insert the power adapter plug into this port. 3 Additional Ethernet port. Connect an Ethernet cable to this port to provide network connectivity to a PC. (This port cannot be used when the phone is connected to the network via the built-in Wireless-G client.) 4 Switch (Ethernet) port. Connect the network cable to this port.
Installing Your Phone (Optional) Mounting the Phone to the Wall 2 (Optional) Mounting the Phone to the Wall To mount the phone to the wall, you must purchase the MB100 wall mount bracket kit. Figure 2 MB100 Wall Mount Kit STEP 1 To attach the Mounting Bracket (MB), align the two cleats on the MB with the holes in the phone’s base. STEP 2 Orient the MB such that the phone’s Ethernet and handset ports are accessible after installation.
Installing Your Phone (Optional) Mounting the Phone to the Wall 2 STEP 3 Push the MB onto the phone’s base. Slide the MB upwards to lock it in place. STEP 4 Plug in the Ethernet and power cables.
2 Installing Your Phone Connecting Your Phone’s Power STEP 5 Hang onto screws mounted in the wall. Connecting Your Phone’s Power If you are using an external power source, plug it into the building’s power source, and plug the power supply into the phone base. See Figure 1 on page 29, item #2. NOTE: The SPA525G does not ship with a power supply. If you are not using Power over Ethernet (PoE), you must order the PA-100 power supply separately from Cisco.
2 Installing Your Phone Connecting Your Phone to the Computer Network Connecting Your Phone to the Computer Network Connecting Your Phone to the Wired Network You connect your phone to the local network by using an Ethernet cable: STEP 1 Plug the Ethernet cable into the back of the base station into the slot marked “SW.” This port is labeled #4 on Figure 1 on page 29. STEP 2 Plug the other end of the Ethernet cable into the appropriate device on your network, such as a network switch.
Installing Your Phone Connecting Your Phone to the Computer Network 2 The Cisco SPA 525G phone supports a direct connection to the wireless network. Before setting up the wireless network, you need to know the wireless security type for your router. The SPA525G works with the following security types: • WEP—Wired Equivalent Privacy. With this type of security, you need to enter a 64 or 128-bit key on the phone (or a more easily remembered passphrase to generate the key).
Installing Your Phone Connecting Your Phone to the Computer Network 2 The following example shows WEP information for a Linksys WRV200 router: If your router is using WPA, note the WPA shared key, or passphrase that you need to enter later.
Installing Your Phone Connecting Your Phone to the Computer Network 2 The following example shows WPA information for a Linksys WRT160N router: To set up the SPA525G wireless connection: STEP 1 If you have plugged in an Ethernet cable to connect the phone to the wired network, remove it and reboot the phone. If an Ethernet connection is present on the phone, it is used instead of the Wi-Fi connection. STEP 2 Press the Setup button on your phone.
Installing Your Phone Connecting Your Phone to the Computer Network STEP 5 2 Scroll to Wi-Fi Configuration and press the Right Arrow key. Choose one of the following options: • Wireless Profile—Use this option to add a new wireless profile (either manually or by scanning for available networks), edit an existing wireless profile, or connect to a previously configured network. See Manually Adding a Wireless Profile on the SPA525G, page 39.
Installing Your Phone Connecting Your Phone to the Computer Network 2 e. Enter the PIN into the field that allows you to setup wireless devices using a PIN. f. Save your changes. g. On the SPA525G, with PIN Configuration highlighted, press Select. To add the connection as a profile, press OK. Your phone may reboot before the Wi-Fi connection is working.
Installing Your Phone Connecting Your Phone to the Computer Network STEP 3 2 (Optional) Press the Right Arrow key under Security Mode to set the security options: • WEP—Wired Equivalent Privacy: You must enter the Default Transmit Key, Key Type and Length, and the keys. • WPA PSK or WPA2 PSK: You must enter the Cipher Type (TKIP or AES CCMP) and the shared key.
Installing Your Phone Connecting Your Phone to the Computer Network • STEP 3 2 WPA/WPA2 Enterprise: You must enter the Cipher Type (TKIP or AES CCMP) and the EAP Type: - TTLS: Enter the anonymous ID, choose whether the phone should check for the server certificate, choose the TTLS Inner Protocol (MSCHV2, MSCHAP, PAP, CHAP, or MD5), and enter the User ID and password. - LEAP: Enter the User ID and password.
2 Installing Your Phone Verifying Phone Startup STEP 6 Use the Up Arrow or Down Arrow key to choose the certificate you want to install (for example, the root certificate). Press the Select softkey. STEP 7 Press Save to save the profile. Verifying Phone Startup After receiving power and network connectivity, the phone executes a boot-up sequence. During this sequence, the display shows the Cisco logo. All of the lights on the phone will flash.
2 Installing Your Phone Upgrading Your Phone’s Firmware There are two ways to upgrade your phone’s firmware: • Download the firmware to your PC and log in to the web interface to run the upgrade procedure. See the ”Upgrading Firmware” section on page 94. • Upgrade using the Cisco SPA9000 Voice System Setup Wizard (if your phone is part of a Cisco SPA9000 Voice System network). See the Cisco SPA9000 Voice System Setup Wizard User Guide.
3 Using Basic Phone Functions This chapter describes how to use the basic functions of your SPA525G IP phone.
3 Using Basic Phone Functions Placing or Answering a Call Placing or Answering a Call NOTE: You may have to dial a number or numbers to reach an outside line. Ask your system administrator. To place or answer a call, do one of these: • Pick up the receiver. • Press the Speaker button. • Press the Headset button. • Press a green line button (to place a call) or a red flashing line button or the Answer softkey (to answer a call).
Using Basic Phone Functions Adjusting Call Volume and Muting 3 Using Dial Assistance If dial assistance is enabled, when placing calls, you’ll see a list of closely-matched phone numbers on the screen after you begin dialing. If you want to choose one of these numbers: STEP 1 Use the navigation button to scroll down and highlight a phone number on the LCD screen. STEP 2 Press the Select button or Dial to complete the call.
3 Using Basic Phone Functions Resuming a Call Resuming a Call To resume the call, press the flashing red line button for the call. If you have multiple calls, all calls are put on hold except the active call. Ending a Call To end a call: • If you are using the handset, hang up. • If you are using the speakerphone, press the Speaker button. • If you are using the headset, either press the Headset button (wired) or replace the receiver (wireless).
3 Using Basic Phone Functions Redialing STEP 4 Do one of the following: • To transfer the call without waiting for the other person to answer, press Transfer after the call begins to ring and hang up. If you hang up before the second call rings, the transfer fails and the first call is disconnected. If you misdial, press the second line button again to receive a dial tone. • To transfer after speaking privately to the other person, press Transfer at any time during the conversation.
3 Using Basic Phone Functions Viewing and Returning Missed Calls Viewing and Returning Missed Calls The LCD screen on your IP phone notifies you if a call came in that was unanswered. (You can also turn off this feature - see the ”Turning the Missed Calls Shortcut On and Off” section on page 50.) Returning a Missed Call To return a missed call: • If the LCD screen shows a missed call, press the Call Rtn button to return the call.
Using Basic Phone Functions Turning the Missed Calls Shortcut On and Off 3 c. Scroll to Missed Calls and press Select. You can do one of the following: • Press Dial to dial the number that called you. • Press EditDial to edit the number before calling it, then press Dial. • Press the Option softkey and choose one of the following: - Delete Entry—Delete the entry from the Missed Calls list. - Delete List—Delete all entries from the Missed Calls list.
Using Basic Phone Functions Forwarding Calls 3 STEP 3 Select Call Preferences. STEP 4 Under Call Forwarding, press the Right Arrow key to turn call forwarding on and press the Save softkey. See the following sections for information on the types of call forwarding. Forwarding Calls to a Single Number STEP 1 In the Call Preferences screen, scroll to Forward All Number. STEP 2 Enter a number to which to forward all calls; for example, your voice mailbox, another extension, or an outside line.
Using Basic Phone Functions Setting Do Not Disturb 3 Forwarding Calls When You Don’t Answer the Phone STEP 1 In the Call Preferences screen, scroll to Forward No Ans Number. STEP 2 Enter “vm” for voice mail, or a number to which to forward all calls; for example, another extension, or an outside line. If forwarding calls to an outside line, be sure to enter any access and area codes required. STEP 3 Press Save.
Using Basic Phone Functions Configuring Call Waiting 3 To set Do Not Disturb, choose one of the following options: • Press the Do Not Disturb softkey on your phone. The LCD screen indicates that Do Not Disturb is turned on for your phone; or • Press the Setup button and select User Preferences. Then: STEP 1 Choose Call Preferences. STEP 2 Scroll to Do Not Disturb. STEP 3 Press the Right Arrow key to turn Do Not Disturb on. STEP 4 Press Save.
Using Basic Phone Functions Picking Up a Call 3 STEP 3 Select Call Preferences. STEP 4 Scroll to Call Waiting and press the Right Arrow key to turn call waiting On or Off. STEP 5 Press Save. Picking Up a Call You can pick up a call that is ringing at another extension. Depending on the way your phone network is configured, you can pick up a call ringing at any extension, or you may have a group of phones configured where members of the group can pick up a call ringing at any group member’s phone.
Using Basic Phone Functions Parking a Call 3 Parking a Call You can “park” a call on a designated line so that another person in your company can pick up the call. The call is active until it is “unparked” or the caller hangs up. NOTE Not all phone systems support call park. If this feature is not working, check with your system administrator. To park a call: STEP 1 While on an active call, press the Park button. STEP 2 Enter a number to identify the park line and press Dial.
Using Basic Phone Functions Placing a Three-Way Conference Call 3 To view a list of parked calls (and unpark from the list): STEP 1 Press the Setup button. STEP 2 Select Status. STEP 3 Scroll to Call Park Status and press Select. STEP 4 Choose the parked call you want to retrieve and press Unpark. Placing a Three-Way Conference Call To initiate a conference call: STEP 1 Press the Conf button during an active call.
3 Using Basic Phone Functions Using the Phone Directories Using the Phone Directories The SPA525G IP phone provides several different types of phone directories, depending on the phone model and what the system administrator has set up for the company. In general, the phones provide the following types of directories: • Personal Address Book—The personal directory provides a place for you to store and view frequently dialed numbers. You can also dial numbers from the directory.
Using Basic Phone Functions Using the Phone Directories 3 You can also view and edit the directory from your PC using the IP Phone Web Interface. See the ”Configuring Your Address Book” section on page 87. Adding a New Contact To add a new entry to the directory: STEP 1 In the Personal Address Book screen, press Add. STEP 2 Use the keypad to enter the name of the directory entry. When finished with the name, use the Down Arrow to navigate to the other fields.
Using Basic Phone Functions Using the Phone Directories 3 Copying a Contact You can copy a contact to create a new contact, changing information as necessary on the second contact. To copy a contact: STEP 1 In the Personal Address Book screen, scroll to highlight a contact. STEP 2 Press Option and select Copy. STEP 3 Press Option again and select Paste. STEP 4 Edit any necessary fields and press Save.
3 Using Basic Phone Functions Using the Phone Directories Editing a Contact To edit a contact’s phone information: STEP 1 In the Personal Address Book screen, highlight the contact you want to edit. STEP 2 Choose one of the following: Press the center Select button to choose the contact and edit the numbers in the entry. Use the delChar key to delete numbers individually, or press Option and choose Clear to delete all numbers and start over. Press Save when finished.
3 Using Basic Phone Functions Using the Call History Lists STEP 3 STEP 4 Choose the type of search to perform and press Select: • Simple Search: Enter a last name and press Search. A first name may be required if too many results are found for the last name. • Advanced Search: The fields available in advanced search depend on your system configuration. Enter information into the fields and press Search. In the results, press Dial to dial the contact, or choose one of the other options.
Using Basic Phone Functions Using the Call History Lists 3 Deleting a Call History List STEP 1 Press the Setup button. STEP 2 Scroll to Call History and press Select. STEP 3 Scroll to the Call History list you want to delete. STEP 4 Press Option and select Delete List. STEP 5 Press OK to delete the list. Calling from the Call History Lists To dial a number from one of the Call History lists: STEP 1 Choose the call. STEP 2 Press Dial.
Using Basic Phone Functions Setting or Changing a Phone Password 3 Saving a Call History List Number to Your Directory STEP 1 In the call history list, choose the call. STEP 2 Press Option and select Add to Address Book. STEP 3 Press Select. The Address Book entry screen appears. STEP 4 Edit the information (if desired) and press Save again. The entry is added to your directory. Setting or Changing a Phone Password You can set or change the password for your phone to prevent unauthorized use.
Using Basic Phone Functions Accessing Voicemail STEP 5 Leave the New Password and Reenter New Password fields empty. STEP 6 Press Save. 3 Logging In and Logging Out of Your Phone After you’ve set a password, you can log in and out of your phone. Logging out leaves the phone locked so that no one can access the directory, call history, user preferences, and other features on your phone. If you are in a menu (for example, Directories) and are not logged in, the system prompts you for your password.
Using Basic Phone Functions Accessing Voicemail STEP 5 TIP STEP 6 3 Enter the number to dial for voicemail. For a Cisco SPA9000 Voice System, this is normally “vmm.” For an external system, enter the phone number, including any digits you must dial to reach an outside line. To enter digits, press Option and choose Input Num. To clear the field of a previous entry, press Option and choose Clear. Press Save.
4 Using Advanced Phone Features This chapter describes how to configure advanced features on your Cisco SPA525G IP phone.
Using Advanced Phone Features Configuring Privacy and Security Features 4 Configuring Privacy and Security Features You can also configure these features using your PC and the IP Phone Web Interface. See “Blocking Caller ID,” on page 90 and the “Blocking Anonymous Calls,” on page 91. Blocking Caller ID You can block Caller ID from your phone so that your phone number will not appear to the person you call. To block Caller ID: STEP 1 Press the Setup button.
Using Advanced Phone Features Configuring Privacy and Security Features STEP 4 Scroll to Block Anonym Call and press the Right Arrow key to choose On. STEP 5 Press Save. 4 Using Secure Call With the secure call feature, the active call is encrypted so that others cannot eavesdrop. Before enabling Secure Call, ask your system administrator if Secure Call is available.
Using Advanced Phone Features Creating and Using Speed Dials STEP 4 Scroll to Dial Assist and press the Right Arrow key to choose On. STEP 5 Press Save. 4 If dial assistance is enabled, after beginning to dial, you can use the navigation button to scroll down, highlight a phone number on the LCD screen, and press dial to complete the call. Creating and Using Speed Dials You can configure up to 8 speed dials. Each speed dial can be a phone number, IP address or URL.
Using Advanced Phone Features Playing MP3 Files on Your Phone 4 To call one of your configured speed dial numbers, choose one of the following options: • Open a phone line and press the number for the speed dial, then wait a few seconds or press Dial. • Press the Setup button, select Speed Dial, choose the number, and press Dial. Playing MP3 Files on Your Phone Your phone contains an audio player that can play .mp3 files.
Using Advanced Phone Features Playing MP3 Files on Your Phone 4 • Choose individual songs by scrolling to the song you want and pressing the Right Arrow key or the Select button. • Choose all songs on the USB device by pressing SelectAll. You can clear all selected songs by pressing ClearAll. STEP 8 After choosing songs, the songs will be marked with a check in the box next to the song. Press Add to add the selected songs to the playlist.
Using Advanced Phone Features Using the Paging Feature 4 Changing the Left and Right Channel for Stereo Headsets When using a stereo headset inserted into the SPA525G, you may need to switch the audio left and right channels to hear the correct audio channel in the right or left ear. To change the audio: STEP 1 Press the Setup button. STEP 2 Scroll to User Preferences and press Select. STEP 3 Scroll to Audio Preferences and press Select.
Using Advanced Phone Features Customizing Your LCD Screen 4 Configuring Auto Answer To configure your phone to auto answer pages: STEP 1 Press the Setup button. STEP 2 Scroll to User Preferences and press Select. STEP 3 Select Call Preferences. STEP 4 Scroll to Auto Answer Page. Press the Right Arrow key to choose On. STEP 5 Press Save. Customizing Your LCD Screen You can customize your LCD screen in the ways described below.
Using Advanced Phone Features Customizing Your LCD Screen 4 Setting the Screen Backlight Timer You can set a timer for your screen so that your LCD screen becomes dark after a specified time when the phone is idle. STEP 1 Press the Setup button. STEP 2 Scroll to User Preferences and press Select. STEP 3 Scroll to Screen Preferences and press Select. STEP 4 Scroll to Backlight. Press the Right Arrow key to choose On, which means that the darkening feature is enabled.
4 Using Advanced Phone Features Customizing Your LCD Screen STEP 5 Scroll to Screen Saver Settings and press the Right Arrow key to choose the settings: • STEP 6 Screen Saver Type—Choose from: - Black Background—Displays a black screen. - Gray Background—Displays a gray screen. - Black/Gray Rotation—The screen incrementally cycles from black to gray. - Picture Rotation—The screen rotates through available pictures that your system administrator has made available on the phone.
Using Advanced Phone Features Using Ring Tones 4 To change the background picture on your phone: STEP 1 Press the Setup button. STEP 2 Scroll to User Preferences and press Select. STEP 3 Scroll to Screen Preferences and press Select. STEP 4 Scroll to Wallpaper. Press the Right Arrow key to select an image to use as the wallpaper. STEP 5 Use the navigation arrows to choose an image.
Using Advanced Phone Features Accessing Weather and News on Your Phone 4 Accessing Weather and News on Your Phone You can access some pre-configured weather and news web services on your IP phone (if enabled by your system administrator). To access these services: STEP 1 Press the Setup button. STEP 2 Select Web Applications. STEP 3 Select the type of service. Accessing Weather Information You can view weather information for a maximum of three cities.
Using Advanced Phone Features Accessing Weather and News on Your Phone 4 To edit the list of cities: STEP 1 In the Web Applications screen, select Weather. STEP 2 To move entries up or down in the list or delete an entry, select the city you want to move, press Option, and choose Move Up, Move Down, or Delete. Accessing News STEP 1 In the Web Applications screen, select News.
Using Advanced Phone Features Configuring Date and Time Parameters on Your Phone 4 Configuring Date and Time Parameters on Your Phone The date and time for your phone normally come from the phone server. However, if you need to change some date and time parameters, you can follow these steps: STEP 1 Press the Setup button. STEP 2 Scroll to Device Administration and press Select. STEP 3 Scroll to Date/Time and press Select.
4 Using Advanced Phone Features Using Star Codes Using Star Codes The SPA525G supports numerous “star codes” to access phone supplementary services. These codes, which start with *, are entered before dialing a telephone number and provide services. For example, to block caller ID (star code 67), you would dial *67, followed by the telephone number you are calling. Following is a list of supported star codes: Code Definition 03 Request media loopback for a call to monitor Voice over IP quality.
4 Using Advanced Phone Features Using Star Codes Code Definition 87 Deactivate anonymous call blocking. See Blocking Anonymous Calls, page 67. 90 Activate Call Forward Busy. See Forwarding Calls, page 50. 91 Deactivate Call Forward Busy. See Forwarding Calls, page 50. 92 Activate Call Forward No Answer. See Forwarding Calls, page 50. 93 Deactivate Call Forward No Answer. See Forwarding Calls, page 50. 96 Page an extension.** See Paging Another Phone, page 72.
Using Advanced Phone Features Restarting Your Phone 4 Restarting Your Phone Occasionally you may need to restart your phone if the screen locks up. To restart your phone: STEP 1 Press the Setup button. STEP 2 Scroll to Device Administration and press Select. STEP 3 Scroll to Restart and press Select. Viewing Phone, Network, and Call Information The SPA525G provides menus to view information about your phone.
Using Advanced Phone Features Viewing Phone, Network, and Call Information 4 Viewing Network Information To view network information for your phone: STEP 1 Press the Setup button. STEP 2 Scroll to Status and press Select. STEP 3 Scroll to Network Status and press Select.
Using Advanced Phone Features Viewing the Wireless Connection Status STEP 3 4 Scroll to Phone Status and press Select. You can view the following information: • Phone Status—Up time and packets sent/received • Extension Status—If an extension is registered, when it was registered, and more • Line Status—Active calls and call information • Provisioning Status—If a profile rule was used, and the status • Call Statistics History—Information about individual calls.
Using Advanced Phone Features Advanced Menus for Technical Support Personnel 4 STEP 3 Select Wi-Fi Configuration and press the Right Arrow key. STEP 4 Scroll to Wireless Status and press Select. The status, SSID name, and signal strength are displayed. Press Detail for more information. Advanced Menus for Technical Support Personnel ! CAUTION These menus are used to configure and troubleshoot your phone and the phone network.
5 Using the Web Interface The Cisco SPA525G provides a web interface to the phone that allows you to configure some features of your phone using a web browser.
Using the Web Interface Logging in to the Web Interface 5 Logging in to the Web Interface STEP 1 Obtain the IP address of your phone by pressing the Setup button and selecting Status. STEP 2 Scroll to Network Status and press Select. Note the IP address. STEP 3 On your PC, open Internet Explorer. STEP 4 Enter the IP address in the browser’s toolbar. STEP 5 The Info page of the IP Phone Web Interface displays. The web interface has several different tabs.
Using the Web Interface Setting Do Not Disturb STEP 4 5 (Optional) To add the contact to a speed dial: a. Click the Phone icon under Speed Dials. b. Choose the phone (office, home, or mobile) that you want to add as a speed dial. c. Choose the speed dial position to assign the contact. d. Press Confirm. To remove a contact from the address book: STEP 1 In the Personal Address Book tab, check the box next to the contacts you want to remove. To select all contacts, check the box at the top of the column.
5 Using the Web Interface Configuring Call Forwarding To set Do Not Disturb: STEP 1 Log in to the web interface. STEP 2 In the Voice tab, User menu, under Supplementary Services, locate the Do Not Disturb field. STEP 3 Choose Yes to turn on Do Not Disturb. STEP 4 At the bottom of the page, click Submit All Changes. Your phone reboots. NOTE You can turn off Do Not Disturb from your phone or from the web interface. Configuring Call Forwarding STEP 1 Log in to the web interface.
Using the Web Interface Configuring Call Waiting 5 Configuring Call Waiting Call waiting alerts you when you are on a call with a status message and ringing that another call is incoming. If you turn call waiting off, incoming calls do not ring your phone if you are on another call, and the caller hears a busy signal or message. To turn call waiting on or off: STEP 1 Log in to the web interface. STEP 2 In the Voice tab, User menu, under Supplementary Services, locate the CW Setting field.
5 Using the Web Interface Blocking Anonymous Calls Blocking Anonymous Calls Blocking anonymous calls prevents calls with unknown Caller ID from ringing your phone. (For example, if a caller set his phone to not display Caller ID, the call is considered anonymous.) These callers receive a busy signal or message. To block anonymous calls: STEP 1 Log in to the web interface. STEP 2 In the Voice tab, User menu, under Supplementary Services, locate the Block ANC Setting field.
Using the Web Interface Creating Speed Dials 5 Creating Speed Dials You can configure up to 8 speed dials. Each speed dial can be a phone number, IP address or URL. To create or edit a speed dial: STEP 1 Log in to the web interface. STEP 2 Choose the Speed Dials tab. STEP 3 Enter the name and number for the speed dial entries you want to create or edit. Remember to enter any digits you must dial to reach an outside line. STEP 4 Click Submit All Changes.
Using the Web Interface Configuring Bluetooth 5 You can enter up to three wireless profiles. To create a wireless profile: STEP 1 In the Wi-Fi tab, ensure Wi-Fi Profile is selected in the Wi-Fi Device box. STEP 2 (Optional) To scan for available wireless networks, click Site Survey. Click the icon under Add in the row of the wireless network you want to select. STEP 3 Click Add New Wi-Fi Profile. STEP 4 Enter or edit (if you performed Step 2) the name, SSID, security mode, and security parameters.
5 Using the Web Interface Upgrading Firmware Upgrading Firmware ! IMPORTANT: If you are using your phone with an Internet Telephony Service Provider’s system, do not upgrade your phone’s firmware without consulting your service provider. Your provider may automatically upgrade your phones without any action on your part necessary. Before upgrading your firmware, you need to download the latest version from http://www.cisco.com/go/smallbiz. Unzip the file to your PC. STEP 1 Log in to the web interface.
6 Using the SPA932 Attendant Console This chapter describes how to install and use the SPA932 Attendant Console with your SPA525G IP Phone. Figure 1 SPA932 Attendant Console The SPA932 is a 32-button attendant console for the SPA525, providing 32 threecolor (red, green, and orange) programmable LEDS, with support for Broadsoft Busy Lamp Field and Asterisk Line Monitoring. The SPA932 attaches to the SPA525 with the attachment arm provided.
Using the SPA932 Attendant Console Connecting the SPA932 Attendant Console to the SPA525G IP Phone 6 Connecting the SPA932 Attendant Console to the SPA525G IP Phone To connect the SPA932 Attendant Console to the SPA525G IP phone, you need the following: • SPA932 Attendant Console • Attachment Arm • Two (2) Attachment Arm Screws • Auxiliary Cable • Desktop Stand Connecting a Single SPA932 STEP 1 Turn both the SPA525G and SPA932 face down.
Using the SPA932 Attendant Console Connecting the SPA932 Attendant Console to the SPA525G IP Phone 6 STEP 4 Align the hole in the SPA932 alignment recess with the hole on the attachment arm. STEP 5 Using the attachment arm screw, secure the attachment arm to the SPA932.
Using the SPA932 Attendant Console Connecting the SPA932 Attendant Console to the SPA525G IP Phone STEP 6 6 Locate the AUX IN port on the back of the SPA932. Connect one end of the auxiliary cable to this port. ! Cisco Small Business Pro IP Phone SPA525G User Guide IMPORTANT: Do not plug a telephone line cord into an AUX port. Use only the auxiliary cable provided with the SPA932.
Using the SPA932 Attendant Console Connecting the SPA932 Attendant Console to the SPA525G IP Phone 6 STEP 7 Locate the AUX port on the back of the SPA525G. Connect the other end of the auxiliary cable to this port. STEP 8 Route the auxiliary cable inside the cable relief channel in the SPA932. STEP 9 Attach the appropriate desktop stand to each unit. The SPA932 is powered via the auxiliary cable with the SPA525G.
Using the SPA932 Attendant Console Connecting the SPA932 Attendant Console to the SPA525G IP Phone 6 Connecting an Additional SPA932 NOTE: A maximum of two SPA932 Attendant Consoles can be connected to a SPA525G. STEP 1 Align the hole in the first SPA932 alignment recess with the hole on the attachment arm. STEP 2 Using the attachment arm screw, secure the attachment arm to the first SPA932. STEP 3 Align the hole in the second SPA932 alignment recess with the hole on the attachment arm.
Using the SPA932 Attendant Console Using the SPA932 Attendant Console with Your SPA525G IP Phone 6 STEP 6 Locate the AUX IN port on the back of the second SPA932. Connect the other end of the auxiliary cable to this port. STEP 7 Route the auxiliary cable inside the cable relief channel. STEP 8 Attach the appropriate desktop stands to each unit. The SPA932 is powered via the auxiliary cable with the SPA525G. No additional power source is required.
Using the SPA932 Attendant Console Monitoring the SPA932 6 The functions of SPA932 buttons may differ depending on configuration. However, in general, you can: • Monitor an extension by viewing its color. A steady red color usually indicates the extension is in use. A green color indicates the line is free. Blinking red indicates the line is ringing. Orange indicates a line error. A line button with no color is not configured.
A Additional Information Regulatory Compliance and Safety Information Regulatory Compliance and Safety Information for this product is available on Cisco.com at the following location: www.cisco.com/go/smallbiz Warranty Warranty information that applies to this product is available on Cisco.com at the following location: www.cisco.com/go/smallbiz End User License Agreement (EULA) Licensing information that applies to this product is available on Cisco.com at the following location: www.cisco.
B Where to Go From Here Cisco provides a wide range of resources to help you obtain the full benefits of the Cisco SPA525G. Product Resources Website addresses in this document are listed without http:// in front of the address because most current web browsers do not require it. If you use an older web browser, you may have to add http:// in front of the web address. Resource Link Cisco Partner Central (requires partner registration and login) www.cisco.
B Where to Go From Here Related Documentation Related Documentation The following table describes related documents that Cisco provides to help you use your Cisco SPA525G IP Phone. These documents and more are available at www.cisco.com/go/smallbiz. Document Title Description Intended Audience Cisco Small Business Pro SPA IP Phone 525G Quick Start Guide Installation and initial configuration of your Cisco SPA525G IP Phone.