
Installation Guide
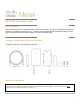


4
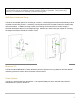
Configure your MT12 in the Networking using Dashboard
The following is a brief overview only of the steps required to add a MT12 to your network. For detailed
instructions about creating, configuring, and managing Meraki IoT networks, refer to the online
documentation (https://documentation.meraki.com/MT).
1. Login to http://dashboard.meraki.com. If this is your first time, create a new account.
2. Find the network to which you plan to add your MT12(s) or create a new network.
3. Add your MT12(s) to your new network. You will need your Meraki order number (found on your
invoice) or the serial number of each camera, which looks like Qxxx-xxxx-xxxx, and is found on the
bottom of the unit.
4. Verify that the camera is now listed under IoT> Monitor > IoT.
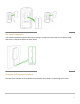
Check and Configure Firewall Settings
If a firewall is in place, it must allow outgoing connections to particular ports using given IP addresses. The
most current list of outbound ports and IP addresses for your particular organization can be found here.
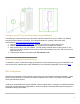
DNS Configuration
Each MT12 will generate a unique domain name to allow for secured direct streaming functionality. These
domain names resolve an A record for the private IP address of the camera. Any public recursive DNS
server will resolve this domain.
If utilizing an onsite DNS server, please whitelist *.devices.meraki.direct or configure a conditional forwarder
so that the local domains are not appended to *.devices.meraki.direct and that these domain requests are
forwarded to Google public DNS.