rpsprf Page xi Monday, September 14, 1998 8:20 AM About This Guide This section discusses the objectives, audience, organization, and conventions of the Cisco Redundant Power System Hardware Installation Guide.
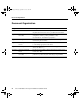
rpsprf Page xii Monday, September 14, 1998 8:20 AM Document Organization Document Organization Chapter Title Description Preface About This Guide Discusses the objectives, audience, organization, and conventions of this publication and describes how to get additional documentation. Chapter 1 Overview of the Cisco RPS Gives an overview of the Cisco RPS, supported devices, configurations, features, product specifications, safety recommendations, and installation prerequisites.
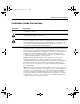
rpsprf Page xiii Monday, September 14, 1998 8:20 AM Installation Guide Conventions Installation Guide Conventions Convention Description Note Means reader take note. Notes contain helpful suggestions or references to additional information and material. Caution This symbol means reader be careful. In this situation, you might do something that could result in equipment damage or loss of data. Warning This symbol means danger. You are in a situation that could cause bodily injury.
rpsprf Page xiv Monday, September 14, 1998 8:20 AM Installation Guide Conventions Warnung Dieses Warnsymbol bedeutet Gefahr. Sie befinden sich in einer Situation, die zu einer Körperverletzung führen könnte. Bevor Sie mit der Arbeit an irgendeinem Gerät beginnen, seien Sie sich der mit elektrischen Stromkreisen verbundenen Gefahren und der Standardpraktiken zur Vermeidung von Unfällen bewußt.
rpsprf Page xv Monday, September 14, 1998 8:20 AM Ordering Additional Documentation ¡Advertencia! Este símbolo de aviso significa peligro. Existe riesgo para su integridad física. Antes de manipular cualquier equipo, considerar los riesgos que entraña la corriente eléctrica y familiarizarse con los procedimientos estándar de prevención de accidentes.
rpsprf Page xvi Monday, September 14, 1998 8:20 AM Documentation Feedback Documentation Feedback You can send us your comments on any Cisco document by using the CCO Feedback button. Click CCO Feedback. Then click MarketPlace and press Return to access the feedback form. You can also use the Feedback button to send us your comments on other CCO content. If you are reading Cisco product documentation on the World Wide Web, you can submit comments electronically.
rpsprf Page xvii Monday, September 14, 1998 8:20 AM Cisco Connection Online • Modem: From North America, 408 526-8070; from Europe, 33 1 64 46 40 82. Use the following terminal settings: VT100 emulation; databits: 8; parity: none; stop bits: 1; and connection rates up to 28.8 kbps. For a copy of CCO’s Frequently Asked Questions (FAQ), contact cco-help@cisco.com. For additional information, contact cco-team@cisco.com.
rpsprf Page xviii Monday, September 14, 1998 8:20 AM Cisco Connection Online xviii Cisco Redundant Power System Hardware Installation Guide
rps1 Page 1 Monday, September 14, 1998 8:17 AM C H A PT E R 1 Overview of the Cisco RPS This chapter describes the Cisco 600W RPS, its features, and supported devices. The Cisco RPS provides power system redundancy to external devices such as routers, switches, or hubs. The system includes two fully redundant AC input power modules and four DC output power modules for connection to external devices. The Cisco RPS supports quasi-redundant, fully redundant, and redundant-with-reboot configurations.
rps1 Page 2 Monday, September 14, 1998 8:17 AM Table 1-1 Cisco RPS-Supported External Devices and Power Configurations External Device QuasiRedundant Fully Redundant Redundant With Reboot FastHub 100 series 100BaseT hubs Yes Yes Yes FastHub 200 series 100BaseT hubs Yes Yes Yes FastHub 300 series 100BaseT hubs Yes Yes Yes HP 10BaseT Hub-16M hub Yes No No Catalyst 1900 series switches Yes Yes Yes Catalyst 2820 series switches Yes Yes Yes Catalyst 2900 series XL switches Yes Ye
rps1 Page 3 Monday, September 14, 1998 8:17 AM DC STATUS 1 2 3 4 FAN Figure 1-2 AC INPUT 1 100-200 V~ 50/60 Hz 10-5 A 1000 W TEMP H9588 Cisco RPS Front Panel Cisco RPS Rear Panel AC INPUT 2 100-200 V~ 50/60 Hz 10-5 A 1000 W DC OUTPUT 1 DC OUTPUT 2 DC OUTPUT 3 DC OUTPUT 4 H9589 Figure 1-1 Overview of the Cisco RPS 1-3
rps1 Page 4 Monday, September 14, 1998 8:17 AM Quasi-Redundant Configuration Quasi-Redundant Configuration The Cisco RPS provides a quasi-redundant power source for four external devices that use up to 150W DC each. You can use a one-to-one cable (one connector at each cable end) to connect four external devices to the four DC output power modules, as shown in Figure 1-3.
rps1 Page 5 Monday, September 14, 1998 8:17 AM Fully Redundant Configuration Fully Redundant Configuration The Cisco RPS can provide a fully redundant power source for two pieces of equipment. You can use a two-to-one cable to connect two external devices to the four DC output power modules, as shown in Figure 1-4. The two-to-one cable is a Y-shaped cable with two connectors at one end and one connector at the other end.
rps1 Page 6 Monday, September 14, 1998 8:17 AM Redundant With Reboot Redundant With Reboot By using a second mode of redundant operation called redundant with reboot, you can connect more hubs and switches to the Cisco RPS and thereby extend its capacity. This configuration also provides switches and hubs (except the HP 10BaseT Hub-16M) with additional redundancy.
rps1 Page 7 Monday, September 14, 1998 8:17 AM Redundant With Reboot Figure 1-5 Redundant-With-Reboot Configuration AC input AC 12052 AC DC DC Cisco RPS DC DC DC output External devices 150W or less AC power cords AC power strip In this configuration, one Cisco RPS can support four devices instead of two. Despite 30 seconds of downtime that occur when using redundancy with reboot, this configuration provides additional redundancy and extends the capacity of the Cisco RPS.
rps1 Page 8 Monday, September 14, 1998 8:17 AM Redundant With Reboot If the Cisco RPS fails or is disconnected, the external device will not power cycle because its internal power supply has not been disturbed. When both the Cisco RPS and internal power supply are powered, the LED on the Cisco RPS front panel and the RPS LED on the external device both blink green. If you cannot afford the 30-second interruption, unplug the external device AC power cord and use only the Cisco RPS with the Y-cable.
rps1 Page 9 Monday, September 14, 1998 8:17 AM Mixed Configuration (Quasi- and Fully Redundant) Mixed Configuration (Quasi- and Fully Redundant) You can mix quasi-redundant and fully redundant configurations. For example, two devices can be in quasi-redundant mode while one is in fully redundant mode (see Figure 1-6).
rps1 Page 10 Monday, September 14, 1998 8:17 AM Features Features The following features are standard: • • • • • • • • Two AC input power cords Two fully redundant AC input power modules Four 150W DC output power modules Four one-to-one cables (PWR600-AC-RPS-CAB) Rack-mountable chassis (19-inch rack-mount brackets included) Redundant cooling fans LEDs for the AC and DC fans and temperature status Simple Network Management Protocol (SNMP) support of error messages for Cisco 2600 and Cisco 3600 series rou
rps1 Page 11 Monday, September 14, 1998 8:17 AM Specifications Specifications The specifications for the Cisco RPS are listed in Table 1-2. Table 1-2 Specifications Description Specification Dimensions (H x W x D) 3.44 x 17.5 x 16 in. (8.73 x 44.45 x 40.64 cm) Weight 27.25 lb (12.
rps1 Page 12 Monday, September 14, 1998 8:17 AM Safety Recommendations Safety Recommendations Follow these guidelines to guarantee general safety: • • • Keep the chassis area clear and dust-free during and after installation. • • Wear safety glasses when working under conditions that may be hazardous to your eyes. Keep tools and chassis components away from walk areas. Do not wear loose clothing that could get caught in the chassis. Fasten your tie or scarf and roll up your sleeves.
rps1 Page 13 Monday, September 14, 1998 8:17 AM Safety with Electricity Warning This product relies on the building’s installation for short-circuit (overcurrent) protection. Make sure that a fuse or circuit breaker is no larger than 120 VAC, 15A U.S. (240 VAC, 10A international) is used on the phase conductors (all current-carrying conductors). Warning This equipment is intended to be grounded. Make sure that the host is connected to earth ground during normal use.
rps1 Page 14 Monday, September 14, 1998 8:17 AM Safety Recommendations 1-14 Cisco Redundant Power System Hardware Installation Guide
rps2 Page 1 Monday, September 14, 1998 8:17 AM C H A PT E R 2 Installing the Cisco RPS You can set the Cisco RPS chassis on a desktop or install it in a rack. Warning Only trained and qualified personnel should be allowed to install or replace this equipment. Warning Do not work on the system or connect or disconnect cables during periods of lightning activity. Before opening the chassis, disconnect the telephone-network cables to avoid contact with telephone-network voltages.
rps2 Page 2 Monday, September 14, 1998 8:17 AM Setting the Cisco RPS on a Desktop Use the procedure in this section that best meets your needs: • • Setting the Cisco RPS on a Desktop Rack-Mounting the Cisco RPS Setting the Cisco RPS on a Desktop The location of the Cisco RPS is extremely important for proper operation. Equipment placed too close together, inadequate ventilation, and inaccessible panels can cause malfunctions and shutdowns and can make maintenance difficult.
rps2 Page 3 Monday, September 14, 1998 8:17 AM Rack-Mounting the Cisco RPS Note If you have questions or need assistance, see the section, “Cisco Connection Online” near the end of the “About This Guide” preface. Rack-Mounting the Cisco RPS This sections explains how to rack-mount the Cisco RPS in 19-, 23-, 24-inch, or telco equipment racks. Read the following information before rack-mounting your chassis.
rps2 Page 4 Monday, September 14, 1998 8:17 AM Rack-Mounting the Cisco RPS • Baffles can isolate exhaust air from intake air, which also helps to draw cooling air through the chassis. The best placement of the baffles depends on the airflow patterns in the rack, which can be found by experimenting with different configurations. • When equipment installed in a rack (particularly in an enclosed rack) fails, try operating the equipment by itself, if possible.
rps2 Page 5 Monday, September 14, 1998 8:17 AM Identifying Rack-Mount Brackets Identifying Rack-Mount Brackets Figure 2-1 and Figure 2-2 show 19-, 23-, 24-inch, and telco brackets.
rps2 Page 6 Monday, September 14, 1998 8:17 AM Rack-Mounting the Cisco RPS Attaching Brackets To install the Cisco RPS in a rack, attach the brackets in one of the following ways: • • • With the Cisco RPS front panel forward (see Figure 2-3). With the Cisco RPS rear panel forward (see Figure 2-4). In a center-mount telco rack (see Figure 2-5). Note Although the figures show 19-inch brackets, the procedure is the same for 23-inch, 24-inch, and telco brackets.
rps2 Page 7 Monday, September 14, 1998 8:17 AM Attaching Brackets Bracket Installation—RPS Rear Panel Forward H9697 Figure 2-4 DC OUTPUT 2 DC OUTPUT 3 DC OUTPUT 4 Note: The second bracket attaches to the other side of the chassis. Telco Bracket Installation—RPS Rear Panel Forward 11540 Figure 2-5 DC OUTPUT 3 DC OUTPUT 4 Note: The second bracket attaches to the other side of the chassis.
rps2 Page 8 Monday, September 14, 1998 8:17 AM Rack-Mounting the Cisco RPS Mounting the Chassis in a Rack After the brackets are secured to the chassis, use your own screws to attach the chassis to the rack, as shown in Figure 2-6. Attaching the Chassis to a Rack—Rear Panel Forward H9699 Figure 2-6 DC OUTPUT 3 DC OUTPUT 4 Note: The second bracket attaches to the rack at the other side of the chassis.
rps3 Page 1 Monday, September 14, 1998 8:17 AM C H A PT E R 3 Connecting to External Devices This section describes how to connect the Cisco RPS to external devices. The Cisco RPS includes two fully redundant AC input power modules and four DC output power modules for connection to external devices. The Cisco RPS supports quasi-redundant, fully redundant, and redundant-with-reboot configurations. For an explanation of power source configurations, refer to Chapter 1, “Overview of the Cisco RPS.
rps3 Page 2 Monday, September 14, 1998 8:17 AM Cables Cables The Cisco RPS ships in either of the following configurations: • With four cables of one-to-one configuration (22-pin to 18-pin) for quasi-redundant powering of up to four external devices (Cisco RPS number PWR600-AC-RPS-CAB). • Without cables (Cisco RPS number PWR600-AC-RPS-NCAB) for fully redundant powering of up to two external devices.
rps3 Page 3 Monday, September 14, 1998 8:17 AM Cables Figure 3-1 Two-to-One Y-Shaped Cable RPS side 22 pins 11538 Load unit 8 or 18 pins Product number CAB-RPSY-2208 CAB-RPSY-2218 One-to-One (Point-to-Point) Cable Load unit 8 or 18 pins Product number CAB-RPS-2208 CAB-RPS-2218 RPS side 22 pins 11539 Figure 3-2 External device Cisco 2500 series router and Cisco MC3810 multiservice concentrator Cisco 2600, 3600, and 4000 series routers External device Cisco 2500 series router and Cisco MC3810 mu
rps3 Page 4 Monday, September 14, 1998 8:17 AM Cables Table 3-1 Redundancy Configuration Quasi-Redundant Fully Redundant Redundant with Reboot Cable Order Numbers Cable Order Number For Use With Cable Description HP 10BaseT Hub-16M, FastHub 100 series, FastHub 200 series, and FastHub 300 series 100BaseT hubs, Catalyst 1900 and Catalyst 2820 series switches, Catalyst 2900 series XL switches, Cisco 2600, 3600, and 4000 series routers One-to-one cable, 22-pin to 18-pin, 4 ft (1.
rps3 Page 5 Monday, September 14, 1998 8:17 AM Upgrade Kit With Power Adapter Plate for Routers and Concentrators Upgrade Kit With Power Adapter Plate for Routers and Concentrators To operate an external device with the Cisco RPS, the device must have an RPS connector. Cisco 2500, 2600, 3600 and 4000 series routers and the Cisco MC3810 multiservice concentrator do not automatically ship with an RPS connector.
rps3 Page 6 Monday, September 14, 1998 8:17 AM Upgrade Kit With Power Adapter Plate for Routers and Concentrators Device-specific instructions for this procedure are shipped with the RPS power adapter plate when you order it, or are available in Cisco Connection Online (CCO) at: http://www.cisco.com.
rps4 Page 1 Monday, September 14, 1998 8:19 AM C H A PT E R 4 Connecting Cables This chapter provides instructions on cabling your external device to the Cisco RPS and is divided into three major sections: • • • Connecting Hubs Connecting Switches Connecting Routers and the Cisco MC3810 Connecting Cables 4-1
rps4 Page 2 Monday, September 14, 1998 8:19 AM Cabling Options Cabling Options The external devices have different configuration and cabling options outlined below and discussed in detail in the “Connecting External Devices to the Cisco RPS” section of this chapter: • FastHub 100, FastHub 200, and FastHub 300 series 100BaseT hubs support: — One-to-one cable for quasi-redundancy — Option to connect the AC power cable for redundancy with reboot — Two-to-one Y-cable for full redundancy — Two-to-one Y-cable
rps4 Page 3 Monday, September 14, 1998 8:19 AM Connecting External Devices to the Cisco RPS Connecting External Devices to the Cisco RPS Note If you want to connect an additional external device to a Cisco RPS that is already powered up, you can do so without interrupting power to the Cisco RPS or any other external devices that are already connected. Be sure to connect your cable to the Cisco RPS first and then to the external device.
rps4 Page 4 Monday, September 14, 1998 8:19 AM Connecting External Devices to the Cisco RPS Connecting Hubs This section provides illustrations and cabling information for connecting the Cisco RPS to the following hubs: • • • • HP 10BaseT Hub-16M (Figure 4-1) FastHub 100 series 100BaseT hubs (Figure 4-2) FastHub 200 series 100BaseT hubs (Figure 4-2) FastHub 300 series 100BaseT hubs (Figure 4-3) All hubs can use the one-to-one cable configuration for quasi-redundancy.
rps4 Page 5 Monday, September 14, 1998 8:19 AM Connecting Hubs HP 10BaseT Hub-16M Rear Panel 11537 Figure 4-1 RS-232 Power receptacle Serial port Redundant power system connector FastHub 100 Series and FastHub 200 Series Rear Panel H9911 Figure 4-2 Reset switch RATING 100-127/200-240V~ 0.5A/0.3A 50-60Hz AC power receptacle CONSOLE PORT For FastHub 200 and Catalyst only DC INPUTS FOR REMOTE POWER SUPPLY SPECIFIED IN MANUAL.
rps4 Page 6 Monday, September 14, 1998 8:19 AM Connecting External Devices to the Cisco RPS Figure 4-3 FastHub 300 Series Rear Panel MODEL NO.# 32905 1996, U.S.A. DC INPUTS FOR REMOTE POWER SUPPLY SPECIFIED IN MANUAL. +5V @ 8A, +12V @ 1A, -12V @ 0.5A DOWN UP DC INPUTS AC power receptacle 4-6 Cisco RPS connector Cisco Redundant Power System Hardware Installation Guide H9423 SERIAL NUMBER: 23985001119584856 INPUT POWER RATING: 115/230 V; 60/50 HZ; 5/3.
rps4 Page 7 Monday, September 14, 1998 8:19 AM Connecting Hubs Step 3 Figure 4-5 AC INPUT 1 100-200 V~ 50/60 Hz 10-5 A 1000 W AC INPUT 2 100-200 V~ 50/60 Hz 10-5 A 1000 W DC OUTPUT 1 DC OUTPUT 2 DC OUTPUT 3 DC OUTPUT 4 H9790 AC INPUT 1 100-200 V~ 50/60 Hz 10-5 A 1000 W Connecting a One-to-One Cable for Quasi-Redundant Power Connecting a Two-to-One Y-Cable for Fully Redundant Power AC INPUT 2 100-200 V~ 50/60 Hz 10-5 A 1000 W DC OUTPUT 1 DC OUTPUT 2 DC OUTPUT 3 DC OUTPUT 4 H9791 Figure 4-
rps4 Page 8 Monday, September 14, 1998 8:19 AM Connecting External Devices to the Cisco RPS Step 4 Connecting the AC Power Cables to the Cisco RPS H9694 Figure 4-6 On the rear panel of the Cisco RPS, connect an AC power cable to either or both of the power connectors. Use cable locks—included with the Cisco RPS—to lock the cables in place. (See Figure 4-6.) Cable locks 4-8 Step 5 Plug the other end of the Cisco RPS AC power cable into a grounded AC power outlet at your site.
rps4 Page 9 Monday, September 14, 1998 8:19 AM Connecting Hubs Step 7 Powering ON the Cisco RPS H9700 Figure 4-7 Power ON the Cisco RPS. There is one power switch for each AC input power module. Make sure the power switch is ON (|) for each AC power module used. (See Figure 4-7.) The Cisco RPS provides power in 10 to 15 seconds. The Cisco RPS is working properly when all its front-panel LEDs are solid green.
rps4 Page 10 Monday, September 14, 1998 8:19 AM Connecting External Devices to the Cisco RPS Connecting Switches All the switches (Catalyst 1900 and Catalyst 2820 series switches and the Catalyst 2900 series XL switches) can use: • • One-to-one cable for quasi-redundancy • • Two-to-one Y-cable for full redundancy One-to-one cable with the switch AC power cable connected for redundancy with reboot Two-to-one Y-cable with the switch AC power cable connected for redundancy with reboot Note Depending o
rps4 Page 11 Monday, September 14, 1998 8:19 AM Connecting Switches Catalyst 1900 Series Switch Rear Panel 11774 Figure 4-8 RATING 100-127/200-240V~ 0.6A/0.3A 50-60Hz CONSOLE PORT For FastHub200 and Catlayst only AC power receptacle SPECIFIED IN MANUAL. +5V @6A, +12V @1A AUI For Catalyst only Cisco RPS connector Catalyst 2820 Series Switch Rear Panel H9426 Figure 4-9 DC INPUTS FOR REMOTE POWER SUPPLY CONSOLE PORT DC INPUTS FOR USE WITH POWER SUPPLY SPECIFIED IN MANUAL.
rps4 Page 12 Monday, September 14, 1998 8:19 AM Connecting External Devices to the Cisco RPS Catalyst 2908 XL Switch Rear Panel 12202 Figure 4-10 DC INPUT CONSOLE RATING 100-120/200-240V ~ 0.7A/0.4A 50-60HZ DC INPUTS FOR REMOTE POWER SUPPLY SPECIFIED IN MANUAL. +5V @8A, +12V @0.5A Figure 4-11 Cisco RPS connector Catalyst 2916M XL Switch Rear Panel RATING 100-120/200-240V ~ 2.0A/1.0A 50-60HZ DC INPUTS FOR REMOTE POWER SUPPLY SPECIFIED IN MANUAL. +5V @24A, +12V @1.
rps4 Page 13 Monday, September 14, 1998 8:19 AM Connecting Switches Catalyst 2924 and Catalyst 2924C XL Switch Rear Panel H11751 Figure 4-12 RATING 100-127/200-240V~ 1.0A/O.5A 50-80HZ DC INPUTS FOR REMOTE POWER SUPPLY SPECIFIED IN MANUAL +5V @9A, +12V @0.
rps4 Page 14 Monday, September 14, 1998 8:19 AM Connecting External Devices to the Cisco RPS Step 3 Figure 4-14 AC INPUT 1 100-200 V~ 50/60 Hz 10-5 A 1000 W 4-14 AC INPUT 2 100-200 V~ 50/60 Hz 10-5 A 1000 W DC OUTPUT 1 DC OUTPUT 2 DC OUTPUT 3 DC OUTPUT 4 H9790 AC INPUT 1 100-200 V~ 50/60 Hz 10-5 A 1000 W Connecting a One-to-One Cable for Quasi-Redundant Power Connecting a Two-to-One Y-Cable for Fully Redundant Power AC INPUT 2 100-200 V~ 50/60 Hz 10-5 A 1000 W DC OUTPUT 1 DC OUTPUT 2 DC OU
rps4 Page 15 Monday, September 14, 1998 8:19 AM Connecting Switches Step 4 On the rear panel of the Cisco RPS, connect an AC power cable to either or both of the power connectors. Use cable locks—included with the Cisco RPS—to lock the cables in place. (See Figure 4-15.) Connecting the AC Power Cables to the Cisco RPS H9694 Figure 4-15 Cable locks Step 5 Plug the other end of the Cisco RPS AC power cable into a grounded AC power outlet at your site.
rps4 Page 16 Monday, September 14, 1998 8:19 AM Connecting External Devices to the Cisco RPS Step 7 Power ON the Cisco RPS. There is one power switch for each of the AC input power modules. Make sure the power switch for each connected AC cable is ON (|). (See Figure 4-16.) Powering ON the Cisco RPS H9700 Figure 4-16 The Cisco RPS provides power in 10 to 15 seconds. The Cisco RPS is working properly when all its front panel LEDs are solid green.
rps4 Page 17 Monday, September 14, 1998 8:19 AM Connecting Routers and the Cisco MC3810 Connecting Routers and the Cisco MC3810 This section provides illustrations and cabling information for connecting the Cisco RPS to Cisco 2500, 2600, 3600 and 4000 series routers and the Cisco MC3810 multiservice concentrator.
rps4 Page 18 Monday, September 14, 1998 8:19 AM Connecting External Devices to the Cisco RPS Cisco 2500 Series Router Rear Panel Input: 100-240VAC Freq: 50/60 Hz Current: 1.2-0.
rps4 Page 19 Monday, September 14, 1998 8:19 AM Connecting Routers and the Cisco MC3810 DO NOT INSTALL WAN INTERFACE CARDS WITH POWER APPLIED 2W ACT ETHERNET 0 LNK ETHERNET 1 AUI EN ACT ACT SERIAL LNK LNK ACT 1 WO 2E W1 SERIAL INSTALLATION 12276 BRI NT1 B2 SEE MANUAL BEFORE LNK B1 ACT NT1 2E W1 2W Cisco 3620 Router Rear Panel ACT Figure 4-19 ETHERNET ETH 1 1 AUI EN 0 ETHERNET 0 DC INPUT FOR USE WITH CISCO RPS +5V– – –14A, +12V– – –5A, -12V– – –3A Cisco RPS connector Figure
rps4 Page 20 Monday, September 14, 1998 8:19 AM Connecting External Devices to the Cisco RPS Cisco 4000 Series Router Rear Panel 11750 Figure 4-21 On/off switch Cisco MC3810 Multiservice Concentrator Rear Panel 12212 Figure 4-22 Cisco RPS connector AVM 1 2 3 4 5 P O W E R 6 ETHERNET 0 SERIAL 0 SERIAL 1 CONSOLE AUX Cisco RPS connector On/off switch 4-20 Cisco Redundant Power System Hardware Installation Guide
rps4 Page 21 Monday, September 14, 1998 8:19 AM Connecting Routers and the Cisco MC3810 Step 3 Figure 4-24 AC INPUT 1 100-200 V~ 50/60 Hz 10-5 A 1000 W AC INPUT 2 100-200 V~ 50/60 Hz 10-5 A 1000 W DC OUTPUT 1 DC OUTPUT 2 DC OUTPUT 3 DC OUTPUT 4 H9790 AC INPUT 1 100-200 V~ 50/60 Hz 10-5 A 1000 W Connecting a One-to-One Cable for Quasi-Redundant Power Connecting a Two-to-One Y-Cable for Fully Redundant Power AC INPUT 2 100-200 V~ 50/60 Hz 10-5 A 1000 W DC OUTPUT 1 DC OUTPUT 2 DC OUTPUT 3 DC
rps4 Page 22 Monday, September 14, 1998 8:19 AM Connecting External Devices to the Cisco RPS Step 4 On the rear panel of the Cisco RPS, connect an AC power cable to either or both of the power connectors. Use cable locks—included with the Cisco RPS—to lock the cables in place. (See Figure 4-25.) Connecting the AC Power Cables to the Cisco RPS H9694 Figure 4-25 Cable locks Step 5 4-22 Plug the other end of the Cisco RPS AC power cable into a grounded AC power outlet at your site.
rps4 Page 23 Monday, September 14, 1998 8:19 AM Connecting Routers and the Cisco MC3810 Step 6 Power ON the Cisco RPS. There is one power switch for each of the AC input power modules. Make sure the power switch for each connected AC cable is ON (|). (See Figure 4-26.) Powering ON the Cisco RPS H9700 Figure 4-26 The Cisco RPS is on and provides power in 10 to 15 seconds. The Cisco RPS is working properly when all its front-panel LEDs are solid green.
rps4 Page 24 Monday, September 14, 1998 8:19 AM Connecting External Devices to the Cisco RPS 4-24 Cisco Redundant Power System Hardware Installation Guide
rpsappa Page 1 Monday, September 14, 1998 8:18 AM A P PEN D I X A Replacing an External Device If an external device (hub, switch, router or concentrator) that is receiving power from the Cisco RPS fails, you can replace it without powering down the Cisco RPS or interrupting power to any other external devices. Take these steps to replace a failed external device that is connected to the Cisco RPS: Note Do not power down the Cisco RPS. Step 1 Power OFF the external device.
rpsappa Page 2 Monday, September 14, 1998 8:18 AM If you have questions or need assistance, see the section, “Cisco Connection Online” near the end of the “About This Guide” preface.
rpsappb Page 1 Monday, September 14, 1998 8:19 AM A P PEN D I X B Troubleshooting the Cisco RPS The key to troubleshooting is to isolate the problem to a specific subsystem. Start by reading the LEDs on the front panel of the Cisco RPS and any error messages displayed on the external device console. If you are unable to resolve the problem, refer to the section “Cisco Connection Online” in the “About This Guide” preface.
rpsappb Page 2 Monday, September 14, 1998 8:19 AM Reading the LEDs Figure B-1 Cisco RPS LEDs 1 2 3 4 FAN AC status LEDs B-2 DC status LEDs Cisco Redundant Power System Hardware Installation Guide TEMP Fan and temp LEDs H9629 DC STATUS
rpsappb Page 3 Monday, September 14, 1998 8:19 AM Reading the LEDs Table B-1 LED Description LED Name Color/State Description AC status Off AC power is not being supplied to the Cisco RPS, or it is switched off. Amber AC power is being supplied to the Cisco RPS, but the designated AC-input power module has failed. Green The AC-input power module is on and operating correctly.
rpsappb Page 4 Monday, September 14, 1998 8:19 AM Displaying Status Displaying Status Cisco IOS Release 11.2(7)P and later releases support status messages for Cisco 3600 series routers using the Cisco RPS. Cisco IOS Release 11.3(2) and later releases support status messages for Cisco 2600 series routers using the Cisco RPS.
rpsappb Page 5 Monday, September 14, 1998 8:19 AM Reading Error Messages on Cisco 2600 and 3600 Series Routers Reading Error Messages on Cisco 2600 and 3600 Series Routers When Cisco RPS status failure is detected while connected to Cisco 2600 and 3600 series routers, Cisco IOS software receives an interrupt and displays the error messages on the router console.
rpsappb Page 6 Monday, September 14, 1998 8:19 AM Reading Error Messages on Cisco 2600 and 3600 Series Routers Table B-2 Error Descriptions and LED Status (Continued) RPS LED Status Condition Error Indicators, Descriptions, and Solutions Description of the Error: The cable connected to one of the internal DC output modules is loose or one of the internal DC output modules in the Cisco RPS has failed.
rpsappb Page 7 Monday, September 14, 1998 8:19 AM Reading Error Messages on Cisco 2600 and 3600 Series Routers Table B-2 Error Descriptions and LED Status (Continued) RPS LED Status Condition Error Indicators, Descriptions, and Solutions Console Message Issued Upon Correction of Error: When an external device console monitor screen displays the Cisco IOS software prompt (routername > or routername #) “Redundant Power Supply DC condition is now normal.
rpsappb Page 8 Monday, September 14, 1998 8:19 AM Reading Error Messages on Cisco 2600 and 3600 Series Routers Table B-2 Error Descriptions and LED Status (Continued) RPS LED Status Condition Error Indicators, Descriptions, and Solutions Description of Error: One of the following has occurred: • Power has been turned off to one of the wall outlets into which the specific Cisco RPS AC power cord is plugged. • One of the power cords has been disconnected at either the Cisco RPS or the wall outlet.
rpsappb Page 9 Monday, September 14, 1998 8:19 AM Reading Error Messages on Cisco 2600 and 3600 Series Routers Table B-2 Error Descriptions and LED Status (Continued) RPS LED Status Condition Error Indicators, Descriptions, and Solutions SNMP Trap Issued Upon Correction of Error: ciscoEnvMonRedundantSupplyNotification is generated. The varbinds included are ciscoEnvMonSupplyStatusDescr and ciscoEnvMonSupplyState. The value of ciscoEnvMonSupplyState will be normal.
rpsappb Page 10 Monday, September 14, 1998 8:19 AM Reading Error Messages on Cisco 2600 and 3600 Series Routers Table B-2 Error Descriptions and LED Status (Continued) RPS LED Status Condition Error Indicators, Descriptions, and Solutions Console Message Issued Upon Correction of Error: When an external device console screen displays the Cisco IOS software prompt (routername > or routername #) “Redundant Power Supply THERMAL condition is now normal” When an external device console screen displays the
rpsappb Page 11 Monday, September 14, 1998 8:19 AM Reading Error Messages on Cisco 2600 and 3600 Series Routers Table B-2 Error Descriptions and LED Status (Continued) RPS LED Status Condition Error Indicators, Descriptions, and Solutions How to Correct Error: Check the temperature of the room that the Cisco RPS is located in. Correct the room temperature if it is above 40oC. Check the front bezel and rear of the Cisco RPS to make sure they are clear of any obstructions.
rpsappb Page 12 Monday, September 14, 1998 8:19 AM Reading Error Messages on Cisco 2600 and 3600 Series Routers Table B-2 Error Descriptions and LED Status (Continued) RPS LED Status Condition Error Indicators, Descriptions, and Solutions SNMP Trap Issued Upon Error: ciscoEnvMonRedundantSupplyNotification is generated. The varbinds included are ciscoEnvMonSupplyStatusDescr and ciscoEnvMonSupplyState. The value of ciscoEnvMonSupplyState will be critical.
rpsappb Page 13 Monday, September 14, 1998 8:19 AM Getting Technical Support Getting Technical Support If you cannot locate the source of the problem, contact technical support. Refer to the information packet publication that shipped with your Cisco RPS for information about how to contact technical support.
rpsappb Page 14 Monday, September 14, 1998 8:19 AM Getting Technical Support B-14 Cisco Redundant Power System Hardware Installation Guide