Phone Guide Cisco Unified IP Phone 7961G/7961G-GE and 7941G/7941G-GE for Cisco Unified CallManager 5.1 (SCCP and SIP) INCLUDING LICENSE AND WARRANTY Corporate Headquarters Cisco Systems, Inc. 170 West Tasman Drive San Jose, CA 95134-1706 USA http://www.cisco.
Common Phone Tasks Softkey Definitions View online help on the phone Press AbbrDial Dial using a speed dial index number Place a call Go-off hook before or after dialing a number. Answer Answer a call Back Return to the previous Help topic Redial a number Press Redial. Or press the Navigation button while on-hook to see your Placed Calls log.
iDivert Send a call to a voice messaging system Join Join several calls already on a single line to create a conference Links View related Help topics Main Display the Help main menu MeetMe Host a Meet-Me conference call more Display additional softkeys NewCall Make a new call OPickUp Answer a call ringing in an associated group Park Store a call using Call Park PickUp Answer a call in your group QRT Submit call problems to the system administrator Redial Redial the most recently dial
Contents Getting Started 1 Using this Guide 1 Finding Additional Information 2 Safety and Performance Information 2 Accessibility Features 4 Connecting Your Phone 5 An Overview of Your Phone 8 Understanding Buttons and Hardware 8 Understanding Phone Screen Features 12 Cleaning the Phone Screen 12 Understanding Feature Buttons and Menus 13 Understanding the Help System on Your Phone 13 Understanding Lines vs.
Viewing Multiple Calls 20 Transferring Calls 21 Sending a Call to a Voice Messaging System 22 Forwarding All Calls to Another Number 23 Using Do Not Disturb 24 Making Conference Calls 25 Understanding Types of Conference Calls 25 Starting and Joining a Standard Conference 26 Starting or Joining a Meet-Me Conference Call 28 Advanced Call Handling 29 Speed Dialing 29 Picking Up a Redirected Call on Your Phone 30 Using a Shared Line 31 Understanding Shared Lines 31 Adding Yourself to a Shared-Line Call 32 Prev
Directory Dialing 43 Using Corporate Directory on Your Phone 44 Using Personal Directory on Your Phone 45 Accessing Voice Messages 48 Customizing Your Phone on the Web 49 Accessing Your User Options Web Pages 49 Configuring Features and Services on the Web 50 Using Personal Directory on the Web 50 Using Your Personal Address Book on the Web 50 Configuring Fast Dials on the Web 51 Using the Address Book Synchronization Tool 52 Setting Up Speed Dials on the Web 52 Setting Up Phone Services on the Web 53 Contr
vi OL-11526-01
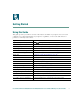
Getting Started Using this Guide This guide provides you with an overview of the features available on your phone. You can read it completely for a solid understanding of your phone’s capabilities, or refer to the table below for pointers to commonly used sections. If you want to... Then... Explore your phone on your own Press Review safety information See Safety and Performance Information, page 2. Connect your phone See Connecting Your Phone, page 5. on the phone when you need assistance.
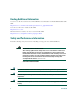
Finding Additional Information You can access the most current Cisco Unified IP Phone documentation on the World Wide Web at this URL: http://www.cisco.com/univercd/cc/td/doc/product/voice/c_ipphon/index.htm You can access the Cisco website at this URL: http://www.cisco.com/ International Cisco websites can be accessed from this URL: http://www.cisco.com/public/countries_languages.
Getting Started Warning To avoid electric shock, do not connect safety extra low voltage (SELV) circuits to telephone network voltage (TNV) circuits. LAN ports contain SELV circuits, and WAN ports contain TNV circuits. Some LAN and WAN ports use RJ-45 connectors. Use caution when connecting cables. Caution Inline power circuits provide current through the communication cable. Use the Cisco provided cable or a minimum 24 AWG communication cable.
Using External Devices The following information applies when you use external devices with the Cisco Unified IP Phone: Cisco recommends the use of good quality external devices (such as headsets) that are shielded against unwanted radio frequency (RF) and audio frequency (AF) signals. Depending on the quality of these devices and their proximity to other devices such as mobile phones or two-way radios, some audio noise may still occur.
Connecting Your Phone Connecting Your Phone Your system administrator will likely connect your new Cisco Unified IP Phone to the corporate IP telephony network. If that is not the case, refer to the figure and table below to connect your phone. 8 1 AUX 10/100 SW 10/100 PC + DC48V 7 2 6 113656 3 5 4 1 DC adaptor port (DC48V) 5 Access port (10/1001 PC) 2 AC-to-DC power supply 6 Handset port 3 AC power cord 7 Headset port 8 Footstand button 4 Network port (10/1001 SW) 1.
Adjusting the Footstand To change the angle of the phone base, adjust the footstand while pressing the footstand button. Adjusting the Handset Rest Cisco recommends adjusting the handset rest, particularly when wall mounting the phone, as this will ensure that the receiver will not readily slip out of the cradle. See the table below for instructions. 2 3 120521 1 1 Set the handset aside and pull the square plastic tab from the handset rest. 2 Rotate the tab 180 degrees.
Connecting Your Phone Headset Information To use a headset, connect it to the headset port on the back of your phone. Although Cisco Systems performs some internal testing of third-party headsets for use with the Cisco Unified IP Phones, Cisco does not certify or support products from headset or handset vendors.
An Overview of Your Phone The Cisco Unified IP Phone 7961G and 7961G-GE (gigabit Ethernet version) and the 7941G and 7941G-GE (gigabit Ethernet version) are full-feature telephones that provide voice communication over the same data network that your personal computer uses, allowing you to place and receive phone calls, put calls on hold, speed dial numbers, transfer calls, make conference calls, and so on.
An Overview of Your Phone Figure 1 Cisco Unified IP Phone 7961G and 7961G-GE 2 1 3 16 1 4 5 6 7 8 15 Figure 2 14 13 137503 9 12 11 10 Cisco Unified IP Phone 7941G and 7941G-GE 1 2 3 16 1 4 5 6 7 8 15 14 13 12 11 10 137504 9 Cisco Unified IP Phone 7961G/7961G-GE and 7941G/7941G-GE for Cisco Unified CallManager 5.
1 Item Description Programmable buttons Depending on configuration, programmable buttons provide access to: • Phone lines (line buttons) • Speed-dial numbers (speed-dial buttons, including the BLF speed-dial feature) • Web-based services (for example, a Personal Address Book (PAB) button) • Phone features (for example, a Privacy button) For more information, see...
An Overview of Your Phone Item Description For more information, see... Volume button Controls the handset, headset, and speakerphone volume (off-hook) and the ringer volume (on-hook). Using a Handset, Headset, and Speakerphone, page 37 10 Speaker button Toggles the speakerphone on or off. When the speakerphone is on, the button is lit. Using a Handset, Headset, and Speakerphone, page 37 11 Mute button Toggles the Mute feature on or off. When Mute is on, the button is lit.
Understanding Phone Screen Features This is what your main phone screen might look like with active calls and several feature menus open: 7 1 77961 6 2 4 3 137522 5 1 Primary phone Displays the phone number (directory number) for your primary phone line. line When several feature tabs are open, the phone number and the time and date alternate display in this area.
An Overview of Your Phone Understanding Feature Buttons and Menus Press a feature button to open or close a feature menu. If you want to... Then... Open or close a feature menu Press a feature button: Messages Services Directories Settings Help Scroll through a list or menu Press the Navigation button. Go back one level in a feature menu Press Exit. Pressing Exit from the top level of a menu, closes the menu. Switch among open feature menus Press a feature tab.
Understanding Lines vs. Calls To avoid confusion about lines and calls, refer to these descriptions: Lines—Each line corresponds to a directory number that others can use to call you. The Cisco Unified IP Phone 7961G/7961G-GE supports one to six lines and the Cisco Unified IP Phone 7941G/7941G-GE supports one to two lines, depending on configuration. To see how many lines you have, look at the right side of your phone screen. You have as many lines as you have directory numbers and phone line icons: .
An Overview of Your Phone Recognizing Recording Tones If your system administrator has configured your phone to support recording tones (also called beep tones), then the parties on a call might hear a beep tone which indicates that the call may be recorded. Ask your system administrator for more information. Understanding Feature Availability Depending on your phone system configuration, features included in this Phone Guide might not be available to you or might work differently on your phone.
Basic Call Handling You can perform basic call-handling tasks using a range of features and services. Feature availability can vary; see your system administrator for more information. Placing a Call—Basic Options Here are some easy ways to place a call on your Cisco Unified IP Phone. If you want to... Then... For more information, see... Place a call using the handset Pick up the handset and enter a number.
Basic Call Handling Placing a Call—Additional Options You can place calls using special features and services that might be available on your phone. See your system administrator for more information about these additional options. For more information, see... If you want to... Then... Place a call while another call is active (using a different line) 1. Press for the new line. The first Using Hold and Resume, call is automatically placed on hold.
If you want to... Then... For more information, see... Dial from a Personal Address Book (PAB) entry 1. Choose > Personal Directory to log in. Using Personal Directory on Your Phone, page 45 2. Choose Personal Address Book and search for a listing. Place a call using a billing or tracking code (SCCP phones only) 1. Dial a number. Place a call using your Cisco Unified Extension Mobility profile Log in to the Extension Mobility service on a phone. 2.
Basic Call Handling If you want to... Then... For more information, see... Use your phone to answer a call ringing elsewhere Use Call Pickup. Picking Up a Redirected Call on Your Phone, page 30 Answer a priority call (SCCP phones only) Hang up the current call and press Answer. Prioritizing Critical Calls, page 35 Ending a Call To end a call, hang up. Here are some more details. If you want to... Then... Hang up while using the handset Return the handset to its cradle. Or press EndCall.
Using Mute With Mute enabled, you can hear other parties on a call but they cannot hear you. You can use Mute in conjunction with the handset, speakerphone, or a headset. If you want to... Then... Toggle Mute on Press . Toggle Mute off Press . Switching Between Multiple Calls You can switch between multiple calls on one or more lines. If the call that you want to switch to is not automatically highlighted, use the Navigation button to scroll to it. If you want to... Then...
Basic Call Handling You can use these additional methods to view multiple calls on multiple lines: If you want to... Then... View calls on another line 1. Press Switch to call overview mode Press . 2. Immediately press the line button . for the highlighted line. The phone switches to call overview mode, displaying one call per line. The displayed call is either the active call or the held call with the longest duration. To return to standard viewing mode, press line button.
If you want to... Then... Transfer two current calls to each other (direct transfer) without staying on the line (SCCP phones only) 1. Scroll to highlight any call on the line. 2. Press Select. 3. Repeat this process for the second call. 4. With one of the selected calls highlighted, press DirTrfr. (To display DirTrfr, you might need to press more.) The two calls connect to each other and drop you from the call.
Basic Call Handling If you want to... Then... Send an active, ringing, or on-hold call to a voice messaging system Press iDivert. One of two things occurs: • The call is transferred to your voice messaging system. • Your phone screen displays a menu that allows you to choose between your voice messaging system or the voice messaging system of the original called party. Choose an option to redirect the call.
Tips • Enter the call forward target number exactly as you would dial it from your phone. For example, enter an access code or the area code, if necessary. • You can forward your calls to a traditional analog phone or to another IP phone, although your system administrator might restrict the call forwarding feature to numbers within your company. • Call forwarding is phone line specific. If a call reaches you on a line where call forwarding is not enabled, the call will ring as usual.
Basic Call Handling Making Conference Calls Your Cisco Unified IP Phone allows you to combine three or more separate calls into one conversation, creating a conference call. Understanding Types of Conference Calls There are two types of conference calls: Standard (ad hoc) and Meet-Me.
Starting and Joining a Standard Conference A standard (ad hoc) conference allows at least three people to participate in a single call. If you want to... Then... • Create a conference by calling participants 1. From a connected call, press Confrn. (You may need to press the more softkey to see Confrn.) • Add new participants to an existing conference 2. Enter the participant’s phone number. 3. Wait for the call to connect. 4. Press Confrn again to add the participant to your call. 5.
Basic Call Handling If you want to... Then... Remove any conference participant 1. Highlight the participant’s name. 2. Press Remove. You can remove participants only if you initiated the conference. End your participation in a conference Hang up or press EndCall. Tips • Calls must be on the same line before you can add them to a conference. If calls are on different lines, transfer them to a single line before using Confrn or Join. (Join is on SCCP phones only.
Starting or Joining a Meet-Me Conference Call Meet-Me conferencing allows you to start or join a conference by calling the conference number. If you want to... Start a Meet-Me conference Then... 1. Obtain a Meet-Me phone number from your system administrator. 2. Distribute the number to participants. 3. When you are ready to start the meeting, go off-hook to invoke a dial tone, then press MeetMe. 4. Dial the Meet-Me conference number. Participants can now join the conference by dialing in.
Advanced Call Handling Advanced Call Handling Advanced call-handling tasks involve special features that your system administrator might configure for your phone depending on your call-handling needs and work environment. Speed Dialing Speed dialing allows you to enter an index number, press a button, or select a phone screen item to place a call.
Picking Up a Redirected Call on Your Phone Call PickUp allows you to answer a call that is ringing on a coworker’s phone by redirecting the call to your phone. You might use Call PickUp if you share call-handling with coworkers. If you want to... Then... Answer a call that is ringing on another extension within your call pickup group 1. Do one of the following: • If the PickUp softkey is available, press it. • If the PickUp softkey is not available, go off-hook to display it, then press PickUp.
Advanced Call Handling Using a Shared Line Your system administrator might ask you to use a shared line if you: • Have multiple phones and want one phone number • Share call-handling tasks with coworkers • Handle calls on behalf of a manager Understanding Shared Lines Remote-in-Use Icon The Remote-in-Use icon appears when another phone that shares your line has a connected call. You can place and receive calls as usual on the shared line, even when the Remote-in-Use icon appears.
Adding Yourself to a Shared-Line Call Depending on how your phone is configured, you can add yourself to a call on a shared line using either Barge or cBarge. If you want to... Then... See if the shared line is in use Look for the remote-in-use icon View details about current calls on the shared line Press the red line button for the remote-in-use line. All non-private calls appear in the call activity area of the phone screen. Add yourself to a call on a shared line using the Barge softkey 1.
Advanced Call Handling Preventing Others from Viewing or Barging a Shared-Line Call If you share a phone line, you can use the Privacy feature to prevent others who share the line from viewing or barging (adding themselves to) your calls. If you want to... Then... Prevent others from viewing or barging calls on a shared line 1. Press Private Allow others to view or barge calls on a shared line . 2. To verify that Privacy is on, look for the Privacy-enabled icon next to an amber line button . 1.
Making and Receiving Secure Calls Depending on how your system administrator has configured your phone system, your phone might support making and receiving secure calls. Your phone is capable of supporting these types of calls: • Authenticated call—The identities of all phones participating in the call have been verified. • Encrypted call—The phone is receiving and transmitting encrypted audio (your conversation) within the Cisco IP network. Encrypted calls are also authenticated.
Advanced Call Handling Prioritizing Critical Calls (SCCP phones only.) In some specialized environments, such as military or government offices, you might need to make and receive urgent or critical calls. If you have the need for this specialized call handling, your system administrator can add Multilevel Precedence and Preemption (MLPP) to your phone. Keep these terms in mind: • Precedence indicates the priority associated with a call.
Using Cisco Extension Mobility Cisco Extension Mobility (EM) allows you to temporarily configure a Cisco Unified IP Phone as your own. Once you log in to EM, the phone adopts your user profile, including your phone lines, features, established services, and web-based settings. Your system administrator must configure EM for you. If you want to... Then... Log in to EM 1. Choose > EM Service (name can vary). 2. Enter your user ID and PIN (provided by your system administrator). 3.
Using a Handset, Headset, and Speakerphone Using a Handset, Headset, and Speakerphone You can use your phone with a handset, headset, or speakerphone. If you want to... Then... Use the handset Lift it to go off-hook; replace it to go on-hook. Use a headset Press to toggle headset mode on and off. You can use a headset in conjunction with all of the controls on your phone, including and . If you use AutoAnswer, see Using AutoAnswer, page 38.
Obtaining a Headset Your phone supports four- or six-wire headset jacks. For information about purchasing headsets, see Headset Information, page 7. Using AutoAnswer When AutoAnswer is enabled, your phone answers incoming calls automatically after a few rings. Your system administrator configures AutoAnswer to use either the speakerphone or a headset. You might use AutoAnswer if you receive a high volume of incoming calls. If you... Then...
Using Phone Settings Using Phone Settings You can customize your Cisco Unified IP Phone by adjusting the ring tone, background image, and other settings. Customizing Rings and Message Indicators You can customize how your phone indicates an incoming call and a new voice mail message. You can also adjust the ringer volume for your phone. If you want to... Then... Change the ring tone per line 1. Choose > User Preferences > Rings. 2. Choose a phone line or the default ring setting. 3.
Customizing the Phone Screen You can adjust the characteristics of your phone screen. If you want to... Then... Change the phone screen contrast 1. Choose > User Preferences > Contrast. 2. To make adjustments, press Up, Down or . 3. Press Save, or press Cancel. Note If you accidentally save a very light or very dark contrast and cannot see the phone screen display: Press and then press 1, 3 on the keypad.
Using Call Logs and Directories Using Call Logs and Directories This section describes how you can use call logs and directories. To access both features, use the Directories button . Using Call Logs Your phone maintains call logs. Call logs contain records of your missed, placed, and received calls. If you want to... Then... View your call logs Choose > Missed Calls, Placed Calls, or Received Calls. Each stores up to 100 records. Display details for a single call record 1.
If you want to... Then... Dial from a call log (while connected to another call) 1. Choose > Missed Calls, Placed Calls, or Received Calls. 2. Highlight a call record. 3. If you need to edit the displayed number, press EditDial followed by << or >>. To delete the number, press EditDial followed by Delete. (You may need to press the more softkey to display Delete.) 4. Press Dial. 5. Choose a menu item to handle the original call: • Hold—Puts the first call on hold and dials the second.
Using Call Logs and Directories Tip (SCCP phones only) To view the complete call record of a multiparty call (for example, of call that has been forwarded or transferred to you), highlight the call record and press Details. The Details record shows two entries for each missed or received multiparty call. The entries are listed in reverse chronological order: • The first logged entry is the name/number of the last completed call of a multiparty call received on your phone.
Using Corporate Directory on Your Phone You can use a corporate directory to place calls to coworkers. If you want to... Then... Dial from a corporate directory (while not on another call) 1. Choose Dial from a corporate directory (while on another call) 1. Choose > Corporate Directory (exact name can vary). 2. User your keypad to enter a full or partial name and press Search. 3. To dial, select the listing, or scroll to the listing and go off-hook. > Corporate Directory (exact name can vary). 2.
Using Call Logs and Directories Using Personal Directory on Your Phone The Personal Directory feature set contains your Personal Address Book (PAB) and Fast Dials. This section describes how to set up and use Personal Directory on your phone. Alternately, see Using Personal Directory on the Web, page 50. If you want to... Then... Access Personal Directory (for PAB and Fast Dial codes) 1. Choose Search for a PAB entry 1. Access Personal Directory, then choose Personal Address Book.
If you want to... Then... Add a new PAB entry 1. Access Personal Directory, then choose Personal Address Book. 2. Access the Search page by choosing Submit. (You do not need to input search information first.) 3. Press New. 4. Use your phone keypad to enter a name and e-mail information. 5. Choose Phones and use the keypad to enter phone numbers. Be sure to include any necessary access codes such as a 9 or 1. 6. Choose Submit to add the entry to the database. Assign a Fast Dial code to a PAB entry 1.
Using Call Logs and Directories Tips • Your system administrator can provide you with the user ID and PIN that you need to log in to Personal Directory. • Personal Directory automatically logs you out after a certain amount of time. This time limit can vary. Ask your system administrator for more information. • Use the numbers on your keypad to enter characters on your phone screen. Use the Navigation button on your phone to move between input fields.
Accessing Voice Messages To access voice messages, use the Note button. Your company determines the voice message service that your phone system uses. For the most accurate and detailed information, refer to the documentation that came with your voice message system. If you want to... Then... Set up and personalize your voice message service Press See if you have a new voice message Look for: and follow the voice instructions. If a menu appears on your screen, choose an appropriate menu item.
Customizing Your Phone on the Web Customizing Your Phone on the Web Your Cisco Unified IP Phone is a network device that can share information with other network devices in your company, including your personal computer. You can use your computer to log in to your Cisco Unified CallManager User Options web pages, where you can control features, settings, and services for your Cisco Unified IP Phone. For example, you can set up speed-dial buttons from your User Options web pages.
Configuring Features and Services on the Web The topics in this section describe how to configure features and services from your User Options web pages after logging in. See Accessing Your User Options Web Pages, page 49. Using Personal Directory on the Web The Personal Directory feature set consists of: • A Personal Address Book (PAB) • Fast Dials • The Address Book Synchronization Tool (TABSynch) Note You can also access PAB and Fast Dials from your phone.
Customizing Your Phone on the Web Configuring Fast Dials on the Web This section describes how to assign Fast Dials from your User Options web pages. If you want to... Then do this after you log in... Assign a Fast Dial code to a PAB entry 1. Create a PAB entry. See Using Your Personal Address Book on the Web, page 50. 2. Choose User Options > Fast Dials. 3. Click Add New. 4. Change the Fast Dial code, if desired. 5. Use the Search Options area to find the appropriate PAB entry. 6.
Using the Address Book Synchronization Tool You can use the Address Book Synchronization Tool (TABSynch) to synchronize your existing Microsoft Windows Address Book (if applicable) with your PAB. Entries from your Microsoft Windows Address Book will then be accessible on your Cisco Unified IP Phone and User Options web pages. Your system administrator can give you access to TABSynch and provide detailed instructions.
Customizing Your Phone on the Web Setting Up Phone Services on the Web Phone services can include special phone features, network data, and web-based information (such as stock quotes and movie listings). You must first subscribe to a phone service before accessing it on your phone. If you want to... Then do this after you log in and select a device... Subscribe to a service 1. Select a device. 2. Click Phone Services. 3. Click Add New. 4. Choose a service from the drop-down list and click Next. 5.
Controlling User Settings on the Web User settings include your password, PIN, and language (locale) settings. If you want to... Then do this after you log in... Change your password 1. Choose User Options > User Settings. 2. In the Browser Password area, enter information. 3. Click Save. Change your PIN 1. Choose User Options > User Settings. 2. In the Phone PIN area, enter information. 3. Click Save. Change the language (locale) for your User Options web pages 1.
Customizing Your Phone on the Web Controlling Line Settings on the Web Line settings affect a specific phone line (directory number) on your phone. Line settings can include call forwarding, voice message indicators, ring patterns, and line labels. Note • You can also set up call forwarding (for your primary phone line) directly on your phone. See Forwarding All Calls to Another Number, page 23. • To learn about phone settings that you can access directly on your phone, see Using Phone Settings, page 39.
If you want to... Then do this after you log in... Change the ring pattern per line 1. Select a device. 2. Click Line Settings. 3. If you have more than one directory number (line) assigned to your phone, verify that the appropriate line is selected or choose a new one. 4. In the Ring Settings area, choose a setting to tell your phone how to indicate an incoming call on the selected line. 5. Click Save.
Customizing Your Phone on the Web Using Cisco WebDialer Cisco WebDialer allows you to make calls on your Cisco Unified IP Phone to directory contacts by clicking items in a web browser. Your system administrator must configure this feature for you. If you want to... Then... Use WebDialer with your User Options directory 1. Log into your User Options web pages. See Accessing Your User Options Web Pages, page 49. 2. Choose User Options > Directory and search for a coworker. 3.
If you want to... Then... Log out of WebDialer Click the logout icon in the Make Call or Hang Up page. Set up, view, or change WebDialer preferences Access the Preferences page. The Preferences page appears the first time that you use WebDialer (after you click the number that you want to dial.) To return to Preferences in the future, click the preferences icon from the Make Call or Hang Up page.
Understanding Additional Configuration Options Understanding Additional Configuration Options Your system administrator can configure your phone to use specific button and softkey templates along with special services and features, if appropriate. This table provides an overview of some configuration options that you might want to discuss with your phone system administrator based on your calling needs or work environment.
If you... Then... For more information...
Troubleshooting Your Phone Troubleshooting Your Phone This section provides information to help you troubleshoot problems with your phone. General Troubleshooting This section provides information to help you troubleshoot general problems with your phone. For more information, see your system administrator. Symptom Explanation You cannot hear a dial tone or complete a call One or more of the following factors might apply: • You must log into the Extension Mobility service.
Viewing Phone Administration Data Your system administrator might ask you to access administration data on your phone for troubleshooting purposes. If you are asked to... Then... Access network configuration data Choose > Network Configuration and select the network configuration item that you want to view. Access status data Choose > Status and select the status item that you want to view. Access phone model information Choose > Model Information.
Cisco One-Year Limited Hardware Warranty Terms Cisco One-Year Limited Hardware Warranty Terms There are special terms applicable to your hardware warranty and various services that you can use during the warranty period. Your formal Warranty Statement, including the warranties and license agreements applicable to Cisco software, is available on Cisco.com. Follow these steps to access and download the Cisco Information Packet and your warranty and license agreements from Cisco.com. 1.
Replacement, Repair, or Refund Policy for Hardware Cisco or its service center will use commercially reasonable efforts to ship a replacement part within ten (10) working days after receipt of a Return Materials Authorization (RMA) request. Actual delivery times can vary, depending on the customer location. Cisco reserves the right to refund the purchase price as its exclusive warranty remedy. To Receive a Return Materials Authorization (RMA) Number Contact the company from whom you purchased the product.
Index A viewing and dialing from 41 call park 33 Address Book Synchronization Tool 52 call pickup, using 30 answering calls, options for 18 call waiting 18 ASCII label field support 52, 53 caller ID 12 audio problems 62 call-handling, advanced 29 audio, quality of 7 call-handling, basic 16 authenticated calls 34 calls Auto Dial 16 answering 18 AutoAnswer 38 barging 32 blocking 24 compared to lines 14 B conference features for 25 barge ending 19 and privacy 33 forwarding 23 and shared
messages 48 secure 34 storing and retrieving 33 transferring 21 using DND 24 viewing 12, 20 D Details softkey, viewing multiparty calls with 43 viewing multiple 20 cBarge 32 dialing, options for 16 Cisco Unified IP Phone directory adjusting height of 6 corporate 43 connecting 5 dialing from web page with 17 description of 8 personal 43 using on phone 17, 41 feature configuration for 15, 59 illustration of 9 DND 24 online help for 13 Do Not Disturb 24 registering 6 securing handset rest 6 E
using 19 feature menus, using 15 features, availability of 15, 59 footstand adjusting 6 button, identifying 10 I icons Forced Authorization Code 18 for call states 14 forwarding calls, options for 23 for lines 14 iDivert G description of 2 installing, Cisco Unified IP Phone 5 group call pickup, using 30 K H keypad description of 11 handset light strip 11 securing in cradle 6 using 37 L hanging up, options for 19 language (locale) settings 54 headset line buttons, identifying 10 answering c
indicator for 39, 48 adjusting contrast of 40 listening to 48 changing language of 40 messages button, description of 10 cleaning 12 missed calls, records of 41 features of 12 MLPP, using 35 phone services See also User Options web pages 53 multiparty calls viewing details of 43 placed calls, records of 41 multiple calls, handling 20 placing calls, options for 16 mute button, description of 11 prioritizing calls 35 mute, using 20 privacy and shared lines 31 N using 33 programmable buttons
status line, viewing 12 S subscriptions safety, warnings 2 See services, subscribing to 53 secure calls 34 suspicious calls, tracing 34 security switching calls 20 levels of 34 making and receiving secure calls 34 verifying non-secure calls 34 services changing or ending 53 service names 53 subscribing to 53 services button, description of 10 settings button, description of 10 shared lines and Remote-in-Use icon 31 description of 31 T Tabs, phone and feature 12 TABSynch 52 TAPS, using 6 text, enter
web-based services See User Options web pages 53 WebDialer 17 70 OL-11526-01
Corporate Headquarters Cisco Systems, Inc. 170 West Tasman Drive San Jose, CA 95134-1706 USA www.cisco.com Tel: 408 526-4000 800 553-NETS (6387) Fax: 408 526-4100 European Headquarters Cisco Systems International BV Haarlerbergpark Haarlerbergweg 13-19 1101 CH Amsterdam The Netherlands www-europe.cisco.com Tel: 31 0 20 357 1000 Fax: 31 0 20 357 1100 Americas Headquarters Cisco Systems, Inc. 170 West Tasman Drive San Jose, CA 95134-1706 USA www.cisco.