Cisco Wireless IP Phone 8821 and 8821-EX Wireless LAN Deployment Guide The Cisco Wireless IP Phone 8821 and 8821-EX are adaptable for all mobile professionals, from users on the move within an office environment to nurses and doctors in a healthcare environment to associates working in the warehouse, on the sales floor, or in a call center. Staff, nurses, doctors, educators, and IT personnel can be easily reached when mobile.
Revision History Date Comments 08/24/16 11.0(2) Release 10/08/16 11.
Contents Cisco Wireless IP Phone 8821 and 8821-EX Overview ......................................................................................................................... 6 Phone Models ......................................................................................................................................................................................... 6 Requirements ...................................................................................................................
RF Profiles ........................................................................................................................................................................................ 63 FlexConnect Groups ......................................................................................................................................................................... 65 Multicast Direct .......................................................................................................
WLAN Diagnostics.............................................................................................................................................................................. 194 Restoring Factory Defaults................................................................................................................................................................. 195 Phone Webpages ..............................................................................................................
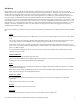
Cisco Wireless IP Phone 8821 and 8821-EX Overview The Cisco Wireless IP Phone 8821 and 8821-EX are the platforms that provide collaboration within enterprises. It brings together the capabilities of Cisco Unified Communication applications, building upon the solid foundations of Cisco Unified Communications devices, both wired and wireless. Cisco’s implementation of 802.11 permits time sensitive applications such as voice and video to operate efficiently across campus wide wireless LAN (WLAN) deployments.
Site Survey Before deploying the Cisco Wireless IP Phone 8821 and 8821-EX into a production environment, a site survey must be completed by a Cisco certified partner with the advanced wireless LAN specialization. During the site survey the RF spectrum can be analyzed to determine which channels are usable in the desired band (5 GHz or 2.4 GHz).
Call Control The Cisco Wireless IP Phone 8821 and 8821-EX utilize Session Initiation Protocol (SIP) for call control with the following applications. • Cisco Unified Communications Manager (CUCM) Minimum = 9.1(2) Recommended = 10.5(2), 11.0(1), 11.5(1) • Cisco Unified Communications Manager Express (CUCME) Minimum = 10.5 Recommended = 11.0 and later • Cisco Unified Survivable Remote Site Telephony (SRST) Minimum = 10.5 Recommended = 11.
Note: The Cisco Wireless IP Phone 8821 and 8821-EX are supported with the Cisco AP3600 when the internal 802.11a/b/g/n radio is utilized, however is not supported if the 802.11ac module (AIR-RM3000AC) for the Cisco AP3600 is installed. The table below lists the modes that are supported by each Cisco Access Point. Cisco AP Series 802.11a 802.11b 802.11g 802.11n 600 Yes Yes Yes Yes 802.
700 Yes Yes Yes Yes No Yes Yes 700W Yes Yes Yes Yes No Yes Yes 1040 Yes Yes Yes Yes No Yes Yes 1130 Yes Yes Yes No No Yes Yes 1140 Yes Yes Yes Yes No Yes Yes 1240 Yes Yes Yes No No Yes Yes 1250 Yes Yes Yes Yes No Yes Yes 1260 Yes Yes Yes Yes No Yes Yes 1600 Yes Yes Yes Yes No Yes Yes 1700 Yes Yes Yes Yes Yes Yes Yes 1810 Yes Yes Yes Yes Yes Yes No 1810W Yes Yes Yes Yes Yes Yes No 1830 Yes Yes Yes Yes Yes Ye
https://meraki.cisco.com/products/wireless#models The Cisco Meraki MR12, MR16, and Z1 access point platforms are not certified for use with Cisco Wireless IP Phone 8821 and 8821-EX deployments. Note: VoWLAN is not currently supported in conjunction with outdoor MESH technology (1500 series). Limited support is provided when using 3rd party access points as there are no interoperability tests performed for 3rd party access points.
http://www.cisco.com/c/en/us/products/collateral/wireless/aironet-antennasaccessories/product_data_sheet09186a008008883b.html All indoor Cisco Meraki access points have internal antennas and all outdoor Cisco Meraki access points require external antennas. https://meraki.cisco.com/products/wireless/antennas-power 3rd party antennas are not supported, as there is no interoperability testing performed against 3rd party antennas including Distributed Antenna Systems (DAS) and Leaky Coaxial Systems.
36 Mbps OFDM - 16 QAM -83 dBm 48 Mbps OFDM - 64 QAM -78 dBm 54 Mbps OFDM - 64 QAM -76 dBm 5 GHz - 802.
180 Mbps (MCS 8) OFDM – 256 QAM -67 dBm 200 Mbps (MCS 9) OFDM – 256 QAM -66 dBm 5 GHz - 802.
Note: Receiver sensitivity is the minimum signal needed to decode a packet at a certain data rate. The above values are pure radio specifications and do not account for the gain of the single integrated antenna. To achieve 802.11n/ac connectivity, it is recommended that the Cisco Wireless IP Phone 8821 and 8821-EX be within 100 feet of the access point. Regulatory World Mode (802.
Note: Compliance information is available on the Cisco Product Approval Status web site at the following URL: http://tools.cisco.com/cse/prdapp/jsp/externalsearch.do?action=externalsearch&page=EXTERNAL_SEARCH Bluetooth The Cisco Wireless IP Phone 8821 and 8821-EX support Bluetooth 3.0 technology allowing for wireless headset communications.
When using Coexistence (802.11b/g/n + Bluetooth), call capacity is reduced due to the utilization of CTS to protect the 802.11g/n and Bluetooth transmissions. Multicast Audio Multicast audio from Push To Talk (PTT), Music on Hold (MMOH) and other applications are not supported when using Coexistence. Voice Quality Depending on the current data rate configuration, CTS may be sent to protect the Bluetooth transmissions when using Coexistence. In some environments, 6 Mbps may need to be enabled.
Certification ensures that the equipment is fit for its intended purpose and that adequate information is supplied with it to ensure that it can be used safely. Canadian Standards Association (CSA) Class I Division 2 Laws and regulations in most municipalities, states, and provinces in North America require certain products to be tested to a specific standard or group of standards when they are to be classified safe when used in an explosive environment.
Call State On Call Idle Scan Mode Expected Battery Time Continuous Up to 13 hours Auto Up to 13 hours Continuous Up to 48 hours Auto Up to 96 hours There are many factors that can influence actual battery life time. Usage Battery life will be reduced when the Cisco Wireless IP Phone 8821 or 8821-EX user is on call, using Bluetooth, using applications, receiving XSI messages, or navigating the menus on the phone.
It is recommended to utilize an access point that supports the Cisco Compatible Extensions (CCX) Dynamic Transmit Power Control (DTPC) feature. When DTPC is enabled, the access point will advertise its transmit power to all clients, where the Cisco Wireless IP Phone 8821 and 8821-EX can then adjust its transmit power to a minimum level that is only necessary to communicate with the connected access point, therefore also reducing unnecessary noise in other areas.
• Multicharger For more information, refer to the Cisco Wireless IP Phone 8821 Series Accessory Guide at this URL: http://www.cisco.com/c/en/us/td/docs/voice_ip_comm/cuipph/8821/english/accessories/w88x_b_wireless-ip-phone-882xaccessory.html 3rd Party Accessories Only the 3rd party accessories listed below are certified for use with the Cisco Wireless IP Phone 8821 and 8821-EX. • Headsets Apple (www.apple.com) Jabra (www.jabra.com) Plantronics (www.plantronics.com) Sennheiser (www.sennheiser.
802.11 Network Use the following guidelines to assist with deploying and configuring the wireless LAN. 5 GHz (802.11a/n/ac) 5 GHz is the recommended frequency band to utilize for operation of the Cisco Wireless IP Phone 8821 and 8821-EX. In general, it is recommended for access points to utilize automatic channel selection instead of manually assigning channels to access points.
TPC allows the client and access point to exchange information, so that the client can dynamically adjust the transmit power. The client uses only enough energy to maintain association to the access point at a given data rate. As a result, the client contributes less to adjacent cell interference, which allows for more densely deployed, high-performance wireless LANs.
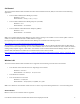
Non-overlapping channels must be used and allow at least 20 percent overlap with adjacent channels when deploying the Cisco Wireless IP Phone 8821 and 8821-EX in an 802.11b/g/n environment, which allows for seamless roaming. Using an overlapping channel set such as 1, 5, 9, 13 is not a supported configuration. Below is a sample 2.4 GHz wireless LAN deployment.
Recommended to set the minimum data rate to 11 Mbps or 12 Mbps for 2.4 GHz (dependent upon 802.11b client support policy) and 12 Mbps for 5 GHz, which should also be the only rate configured as a mandatory / basic rate. In some environments, 6 Mbps may need to be enabled as a mandatory / basic rate. Due to the above requirements, a single channel plan should not be deployed. When designing the placement of access points, be sure that all key areas have adequate coverage (signal).
The Cisco Unified Network Control System (NCS) can be utilized to verify signal strength and coverage.
Data Rates It is recommended to disable rates below 12 Mbps for 5 GHz deployments and below 12 Mbps for 2.4 GHz deployments where capacity and range are factored in for best results. The Cisco Wireless IP Phone 8821 and 8821-EX both have a single antenna, therefore it supports up to MCS 7 data rates for 802.11n (up t to 150 Mbps) and up to MCS 9 data rates for 802.11ac (up to 433 Mbps). Higher MCS rates can be left enabled for other 802.
Note: Some environments may require that a lower data rate be enabled due to use of legacy clients, environmental factors or maximum range is required. Set only the lowest data rate enabled as the single mandatory / basic rate. Multicast packets will be sent at the highest mandatory / basic data rate enabled. Note that capacity and throughput are reduced when lower rates are enabled. Rugged Environments When deploying the Cisco Wireless IP Phone 8821 and 8821-EX in a rugged environment (e.g.
It is recommended to utilize 802.11r / Fast Transition (FT) for fast roaming. Enabling 802.11r (FT) also reduces the number of frames in the handshake when roaming to only two frames. Reducing the number of frames during a roam, increases the chances of roam success. When using 802.1x authentication, it is important to use the recommended EAPOL key settings.
Use of Orthogonal Frequency Division Multiplexing (OFDM), which is used by 802.11a/n/ac and 802.11g/n, can help to reduce issues seen in high multipath environments. If using 802.11b in a high multipath environment, lower data rates should be used in those areas (e.g. 1 and 2 Mbps). Use of antenna diversity can also help in such environments. Security When deploying a wireless LAN, security is essential. The Cisco Wireless IP Phone 8821 and 8821-EX support the following wireless security features.
Note: Shared Key authentication is not supported. The Cisco Wireless IP Phone 8821 and 8821-EX also support the following additional security features.
If anonymous PAC provisioning is not allowed in the production wireless LAN environment then a staging RADIUS server can be setup for initial PAC provisioning of the Cisco Wireless IP Phone 8821 and 8821-EX. This requires that the staging RADIUS server be setup as a slave EAP-FAST server and components are replicated from the product master EAP-FAST server, which include user and group database and EAP-FAST master key and policy info.
EAP-TLS may also require a user account to be created on the authentication server matching the common name of the certificate imported into the Cisco Wireless IP Phone 8821 or 8821-EX. It is recommended to use a complex password for this user account and that EAP-TLS is the only EAP type enabled on the RADIUS server.
Protected Extensible Authentication Protocol (PEAP) Protected Extensible Authentication Protocol (PEAP) uses server-side public key certificates to authenticate clients by creating an encrypted SSL/TLS tunnel between the client and the authentication server. The ensuing exchange of authentication information is then encrypted and user credentials are safe from eavesdropping. PEAP-GTC and PEAP-MSCHAPv2 are supported inner authentication protocols.
LEAP Proxy RADIUS Server Yes No Yes Yes All Token Servers No No No No Quality of Service (QoS) Quality of Service enables queuing to ensure high priority for voice traffic. To enable proper queuing for voice and call control traffic use the following guidelines. • Ensure that WMM is enabled on the access point. • Create a QoS policy on the access point giving priority to voice and call control traffic. Traffic Type DSCP 802.
If the AP sends an ADDTS successful message then the Cisco Wireless IP Phone 8821 or 8821-EX establishes the call. If the access point rejects the call and the Cisco Wireless IP Phone 8821 or 8821-EX has no other access point to roam to, then the phone will display Network Busy.
Wired QoS Configure QoS settings and policies for the necessary network devices. Configuring Cisco Switch Ports for WLAN Devices Configure the Cisco Wireless LAN Controller and Cisco Access Point switch ports as well as any uplink switch ports. If utilizing Cisco IOS Switches, use the following switch port configurations.
Roaming The Cisco Wireless IP Phone 8821 and 8821-EX default to Auto for the 802.11 mode, which allows the Cisco Wireless IP Phone 8821 and 8821-EX to connect to either 5 GHz or 2.4 GHz and enables interband roaming support. 802.11r / Fast Transition (FT) is the recommended deployment model for all environment types where frequent roaming occurs. 802.1x authentication is required in order to utilize CCKM. 802.1x without 802.
Over the Air The client communicates directly with the target access point using 802.11 authentication with the FT authentication algorithm. Over the Distribution The client communicates with the target access point through the current access point. The communication between the client and the target access point is carried in FT action frames between the client and the current access point via the WLAN controller. 802.
At power on, the Cisco Wireless IP Phone 8821 and 8821-EX will scan all 2.4 and 5 GHz channels when in Auto mode, then attempt to associate to an access point for the configured network if available. If configured for 5 GHz only or 2.4 GHz only mode, then just those channels are scanned. It is recommended to perform a spectrum analysis to ensure that the desired bands can be enabled in order to perform interband roaming.
The DTIM period is a tradeoff between battery life and multicast performance. Broadcast and multicast traffic will be queued until the DTIM period when there are power save enabled clients associated to the access point, so DTIM will determine how quickly these packets can be delivered to the client. If using multicast applications, a shorter DTIM period can be used. When multiple multicast streams exist on the wireless LAN frequently, then it is recommended to set the DTIM period to 1.
The multicast traffic will be sent at the highest mandatory / basic data rate enabled on the access point, so will want to ensure that only the lowest enabled rate is configured as the only mandatory / basic rate. The client will send the IGMP join request to receive that multicast stream. The client will send the IGMP leave when the session is to be ended.
• Set EDCA Profile to Voice Optimized or Voice and Video Optimized • Set Enable Low Latency MAC to Disabled • Ensure that Power Constraint is Disabled • Enable Channel Announcement and Channel Quiet Mode • Configure the High Throughput Data Rates as necessary • Configure the Frame Aggregation settings • Enable CleanAir if utilizing Cisco Access Points with CleanAir technology • Configure Multicast Direct Feature as necessary • Set the 802.1p tag to 5 for the Platinum QoS profile 802.
Short Preamble should be Enabled in the 2.4 GHz radio configuration setting on the access point when no legacy clients that require a long preamble are present in the wireless LAN. By using the short preamble instead of long preamble, the wireless network performance is improved. Ensure DTPC Support is enabled. If using Cisco 802.11n capable Access Points, ensure ClientLink is enabled. With the current releases, Maximum Allowed Clients can be configured.
The current status of the beamforming feature can be displayed by using the following command. (Cisco Controller) >show 802.11a (Cisco Controller) >show 802.11b Legacy Tx Beamforming setting.................... Enabled Auto RF (RRM) When using the Cisco Wireless LAN Controller it is recommended to enable Auto RF to manage the channel and transmit power settings. Configure the access point transmit power level assignment method for either 5 or 2.4 GHz depending on which frequency band is to be utilized.
If using 5 GHz, it is recommended to enable up to 12 channels only to avoid any potential delay of access point discovery due to having to scan many channels. The 5 GHz channel width can be configured for 20 MHz or 40 MHz if using Cisco 802.11n Access Points and 20 MHz, 40 MHz, or 80 MHz if using Cisco 802.11ac Access Points. If using 2.4 GHz, only channels 1, 6, and 11 should be enabled in the DCA list. It is recommended to configure the 2.4 GHz channel for 20 MHz even if using Cisco 802.
Individual access points can be configured to override the global setting to use dynamic channel and transmit power assignment for either 5 or 2.4 GHz depending on which frequency band is to be utilized. Other access points enabled can be enabled for Auto RF and workaround the access points that are statically configured. This may be necessary if there is an intermittent interferer present in an area. The 5 GHz channel width can be configured for 20 MHz or 40 MHz if using Cisco 802.
Client Roaming The Cisco Wireless IP Phone 8821 and 8821-EX do not utilize the RF parameters in the Client Roaming section of the Cisco Wireless LAN Controller as scanning and roaming is managed independently by the phone itself. EDCA Parameters Set the EDCA profile for Voice Optimized and disable Low Latency MAC for either 5 or 2.4 GHz depending on which frequency band is to be utilized.
High Throughput (802.11n/ac) The 802.11n data rates can be configured per radio (2.4 GHz and 5 GHz). 802.11ac data rates are applicable to 5 GHz only. Ensure that WMM is enabled and WPA2(AES) is configured in order to utilize 802.11n/ac data rates. The Cisco Wireless IP Phone 8821 and 8821-EX support HT MCS 0 - MCS 7 and VHT MCS 0 - MCS 9 data rates only, but higher MCS rates can optionally be enabled if there are other 802.
In the 7.0.116.0 release for the Cisco Wireless LAN Controller, the default A-MPDU and A-MSDU configuration is the following. A-MPDU User Priority 0, 4, 5 = Enabled User Priority 1, 2, 3, 6, 7 = Disabled A-MSDU User Priority 0, 1, 2, 3, 4, 5 = Enabled User Priority 6, 7 = Disabled Use the following commands to configure the A-MPDU and A-MSDU settings per the Cisco Wireless IP Phone 8821 and 8821EX recommendations. In order to configure the 5 GHz settings, the 802.
802.11n Status: A-MPDU Tx: Priority 0............................... Enabled Priority 1............................... Disabled Priority 2............................... Disabled Priority 3............................... Enabled Priority 4............................... Enabled Priority 5............................... Enabled Priority 6............................... Disabled Priority 7............................... Disabled A-MSDU Tx: Priority 0............................... Disabled Priority 1.........
Cisco Wireless IP Phone 8821 and 8821-EX Wireless LAN Deployment Guide 52
WLAN Settings It is recommended to have a separate SSID for the Cisco Wireless IP Phone 8821 and 8821-EX. However, if there is an existing SSID configured to support voice capable Cisco Wireless LAN endpoints already, then that WLAN can be utilized instead. The SSID to be used by the Cisco Wireless IP Phone 8821 and 8821-EX can be configured to only apply to a certain 802.11 radio type (e.g. 802.11a only).
802.1x, CCKM and/or PSK may also be enabled if wanting to utilize the same SSID for various type of voice clients, where some clients do not support 802.11r (FT) depending on whether 802.1x or PSK is being utilized. To utilize CCKM for fast secure roaming, enable WPA2 policy with AES encryption and 802.1x + CCKM for authenticated key management type.
The WMM policy should be set to Required only if the Cisco Wireless IP Phone 8821 and 8821-EX or other WMM enabled phones will be using this SSID. If there are non-WMM clients existing in the WLAN, it is recommended to put those clients on another WLAN. If non-other WMM clients must utilize the same SSID as the Cisco Wireless IP Phone 8821 and 8821-EX, then ensure the WMM policy is set to Allowed. Enabling WMM will enable the 802.11e version of QBSS.
Configure Enable Session Timeout as necessary per your requirements. It is recommended to either disable the session timeout or extend the timeout (e.g. 24 hours / 86400 seconds) to avoid possible interruptions during audio calls. If disabled it will avoid any potential interruptions altogether, but enabling session timeout can help to re-validate client credentials periodically to ensure that the client is using valid credentials. Enable Aironet Extensions (Aironet IE).
AP Groups AP Groups can be created to specify which WLANs / SSIDs are to be enabled and which interface they should be mapped to as well as what RF Profile parameters should be used for the access points assigned to the AP Group. On the WLANs tab, select the desired SSIDs and interfaces to map to then select Add.
On the RF Profile tab, select the desired 802.11a or 802.11b RF Profile, then select Apply. If changes are made after access points have joined the AP Group, then those access points will reboot once those changes are made. On the APs tab, select the desired access points then select Add APs. Those access points will then reboot. Controller Settings Ensure the Cisco Wireless LAN Controller hostname is configured correctly.
Enable Link Aggregation (LAG) if utilizing multiple ports on the Cisco Wireless LAN Controller. Configure the desired AP multicast mode. If utilizing multicast, then Enable Global Multicast Mode and Enable IGMP Snooping should be enabled. If utilizing layer 3 mobility, then Symmetric Mobility Tunneling should be Enabled. In the recent versions, Symmetric Mobility Tunneling is enabled by default and non-configurable.
When multiple Cisco Wireless LAN Controllers are to be in the same mobility group, then the IP address and MAC address of each Cisco Wireless LAN Controller should be added to the Static Mobility Group Members configuration. Call Admission Control (CAC) It is recommended to enable Admission Control Mandatory for Voice and configure the maximum bandwidth and reserved roaming bandwidth percentages for either 5 or 2.4 GHz depending on which frequency band is to be utilized.
The access point has different methods for Call Admission Control when using SIP CAC depending on whether the client uses TCP or UDP for SIP communications. If the client uses TCP for SIP, then the access point will snoop the SIP packets when media session snooping is enabled on the WLAN and will not forward the SIP frames upstream or downstream if there is not bandwidth available for the new voice stream. This could potentially result in loss of registration to the Cisco Unified Communications Manager.
If Call Admission Control for voice is enabled, then the following configuration should be active, which can be displayed in the show run-config. Call Admission Control (CAC) configuration Voice AC - Admission control (ACM)............ Enabled Voice max RF bandwidth........................ 75 Voice reserved roaming bandwidth.............. 6 Voice load-based CAC mode..................... Enabled Voice tspec inactivity timeout................ Disabled Video AC - Admission control (ACM)............
Dot11-Phone Mode (7920).......................... ap-cac-limit Wired Protocol................................... 802.1P (Tag=5) In the Media settings, Unicast Video Redirect and Multicast Direct Enable should be enabled. RF Profiles RF Profiles can be created to specify which frequency bands, data rates, RRM settings, etc. a group of access points should use. It is recommended to have the SSID used by the Cisco Wireless IP Phone and 8821 and 8821-EX to be applied to 5 GHz radios only.
On the 802.11 tab, configure the data rates as desired. Is recommended to enable 12 Mbps as Mandatory and 18 Mbps and higher as Supported; however some environments may require 6 Mbps to be enabled as a mandatory (basic) rate. On the RRM tab, the Maximum Power Level Assignment and Minimum Power Level Assignment settings as well as other TPC and Coverage Hole Detection settings can be configured. On the High Density tab, Maximum Clients and Multicast Data Rates can be configured.
FlexConnect Groups All access points configured for FlexConnect mode need to be added to a FlexConnect Group. If utilizing CCKM, then seamless roams can only occur when roaming to access points within the same FlexConnect Group. Multicast Direct In the Media Stream settings, Multicast Direct feature should be enabled.
After Multicast Direct feature is enabled, then there will be an option to enable Multicast Direct in the QoS menu of the WLAN configuration. QoS Profiles Configure the four QoS profiles (Platinum, Gold, Silver, Bronze), by selecting 802.1p as the protocol type and set the 802.1p tag for each profile.
Cisco Wireless IP Phone 8821 and 8821-EX Wireless LAN Deployment Guide 67
Cisco Wireless IP Phone 8821 and 8821-EX Wireless LAN Deployment Guide 68
Cisco Wireless IP Phone 8821 and 8821-EX Wireless LAN Deployment Guide 69
Note: The 802.1p tag mappings were changed with the 7.5.102.0 release. Prior to the 7.5.102.0 release, Platinum = 6, Gold = 5, Silver = 3, Bronze = 1. Advanced Settings Advanced EAP Settings Need to ensure that the advanced EAP settings in the Cisco Wireless LAN Controller are configured per the information below. To view the EAP configuration on the Cisco Wireless LAN Controller, telnet or SSH to the controller and enter the following command.
EAPOL-Key Max Retries............................ 4 If using 802.1x or WPA/WPA2, the EAP-Request Timeout on the Cisco Wireless LAN Controller should be set to at least 20 seconds. In later versions of Cisco Wireless LAN Controller software, the default EAP-Request Timeout was changed from 2 to 30 seconds. To change the EAP-Request Timeout on the Cisco Wireless LAN Controller, telnet or SSH to the controller and enter the following command.
Excessive 802.11-association failures.......... Enabled Excessive 802.11-authentication failures....... Enabled Excessive 802.1x-authentication................ Enabled IP-theft....................................... Enabled Excessive Web authentication failure........... Enabled Signature Policy Signature Processing........................... Enabled To disable the Auto-Immune feature on the Cisco Wireless LAN Controller, telnet or SSH to the controller and enter the following command.
Tkip MIC Countermeasure Hold-down Timer....... 60 Cisco Meraki Access Points When configuring Cisco Meraki access points, use the following guidelines: • Enable 802.
Cisco Meraki access points can be claimed either by selecting Claim on the Create network or Organization > Configure > Inventory pages. Access points can also be claimed by selecting Add APs on the Wireless > Monitor > Access points page, then selecting Claim. Once claimed, Cisco Meraki access points can be added to the desired wireless network via the Organization > Configure > Inventory page.
SSID Configuration To create a SSID, select the desired network from the drop-down menu then select Wireless > Configure > SSIDs. It is recommended to have a separate SSID for the Cisco Wireless IP Phone 8821 and 8821-EX; data clients and other type of clients should utilize a different SSID and VLAN. However, if there is an existing SSID configured to support voice capable Cisco Wireless LAN endpoints already, then that WLAN can be utilized. To set the SSID name, select Rename.
On the Wireless > Configure > Access control page, select WPA2-Enterprise to enable 802.1x authentication. The Cisco Meraki authentication server or an external RADIUS server can be utilized when selecting WPA2-Enterprise. The Cisco Meraki authentication server supports PEAP authentication and requires a valid email address. Other authentication types (e.g. Pre-Shared Key) are available as well. Ensure 802.11r is enabled. Ensure Splash page is set to None to enable direct access.
On the Wireless > Configure > Access control page, recommend to enable Bridge mode, where the Cisco Wireless IP Phone 8821 and 8821-EX will obtain DHCP from the local LAN instead of the Cisco Meraki network; unless call control, other endpoints, etc. are cloud-based. Once Bridge mode is enabled, the VLAN tagging option will be available. It is recommended to enable VLAN tagging for the SSID.
On the Wireless > Configure > Access control page, the frequency band for the SSID to be used by the Cisco Wireless IP Phone 8821 and 8821-EX can be configured as necessary. It is recommended to select 5 GHz band only to have the Cisco Wireless IP Phone 8821 and 8821-EX operate on the 5 GHz band due to have many channels available and not as many interferers as the 2.4 GHz band has. If the 2.4 GHz band needs to be used due to increased distance, then Dual band operation (2.
Radio Settings On the Wireless > Configure > Radio settings page, configure what radio transmit power and channel settings to use. For the Radio power setting, it is recommended to select Enable power reduction on nearby APs as co-channel interference can be potentially reduced. If wanting to use maximum radio power, then select Always use 100% power. Can select whether to enable use of DFS channels or not via the Auto channel option.
When Auto is selected for 2.4 GHz channels, only channels 1, 6, and 11 will be utilized. Configure the access point transmit power level assignment method for either 5 or 2.4 GHz depending on which frequency band is to be utilized. Individual access points can be configured with static channel and transmit power for either 5 or 2.4 GHz radios, which may be necessary if there is an intermittent interferer present in an area.
Note: Cisco Meraki access points do not support Call Admission Control / Traffic Specification (TSPEC). Monitoring Clients On the Network-wide > Monitor > Clients page, client information and statistics can be displayed.
Cisco Autonomous Access Points When configuring Cisco Autonomous Access Points, use the following guidelines: • Ensure 802.11r (FT) or CCKM is Enabled • Configure the Data Rates as necessary • Enable DTPC • Configure Quality of Service (QoS) • Set the WMM Policy to Required • Ensure Aironet Extensions is Enabled • Disable Public Secure Packet Forwarding (PSPF) • Set IGMP Snooping to Enabled 802.
Is recommended to enable 11r over air to enable fast secure roaming. Recommended to set 12 Mbps as the mandatory (basic) rate and 18 Mbps and higher as supported (optional) rates; however some environments may require 6 Mbps to be enabled as a mandatory (basic) rate. If using 5 GHz, it is recommended to enable up to 12 channels only to avoid any potential delay of access point discovery due to having to scan many channels.
Cisco Wireless IP Phone 8821 and 8821-EX Wireless LAN Deployment Guide 84
If wanting to use 2.4 GHz, ensure the 802.11b/g/n network status and 802.11g is enabled. Recommended to set 12 Mbps as the mandatory (basic) rate and 18 Mbps and higher as supported (optional) rates assuming that there will not be any 802.11b only clients that will connect to the wireless LAN; however some environments may require 6 Mbps to be enabled as a mandatory (basic) rate. If 802.
WLAN Settings It is recommended to have a separate SSID for the Cisco Wireless IP Phone 8821 and 8821-EX. However, if there is an existing SSID configured to support voice capable Cisco Wireless LAN endpoints already, then that WLAN can be utilized instead. The SSID to be used by the Cisco Wireless IP Phone 8821 and 8821-EX can be configured to only apply to a certain 802.11 radio type (e.g. 802.11a only). Enable WPA2 key management. Ensure either 11r or CCKM is enabled, where 11r is recommended.
Cisco Wireless IP Phone 8821 and 8821-EX Wireless LAN Deployment Guide 87
Segment wireless voice and data into separate VLANs. Ensure that Public Secure Packet Forwarding (PSPF) is not enabled for the voice VLAN as this will prevent clients from communicating directly when associated to the same access point. If PSPF is enabled, then the result will be no way audio.
Ensure AES is selected for encryption type.
Configure the RADIUS servers to be used for authentication and accounting.
Wireless Domain Services (WDS) Wireless Domain Services should be utilized in the Cisco Autonomous Access Point environment, which is also required for fast secure roaming. Select one access point to be the primary WDS server and another to be the backup WDS server. Configure the primary WDS server with the highest priority (e.g. 255) and the backup WDS server with a lower priority (e.g. 254).
The Cisco Autonomous Access Points utilize Inter-Access Point Protocol (IAPP), which is a multicast protocol, therefore should use a dedicated native VLAN for Cisco Autonomous Access Points. For the native VLAN, it is recommended to not use VLAN 1 to ensure that IAPP packets are exchanged successfully. Port security should be disabled on switch ports that Cisco Autonomous Access Points are directly connected to. Server groups for Wireless Domain Services must be defined.
First, define the server group to be used for infrastructure authentication. Is recommended to use local RADIUS for infrastructure authentication. If not using local RADIUS for infrastructure authentication, then need to ensure that all access points with Wireless Domain Services enabled are configured in the RADIUS server. Then, define the server group to be used for client authentication. Will need to ensure that all access points with Wireless Domain Services enabled are configured in the RADIUS server.
To utilize local RADIUS for infrastructure authentication, enable all authentication protocols. Create a Network Access Server entry for the local access point. Define the user account in which access points will be configured for to authenticate to the Wireless Domain Services enabled access point. Configure local RADIUS on each access point participating in Wireless Domain Services.
Once the desired access points have been configured successfully to enable Wireless Domain Services, then all access points including those serving as WDS servers need to be configured to be able to authenticate to the WDS servers. Enable Participate in SWAN Infrastructure. If using a single WDS server, then can specify the IP address of the WDS server; otherwise enable Auto Discovery. Enter the Username and Password to be used to authenticate to the WDS server.
Once the access point has been configured to authenticate to the WDS server, can check WDS Status to see the WDS server state as well as how many access points are registered to the WDS server. Call Admission Control (CAC) Load-based CAC and support for multiple streams are not present on the Cisco Autonomous Access Points therefore it is not recommended to enable CAC on Cisco Autonomous Access points.
The Cisco Autonomous Access Point only allows for 1 stream and the stream size is not customizable, therefore SRTP and barge will not work if CAC is enabled. If enabling Admission Control for Voice or for Video on the Cisco Autonomous Access Point, the admission must be unblocked on the SSID as well. In recent releases, the admission is unblocked by default.
To enable QBSS, select Enable and check Dot11e. If Dot11e is checked, then both CCA versions (802.11e and Cisco version 2) will be enabled. Ensure IGMP Snooping is enabled. Ensure Wi-Fi MultiMedia (WMM) is enabled.
If enabling the Stream feature either directly or via selecting Optimized Voice for the radio access category in the QoS configuration section, then use the defaults, where 5.5, 6, 11, 12 and 24 Mbps are enabled as nominal rates for 802.11b/g, 6, 12, and 24 Mbps enabled for 802.11a and 6.5, 13, and 26 Mbps enabled for 802.11n. If the Stream feature is enabled, ensure that only voice packets are being put into the voice queue. Signaling packets (SIP) should be put into a separate queue.
Power Management Proxy ARP can optimize idle battery life, by answering any ARP requests on behalf of the phone. To enable Proxy ARP, set Client ARP Caching to Enable. Also ensure that Forward ARP Requests to Radio Interfaces When Not All Client IP Addresses Are Known is checked.
Advanced Settings TKIP Countermeasure Holdoff Time TKIP countermeasure mode can occur if the access point receives two Message Integrity Check (MIC) errors within a 60 second period. When this occurs, the access point will de-authenticate all TKIP clients associated to that 802.11 radio and holdoff any clients for the countermeasure holdoff time (default = 60 seconds).
aaa authentication login method_WDS group WDS aaa authentication login method_Clients group Clients aaa authorization exec default local aaa accounting network acct_methods start-stop group rad_acct ! aaa session-id common clock timezone -0500 -5 0 clock summer-time -0400 recurring no ip source-route no ip cef ip domain name cisco.com ip name-server 10.0.0.30 ip name-server 10.0.0.
A8B174BC A46EB56A 857166C3 B9FD71DF 7264F5AF DC804A67 16BD35A2 4F39AFD7 0BD24F71 BAF916AC E984343C A54B7395 E5D15237 8897D436 A150BFB2 DC23E8D3 AFF0A51C B6253153 C4E2C022 66F1E361 B2EE49E2 763FCBC7 6381E7F7 61B6E14D 60CDF947 2C044617 37211E5F CE quit username privilege 15 password 7 ! class-map match-all _class_Voice0 match ip dscp cs3 class-map match-all _class_Voice1 match ip dscp af41 class-map match-all _class_Voice2 match ip dscp ef ! policy-map Voice class _class_Voice0 set cos 4 c
! antenna gain 0 peakdetect dfs band 3 block stbc mbssid speed basic-12.0 18.0 24.0 36.0 48.0 54.0 m0. m1. m2. m3. m4. m5. m6. m7. m8. m9. m10. m11. m12. m13. m14. m15. m16. m17. m18. m19. m20. m21. m22. m23.
speed auto ! interface GigabitEthernet0.2 encapsulation dot1Q 2 bridge-group 2 bridge-group 2 spanning-disabled no bridge-group 2 source-learning service-policy input Data service-policy output Data ! interface GigabitEthernet0.3 encapsulation dot1Q 3 bridge-group 3 bridge-group 3 spanning-disabled no bridge-group 3 source-learning service-policy input Voice ! interface GigabitEthernet0.
wlccp ap wds ip address 10.9.0.9 wlccp authentication-server infrastructure method_WDS wlccp authentication-server client eap method_Clients wlccp authentication-server client leap method_Clients wlccp wds priority 255 interface BVI1 ! line con 0 access-class 111 in line vty 0 4 access-class 111 in transport input all ! sntp server 10.0.0.
Phone Button Templates When creating a new Cisco Wireless IP Phone 8821 or 8821-EX, a Phone Button Template must be configured. Custom phone button templates can be created with the option for many different features, which can then be applied on a device or group level. Security Profiles When creating a new Cisco Wireless IP Phone 8821 or 8821-EX, a Device Security Profile must be configured.
Security profiles can be utilized to enable authenticated mode or encrypted mode, where signaling, media and configuration file encryption is then enabled. The Certificate Authority Proxy Function (CAPF) must be operational in order to utilize a Locally Signed Certificate (LSC) with a security profile. The Cisco Wireless IP Phone 8821 and 8821-EX have a Manufacturing Installed Certificate (MIC), which can be utilized with a security profile as well.
SIP Profiles When creating a new Cisco Wireless IP Phone 8821 or 8821-EX, a SIP Profile must be configured. It is recommended to either create a custom SIP Profile or use the pre-defined Standard SIP Profile for Mobile Device for the Cisco Wireless IP Phone 8821 and 8821-EX (do no use the Standard SIP Profile). To create a custom SIP Profile for the Cisco Wireless IP Phone 8821 or 8821-EX, use the Standard SIP Profile as the reference template.
Custom 8821 SIP Profile Cisco Wireless IP Phone 8821 and 8821-EX Wireless LAN Deployment Guide 110
Cisco Wireless IP Phone 8821 and 8821-EX Wireless LAN Deployment Guide 111
Cisco Wireless IP Phone 8821 and 8821-EX Wireless LAN Deployment Guide 112
Standard SIP Profile for Mobile Device Cisco Wireless IP Phone 8821 and 8821-EX Wireless LAN Deployment Guide 113
Cisco Wireless IP Phone 8821 and 8821-EX Wireless LAN Deployment Guide 114
Common Settings Some settings such as Bluetooth can be configured on an enterprise phone, common phone profile or individual phone level. Bluetooth is enabled by default for the Cisco Wireless IP Phone 8821 and 8821-EX. Override common settings can be enabled at either configuration level. QoS Parameters The DSCP values to be used for SIP communications, phone configuration, and phone based services to be used by the phone are defined in the Cisco Unified Communications Manager’s Enterprise Parameters.
The default DSCP value for SIP communications and phone configuration is set to CS3. Phone based services are configured to be best effort traffic by default. G.722 and iSAC Advertisement Cisco Unified Communications Manager supports the ability to configure whether G.722 and iSAC are to be a supported codec system wide or not. G.722 and iSAC codecs can be disabled at the enterprise phone, common phone profile or individual phone level by setting Advertise G.722 and iSAC Codecs to Disabled.
Use the following information to configure the audio bit rate to be used for audio or audio + video calls. Audio Codec Audio Bit Rate G.722 / G.711 64 Kbps iSAC 32 Kbps iLBC 16 Kbps G.729 8 Kbps Wireless LAN Profiles With Cisco Unified Communications Manager 10.0 release and later, the Cisco Wireless IP Phone 8821 and 8821-EX can be provisioned with Wireless LAN Profiles via the Cisco Unified Communications Manager. With Cisco Unified Communications Manager 11.
• • • • Once the security profile has been created, it then needs to be applied to the Cisco Wireless IP Phone 8821 and 8821EX to enable TFTP encryption for that Cisco Wireless IP Phone 8821 and 8821-EX’ configuration files. Select the configured security profile from the Device Security Profile drop-down menu. To create a Wireless LAN Profile, navigate to Device > Device Settings > Wireless LAN Profile within the Cisco Unified Communications Manager’s Administration interface.
• A Wireless LAN Profile can then be created where the Name, Description, Wireless Settings (SSID, Frequency Band, User Modifiable), and Authentication Settings are specified.
• • Enter a Name for the Wireless LAN Profile containing up to 50 characters. A Description containing up to 63 characters can optionally be configured. • Select the desired User Modifiable option. • Allowed - The user has the capability to change any Wireless LAN settings (e.g. Enable/Disable, SSID, Frequency Band, Authentication Method, Username and Password, PSK Passphrase, WEP Key) locally on the endpoint. • Disallowed - The user is unable to change any Wireless LAN settings.
• Enter an SSID containing up to 32 ASCII characters. • Select the desired Frequency Band option. • Auto = Give preference to 5 GHz channels, but operates on both 5 GHz and 2.4 GHz channels • 2.4 GHz = Operates on 2.4 GHz channels only • 5 GHz = Operates on 5 GHz channels only • Select the desired Authentication Method option. • If EAP-FAST, PEAP-MSCHAPv2, or PEAP-GTC is selected then the option to enter shared credentials (Username and Password) is available.
• • • • • • • • • • • • If Provide Shared Credentials is checked, then the specified Username and Password will be utilized for all Cisco Wireless IP Phone 8821 and 8821-EX that utilize this Wireless LAN Profile. Up to 64 characters can be entered for the Username and Password. A Password Description can optionally be entered. If EAP-TLS is selected then User Certificate must be configured to specify the type of user certificate to utilize for EAP-TLS authentication.
• If None is selected, then no authentication is required and no encryption will be utilized. • • Select Save once the Wireless LAN Profile configuration is complete. The Cisco Wireless IP Phone 8821 and 8821-EX do not support the Network Access Profile option. • To create a Wireless LAN Profile Group, navigate to Device > Device Settings > Wireless LAN Profile Group within the Cisco Unified Communications Manager’s Administration interface. From the Wireless LAN Profile Group page, select Add New.
• • • • • • • • A Wireless LAN Profile Group can then be created where the Name, Description, and Wireless LAN Profiles are specified. Up to 4 Wireless LAN Profiles can be added to a Wireless LAN Profile Group. Select Save once the Wireless LAN Profile Group configuration is complete. Once the Wireless LAN Profile Group has been created, it can be applied to a Device Pool or an individual Cisco Wireless IP Phone 8821 and 8821-EX.
• • • To apply a Wireless LAN Profile Group to an individual Cisco Wireless IP Phone 8821 and 8821-EX, navigate to Device > Phone within the Cisco Unified Communications Manager’s Administration interface. Navigate to the desired Cisco Wireless IP Phone 8821 and 8821-EX, configure the Wireless LAN Profile Group then select Save.
Cisco Unified Communications Manager Express Prior to release 11.0 of Cisco Unified Communications Manager Express, the Cisco Wireless IP Phone 8821 and 8821-EX are to utilize the fast track method utilizing the Cisco Unified IP Phone 9971 as the reference model (use 7975 as reference model if needing softkey template support). With release 11.0 and later of Cisco Unified Communications Manager Express, the Cisco IP Phone 8821 and 8821-EX can utilize the Cisco IP Phone 8861 as the reference model.
69666963 6174652D 32393135 30323232 3331301E 170D3132 30373033 30333039 35395A17 0D323030 31303130 30303030 305A3031 312F302D 06035504 03132649 4F532D53 656C662D 5369676E 65642D43 65727469 66696361 74652D32 39313530 32323233 3130819F 300D0609 2A864886 F70D0101 01050003 818D0030 81890281 8100ABC4 D23F5B00 36665DDC 86171E19 CE92D3E5 A0576068 3AADCD26 89C3B795 1B4518BE 2B173A5C 60A82125 80935C29 1027DE28 FCF05E62 18A07C10 C59D34ED 9A14CCD7 3981E1BB 20445CFC 99686D13 D84C6B03 4D84B448 1102A0CF AE333B48 CBF5B85F
! voice register dn 2 number 1102 name 8821-2 label 1102 mwi ! voice register pool 1 busy-trigger-per-button 2 id mac A055.4FDB.31F8 session-transport tcp type 8821 number 1 dn 1 dtmf-relay rtp-nte username 8821-1 password codec g711ulaw no vad ! voice register pool 2 busy-trigger-per-button 2 id mac A055.4FDB.
! ip route 0.0.0.0 0.0.0.0 10.0.0.2 ! tftp-server flash:/8821/sip8821.11-0-2SR2-1.loads alias sip8821.11-0-2SR2-1.loads tftp-server flash:/8821/dtblob8821.HE-01-004.sbn alias dtblob8821.HE-01-004.sbn tftp-server flash:/8821/fbi8821.HE-01-008.sbn alias fbi8821.HE-01-008.sbn tftp-server flash:/8821/kern8821.11-0-2SR2-1.sbn alias kern8821.11-0-2SR2-1.sbn tftp-server flash:/8821/rootfs8821.11-0-2SR2-1.sbn alias rootfs8821.11-0-2SR2-1.sbn tftp-server flash:/8821/sb28821.HE-01-019.sbn alias sb28821.HE-01-019.
! end Product Specific Configuration Options In Cisco Unified Communications Manager Administration, the following configuration options are available for the Cisco Wireless IP Phone 8821 and 8821-EX. For a description of these options, click ? at the top of the configuration page. Product specific configuration options can be configured in bulk via the Bulk Admin Tool if using Cisco Unified Communications Manager.
Field Name Description Disable Speakerphone This parameter disables the speakerphone functionality. Disabling speakerphone functionality will not affect the headset. You can use lines and speed dials with headset/handset. Disable Speakerphone and Headset This parameter disables all speakerphone and headset functions. Settings Access This parameter specifies whether the Settings menu on the phone is functional. When Settings Access is enabled, you can change the phone configuration, ring type, etc.
relies on web access. HTTPS Server This parameter specifies whether to permit HTTP and HTTPS or HTTPS only connections if Web Access is enabled. Web Admin This parameter controls the accessibility of the Web Admin interface, which operates independently from the Web Access parameter. If disabled, then the Web Admin interface is not available. If enabled, then the Web Admin interface is available, but also requires the Admin Password to be specified.
Power Off in Multicharger This parameter specifies whether the phone should power off when it is placed in a Multicharger or not. Background Image This parameter specifies the default wallpaper file. The administrator controls access to the phone’s wallpaper list. Home Screen This parameter sets the phone's default home screen to Application View or Line View. Local Contacts Access This parameter enables or disables access to Local Contacts.
Cisco Discover Protocol (CDP) This parameter allows the administrator to enable or disable Cisco Discovery Protocol (CDP). SSH Access This parameter specifies whether the phone will accept SSH connections. Disabling SSH Access will prevent access to the phone via SSH. Ring Locale This parameter specified the ring cadence. The phone has distinctive ring for Onnet/Off-net or line based, but its ring cadence is fixed, and it is based on US standard only.
hexadecimal character value for the SHA256 fingerprint or the 40 hexadecimal character value for the SHA1 fingerprint with a common separator (colon, dash, period, space) or without a separator. If using a separator, then the separator should be consistently placed after every 2, 4, 8, 16, or 32 hexadecimal characters for a SHA256 fingerprint or every 2, 4, or 8 hexadecimal characters for a SHA1 fingerprint. Console Access This parameter specifies whether the serial console is enabled or disabled.
XML Syntax To configure product specific configuration options for the Cisco Wireless IP Phone 8821 and 8821-EX with Cisco Unified Communications Manager Express, add the necessary options under telephony-service.
Application Button Activation Timer appButtonTimer 0 = Disabled 1 = 1 seconds 2 = 2 seconds 3 = 3 seconds 4 = 4 seconds 5 = 5 seconds Application Button Priority appButtonPriority 0 = Low 1 = Medium 2 = High Emergency Numbers specialNumbers Up to 16 character string Dialing Mode sendKeyAction 0 = On-hook Dialing 1 = Off-hook Dialing Power Off in Multicharger powerOffWhenCharging 0 = Disabled 1 = Enabled Background Image defaultWallpaperFile Up to 64 character string Home Screen homeScreen
Remote Log remoteLog 0 = Disabled 1 = Enabled Log Profile logProfile 0 = Default 1 = Preset 2 = Telephony Log Server logServer Up to 256 character string IPv6 Log Server ipv6LogServer Up to 256 character string Cisco Discover Protocol (CDP) cdpEnable 0 = Disabled SSH Access sshAccess 1 = Enabled 0 = Enabled 1 = Disabled Ring Locale RingLocale 0 = Default 1 = Japan TLS Resumption Timer TLSResumptionTimer 0-3600 (Default = 3600) FIPS Mode fipsMode 0 = Disabled 1 = Enabled Record Cal
IPv6 Load Server ipv6LoadServer Up to 256 character string WLAN SCEP Server wlanScepServer Up to 256 character string WLAN Root CA Fingerprint (SHA256 or SHA1) wlanRootCaFingerprint Up to 95 character string Console Access ConsoleAccess 0 = Enabled 1 = Disabled Gratuitous ARP garp 0 = Enabled 1 = Disabled Show All Calls On Primary Line allCallsOnPrimary Advertise G.
Configuring the Cisco Wireless IP Phone 8821 and 8821-EX Wi-Fi Profile Configuration To configure the Wi-Fi settings on the Cisco Wireless IP Phone 8821 and 8821-EX, either use the desktop charger or default Wi-Fi profile to connect to a Cisco Unified Communications Manager, use the phone’s admin webpage interface, or use the local user interface and keypad.
Local User Interface Use the following guidelines to configure the Wi-Fi Profiles via the local keypad. • Use the 5-way navigation button to navigate to Settings > Wi-Fi, then select the desired profile to configure. • Up to 4 Wi-Fi profiles can be configured. • Then select either Profile name, Network configuration, or WLAN configuration using the 5-way navigation button.
• Profile name configuration is optional, but if selected, then can enter a custom name. • Select Save under … to save the changes or Cancel under ... to dismiss the changes. • Defaults to Profile 1, Profile 2, Profile 3, Profile 4. • Select WLAN configuration to configure the WLAN parameters including SSID, Security mode, 802.11 mode, and On call power save. • Press the 5-way navigation’s middle button to toggle an option and to enter edit mode. • Only Profile 1 is Enabled by default.
• Select SSID then enter the SSID for the desired WLAN. • Select Save under … to save the changes or Cancel under ... to dismiss the changes. • Below lists the available security modes supported and the key management and encryption types that can be used for each mode. The key management and encryption type (cipher) will be auto-configured based on the access point’s current configuration, where precedence is giving to the strongest key management type enabled (e.g.
EAP-TLS EAP-TLS WPA2, WPA AES, TKIP PEAP-GTC PEAP-GTC WPA2, WPA AES, TKIP PEAP-MSCHAPv2 PEAP-MSCHAPv2 WPA2, WPA AES, TKIP • To utilize open security, set Security mode = None. • Select Save to save the changes or Cancel to dismiss the changes. • To utilize WEP security, set Security mode = WEP then enter the 40/104 or 64/128 ASCII or HEX WEP key. • Only key index 1 is supported, so will want to ensure that only key index 1 is configured on the access point.
• To utilize PSK security, set Security mode = PSK then enter the 8-63 ASCII or 64 HEX Passphrase. • Select Save to save the changes or Cancel to dismiss the changes. Key Style Characters ASCII 8-63 HEX 64 (0-9,A-F) • To utilize EAP-FAST, PEAP-GTC, or PEAP-MSCHAPv2, set the Security mode accordingly, then the User ID and Password must be configured.
• To utilize EAP-TLS security, set Security mode = EAP-TLS then select the User certificate type. • If selecting EAP-TLS as the security mode, then must configure the type of user certificate to use. If User installed is selected, then will need to have a user certificate installed either manually via the admin webpage or via SCEP. • Server Validation is optional, where Server Certificate can optionally be installed. • Select Save to save the changes or Cancel to dismiss the changes.
• Select one of the following 802.11 modes to set the frequency band, then Save. • Auto • 2.4 GHz • 5 GHz • Auto mode (default mode) will scan both 2.4 GHz and 5 GHz channels, but will give preference to the 5 GHz frequency band. • 2.4 GHz mode will only scan 2.4 GHz channels and 5 GHz mode will only scan 5 GHz channels, then will attempt to associate to an available access point.
• If option 150 or 66 is not configured to provide the TFTP Server’s IP address via the network’s DHCP scope, then set Alternate TFTP to On and enter the IP address for the TFTP Server. • Select Save to save the changes or Cancel to dismiss the changes. • Ensure to select Erase if prompted, when configuring Alternate TFTP. • On call power save defaults to Enabled. • When Enabled, the phone will utilize U-APSD when on call.
Note: 802.11r (FT) or CCKM will be negotiated if enabled on the access point when using EAP-FAST, EAP-TLS, PEAP-GTC, or PEAP-MSCHAPv2, where preference is given to 802.11r (FT). WEP128 is listed as WEP104 on the Cisco Wireless LAN Controllers. For more information, refer to the Cisco Wireless IP Phone 8821 Series Administration Guide at this URL: http://www.cisco.com/c/en/us/td/docs/voice_ip_comm/cuipph/8821/english/adminguide/w88x_b_wireless-8821-8821ex-adminguide.
For out of box / factory reset, the Admin Password is temporarily set to Cisco. • To create a configuration file to be used for all Cisco Wireless IP Phone 8821 and 8821-EX, browse to the admin webpage of the out of box or factory defaulted Cisco Wireless IP Phone 8821 or 8821-EX. • Select WLAN menu option then configure the necessary profiles where the SSID, 802.11 Mode, Security Mode, etc. must be specified.
• Once the Wi-Fi Profile configuration is complete, the configuration can be exported by selecting Backup Settings menu option. • Prior to selecting Export, enter an Encryption Key (8-127characters) to encrypt the export template. • Save the file to the local PC after selecting Export for later use. • Any pre-existing Server (Root CA) Certificates will be included in the exported configuration. • To apply the exported configuration file, select Backup Settings on the phone’s admin webpage.
• Prior to selecting Import, browse to the template to be applied and enter the Encryption Key that was specified during the template export process previously. • The Cisco Wireless IP Phone 8821 and 8821-EX will need to be restarted after the template is uploaded. Certificate Management As of the 11.0(1) release for the Cisco Wireless IP Phone 8821 and 8821-EX, X.509 digital certificates can be utilized for EAPTLS or to enable Server Validation when using PEAP-GTC or PEAP-MSCHAPV2.
Once the phone has registered to CUCM, set Web Admin to Enabled in CUCM to enable the admin webpage interface. Then configure Admin Password by specifying a 8-127 character string. If wanting to keep the admin webpage interface access enabled long-term, then should utilize a secure profile with TFTP encryption enabled. For out of box (factory reset), will need to ensure the date and time is configured correctly. Can set the Date & Time by syncing to the local machine or setting the Date & Time manually.
Manufacturing Installed Certificate (MIC) The pre-installed Manufacturing Installed Certificate (MIC) can be used as the User Certificate for EAP-TLS. The MIC’s CA chain must be exported and added to the RADIUS server’s trust list if wanting to use the MIC as the User Certificate for EAP-TLS. Click Export to download the root and sub CA certificates from the admin webpage interface.
To manually install a server certificate, select Install for Authentication Server CA on the main certificates webpage. Select Browse to point to the server certificate with PEM (Base-64) or DER encoding. Will need to restart the Cisco Wireless IP Phone 8821 or 8821-EX after all certificates are installed. Simple Certificate Enrollment Protocol (SCEP) SCEP is the standard for automatically provisioning and renewing certificates avoiding manual installation and re-installation of certificates on clients.
The Cisco Wireless IP Phone 8821 and 8821-EX utilize the following parameters defined in Cisco Unified Communications Manager for SCEP requests. The WLAN SCEP Server must be configured to include either the IP address or hostname of the SCEP RA. The WLAN Root CA Fingerprint (SHA256 or SHA1) must be configured to include the fingerprint of the CA that issuing the certificates.
• On the Select Server Role page, select the Active Directory Certificate Services role, then click Next. • • Add the Network Device Enrollment Service role service. In the Add Roles Wizard, on the Select Role Services page, select the Network Device Enrollment Service check box, then click Next. • The wizard will detect whether all the required dependencies are installed.
• Click User Account under Role Services and then click Select User…. • Type in Administrator as the user name, then enter the password. • Enter the Registration Authority information.
• Select Microsoft Strong Cryptographic Provider for Signature Key CSP and Encryption key CSP. • Select 2048 for Key character length.
• Select Install.
• A confirmation page will be displayed if the installation was successful.
• Disable SCEP enrollment challenge password requirement via regedit by setting EnforcePassword to 0. (HKEY_LOCAL_MACHINE > SOFTWARE > Microsoft > Cryptography > MSCEP > EnforcePassword) • SCEP uses the certificate template that is set in the registry for issuing certificates.
• Typically the RA will have a longer period (same as that of the CA certificate). • The default template used for RA to be enrolled to the SCP server is IPSECIntermediateOffline as highlighted above. • Make sure a correct template is set to the above registries before enrolling the RA to the SCEP server. • After the Cisco RA is enrolled to the SCEP server, admin needs to change the template in the registry (if the user certificate period needs to be shorter than that of the root CA).
• Configure the Validity Period on the General tab as necessary.
• Configure Subject Name tab as shown below.
• Configure Extensions tab as shown below.
• Configure Algorithm Name, Minimum Key Size, and Request Hash as necessary on the Cryptography tab.
• Enable the newly created template by right clicking Certificate Templates then selecting New > Certificate Template to Issue. • Select SCEP User template.
• Associate the newly created template to SCEP via regedit. • Go to IIS > Application Pools to stop then start the SCEP service for the new template to take effect. RADIUS Configuration Use the following guidelines to configure the RADIUS server. • Add the SCEP RA under Network Device and AAA Clients. • Configure the RADIUS shared secret that the SCEP RA is currently configured for.
• Create a user account matching the common name of the phone’s Manufacturing Installed Certificate (MIC) with the password set to cisco (e.g. CP-8821-SEPxxxxxxxxxxxx). • Add the Cisco Manufacturing CA chain to the RADIUS trust list as well as any other CA chains utilized for authentication.
• Create a Certificate Authentication Profile. • • Create an Identity Store Sequence to be used for EAP-TLS authentication. Check Certificate Based, select the newly created Certificate Authentication Profile, and select Internal Users as the additional identity store.
• • Create an Identity Store Sequence to be used for SCEP authentication. Check Password Based, select the newly created Certificate Authentication Profile, and select Internal Users as the identity store.
• Create an Authorization Profile to be used for SCEP authorization.
Cisco Wireless IP Phone 8821 and 8821-EX Wireless LAN Deployment Guide 174
• Under the RADIUS Attributes tab, add the cisco-av-pair attribute where the Type is set to String and Value is set to pki:cert-application=all. • Create an Access Policy to be used for EAP-TLS authentication.
• For the Access Service for EAP-TLS authentication, need to ensure that EAP-TLS is enabled.
• Under Identity, rules can be defined to match EAP type then determine which identity source to use for authentication.
• Under Identity, rules can be defined to match various conditions then determine which authorization profile to use. • Create an Access Policy to be used for SCEP authentication.
• For the Access Service for SCEP authentication, need to ensure that PAP/ASCII is enabled.
• Under Identity, rules can be defined to match various conditions then determine which identity source to use for authentication.
• Under Identity, rules can be defined to match various conditions then determine which authorization profile to use. SCEP RA Configuration Currently only a Cisco IOS router running IOS version 15.1(4)M10 or later is supported as the SCEP RA. Use the following guidelines to configure a Cisco IOS router as a SCEP RA. • Enable HTTP server on the Cisco IOS router.
• Configure a RADIUS server for device authentication. ISR_RA# configure terminal ISR_RA(config)# radius server MyRadius ISR_RA(config-radius-server)# address ipv4 10.195.19.63 auth-port 1812 acct-port 1813 ISR_RA(config-radius-server)# key ISR_RA(config-radius-server)# exit ISR_RA(config)# aaa authorization network PhoneList group radius ISR_RA(config)# exit • Configure a PKI trustpoint for the MIC’s CA chain to validate the phone’s MIC.
MAKGMmh0dHA6Ly93d3cuY2lzY28uY29tL3NlY3VyaXR5L3BraS9jZXJ0cy9jcmNh bTIuY2VyMCwGCCsGAQUFBzABhiBodHRwczovL3Rvb2xzLmNpc2NvLmNvbS9wa2kv b2NzcDAfBgNVHSMEGDAWgBTJAPkfih/CZr2l0m1lDiIuNMMFoDANBgkqhkiG9w0B AQsFAAOCAQEAc1k2rH6YT4juFxs9q7ObzfcKbNvOyDsaU7av4IHFXmn/JxfnBmUv YxAI2Hx3xRb0KtG1JGkffQjVAtBboTXynLaQso/jj46ZOubIF8y6Ho3nTAv7Q6VH kqSCdZClVu91zbHV9FFYQzJxjw1QgB0a4ItS4yhdmgl3oDNEcb3trQezrQ3/857/ ISqBGVLEbKHOu8H6zOLhxAgZ08ae1oQQQJowki0Ibd+LRLGovtEwLg8yyqiTIGve 7VFL2sRa8Z3rK9tlwKVH2kpFKNAeN3rfKFqr0/weR0cyKpmLMrSBTBZcx
Trustpoint CA certificate accepted.% % Start certificate enrollment ... % Create a challenge password. You will need to verbally provide this password to the CA Administrator in order to revoke your certificate. For security reasons your password will not be saved in the configuration. Please make a note of it.
crypto pki server MSCA grant auto trustpoint MIC_trustpoint hash sha1 mode ra transparent crypto pki token default removal timeout 0 ! crypto pki trustpoint MIC_trustpoint enrollment terminal revocation-check none authorization list PhoneList authorization username subjectname commonname ! crypto pki trustpoint MSCA enrollment mode ra enrollment url http://10.81.116.249:80/certsrv/mscep/mscep.
322A998B 32B4814C 165CC507 09098178 5FA14EFF 7D8A3AA7 3124520E 28654852 3BC0BE2A 0EAA876E 73 quit crypto pki certificate chain MSCA certificate 4F35C0050000000002F8 308205FF 308204E7 A0030201 02020A4F 35C00500 00000002 F8300D06 092A8648 86F70D01 010B0500 30593113 3011060A 09922689 93F22C64 01191603 636F6D31 15301306 0A099226 8993F22C 64011916 0579646E 65743117 3015060A 09922689 93F22C64 01191607 79642D6D 73636131 12301006 03550403 13097969 6368756E 2D434130 1E170D31 36303532 34323333 3333385A 170D3136 30373
0D06092A 864886F7 0D01010B 05003059 31133011 060A0992 268993F2 2C640119 1603636F 6D311530 13060A09 92268993 F22C6401 19160579 646E6574 31173015 060A0992 268993F2 2C640119 16077964 2D6D7363 61311230 10060355 04031309 79696368 756E2D43 41301E17 0D313431 31323530 33333033 315A170D 32393131 32353033 34303330 5A305931 13301106 0A099226 8993F22C 64011916 03636F6D 31153013 060A0992 268993F2 2C640119 16057964 6E657431 17301506 0A099226 8993F22C 64011916 0779642D 6D736361 31123010 06035504 03130979 69636875 6E2D4341
no ip http secure-server ip route 0.0.0.0 0.0.0.0 10.195.19.1 ! radius server MyRadius address ipv4 10.195.19.63 auth-port 1812 acct-port 1813 key ! control-plane ! line con 0 exec-timeout 0 0 line aux 0 line vty 0 4 exec-timeout 0 0 transport input all line vty 5 15 exec-timeout 0 0 transport input all ! scheduler allocate 20000 1000 end Certificate Removal Certificates can be removed either via the admin webpage interface or via the local user interface.
• Select the Bluetooth device after it is displayed in the list. • The Cisco Wireless IP Phone 8821 and 8821-EX will then attempt to pair will attempt to use the pin code 0000. If unsuccessful, enter the pin code when prompted. • Once paired, then the Cisco Wireless IP Phone 8821 and 8821-EX will attempt to connect to the Bluetooth device. • Selecting the Bluetooth device then selecting Disconnect will disconnect that currently connected Bluetooth device.
• Select Delete to unpair the selected Bluetooth device. Upgrading Firmware Cisco Unified Communications Manager To upgrade the firmware, install the signed COP file for Cisco Unified Communications Manager. For information on how to install the COP file, refer to the Cisco Unified Communications Manager Operating System Administrator Guide at this URL: http://www.cisco.com/c/en/us/support/unified-communications/unified-communications-manager-callmanager/productsmaintenance-guides-list.
Cisco Unified Communications Manager Express To install the firmware on Cisco Unified Communications Manager Express, extract the contents of the TAR file and upload into the router’s flash. Each file will need to be enabled for TFTP download. Configure the phone load and reset the phones to upgrade the firmware. Example: tftp-server flash:sip8821.11-0-2SR2-1.loads tftp-server flash:dtblob8821.HE-01-004.sbn tftp-server flash:fbi8821.HE-01-008.sbn tftp-server flash:kern8821.11-0-2SR2-1.
Neighbor List Current access point and neighbor access point details can be viewed by selecting Settings > Admin settings > Neighbor list. AP name, BSSID, SSID, Channel, RSSI, and CU (Channel Utilization) information will be displayed. WLAN Statistics Wireless statistic information can be viewed locally on the phone under Applications > Admin settings > Status > Wireless statistics.
Call Statistics Call statistic information can be viewed locally on the phone under Applications > Admin settings > Status > Call statistics. Status Messages Status messages can be viewed locally on the phone under Applications > Admin settings > Status > Status messages.
WLAN Diagnostics WLAN Diagnostics is an online tool that can display details for each access point that matches a configured Wi-Fi Profile when selecting Settings > Admin settings > Diagnostics > WLAN. AP name, BSSID, SSID, Frequency, Current channel, Last RSSI, Beacon Interval, Data rate, DTIM, Country code, Channel, Power constraint, Power limit, CU, Station count, Admission capacity, WMM, UAPSD, Proxy ARP, CCX, and Access category information will be displayed.
Restoring Factory Defaults The configuration of the Cisco Wireless IP Phone 8821 and 8821-EX can be reset to factory defaults by selecting Applications > Admin settings > Reset settings > All settings. A confirmation screen will appear where Reset must be selected to proceed with the factory data reset. If the Cisco Wireless IP Phone 8821 or 8821-EX is not able to boot properly, a factory reset can also be initiated via the following procedure: • • • • • • Turn the phone off by pressing the red button.
To boot the alternate image, perform the following procedure. • • • • • Turn the phone off by pressing the red button. Press and hold the * key, then power on the phone. Keep the * key held until the LED changes colors. Once the LED changes colors, release the * key. The Cisco Wireless IP Phone 8821 or 8821-EX will then boot using the alternate image for that one time only.
Network Setup The Cisco Wireless IP Phone 8821 and 8821-EX provide network setup information, where network and Cisco Unified Communications Manager information is displayed. Browse to the standard web interface (https://x.x.x.x) of the Cisco Wireless IP Phone 8821 or 8821-EX then select Network setup to view this information.
Streaming Statistics The Cisco Wireless IP Phone 8821 and 8821-EX provide call statistic information, where MOS, jitter and packet counters are displayed. Browse to the standard web interface (https://x.x.x.x) of Cisco Wireless IP Phone 8821 or 8821-EX then select the necessary menu item under Streaming statistics to view this information.
Device Logs Console Logs Console logs, core dumps, status messages, and debug display can be obtained from the web interface of Cisco Wireless IP Phone 8821 or 8821-EX for troubleshooting purposes. Browse to the standard web interface (https://x.x.x.x) of Cisco Wireless IP Phone 8821 or 8821-EX then select the necessary menu item under Device Logs to view this information.
Status Messages The Cisco Wireless IP Phone 8821 and 8821-EX provide status message information. Browse to the standard web interface (https://x.x.x.x) of Cisco Wireless IP Phone 8821 or 8821-EX then select the necessary menu item under Status messages to view this information.
Capturing a Screenshot of the Phone Display The current display of the Cisco Wireless IP Phone 8821 or 8821-EX can be captured by browsing to http://x.x.x.x/CGI/Screenshot, where x.x.x.x is the IP address of the Cisco Wireless IP Phone 8821 or 8821-EX. At the prompt enter the username and password for the account that the Cisco Wireless IP Phone 8821 or 8821-EX is associated to in Cisco Unified Communications Manager.
Additional Documentation Cisco Wireless IP Phone 8821 and 8821-EX Data Sheets http://www.cisco.com/c/en/us/products/collateral/collaboration-endpoints/wireless-ip-phone-8821/datasheet-c78-737346.html http://www.cisco.com/c/en/us/products/collateral/collaboration-endpoints/wireless-ip-phone-8821-ex/datasheet-c78737347.html Cisco Wireless IP Phone 8821 and 8821-EX Administration Guide http://www.cisco.com/c/en/us/td/docs/voice_ip_comm/cuipph/8821/english/adminguide/w88x_b_wireless-8821-8821ex-adminguide.
Real-Time Traffic over Wireless LAN SRND http://www.cisco.com/c/en/us/td/docs/solutions/Enterprise/Mobility/RToWLAN/CCVP_BK_R7805F20_00_rtowlan-srnd.html Cisco Unified Communications SRND http://www.cisco.com/c/en/us/support/unified-communications/unified-communications-manager-callmanager/productsimplementation-design-guides-list.html Cisco Wireless LAN Controller Documentation http://www.cisco.com/c/en/us/support/wireless/5500-series-wireless-controllers/products-installation-and-configuration-guideslist.
____________________________________________________________________________________________________ CCDE, CCENT, Cisco Eos, Cisco Lumin, Cisco Nexus, Cisco StadiumVision, Cisco TelePresence, Cisco WebEx, the Cisco logo, DCE, and Welcome to the Human Network are trademarks; Changing the Way We Work, Live, Play, and Learn and Cisco Store are service marks; and Access Registrar, Aironet, AsyncOS, Bringing the Meeting To You, Catalyst, CCDA, CCDP, CCIE, CCIP, CCNA, CCNP, CCSP, CCVP, Cisco, the Cisco Certified