Cisco TelePresence Video Communication Server Getting started D14350.
Contents Contents Contents 2 General information 3 About the Cisco TelePresence Video Communication Server (Cisco VCS) 3 Installing the Cisco VCS 4 Package contents 4 Before you start 4 Preparing the installation site 4 Preparing the unit 4 Connecting the cables 5 Powering on the Cisco VCS 5 Initial configuration 6 Configuration using a serial cable 6 Configuration using the front panel 8 Using the Cisco VCS 9 Changing the admin account password 9 Changing the root account pas
General information General information About the Cisco TelePresence Video Communication Server (Cisco VCS) The Cisco VCS enhances the video experience and provides seamless communication between SIP and H.323 devices utilizing IETF and ITU standards. The Cisco VCS is the center of the video communication network and connects all H.323 and SIP endpoints, infrastructure, and management devices.
Installing the Cisco VCS Installing the Cisco VCS Package contents To avoid damage to the unit during transportation the Cisco VCS is delivered in a special shipping box, which should contain the following components: n n n n Cisco VCS unit rack ears, screws and Torx driver rubber feet cables: l power cables l Ethernet cable l shielded serial cable Report any discrepancies to your Cisco representative immediately. We recommend that the shipping box is kept in case the Cisco VCS needs to be returned.
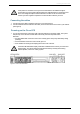
Installing the Cisco VCS If this product is mounted in a rack you are recommended to use additional support accessories such as rack side support angles (rack angle brackets) or rack shelves, due to the unit’s weight and depth. Ensure that units in the rack do not touch each other. Contact your rack supplier to request the accessories best suited for your rack. Connecting the cables 1. Connect the power cable to the back of the Cisco VCS (see Figure 2). 2.
Initial configuration Initial configuration Before you can use the Cisco VCS, you must configure its IPv4 address, subnet mask and default gateway. Consult your network administrator for information on which addresses to use. Note that the Cisco VCS must use a static IP address. This initial configuration can be done: n n n by connecting from a PC to the Cisco VCS using a serial cable.
Initial configuration Password: 7. Enter the default password of TANDBERG and press Enter. You will get the install wizard prompt: Run install wizard [n]: 8. Type y and press Enter. 9. Follow the prompts given by the install wizard to specify the following: l the password you want to use for your admin account For security reasons you are advised to change the password from the default of TANDBERG.
Initial configuration Configuration using the front panel The LCD panel and buttons at the front of the Cisco VCS allow you to configure and check the IP settings as well as to reboot the system (see Figure 3). You are not recommended to perform the initial configuration using the front panel, but you may need to use this method if you do not have access to a PC and serial cable.
Using the Cisco VCS Using the Cisco VCS After you have set the initial configuration of the Cisco VCS, the system is ready to use.
Using the Cisco VCS See the Cisco VCS Administrator Guide, deployment guides and release notes (available for download from www.cisco.com) or the online help for complete information on configuring these and all other options available on your Cisco VCS. Using the web interface To use the web interface: 1. Open a browser window and in the address line type either: l the IP address of the Cisco VCS l the FQDN of the Cisco VCS The Login page will appear. 2. Select Administrator Login. 3.
Documentation and training Documentation and training All Cisco VCS documentation including the Cisco VCS Administrator Guide, FindMe™ User Guide, Cisco VCS deployment guides and release notes, plus supporting documentation for other products, is available in PDF format from the Support area of our web site at www.cisco.com. You can download and print these documents locally, if required. Our systems also have intuitive on-page help, which provides a range of useful features and tips.
Documentation and training Disclaimers and notices THE SPECIFICATIONS AND INFORMATION REGARDING THE PRODUCTS IN THIS MANUAL ARE SUBJECT TO CHANGE WITHOUT NOTICE. ALL STATEMENTS, INFORMATION, AND RECOMMENDATIONS IN THIS MANUAL ARE BELIEVED TO BE ACCURATE BUT ARE PRESENTED WITHOUT WARRANTY OF ANY KIND, EXPRESS OR IMPLIED. USERS MUST TAKE FULL RESPONSIBILITY FOR THEIR APPLICATION OF ANY PRODUCTS.