Cisco Tidal Enterprise Scheduler 6.2.1 SP3 Patch Installation Guide February 15, 2016 Americas Headquarters Cisco Systems, Inc. 170 West Tasman Drive San Jose, CA 95134-1706 USA http://www.cisco.
THE SPECIFICATIONS AND INFORMATION REGARDING THE PRODUCTS IN THIS MANUAL ARE SUBJECT TO CHANGE WITHOUT NOTICE. ALL STATEMENTS, INFORMATION, AND RECOMMENDATIONS IN THIS MANUAL ARE BELIEVED TO BE ACCURATE BUT ARE PRESENTED WITHOUT WARRANTY OF ANY KIND, EXPRESS OR IMPLIED. USERS MUST TAKE FULL RESPONSIBILITY FOR THEIR APPLICATION OF ANY PRODUCTS.
CONTENTS Preface v Audience v Related Documentation v Obtaining Documentation and Submitting a Service Request Document Change History vi Windows 6.2.
Contents Cisco Tidal Enterprise Scheduler Patch Installation Guide iv 6.2.
Preface This guide describes how to patch Cisco Tidal Enterprise Scheduler (TES) 6.2.1 on Windows and UNIX machines using automated scripts (sometime referred to as “mini-installers”). It also describes how to manually patch Cisco TES 6.2.1 using the command line. See the Cisco Tidal Enterprise Scheduler Installation Guide for comprehensive documentation on the full installation and configuration of each TES component using the installers provided with the base product.
Preface Preface Document Change History The table below provides the revision history for the Cisco Tidal Enterprise Scheduler Patch Installation Guide. Version Number Issue Date Reason for Change 6.2.1 (SP2) July 2015 New guide that describes how to apply a patch using the automated scripts provided for Windows and UNIX, or alternatively how to manually patch TES. This document consolidates the three patch text files that were provided inside the patch package. 6.2.
CH A P T E R 1 Windows 6.2.1 SP3 Patch Installation This chapter describes the automated process (sometimes called the mini-installer) to install the TES 6.2.1 SP3 patch to update the TES Master and Client Manager on Windows. This patch process explains how to back up existing files and run the script to perform the patch. ADMIN access is required to perform the patch update. To perform this patch manually instead of using the scripts in this chapter, see Manually Patching TES 6.2.1 SP3.
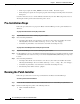
Chapter 1 Windows 6.2.1 SP3 Patch Installation Pre-Installation Steps • On the Agent, update the JAVA_HOME environment variable. Restart the Agent. • On the Transporter, update the transporter.props file in the Transporter/Config folder. Restart the Transporter. Customers must have Java 7 to run the TES Java Client if they run other TES Components on Java 8. The lib path and bin path in tesclient.bat must point to Java 7.
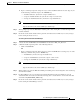
Chapter 1 Windows 6.2.1 SP3 Patch Installation Running the Patch Installer b. Open a command prompt and change directory to where installScheduler.vbs located. Type any one of the following commands and press the "ENTER" key: – "installScheduler.vbs" (invokes the script in default mode) – "cscript.exe installScheduler.vbs" (invokes the script in console mode) – "wscript.exe installScheduler.
Chapter 1 Windows 6.2.1 SP3 Patch Installation Patching the Standalone TES Java Client Application Patching the Standalone TES Java Client Application The TES Java Client Web interface is updated as part of this TES Master patch process. However, if you are using the standalone TES Java Client application, you can update it by manually patching the standalone TES Java Client application. Follow the instructions in Manually Patching the 6.2.1 SP1 or SP2 Build TES Java Client, page 3-17.
CH A P T E R 2 UNIX 6.2.1 SP3 Patch Installation This chapter describes the automated process (sometimes called the mini-installer) to install the TES 6.2.1 SP3 patch to update the TES Master and Client Manager on UNIX. This patch process explains how to back up existing files and run the script to perform the patch. ROOT access is required to perform the patch update. To perform this patch manually instead of using the scripts in this chapter, see Manually Patching TES 6.2.1 SP3.
Chapter 2 UNIX 6.2.1 SP3 Patch Installation Running the Patch Installer To prepare the Client Manager before running the patch installer Step 1 Stop the Client Manager service before running the patch installer. Step 2 For Client Manager, if you’ve modified the webdefault.xml and webserver.xml files, backup the existing "webdefault.xml" and "webserver.xml” present inside CM_INSTALLED_DIR\Config to a temporary location.
Chapter 2 UNIX 6.2.1 SP3 Patch Installation Patching the Standalone TES Java Client Application Patching the Standalone TES Java Client Application The TES Java Client Web interface is updated as part of the TES Master patch process. However, if you are using the standalone TES Java Client application, you can update it by manually patching the standalone TES Java Client application. Follow the instructions in Manually Patching the 6.2.1 SP1 or SP2 Build TES Java Client, page 3-17.
Chapter 2 UNIX 6.2.
CH A P T E R 3 Manually Patching TES 6.2.1 SP3 This chapter describes how to manually install the TES 6.2.1 SP3 patch. Specific instructions are provided for the TES Master, the Client Manager, and the TES Java Client. To use automated scripts to patch TES 6.2.1, see the chapter for your system: • Chapter 1, “Windows 6.2.1 SP3 Patch Installation” • Chapter 2, “UNIX 6.2.1 SP3 Patch Installation” Requirements The requirements to patch your system depend on your current build level: If you are running...
Chapter 3 Manually Patching TES 6.2.1 SP3 Manually Patching the TES Master UNIX /opt/TIDAL/master Note In the text below 621_SP3_BINARIES refers to the patch directory downloaded from CISCO.COM at: https://software.cisco.com/download/release.html?mdfid=286266581&softwareid=283781148&rele ase=6.2.1 To patch the TES Master Step 1 Stop the Master service. Step 2 Backup the adapter configuration files as follows: a.
Chapter 3 Manually Patching TES 6.2.1 SP3 Manually Patching the Client Manager Troubleshooting Missing Adapters after Patching To troubleshoot the patch if an adapter does not appear in your TES Client Step 1 Stop the Master service. Step 2 Backup the adapter configuration files (if present) following the instructions in Manually Patching the TES Master. Step 3 Delete the specific adapter guide folder at MASTER_INSTALLED_DIR\Master\Services\ADAPTER_GUID_FOLDER as well as the .
Chapter 3 Manually Patching TES 6.2.1 SP3 Manually Patching the Client Manager jetty-xml-9.1.5.v20140505.jar jetty-webapp-9.1.5.v20140505.jar jetty-util-9.1.5.v20140505.jar jetty-servlets-9.1.5.v20140505.jar jetty-servlet-9.1.5.v20140505.jar jetty-server-9.1.5.v20140505.jar jetty-security-9.1.5.v20140505.jar jetty-schemas-3.1.jar jetty-rewrite-9.1.5.v20140505.jar jetty-proxy-9.1.5.v20140505.jar jetty-plus-9.1.5.v20140505.jar jetty-jndi-9.1.5.v20140505.jar jetty-jmx-9.1.5.v20140505.jar jetty-jaspi-9.1.5.
Chapter 3 Manually Patching TES 6.2.1 SP3 Manually Patching the 6.2.1 SP1 or SP2 Build TES Java Client Patching the 6.2.1 SP1 or SP2 Build Client Manager To patch the Client Manager if running the TES 6.2.1 SP1 or SP2 build Step 1 Stop the Client Manager service. Step 2 Backup existing "webdefault.xml" and "webserver.xml" present inside CM_INSTALLED_DIR\Config. Step 3 Pick "webdefault.xml" and "webserver.
Chapter 3 Manually Patching TES 6.2.1 SP3 Manually Patching the 6.2.